Mii Gunner (SSB4): Difference between revisions
m (→Crowd cheer) |
|||
| (45 intermediate revisions by 27 users not shown) | |||
| Line 7: | Line 7: | ||
|game = SSB4 | |game = SSB4 | ||
|ssbgame1 = SSBU | |ssbgame1 = SSBU | ||
|availability = [[ | |availability = [[Character customization|Custom]] | ||
|tier = | |tier = | ||
|ranking = unranked | |ranking = unranked | ||
}} | }} | ||
{{cquote| | :{{cquote|''Anyone Can Join The Battle!''|cite=Introduction Tagline}} | ||
'''Mii Gunners''' ({{ja|射撃タイプ|Shageki Taipu}}, ''Shooting Type'') are one of the three different types of {{SSB4|Mii Fighter}}s that appear in ''[[Super Smash Bros. 4]]'', along with {{SSB4|Mii Brawler}}s and {{SSB4|Mii Swordfighter}}s. | '''Mii Gunners''' ({{ja|射撃タイプ|Shageki Taipu}}, ''Shooting Type'') are one of the three different types of {{SSB4|Mii Fighter}}s that appear in ''[[Super Smash Bros. 4]]'', along with {{SSB4|Mii Brawler}}s and {{SSB4|Mii Swordfighter}}s. | ||
The Mii Gunner is | The Mii Gunner is unranked on the latest [[tier list]], but was 53rd out of 57 characters on the third tier list (when only taking their default moveset and size into account), making them the highest ranking Mii Fighter. Mii Gunner's positives include their fast-starting attacks, wide range of projectiles (including a projectile-based forward aerial) making them very versatile in different situations, fast grab, and above-average range due to their arm cannon. | ||
However, they have some noticeable flaws. If using their default size and height, their overall mobility is very unimpressive, which gives problems with approaching and escaping pressure. Despite being a long-ranged fighter, they have a surprisingly ironic lack of long-ranged KO options, with their strongest moves being effective at close range; this is further emphasized by their moves having a high amount of ending lag. Their fast grab is also heavily outweighed by their very poor grab game, with their throws dealing very low damage, and being unable to combo or KO reliably. Their biggest flaw, however, is the banning of custom moves. Ever since [[EVO 2015]], all custom moves have been banned, forcing Mii Gunners to resort to their slow and situational default moveset and removing the versatility of their custom moves. | However, they have some noticeable flaws. If using their default size and height, their overall mobility is very unimpressive, which gives problems with approaching and escaping pressure. Despite being a long-ranged fighter, they have a surprisingly ironic lack of long-ranged KO options, with their strongest moves being effective at close range; this is further emphasized by their moves having a high amount of ending lag. Their fast grab is also heavily outweighed by their very poor grab game, with their throws dealing very low damage, and being unable to combo or KO reliably. Their biggest flaw, however, is the banning of custom moves. Ever since [[EVO 2015]], all custom moves have been banned, forcing Mii Gunners to resort to their slow and situational default moveset and removing the versatility of their custom moves. | ||
| Line 32: | Line 32: | ||
==Update history== | ==Update history== | ||
Like the Mii Swordfighter, the Mii Gunner has been buffed in updates | Like the Mii Swordfighter, the Mii Gunner has been buffed in updates, though not to the same extent as the Swordfighter. The ending lag on its moves has been notably decreased, and it also benefits slightly from the changes to shield mechanics in updates 1.1.0 and 1.1.1, as its attacks (most notably forward smash, down tilt and Charge Blast) have acquired better shield damaging capabilities, enhancing its spacing and zoning game. | ||
''' {{GameIcon|ssb4}} 1.0.6''' | ''' {{GameIcon|ssb4}} [[1.0.6]]''' | ||
*{{buff|[[Absorbing Vortex]] has significantly reduced end lag.}} | *{{buff|[[Absorbing Vortex]] has significantly reduced end lag.}} | ||
''' {{GameIcon|ssb4}} 1.1.0''' | ''' {{GameIcon|ssb4}} [[1.1.0]]''' | ||
*{{buff|Up aerial's final hit damage slightly increased|3%|4%}} | *{{buff|Up aerial's final hit damage slightly increased|3%|4%}} | ||
*{{buff|Up aerial landing lag reduced|26|22 frames.}} | *{{buff|Up aerial landing lag reduced|26|22 frames.}} | ||
| Line 45: | Line 45: | ||
*{{change|[[Lunar Launch]] hitbox angle 70 → 55}} | *{{change|[[Lunar Launch]] hitbox angle 70 → 55}} | ||
*{{nerf|[[Grenade Launch]] projectile now dissipates upon hitbox clash rather than exploding.}} | *{{nerf|[[Grenade Launch]] projectile now dissipates upon hitbox clash rather than exploding.}} | ||
'''{{GameIcon|ssb4}} 1.1.1''' | '''{{GameIcon|ssb4}} [[1.1.1]]''' | ||
*{{change|Graphic effects on neutral and dash attack altered slightly.}} | *{{change|Graphic effects on neutral and dash attack altered slightly.}} | ||
'''{{GameIcon|ssb4}} 1.1.3''' | '''{{GameIcon|ssb4}} [[1.1.3]]''' | ||
{{UpdateList/1.1.3|char=Mii Gunner}} | {{UpdateList/1.1.3|char=Mii Gunner}} | ||
| Line 75: | Line 75: | ||
|fsmashname= | |fsmashname= | ||
|fsmashdmg={{ChargedSmashDmgSSB4|0.8}} (hits 1-6), {{ChargedSmashDmgSSB4|5}} (last hit), {{ChargedSmashDmgSSB4|9.8}} if all hits connect | |fsmashdmg={{ChargedSmashDmgSSB4|0.8}} (hits 1-6), {{ChargedSmashDmgSSB4|5}} (last hit), {{ChargedSmashDmgSSB4|9.8}} if all hits connect | ||
|fsmashdesc=Unleashes a series of energy bursts in quick succession, followed by a stronger burst. Hits opponents multiple times and has the second longest range of any non-projectile forward smash (right behind {{SSB4|Corrin}}) along with a very long hitbox duration that makes it difficult to challenge as well as great for pressuring shields and [[edgeguarding]], and possesses decently low ending lag. However, its knockback is weak and lacks reliable KO potential on-stage, doing so at 148%. | |fsmashdesc=Unleashes a series of energy bursts in quick succession, followed by a stronger burst. Hits opponents multiple times and has the second longest range of any non-projectile forward smash (right behind {{SSB4|Corrin}}) along with a very long hitbox duration that makes it difficult to challenge as well as great for pressuring shields and [[edgeguarding]], and possesses decently low ending lag. However, its knockback is weak and lacks reliable KO potential on-stage, doing so at 148%. | ||
|usmashname= | |usmashname= | ||
|usmashdmg={{ChargedSmashDmgSSB4|3}} (hit 1), {{ChargedSmashDmgSSB4|2.5}} (hits 2-4), {{ChargedSmashDmgSSB4|6}} (hit 5), {{ChargedSmashDmgSSB4|16.5}} if all hits connect | |usmashdmg={{ChargedSmashDmgSSB4|3}} (hit 1), {{ChargedSmashDmgSSB4|2.5}} (hits 2-4), {{ChargedSmashDmgSSB4|6}} (hit 5), {{ChargedSmashDmgSSB4|16.5}} if all hits connect | ||
| Line 87: | Line 87: | ||
|fairname= | |fairname= | ||
|fairdmg=6% (close), 4% (far) | |fairdmg=6% (close), 4% (far) | ||
|fairdesc=Fires a weak single energy shot projectile that travels a third of Final Destination | |fairdesc=Fires a weak single energy shot projectile that travels a third of Final Destination. The force of the shot pushes the Gunner backwards slightly and is called a gundash. Can be absorbed or reflected, but is a great spacing option similar to {{SSB4|Villager}}'s slingshot aerials. Low landing lag but extremely high ending lag in the air, especially if using a large Mii. | ||
|bairname= | |bairname= | ||
|bairdmg=12% | |bairdmg=12% | ||
| Line 95: | Line 95: | ||
|uairdesc=Unleashes a series of energy bursts upwards in quick succession, followed by a stronger burst. Acts like the Gunner's forward smash aimed vertically upwards. Somewhat awkward to use as the attack cuts off abruptly if the Gunner lands before the final shot is used, but is a good juggling tool and KO move if the final hit connects at height. It can also be used to follow up with an up tilt or up smash despite the moves' decently high landing lag. | |uairdesc=Unleashes a series of energy bursts upwards in quick succession, followed by a stronger burst. Acts like the Gunner's forward smash aimed vertically upwards. Somewhat awkward to use as the attack cuts off abruptly if the Gunner lands before the final shot is used, but is a good juggling tool and KO move if the final hit connects at height. It can also be used to follow up with an up tilt or up smash despite the moves' decently high landing lag. | ||
|dairname= | |dairname= | ||
|dairdmg=10% (base), 15% (tip) | |dairdmg=10% (base), 15% (tip), 12% (late) | ||
|dairdesc=The Gunner pauses, then fires a single energy burst below themselves. The tip of the burst deals more damage and is a very strong, aerial-only [[meteor smash]], in a similar fashion to {{SSB4|Mega Man}}'s Hard Knuckle. However, the hitbox only lasts for one frame, in a similar fashion to {{SSB4|Palutena}}'s down aerial, and it has incredibly slow startup | |dairdesc=The Gunner pauses, then fires a single energy burst below themselves. The tip of the burst deals more damage and is a very strong, aerial-only [[meteor smash]], in a similar fashion to {{SSB4|Mega Man}}'s Hard Knuckle. The blast deals less damage after the initial meteor hit. However, the meteor smashing hitbox only lasts for one frame, in a similar fashion to {{SSB4|Palutena}}'s down aerial, and it has incredibly slow startup, making it very difficult to land. | ||
|grabname= | |grabname= | ||
|grabdesc=An average grab. | |grabdesc=An average grab. | ||
| Line 103: | Line 103: | ||
|pummeldesc=Hits the opponent with its arm cannon. A moderately slow pummel. | |pummeldesc=Hits the opponent with its arm cannon. A moderately slow pummel. | ||
|fthrowname= | |fthrowname= | ||
|fthrowdmg=2% (punch), 3% (throw) | |fthrowdmg=2% (punch), 3% (throw) | ||
|fthrowdesc=Punches the enemy away with the arm cannon. | |fthrowdesc=Punches the enemy away with the arm cannon. | ||
|bthrowname= | |bthrowname= | ||
| Line 152: | Line 152: | ||
|usc2name=[[Arm Rocket]] | |usc2name=[[Arm Rocket]] | ||
|usc2dmg=0% | |usc2dmg=0% | ||
|usc2desc=Fires a small flame burst, then propels themselves with a stream of flames from the arm cannon. By holding the Control Stick in a direction, the Mii Gunner can travel more horizontally. Similar to {{SSB4|Pit}}'s and {{SSB4|Dark Pit}}'s Power of Flight but it covers slightly less distance. | |usc2desc=Fires a small flame burst, then propels themselves with a stream of flames from the arm cannon. By holding the Control Stick in a direction, the Mii Gunner can travel more horizontally. Similar to {{SSB4|Pit}}'s and {{SSB4|Dark Pit}}'s Power of Flight but it covers slightly less distance. | ||
|dsdefname=Echo Reflector | |dsdefname=Echo Reflector | ||
|dsdefdmg=2% (activation), 1.4x damage (reflected projectiles) | |dsdefdmg=2% (activation), 1.4x damage (reflected projectiles) | ||
| Line 164: | Line 164: | ||
|fsname=Full Blast | |fsname=Full Blast | ||
|fsdmg=46% | |fsdmg=46% | ||
|fsdesc=The Gunner shoots a strong laser, with two small laser cannons firing smaller lasers. Can be angled. Similar to Samus's Final Smash, | |fsdesc=The Gunner shoots a strong laser, with two small laser cannons firing smaller lasers. Can be angled. Similar to Samus's Final Smash, {{b|Zero Laser|Samus}}. | ||
}} | }} | ||
===Stats=== | |||
All stats listed in the following table assumes a default Mii of perfectly average height and weight. | |||
{{Attributes | |||
|cast = 58 | |||
|weight = 100 | |||
|rweight = 17-21 | |||
|dash = 1.6 | |||
|rdash = 15-23 | |||
|run = 1.3 | |||
|rrun = 53-54 | |||
|walk = 1.05 | |||
|rwalk = 37-38 | |||
|trac = 0.045 | |||
|rtrac = 44-52 | |||
|airfric = 0.01 | |||
|rairfric = 24-32 | |||
|air = 1.05 | |||
|rair = 25 | |||
|baseaccel = 0.01 | |||
|rbaseaccel = 10-54 | |||
|addaccel = 0.07 | |||
|raddaccel = 18-28 | |||
|gravity = 0.08715 | |||
|rgravity = 32-34 | |||
|fall = 1.45 | |||
|rfall = 38-39 | |||
|ff = 2.32 | |||
|rff = 37-38 | |||
|jumpsquat = 6 | |||
|rjumpsquat = 42-51 | |||
|jumpheight = 32 | |||
|rjumpheight = 38-40 | |||
|shorthop = 17.539339 | |||
|rshorthop = 12-13 | |||
|djump = 33.500343 | |||
|rdjump = 32 | |||
}} | |||
===[[Announcer]] call=== | |||
{{audio|Needs announcer calls from other languages.}} | |||
<gallery> | |||
Mii Fighter English Announcer SSB4.wav|English/Japanese/Chinese | |||
</gallery> | |||
===[[On-screen appearance]]=== | ===[[On-screen appearance]]=== | ||
| Line 175: | Line 219: | ||
===[[Taunt]]s=== | ===[[Taunt]]s=== | ||
{{Taunt/SSB4 | {{Taunt/SSB4 | ||
| | |char=MiiGunner | ||
|desc-up=Points the arm cannon in two directions. | |desc-up=Points the arm cannon in two directions. | ||
|desc-side=Holds the arm cannon with their hand and cocks it down, similar to one of {{SSB4|Samus}}' victory poses. | |desc-side=Holds the arm cannon with their hand and cocks it down, similar to one of {{SSB4|Samus}}' victory poses. | ||
| Line 190: | Line 232: | ||
===[[Crowd cheer]]=== | ===[[Crowd cheer]]=== | ||
{{ | {| class="wikitable" border="1" cellpadding="4" cellspacing="1" | ||
| | |- | ||
| | !{{{name|}}} | ||
| | !Cheer (English) | ||
| | !Cheer (Japanese) | ||
| | !Cheer (Spanish) | ||
| | |- | ||
! scope="row"|Cheer | |||
|[[File:Mii Cheer English SSB4 SSBU.ogg|center]]||[[File:Mii Cheer Japanese SSB4 SSBU.ogg|center]]||{{NTSC}} [[File:Mii Cheer Spanish NTSC SSB4 SSBU.ogg|center]] <br> {{PAL}} [[File:Mii Cheer Spanish PAL SSB4.ogg|center]] | |||
|- | |||
! scope="row"|Description | |||
|Mii! || Mii! Mii! Mii Mii Mii! || Mii! Mii! Rah - Rah - Rah! | |||
|- | |||
!{{{name|}}} | |||
!Cheer (French) | |||
!Cheer (German) | |||
!Cheer (Italian) | |||
|- | |||
! scope="row"|Cheer | |||
|{{NTSC}} [[File:Mii Cheer French NTSC SSB4.ogg|center]] <br> {{PAL}} [[File:Mii Cheer French PAL SSB4.ogg|center]]||[[File:Mii Cheer German SSB4.ogg|center]]||[[File:Mii Cheer Italian SSB4 SSBU.ogg|center]] | |||
|- | |||
! scope="row"|Description | |||
|Mii Mii Mii ! || Mii Mii Mii! || Mi - i! Mi - i! *clap 4 times* | |||
|} | |||
===[[Victory pose]]s=== | ===[[Victory pose]]s=== | ||
| Line 221: | Line 280: | ||
| colspan="2"| <center>3132</center> || 3131 || 3133 || 1312 | | colspan="2"| <center>3132</center> || 3131 || 3133 || 1312 | ||
|} | |} | ||
===Most historically significant players=== | |||
<!--This character has a ten player limit for this section. Before adding and/or removing a player, read these guidelines: https://www.ssbwiki.com/SmashWiki:Notability#%22Most_historically_significant_players%22_guidelines --> | |||
''See also: [[:Category:Mii Gunner players (SSB4)]]'' | |||
*{{Sm|AEMehr|USA}} - The best Mii Gunner player in North America, and the only primarily Mii Gunner player in the United States to make any noticeable impact. His 13th-place finish at {{Trn|IBP Masters Showdown}} with a win over {{Sm|Manny}} marks the best Mii Gunner placement at a major. In addition, he also placed 7th at {{Trn|Noods Noods Noods: Melee Edition}}, which marks the only time a Mii Gunner player placed top 8 at a [[PGR]]-ranked event. | |||
*{{Sm| | *{{Sm|Flama|Mexico}} - Best known as a strong online player, having placed 5th at {{Trn|PG Key to Frostbite 2017}}. Offline, he plays Mii Brawler alongside {{SSB4|Mario}} and is best known for placing 9th at {{Trn|Smash Factor 4}} with primarily Mii Gunner. | ||
*{{Sm|Flama|Mexico}} - | *{{Sm|Rom|Japan}} - Widely considered to be the best Mii Gunner player in the world. Aside from placements such as 17th at {{Trn|Umebura 15}} and 33rd at {{Trn|Umebura 24}}, he has the best wins out of any other Mii Gunner player, having defeated {{Sm|Kirihara}} at {{Trn|Umebura 24}}, {{Sm|Raito}} at {{Trn|SHI-G Tournament}}, and {{Sm|Pugwest}} at {{Trn|GENESIS 3}}. | ||
*{{Sm| | |||
===Tier placement and history=== | ===Tier placement and history=== | ||
<!-- Since the Miis were originally built around custom special movesets, an explanation about them is valid.--> | <!-- Since the Miis were originally built around custom special movesets, an explanation about them is valid.--> | ||
The Mii Gunner's perceived potential was received rather lukewarmly; players acknowledged the excellent range of several moves (most notably forward smash and up aerial), the potential for effective [[camping]] with the combined use of forward aerial and custom moves, along with good utility in their down special moves. However, all three kinds of Mii were quickly looked down upon due to the controversy surrounding the allowance of custom movesets in tournaments, with the ban restricting the Mii Gunner to a relatively unimpressive moveset, forcing them to contest with a poor grab game, surprising lack of ranged KO options, high ending lag on KO moves, and lackluster mobility, despite their spacing game being relatively good with options such as forward air, Charge Blast and Flame Pillar. | The Mii Gunner's perceived potential was received rather lukewarmly; players acknowledged the excellent range of several moves (most notably forward smash and up aerial), the potential for effective [[camping]] with the combined use of forward aerial and custom moves, along with good utility in their down special moves. However, all three kinds of Mii were quickly looked down upon due to the controversy surrounding the allowance of custom movesets in tournaments, as well as the use of custom Mii sizes, with the ban restricting the Mii Gunner to a relatively unimpressive moveset and their poor attributes at their default size, forcing them to contest with a poor grab game, surprising lack of ranged KO options, high ending lag on KO moves, and lackluster mobility, despite their spacing game being relatively good with options such as forward air, Charge Blast and Flame Pillar. | ||
While at first the Mii's choice for custom movesets was up to a [[tournament director]]'s discretion, when custom special movesets began to be discussed, the Mii's tier placements once again began to rise in the eyes of many players, in the case of the Mii Gunner, many considered it to be a mid-tier character. After the universal ban of custom movesets and custom Mii sizes post-EVO 2015, however, expectations of the Mii plummeted once again, and they would go on to be widely viewed as some of the worst characters in the game. In the case of the Mii Gunner, it would at first rank at 52nd on the first ''4BR'' [[tier list]] as the second best kind of Mii. It would then see slight drops to 53rd on the second tier list, and 54th on the third and current tier list, though this time as the best kind of default Mii for the last two placings, the primary reason behind this being to its better tournament results than the other kinds of Miis. | |||
Due to a very large stagnation of data on the Miis, as well as no response on whether or not they should be allowed to use custom moves, the Miis were excluded from placement voting on the fourth and most recent tier list and with the game coming to the end of its competitive lifetime only a year after the tier list was released, it is unlikely that the Miis will be added to any official tier lists in the foreseeable future. Tournaments near and after the end of the game's competitive life were more lenient towards the Miis having access to their custom moves, which would leave Mii Gunner in a better spot but by exactly how much is unknown. | |||
==In Solo Modes== | |||
===[[All-Star Mode]]=== | |||
Unlike other fighters, Mii Fighters do not appear as opponents in All-Star Mode. | |||
===[[Congratulations screen]]s=== | |||
<center> | <center> | ||
====3DS==== | |||
<gallery> | |||
SSB4-3DS Congratulations Classic Mii Fighter.png|Classic Mode | |||
SSB4-3DS Congratulations All-Star Mii Fighter.png|All-Star Mode | |||
</gallery> | |||
====Wii U==== | |||
<gallery> | <gallery> | ||
SSB4-Wii U Congratulations Classic Mii Fighter.png|Classic Mode | |||
SSB4-Wii U Congratulations All-Star Mii Fighter.png|All-Star Mode | |||
</gallery> | </gallery> | ||
</center> | </center> | ||
==[[Trophies]]== | |||
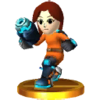
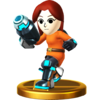
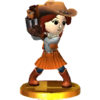
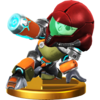
Mii Gunner's default trophy is obtained by clearing Classic Mode as Mii Gunner. Their alternate trophy is obtained by clearing All-Star Mode as Mii Gunner in the 3DS version or purchasing it in the Trophy Shop for 1000G in the Wii U version (the latter can only appear after clearing Classic or All-Star as Mii Gunner). The Full Blast trophy is obtained only in the Wii U version by clearing All-Star Mode as Mii Gunner. | |||
{{Trophy/Fighter | |||
|name=Mii Gunner | |||
|image-3ds=MiiGunnerTrophy3DS.png | |||
|image-wiiu=MiiGunnerTrophyWiiU.png | |||
|mode=Classic | |||
|desc-ntsc=A Mii sporting a blaster arm, this fighter is a great choice for those who prefer to fight the battle from a distance. The Mii Gunner has a lot of special projectile moves available, so pick your favorites and use them when needed. Don't forget about standard and smash attacks! | |||
|desc-pal=A fighter based on your Mii! Gunners are all about the guns, of course. No matter how you set up your specials, you'll end up with a powerful arsenal. And it's not just their special moves that have excellent range – they have standard and smash attacks that can really go the distance too. Use them to dominate the battle from afar. | |||
|gamelist={{Trophy games|console1=WiiU|game1=Super Smash Bros. for Wii U}} | |||
}} | |||
{{clrl}} | |||
{{Trophy/Fighter | |||
|name=Mii Gunner (Alt.) | |||
|image-3ds=MiiGunnerAltTrophy3DS.png | |||
|image-wiiu=MiiGunnerAltTrophyWiiU.png | |||
|mode=Alt | |||
|desc-3ds-ntsc=One of the Mii Gunner's side specials is Stealth Burst. The missile blends in, making it tough to see. Plus, you can control when it explodes, so it's handy for surprise attacks! You could also use Absorbing Vortex to absorb damage done to you by energy weapons. This is one fighter with a lot of tricks up its sleeve! | |||
|desc-wiiu-ntsc=One of the Mii Gunner's side specials is Stealth Burst. The missile blends in, making it tough to see. Plus, you can control when it explodes, so it's handy for surprise attacks! You can also use Absorbing Vortex to absorb damage done to you by energy weapons. This is one fighter with a lot of tricks up its sleeve! | |||
|desc-pal=One of the Mii Gunner's side specials is Stealth Burst. The burst blends in, making it tough to see. Plus, you can control when it explodes, so it's handy for surprise attacks! You could also use Absorbing Vortex to absorb damage done to you by energy weapons. This is one fighter with a lot of tricks up its sleeve! | |||
|gamelist={{Trophy games|console1=WiiU|game1=Super Smash Bros. for Wii U}} | |||
}} | |||
{{clrl}} | |||
{{Trophy/Fighter | |||
|name=Full Blast | |||
|image=FullBlastTrophyWiiU.png | |||
|desc-ntsc=The Mii Gunner's Final Smash unleashes a wide, long-range beam of painful energy. The laser will hit several times, pushing back opponents before launching them with the last blow. You can adjust the laser beam's angle, so punish a foe who thought he or she was safe by trying to duck under the beam! | |||
|desc-pal=Mii Gunner's Final Smash is a set of laser beams fired straight ahead that reach all the way across the screen. These can hit repeatedly and push foes back, ultimately launching them at the end. While firing the beams, you can tilt them up and down, so fine-tune the angle to really go for your foes! | |||
|game=ssb4-wiiu | |||
}} | |||
{{clrl}} | |||
==[[Alternate costume (SSB4)#Mii Fighter|Alternate costumes]]== | ==[[Alternate costume (SSB4)#Mii Fighter|Alternate costumes]]== | ||
| Line 282: | Line 355: | ||
<center> | <center> | ||
{| class="wikitable" | {| class="wikitable" | ||
| High-Tech Armor || | | Dragon Armor || Fancy Suit || High-Tech Armor || Mage Outfit || Standard Outfit || Steampunk Outfit || Wild West Wear | ||
|} | |} | ||
</center> | </center> | ||
*The color of the costume depends on the Mii's original color from the Mii Maker. | *The color of the costume depends on the Mii's original color from the Mii Maker. | ||
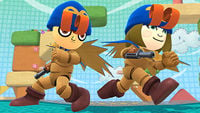
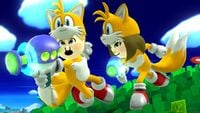
=== | ==={{SSB4|Downloadable content}}=== | ||
<center> | <center> | ||
{| class="wikitable" | {| class="wikitable" | ||
| Line 296: | Line 369: | ||
|[[File:DLC Costume Bear Suit.jpg|200px]] || [[File:DLC Costume Samus's Armor.jpg|200px]] || [[File:DLC Costume Business Suit.jpg|200px]] || [[File:DLC Costume Fox Outfit.jpg|200px]] | |[[File:DLC Costume Bear Suit.jpg|200px]] || [[File:DLC Costume Samus's Armor.jpg|200px]] || [[File:DLC Costume Business Suit.jpg|200px]] || [[File:DLC Costume Fox Outfit.jpg|200px]] | ||
|- | |- | ||
| || [[File:DLC Costume Geno.jpg|200px]] || [[File:DLC Costume Tails Costume.jpg|200px]] || | | || [[File:DLC Costume Geno.jpg|200px]] || [[File:DLC Costume Tails Costume.jpg|200px]] || | ||
|} | |} | ||
| Line 312: | Line 385: | ||
==Gallery== | ==Gallery== | ||
<gallery> | <gallery> | ||
Lincoln ssb4.png|{{s|wikipedia|Abraham Lincoln}} as a Gunner. | |||
Mii Gunner amiibo.png|Mii Gunner's [[amiibo]]. | Mii Gunner amiibo.png|Mii Gunner's [[amiibo]]. | ||
SSB4 Mii Fighter Screen-1.jpg|Mii Gunner with Mii Brawler and Mii Swordfighter. | SSB4 Mii Fighter Screen-1.jpg|Mii Gunner with Mii Brawler and Mii Swordfighter. | ||
| Line 324: | Line 397: | ||
Full Blast SSB4.jpg|A gunner using his final smash against {{SSB4|Zero Suit Samus}}, {{SSB4|Lucina}}, and {{SSB4|Zelda}}. | Full Blast SSB4.jpg|A gunner using his final smash against {{SSB4|Zero Suit Samus}}, {{SSB4|Lucina}}, and {{SSB4|Zelda}}. | ||
Mii VS Master Shadow.JPG|A gunner battling [[Master Core]]. Note how Master Shadow copies the Mii's outfit. | Mii VS Master Shadow.JPG|A gunner battling [[Master Core]]. Note how Master Shadow copies the Mii's outfit. | ||
SSB4-3DS - Nikki and Takamaru.png| | NikkiMiiGunner.png|Promotional artwork of [[Nikki]] as a Mii Gunner | ||
SSB4-3DS - Nikki and Takamaru.png|Nikki as a Mii Gunner alongside [[Takamaru]]. | |||
</gallery> | </gallery> | ||
| Line 340: | Line 414: | ||
{{SSB4Characters}} | {{SSB4Characters}} | ||
{{Smash universe}} | {{Smash universe}} | ||
[[Category:Mii Gunner (SSB4)]] | [[Category:Mii Fighter (SSB4)| ]] | ||
[[Category:Mii Gunner (SSB4)| ]] | |||
[[Category:Trophies (SSB4-3DS)]] | [[Category:Trophies (SSB4-3DS)]] | ||
[[Category:Trophies (SSB4-Wii U)]] | [[Category:Trophies (SSB4-Wii U)]] | ||
[[es:Tirador Mii (SSB4)]] | |||
Latest revision as of 00:29, December 19, 2024
| Mii Gunner in Super Smash Bros. 4 | |
|---|---|
| |
| Universe | Super Smash Bros. |
| Shares character slot with | Mii Brawler Mii Swordfighter |
| Other playable appearance | in Ultimate |
| Availability | Custom |
| Final Smash | Full Blast |
| “ | Anyone Can Join The Battle! | ” |
| —Introduction Tagline | ||
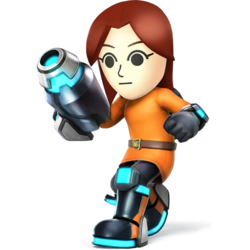
Mii Gunners (射撃タイプ, Shooting Type) are one of the three different types of Mii Fighters that appear in Super Smash Bros. 4, along with Mii Brawlers and Mii Swordfighters.
The Mii Gunner is unranked on the latest tier list, but was 53rd out of 57 characters on the third tier list (when only taking their default moveset and size into account), making them the highest ranking Mii Fighter. Mii Gunner's positives include their fast-starting attacks, wide range of projectiles (including a projectile-based forward aerial) making them very versatile in different situations, fast grab, and above-average range due to their arm cannon.
However, they have some noticeable flaws. If using their default size and height, their overall mobility is very unimpressive, which gives problems with approaching and escaping pressure. Despite being a long-ranged fighter, they have a surprisingly ironic lack of long-ranged KO options, with their strongest moves being effective at close range; this is further emphasized by their moves having a high amount of ending lag. Their fast grab is also heavily outweighed by their very poor grab game, with their throws dealing very low damage, and being unable to combo or KO reliably. Their biggest flaw, however, is the banning of custom moves. Ever since EVO 2015, all custom moves have been banned, forcing Mii Gunners to resort to their slow and situational default moveset and removing the versatility of their custom moves.
All of these flaws have landed the Mii Gunner in the bottom tier, and has resulted in very poor tournament representation, much like the two other Mii Fighters.
Attributes[edit]
Of the three types of Mii Fighters, Gunners are the slowest runners, and their jump height is between that of the Mii Swordfighter and the Mii Brawler. Their walking speed and gravity are average, they have slightly above average air speed and air acceleration, and below average falling speed. Their attacks are equally as fast as the Brawler's and equally as strong as the Swordfighter's, though they trump both of the other types in terms of range. Like the Mii Brawler, they can wall jump.
The Gunner has a wide range of projectiles to keep opponents at a distance with. Mii Gunner excels at creating space from its opponent, as well as creating frame traps on the spot for heavy damage. Laser Blaze works in a manner similar to that of Fox's laser, racking up quick damage and forcing a reaction from the enemy. The Gunner's Grenade Launch, while being tough to punish, is able to cover a large range of angles, switch directions up to three times while charging, and fall below the stage in order to attack recovering enemies. Its edgeguarding ability is further emphasized by the fact that the grenade will eventually explode even after not hitting anything (the larger explosion helping to catch enemies off stage) and the explosion is multiple hits, making airdodging through it more difficult. Flame Pillar is able to block projectiles and guard edges, while Bomb Drop is similar to Grenade Launch in that it leaves a trap that the enemy has to deal with, which is equally capable of edgeguarding while offering decent KO power. Lunar Launch gives the Gunner a great vertical recovery, while Cannon Uppercut trades distance for a powerful meteor smash and out of shield kill move. Even with the plethora of projectiles Gunner already has, they can force approaches from other projectiles users by reflecting enemy projectiles with their Echo Reflector, or absorbing them and healing with the Absorbing Vortex.
Even outside of their specials, the Mii Gunner's range should not be underestimated. The Gunner's forward smash and up aerial outrange those of Shulk while having high knockback and multiple hits, making them useful tools for catching rolls, sidesteps, and air dodges. Mii Gunner's forward aerial, a move similar to that of Villager, is useful as a quick projectile, and also has the unique property of applying adjustable momentum to the Gunner, similar to Mewtwo's Shadow Ball. This can be used for recovery or to evade an enemy looking to punish the move.
Their close-range attacks come out quickly with good knockback, but some have high endlag, making precision vital to avoid punishment. Despite being long-ranged fighters, some of their best KO moves are close-range attacks, such as their up and down smashes, up and down tilts, and back and down aerials. Low running speed and endlag on attacks can make approaching difficult, so forcing an opponent to attempt an approach and keeping them at a distance with various projectiles is a good way to build up damage and eventually send them offstage, where it will be easier to finish them off. Gunners also have good options for recovery, but their recoveries are largely vertical outside of Arm Rocket which deals no damage. Mii Gunners are also constrained by their weak grab game; while the Gunner's grab itself is relatively fast, their throws deal little damage and are lacking in KO potential.
As a whole, the Gunner is a dominant long-range force, able to force approaches with ease; however, they may find difficulty dealing with up-close pressure from aggressive foes due to their slow speed and generally poor out of shield options. The banning of custom moves, however, is a serious hindrance for the character, resulting in low popularity among competitive players, and poor tournament results.
Update history[edit]
Like the Mii Swordfighter, the Mii Gunner has been buffed in updates, though not to the same extent as the Swordfighter. The ending lag on its moves has been notably decreased, and it also benefits slightly from the changes to shield mechanics in updates 1.1.0 and 1.1.1, as its attacks (most notably forward smash, down tilt and Charge Blast) have acquired better shield damaging capabilities, enhancing its spacing and zoning game.
 Absorbing Vortex has significantly reduced end lag.
 Up aerial's final hit damage slightly increased: 3% → 4%
 Up aerial landing lag reduced: 26 → 22 frames.
 Up aerial ending lag reduced: 66 → 62.
 Charge Blast at any charge end frame reduced: 45 → 39.
 Gunner Missile ending lag reduced 76 → 62 on homing missile and 59 → 49 on super missile.
 Laser Blaze damage increased on both long range and close: 3.6%/2.6% → 4%/3%
 Lunar Launch hitbox angle 70 → 55
 Grenade Launch projectile now dissipates upon hitbox clash rather than exploding.
 Graphic effects on neutral and dash attack altered slightly.
 The second hit now uses a forward launching angle (130° → 50°), but it now uses a backwards angle flipper (3 → 4). This means that the opponent is still sent behind Mii Gunner at the same angle, but they are now facing Mii Gunner, rather than away from them.
 Because of this, the second hit now pushes shielding opponents away from Mii Gunner rather than dragging them towards them, making the move safer.
 However, this also makes it easier for the opponent to recover.
 Absorbing Vortex heals half damage from absorbing teammates' projectiles.
Moveset[edit]
All damage listed in this table assumes a default Mii of perfectly average height and weight.
- Mii Gunner can wall jump.
| Name | Damage | Description | ||
|---|---|---|---|---|
| Neutral attack | 2% | The Gunner swings its arm cannon twice then releases a burst of flame from it. The third hit has good knockback for a jab, able to KO at extremely high percentages, though it is difficult to connect at said percentages. | ||
| 2% | ||||
| 1%, 4% | ||||
| Forward tilt | 9% (close), 7.5% (middle), 6% (far) | Fires a short range energy burst. Has good reach for a close range move, but has noticeable endlag. | ||
| Up tilt | 10% (clean), 8% (late) | Uppercuts with the arm cannon, releasing flames. An effective anti-air attack with very fast startup and high knockback, being one of the Gunner's best KO moves if hit with the first frame of the attack, but has considerable ending lag. KOs at 141%. | ||
| Down tilt | 14% | Fires a burst of flame onto the ground in front of themselves, similarly to Samus's down tilt, though with slightly faster startup and stronger knockback that can KO at 144% (similar to the Brawl iteration of Samus's down tilt) but more ending lag, and it suffers from the most endlag of all the Gunner's tilts. | ||
| Dash attack | 10% | Performs a swinging punch with the arm cannon, blasting the enemy with flames. Good knockback. Opponents are sent backwards if hit by the Mii rather than the cannon or flames. | ||
| Forward smash | 0.8% (hits 1-6), 5% (last hit), 9.8% if all hits connect | Unleashes a series of energy bursts in quick succession, followed by a stronger burst. Hits opponents multiple times and has the second longest range of any non-projectile forward smash (right behind Corrin) along with a very long hitbox duration that makes it difficult to challenge as well as great for pressuring shields and edgeguarding, and possesses decently low ending lag. However, its knockback is weak and lacks reliable KO potential on-stage, doing so at 148%. | ||
| Up smash | 3% (hit 1), 2.5% (hits 2-4), 6% (hit 5), 16.5% if all hits connect | Releases bursts of fire in an arc above its head, similarly to Samus's up smash, Cover Fire. Similar to her up smash, it has good power, large range above the Gunner, and low ending lag. However, because of the Gunner's height, it can trap opponents in the entire move much easier than Samus, who has trouble getting smaller characters in the blast. KOs at 121%. | ||
| Down smash | 4% (hit 1), 10% (hit 2) | Fires two bursts of flame onto the ground, first in front then behind of themselves. Enemies that take the first hit are dragged into the second hit, similarly to Ganondorf, Toon Link and Cloud. First hit has deceptively long reach, even outranging certain long ranged moves such as Marth's forward smash. The back hit KOs at 155% at the stage's center. | ||
| Neutral aerial | 6% | Sweeps its arm cannon downward in an arc around themselves. A good "get off me" option due to its duration and range that almost covers 360 degrees, similar to Ike. | ||
| Forward aerial | 6% (close), 4% (far) | Fires a weak single energy shot projectile that travels a third of Final Destination. The force of the shot pushes the Gunner backwards slightly and is called a gundash. Can be absorbed or reflected, but is a great spacing option similar to Villager's slingshot aerials. Low landing lag but extremely high ending lag in the air, especially if using a large Mii. | ||
| Back aerial | 12% | Releases a burst of flames from its arm cannon behind themselves. The Gunner's most reliable aerial finisher that isn't a meteor smash. | ||
| Up aerial | 1% (hits 1-8) 4% (hit 9) | Unleashes a series of energy bursts upwards in quick succession, followed by a stronger burst. Acts like the Gunner's forward smash aimed vertically upwards. Somewhat awkward to use as the attack cuts off abruptly if the Gunner lands before the final shot is used, but is a good juggling tool and KO move if the final hit connects at height. It can also be used to follow up with an up tilt or up smash despite the moves' decently high landing lag. | ||
| Down aerial | 10% (base), 15% (tip), 12% (late) | The Gunner pauses, then fires a single energy burst below themselves. The tip of the burst deals more damage and is a very strong, aerial-only meteor smash, in a similar fashion to Mega Man's Hard Knuckle. The blast deals less damage after the initial meteor hit. However, the meteor smashing hitbox only lasts for one frame, in a similar fashion to Palutena's down aerial, and it has incredibly slow startup, making it very difficult to land. | ||
| Grab | — | An average grab. | ||
| Pummel | 2% | Hits the opponent with its arm cannon. A moderately slow pummel. | ||
| Forward throw | 2% (punch), 3% (throw) | Punches the enemy away with the arm cannon. | ||
| Back throw | 2% (throw), 3% (energy pellet) | Tosses the opponent behind themselves, then fires a single energy pellet at the foe, similarly to Falco's back throw. | ||
| Up throw | 2% (throw), 3% (energy pellet) | Tosses the enemy above themselves, then fires a single energy pellet at the foe, similarly to Falco's up throw. | ||
| Down throw | 5% | Tosses the enemy onto the ground. Strangely enough, this down throw is identical to Marth's, with the exact same damage output, launch angle, knockback values, ending lag and animation, although it is not weight-dependent. However, due to the Gunner's slower jumpsquat and attack speed, it has no guaranteed followups. | ||
| Forward roll Back roll Spot dodge Air dodge |
— | — | ||
| Techs | — | — | ||
| Floor attack (front) Floor getups (front) |
7% | Quickly fires a flame burst on either side as it stands up. | ||
| Floor attack (back) Floor getups (back) |
7% | Similar to frontal floor attack. | ||
| Floor attack (trip) Floor getups (trip) |
5% | Shoots a blast of fire in front then behind themselves. | ||
| Edge attack Edge getups |
7% | Swings their arm cannon ahead. | ||
| Neutral special | Default | Charge Blast | 3.15% (uncharged), 22% (charged) | Charges and fires a large energy sphere. Functions like Samus's Charge Shot. |
| Custom 1 | Laser Blaze | 3-4% depending on the distance the projectiles travel | Fires spammable green energy pellets that only deal damage and slightly push enemies back; similar to Fox's Blaster but fires at a slower rate and does more damage, similar to Falco's Burst Blaster. | |
| Custom 2 | Grenade Launch | 8% if all hits connect | Fires a grenade in an arc that will bounce along the ground a short distance and explode after a very short time after launch. The grenade will also detonate on impact with enemies, and charging this special will increase the distance the grenade is launched. | |
| Side special | Default | Flame Pillar | 4% (projectile), 6% (flame pillar) | Fires an energy shot diagonally down that erupts into a pillar of flame that lingers for a few moments, similarly to Robin's Arcfire and Ness's PK Fire, but only causes one strong hit like Lucas's PK Fire. |
| Custom 1 | Stealth Burst | 10.8-15.4% | Fires a small shining energy shot that detonates when the button is released, similarly to Zelda's Din's Fire but it only travels straight like Din's Flare. Holding the button gives the shot more distance and power before detonating, as well as making it vanish before the button is released or it reaches maximum power. | |
| Custom 2 | Gunner Missile | 4.5% (homing missile), 10% (super missile) | Functions like Samus's Missiles. Holding the button will fire a Homing Missile. Inputting like a Smash attack fires a Super Missile. | |
| Up special | Default | Lunar Launch | 7% | Releases an explosion beneath themselves, launching into the air. |
| Custom 1 | Cannon Uppercut | 9% (concussive blast), 8% (uppercut) | Fires a concussive blast, then propels themselves with the arm cannon while punching into the air. A sweetspotted concussive blast can meteor smash, similar to Palutena's Rocket Jump when it is used midair. | |
| Custom 2 | Arm Rocket | 0% | Fires a small flame burst, then propels themselves with a stream of flames from the arm cannon. By holding the Control Stick in a direction, the Mii Gunner can travel more horizontally. Similar to Pit's and Dark Pit's Power of Flight but it covers slightly less distance. | |
| Down special | Default | Echo Reflector | 2% (activation), 1.4x damage (reflected projectiles) | Activates an octagonal shield that reflects projectiles. Functions like Fox's Reflector. |
| Custom 1 | Bomb Drop | 2% (bomb), 9% (explosion) | Drops a small bomb that rolls along the ground and explodes upon contact with an enemy. Functions like Samus's Bombs. | |
| Custom 2 | Absorbing Vortex | 0% | Covers themselves with a glowing energy shield that absorbs energy projectiles and converts that damage to healing, similarly to Ness's PSI Magnet. Heals 1.2 times the damage the Gunner would have taken. | |
| Final Smash | Full Blast | 46% | The Gunner shoots a strong laser, with two small laser cannons firing smaller lasers. Can be angled. Similar to Samus's Final Smash, Zero Laser. | |
Stats[edit]
All stats listed in the following table assumes a default Mii of perfectly average height and weight.
| Stats | Weight | Dash speed | Walk speed | Traction | Air friction | Air speed | Air acceleration | Gravity | Falling speed | Jumpsquat | Jump height | Double jump height |
|---|---|---|---|---|---|---|---|---|---|---|---|---|
| Value | 100 | 1.6 – Initial dash 1.3 – Run |
1.05 | 0.045 | 0.01 | 1.05 | 0.01 – Base 0.07 – Additional |
0.08715 | 1.45 – Base 2.32 – Fast-fall |
6 | 32 - Base 17.539339 - Short hop |
33.500343 |
Announcer call[edit]
English/Japanese/Chinese
On-screen appearance[edit]
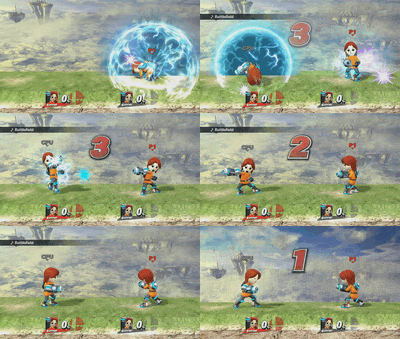
- Emerges from an Absorbing Vortex, then points their arm cannon to the left side of the screen.
|
|---|
Taunts[edit]
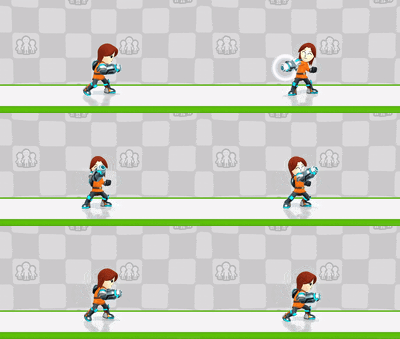
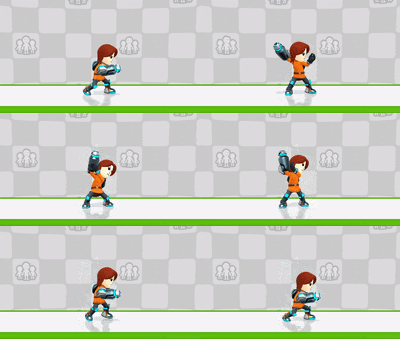
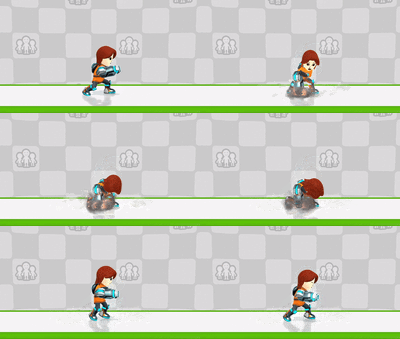
- Up taunt: Points the arm cannon in two directions.
- Side taunt: Holds the arm cannon with their hand and cocks it down, similar to one of Samus' victory poses.
- Down taunt: Thrusts with the arm cannon on the ground whilst releasing small bursts of fire.
| Up taunt | Side taunt | Down taunt |
|---|---|---|
|
|
|
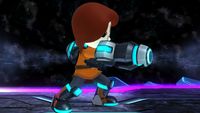
Idle poses[edit]
- Rests their arm cannon and then examines it.
- Points their arm cannon in several directions, similar to one of Samus's taunts.
 |
|
|---|
Crowd cheer[edit]
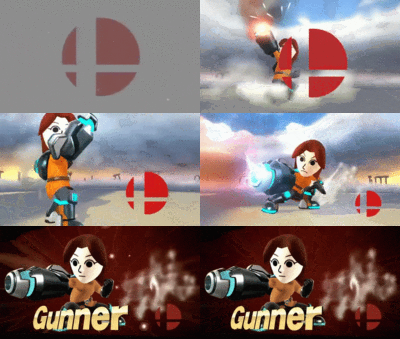
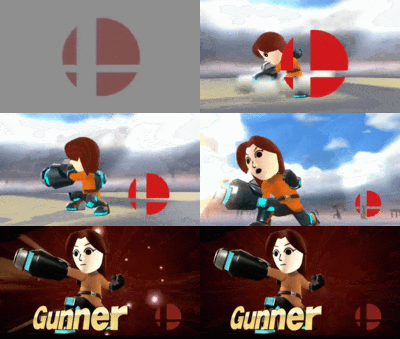
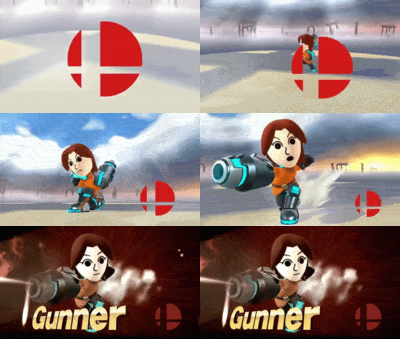
Victory poses[edit]
- Starts shooting in various directions, fires once more with a volley similar to their forward smash, then poses.
- Rolls in from offscreen, then fires arm cannon.
- Swings arm cannon around, then fires it while pointing it ahead. Visually similar to their neutral attack.
 |
 |
|
|---|
In competitive play[edit]
Official Custom Moveset Project[edit]
| Character | Custom sets available | ||||
|---|---|---|---|---|---|
| 3122 | 3121 | 3123 | 3112 | 3111 | |
| 3113 | 3322 | 3321 | 3323 | 3312 | |
| 3311 | 3313 | 1122 | 1121 | 1123 | |
| 3131 | 3133 | 1312 | |||
Most historically significant players[edit]
See also: Category:Mii Gunner players (SSB4)
AEMehr - The best Mii Gunner player in North America, and the only primarily Mii Gunner player in the United States to make any noticeable impact. His 13th-place finish at IBP Masters Showdown with a win over Manny marks the best Mii Gunner placement at a major. In addition, he also placed 7th at Noods Noods Noods: Melee Edition, which marks the only time a Mii Gunner player placed top 8 at a PGR-ranked event.
Flama - Best known as a strong online player, having placed 5th at PG Key to Frostbite 2017. Offline, he plays Mii Brawler alongside Mario and is best known for placing 9th at Smash Factor 4 with primarily Mii Gunner.
Rom - Widely considered to be the best Mii Gunner player in the world. Aside from placements such as 17th at Umebura 15 and 33rd at Umebura 24, he has the best wins out of any other Mii Gunner player, having defeated Kirihara at Umebura 24, Raito at SHI-G Tournament, and Pugwest at GENESIS 3.
Tier placement and history[edit]
The Mii Gunner's perceived potential was received rather lukewarmly; players acknowledged the excellent range of several moves (most notably forward smash and up aerial), the potential for effective camping with the combined use of forward aerial and custom moves, along with good utility in their down special moves. However, all three kinds of Mii were quickly looked down upon due to the controversy surrounding the allowance of custom movesets in tournaments, as well as the use of custom Mii sizes, with the ban restricting the Mii Gunner to a relatively unimpressive moveset and their poor attributes at their default size, forcing them to contest with a poor grab game, surprising lack of ranged KO options, high ending lag on KO moves, and lackluster mobility, despite their spacing game being relatively good with options such as forward air, Charge Blast and Flame Pillar.
While at first the Mii's choice for custom movesets was up to a tournament director's discretion, when custom special movesets began to be discussed, the Mii's tier placements once again began to rise in the eyes of many players, in the case of the Mii Gunner, many considered it to be a mid-tier character. After the universal ban of custom movesets and custom Mii sizes post-EVO 2015, however, expectations of the Mii plummeted once again, and they would go on to be widely viewed as some of the worst characters in the game. In the case of the Mii Gunner, it would at first rank at 52nd on the first 4BR tier list as the second best kind of Mii. It would then see slight drops to 53rd on the second tier list, and 54th on the third and current tier list, though this time as the best kind of default Mii for the last two placings, the primary reason behind this being to its better tournament results than the other kinds of Miis.
Due to a very large stagnation of data on the Miis, as well as no response on whether or not they should be allowed to use custom moves, the Miis were excluded from placement voting on the fourth and most recent tier list and with the game coming to the end of its competitive lifetime only a year after the tier list was released, it is unlikely that the Miis will be added to any official tier lists in the foreseeable future. Tournaments near and after the end of the game's competitive life were more lenient towards the Miis having access to their custom moves, which would leave Mii Gunner in a better spot but by exactly how much is unknown.
In Solo Modes[edit]
All-Star Mode[edit]
Unlike other fighters, Mii Fighters do not appear as opponents in All-Star Mode.
Congratulations screens[edit]
3DS[edit]
Wii U[edit]
Trophies[edit]
Mii Gunner's default trophy is obtained by clearing Classic Mode as Mii Gunner. Their alternate trophy is obtained by clearing All-Star Mode as Mii Gunner in the 3DS version or purchasing it in the Trophy Shop for 1000G in the Wii U version (the latter can only appear after clearing Classic or All-Star as Mii Gunner). The Full Blast trophy is obtained only in the Wii U version by clearing All-Star Mode as Mii Gunner.
- Mii Gunner
A Mii sporting a blaster arm, this fighter is a great choice for those who prefer to fight the battle from a distance. The Mii Gunner has a lot of special projectile moves available, so pick your favorites and use them when needed. Don't forget about standard and smash attacks!
A fighter based on your Mii! Gunners are all about the guns, of course. No matter how you set up your specials, you'll end up with a powerful arsenal. And it's not just their special moves that have excellent range – they have standard and smash attacks that can really go the distance too. Use them to dominate the battle from afar.
: Super Smash Bros. for Wii U
- Mii Gunner (Alt.)
 One of the Mii Gunner's side specials is Stealth Burst. The missile blends in, making it tough to see. Plus, you can control when it explodes, so it's handy for surprise attacks! You could also use Absorbing Vortex to absorb damage done to you by energy weapons. This is one fighter with a lot of tricks up its sleeve!
 One of the Mii Gunner's side specials is Stealth Burst. The missile blends in, making it tough to see. Plus, you can control when it explodes, so it's handy for surprise attacks! You can also use Absorbing Vortex to absorb damage done to you by energy weapons. This is one fighter with a lot of tricks up its sleeve!
One of the Mii Gunner's side specials is Stealth Burst. The burst blends in, making it tough to see. Plus, you can control when it explodes, so it's handy for surprise attacks! You could also use Absorbing Vortex to absorb damage done to you by energy weapons. This is one fighter with a lot of tricks up its sleeve!
: Super Smash Bros. for Wii U
- Full Blast
The Mii Gunner's Final Smash unleashes a wide, long-range beam of painful energy. The laser will hit several times, pushing back opponents before launching them with the last blow. You can adjust the laser beam's angle, so punish a foe who thought he or she was safe by trying to duck under the beam!
Mii Gunner's Final Smash is a set of laser beams fired straight ahead that reach all the way across the screen. These can hit repeatedly and push foes back, ultimately launching them at the end. While firing the beams, you can tilt them up and down, so fine-tune the angle to really go for your foes!
Alternate costumes[edit]
Base game[edit]
| Dragon Armor | Fancy Suit | High-Tech Armor | Mage Outfit | Standard Outfit | Steampunk Outfit | Wild West Wear |
- The color of the costume depends on the Mii's original color from the Mii Maker.
Downloadable content[edit]
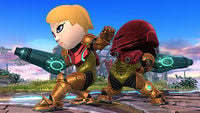
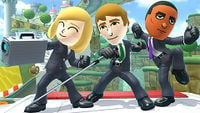
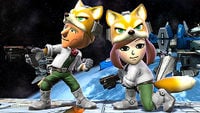
 |
 |
 |

|
 |
 |
 |
|
 |
 |
 |
|
 |
 |
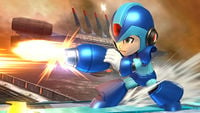
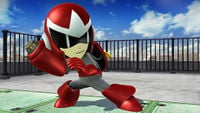
| SSB T-Shirt | X's Armor | Proto Man's Armor | Inkling Outfit |
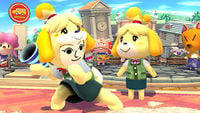
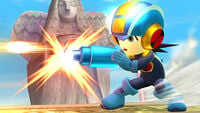
| Isabelle Outfit | MegaMan.EXE's Armor | K.K. Slider Outfit | Hoodie |
| Bear Suit | Samus's Armor | Business Suit | Fox Outfit |
| Geno Outfit | Tails Outfit |
Gallery[edit]
Abraham Lincoln as a Gunner.
Mii Gunner's amiibo.
All of the custom up specials of Mii Gunners.
A Mii Gunner with Peach on the Spirit Train.
A Mii Gunner attacking Rosalina.
A gunner using his final smash against Zero Suit Samus, Lucina, and Zelda.
A gunner battling Master Core. Note how Master Shadow copies the Mii's outfit.
Promotional artwork of Nikki as a Mii Gunner
Nikki as a Mii Gunner alongside Takamaru.
Trivia[edit]
- The design of the Mii Gunner used in promotional material and in-game renders is based on a slightly edited version of Guest F, one of the pre-loaded Miis available for use in games that feature Mii support. In this case, her hair uses a different design and color from the preloaded version, along with a smaller mouth and a different favorite color (orange instead of pink). She is also based on the default female Mii in Mii Maker, though again, with a different hairstyle.
- According to Palutena's Guidance, their cannons are controlled via motion-controlled triggers, and their backpacks hold all their ammo, but nothing connects the packs to their cannons. Some outfits don't have a backpack or other method of storage with them at all.
- While wearing the Isabelle, K.K. Slider, Inkling, Fox, and Tails DLC costumes, the Mii Gunners hold their weapon in hand rather than wear their cannon on their arm.
- Mii Gunner has the most flame attacks of any character in any Smash game.
- Mii Gunner is the only character with a 4-hit standard attack.
- This attack resembles Pit's melee combo in Kid Icarus: Uprising when wielding a Cannon.
- Oddly, Mii Gunner's back throw can semi spike and put the opponent into a tumbling state until 30%. Once past, it doesn't start tumbling until around 70%.
- The heaviest possible Mii Gunner has the slowest dash of any fighter; while it can dash faster than Samus's walking speed, it dashes slower than Mega Man's walking speed.
- Before Corrin (and eventually Simon and Richter), the Mii Gunner's forward smash had the largest range of any forward smash.
| Fighters in Super Smash Bros. 4 | |
|---|---|
| Veterans | Bowser · Captain Falcon · Charizard · Diddy Kong · Donkey Kong · Dr. Mario · Falco · Fox · Ganondorf · Ike · Jigglypuff · King Dedede · Kirby · Link · Lucario · Lucas · Luigi · Mario · Marth · Meta Knight · Mewtwo · Mr. Game & Watch · Ness · Olimar · Peach · Pikachu · Pit · R.O.B. · Roy · Samus · Sheik · Sonic · Toon Link · Wario · Yoshi · Zelda · Zero Suit Samus |
| Newcomers | Bayonetta · Bowser Jr. · Cloud · Corrin · Dark Pit · Duck Hunt · Greninja · Little Mac · Lucina · Mega Man · Mii Fighter (Mii Brawler · Mii Gunner · Mii Swordfighter) · Pac-Man · Palutena · Robin · Rosalina & Luma · Ryu · Shulk · Villager · Wii Fit Trainer |


