Mii Brawler (SSB4)
| Mii Brawler in Super Smash Bros. 4 | |
|---|---|
| |
| Universe | Super Smash Bros. |
| Shares character slot with | Mii Gunner Mii Swordfighter |
| Other playable appearance | in Ultimate |
| Availability | Custom |
| Final Smash | Omega Blitz |
| “ | Anyone Can Join The Battle! | ” |
| —Introduction Tagline | ||
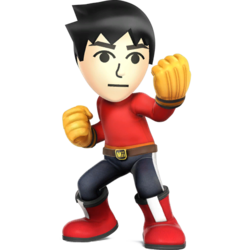
Mii Brawlers (格闘タイプ, Hand-to-Hand Fighting Type) are one of the three different types of Mii Fighters that appear in Super Smash Bros. 4, along with Mii Swordfighters and Mii Gunners.
The Mii Brawler is unranked on the latest tier list, but was 55th out of 57 characters on the third tier list (when only taking their default moveset and size into account). Compared to the other Mii Fighters, Mii Brawlers boast formidable mobility, attack speed, and damage that is further strengthened by their great ground and air games, giving them a versatile combo game and excellent KOing ability once they find an opening.
However, the Mii Brawler is heavily held back by its poor range, which leads to a poor approach when combined with their very lackluster projectile in Shot Put. Mii Brawler also suffers from one of the worst recoveries in the game, as none of its special moves provide significant upward distance, and most of them are easy to edgeguard or gimp against, most notably its standard recovery move Soaring Axe Kick, which cannot sweetspot ledges until the peak of the move. While some of its custom moves can alleviate some of these problems, the universal ban on custom moves since EVO 2015 has prevented players from taking advantage of these. As a result, Mii Brawler has had poor tournament representation, despite some decent tournament results in the early Smash 4 days when customs were legal.
Attributes[edit]
The Mii Brawler is a formidable fighter who combines speed and power with impressive combo-ability to take out opponents, similar to other characters like Captain Falcon and Little Mac. Like the other types of Miis, their weight is average compared to other characters, however, the Mii Brawlers have the best mobility overall of the three types of Mii Fighters, possessing above average walking, dashing, and falling speeds, good jumping height and high air speed, but below average air acceleration, low traction and high gravity.
Mii Brawlers have among the best ground games in SSB4, due to their good ground mobility, an overall serious damage output, and little to no lag on most of their attacks (except for their smash attacks, which all possess a considerable amount of end lag). Additionally, their combo ability isn't bad either, as a good number of their attacks (including their throws) don't deal much knockback, thus keeping opponents close by and leaving them open to follow-ups. However, should the Brawler end up using a move that deals too much knockback, such as a smash attack, they still have a high chance of catching up to their opponent with their great mobility.
The Brawler's aerial game is good as well, as most of their aerials are fast and strong (with even more KOing ability than their ground attacks) and can even be combined with ground attacks and throws for some interesting combos. This is further improved by the Mii Brawler's good jumping ability and high air speed. Additionally, their up aerial is a great tool for juggling, and can be very useful for ceiling KOs, making them a major threat on stages with lower ceilings, while their down aerial makes for a great meteor smash. However, their midair game is hampered by the overall increase in knockback for their aerials, compared to their ground attacks. Thus, Mii Brawler players are better off utilizing aerials to finish combos or score midair KOs (the latter being a particular strength for the Brawlers to begin with) rather than attempting to combo with aerials only.
The Mii Brawler is not without other flaws, though. Except for their slightly longer-reaching aerials and smash attacks, their overall range is poor relative to most of the cast (though it is somewhat counterbalanced by their fast movement), and their grab game is subpar, possessing not only short range but also a weak pummel. The Brawler's vertical recovery is also abysmal (though moves such as Burning Dropkick make their horizontal recovery slightly better), with none of their special moves providing much upward distance and most of them being easy to gimp. Finally, except for Shot Put, the Mii Brawler lacks any type of projectile, giving it a rather miserable approach game.
Despite this, various modes of customization can significantly aid the Mii Brawler in tournaments that allow them, and cover for most of their flaws. Using a larger Mii can improve upon their subpar range, increase their weight, and provide a buff to their already impressive power and KOing ability, but nerfs their movement and attack speed, slightly tones down their combo-ability, and makes them a larger and much easier target to compensate. On the other hand, using a smaller Mii can improve their already high mobility both in the air and on the ground, buff their combo-ability, and decrease the already low lag on their attacks, though it weakens their damage output, nerfs their already poor range, and makes them easier to launch. Average-to-large-sized Miis also benefit very well from rage, being able to KO opponents even more easily due to their increased knockback (with larger Miis having the advantage of being able to maintain rage for longer due to their weight). Custom specials can also aid them. As mentioned above, certain special moves such as Burning Dropkick and Feint Jump can significantly boost their subpar recovery, (with the latter move also serving as a good way to turn the tables on opponents) while others such as Foot Flurry, Piston Punch and Onslaught can give the Mii Brawler an impressive damage-racking game and compliment their combo ability rather well. Shot Put can slightly improve their edgeguarding abilities, and Exploding Side Kick and Ultimate Uppercut are great finishing moves, with the latter being a great tool for starting or ending combos. Burning Dropkick also has another use: it can improve the Brawler's poor approaching game and even stop incoming projectiles. In addition, players can even combine certain specials with certain-sized Miis to open up more possibilities.
While the Brawler was initially agreed to be one of the dominant forces in the metagame of SSB4, especially when given access to their custom moves (which are considerably better than both other types of Mii Fighters), the current blanket ban on custom moves as well as their abysmal tournament representation has relegated them to the lower tiers, much like the other Mii Fighters.
Overall, the Mii Brawler can be considered to be a less effective Mario; a quick and nimble rushdown character that relies on their very quick speed and largely reliable combo ability (with even their main combo moves being similar). However, without the Brawler's custom moves, their subpar range, easily exploitable default recovery, and low-utility special moveset have given them a poor standing in the competitive metagame.
Update history[edit]
The Mii Brawler has received a mix of buffs and nerfs in game updates. 1.0.6 nerfed the Brawler's damage output, but its neutral infinite and special moves have been improved to compensate. The Mii Brawler also slightly benefits from the changes to shield mechanics in 1.1.0 and 1.1.1, due to it increasing the utility of its moves multi-hit nature and benefiting their high hitlag.
 Forward smash has received an additional hitbox close to Mii Brawler.
 Forward smash now always launches opponents in the direction Mii Brawler is facing.
 Both hits of forward aerial deal less damage (4%/6% → 3%/5%).
 However, this also improves its combo potential at higher percents, especially for smaller Mii Brawlers.
 Back aerial deals less damage (12% → 10%).
 Back aerial's foot hitbox is smaller (5.7u → 4.7u).
 Piston Punch's first hit has less set knockback (200 → 150).
 Piston Punch's final hit has less knockback scaling (190 → 180).
 Onslaught windbox 1 angle (50° → 361°) and knockback (80 (set), 100 (scaling) → 0/0).
 Onslaught windbox 1 now has a push effect instead of a hit effect.
 The second hit of neutral attack has swapped priority on its hitboxes.
 Neutral infinite has less ending lag (FAF 44 → 41).
 Forward smash has received an additional hitbox inside of Mii Brawler.
 The first hit of forward aerial deals more damage (3% → 4%).
 Up aerial deals less damage (9% → 8%).
 However, this also improves its followup potential at higher percents, especially for smaller Mii Brawlers.
 Ultimate Uppercut charges faster (137 frames → 124).
 Uncharged Ultimate Uppercut's far hit deals more knockback (20 (base), 82/66 (scaling ground/air) → 40/100).
 Fully charged Ultimate Uppercut's clean hit deals more damage (22% (ground)/15.4% (air) → 23%/16.1%) and the grounded version has slightly higher knockback scaling (79 → 80).
 Fully charged Ultimate Uppercut's late hit deals less damage (17% (ground)/11.9% (air) → 16%/11.2%).
 Burning Dropkick has more base knockback (76/69 → 85/78).
 Feint Jump kick deals more damage (8% → 10%).
 Aerial Foot Flurry has 10 frames less ending lag.
Moveset[edit]
All damage listed in the following table assumes a default Mii of perfectly average height and weight.
- Mii Brawler can wall jump.
| Name | Damage | Description | ||
|---|---|---|---|---|
| Neutral attack | 3% | Two quick punches followed by a series of rapid punches ending with a side kick, somewhat similar to Little Mac's jab. The first two punches can be jab cancelled like Fox's jab, which allows the Brawler to follow up with different attacks or a throw. The jab infinite is somewhat easily escapable from mid-percents onward. Large Miis suffer from heavy ending lag once the finisher is inputted. | ||
| 2% | ||||
| 1% (6 per loop), 2% (end) | ||||
| Forward tilt | ↗ | 8.5% (body), 7.5% (leg) | A single roundhouse kick, similar to Mario's. Can be angled. | |
| → | 8% (body), 7% (leg) | |||
| ↘ | 8.3% (body), 7.3% (leg) | |||
| Up tilt | 6% | Punches with an uppercut, similar to Mario's up tilt, though it does not spin the Mii around. Can juggle at low percentages. The hitbox stays at the Mii's fist, which means it cannot hit opponents behind them. | ||
| Down tilt | 8% | Sweep kick along the ground. Pops opponents into the air, allowing it to combo into tilts at low percents and aerials at medium percents. | ||
| Dash attack | 11% (clean), 6% (late) | Dropkicks forward, similarly to Fox's dash attack. | ||
| Forward smash | 18% | A strong straight punch with high ending lag. The hitbox lasts only one frame. Can be angled. This move has a very strong sourspot, as it often launches opponents behind the Brawler. | ||
| Up smash | 14% (clean), 10% (late) | A flip kick, similar to Fox's up smash. Wide coverage, with the later hitboxes dealing less damage behind the Mii Fighter. Combos from down tilt and up tilt at low percents. | ||
| Down smash | 13% | Punches forwards and kicks backwards simultaneously, with the kick dealing more knockback. Fast with moderate ending lag, though the hitboxes are somewhat small. | ||
| Neutral aerial | 10% (clean), 5% (late) | A sex kick; similar to Mario's neutral aerial, though with an unusually long period of endlag after the kick. Auto-cancels from a short and full hop. | ||
| Forward aerial | 4% (hit 1), 5% (hit 2) | Two spin kicks; similar to Zero Suit Samus' forward aerial. The Mii Fighter's main combo tool, which can combo into itself or after throws. The first hit sends at the autolink angle, allowing it to drag opponents down onto the stage, and can initiate combos into smash attacks and aerials at low to mid-percents. | ||
| Back aerial | 10% | A single swinging back kick. Although it KOs at 158% at the ledge, its speed and semi-spike angle allows it to function as a good edgeguarding or offstage KO tool. Auto-cancels from a short hop. | ||
| Up aerial | 8% | Swipes foot above their head in an arc. Juggles well due to its low knockback and wide range. Auto-cancels from a short-hop. | ||
| Down aerial | 13% (clean), 12% (late) | Swings both fists beneath himself/herself in a double axe handle, similarly to Diddy Kong's down aerial. The Mii's strongest aerial and most reliable meteor smash, though it KOs at 132% onstage. Auto-cancels if used near the peak of a full hop. | ||
| Grab | — | |||
| Pummel | 3.25% | Headbutts the enemy. | ||
| Forward throw | 9% | Hits the enemy with a backhand. The Mii Fighter's strongest throw, though it fails to KO till above 190% near the edge. Sends at a semi-spike angle, allowing it to set up an edgeguard. | ||
| Back throw | 2% (hit 1), 5% (throw) | Kicks the enemy away behind themself. Similar knockback angle as forward throw, but slightly weaker. | ||
| Up throw | 8% | Knocks the enemy up with a palm strike. Can combo into up aerial on heavier characters, but this quickly loses effectiveness. | ||
| Down throw | 2% (hit 1), 4% (throw) | Karate chops the enemy into the ground. An effective combo starter due to its mainly vertical knockback, allowing for mid-air follow-ups such as several forward aerials from 0%, and up aerial at mid percents. Can be used reliably as a setup for Helicopter Kick. | ||
| Forward roll Back roll Spot dodge Air dodge |
— | — | ||
| Techs | — | — | ||
| Floor attack (front) Floor getups (front) |
7% | Gets up while kicking both sides. | ||
| Floor attack (back) Floor getups (back) |
7% | Gets up while kicking both sides. | ||
| Floor attack (trip) Floor getups (trip) |
5% | Gets up and kicks both sides. | ||
| Edge attack Edge getups |
7% | A low karate chop. | ||
| Neutral special | Default | Shot Put | 15% (throw), 11% (bounce 1), 8% (bounce 2) | A shot is thrown into the air as an arcing projectile. Bounces twice upon landing, which deals lower damage; if it misses, the shot travels a set distance before disappearing. Very damaging and strong for an unchargeable projectile, but has considerable amounts of startup and ending lag. The Brawler is able to aerially maneuver during the attack's high ending lag, however. |
| Custom 1 | Ultimate Uppercut | 8%/5% (ground uncharged), 22%/17% (ground fully charged), 6.4%/4% (air uncharged), 15.4%/11.9% (air fully charged) | A chargeable uppercut similar to Giant Punch in function. It does not deal any extra damage unless it is fully charged, but gives the Brawler light armor during an uncharged punch and super armor before and during a fully-charged punch to compensate. | |
| Custom 2 | Exploding Side Kick | 25%/23% (ground), 27%/25% (ground reverse), 21.25%/19.55% (air), 22.95%/21.25% (air reverse) | Does a twirl and charges up for a moment, before unleashing a powerful flaming kick. Functions like a "kick" version of Falcon Punch, including the ability to reverse before unleashing the kick, along with super armor until the end of a grounded, non-reversed kick. The sweetspot of the attack is the foot. | |
| Side special | Default | Onslaught | 1.2% (ground loop hits), 1% (air loop hits), 4% (last hit) | Charges forward with their knee and fist out. If it connects near an opponent, the Mii Brawler will launch into a series of kicks that ends with an moderate-knockback uppercut. After the combo or if missed, the Mii Brawler becomes helpless. The finishing hit is similar to Captain Falcon's Raptor Boost. |
| Custom 1 | Burning Dropkick | 10%-18% | Extends both legs in front of them, charging forward to deliver a double kick while caught on fire. Is charged up similarly to the Green Missile. Very strong, even when uncharged, and does not cause helplessness. | |
| Custom 2 | Headache Maker | 4% (startup), 13%/10% (clean), 9% (late) | Performs a short mid-air jump while doing a falling punch with both fists, vaguely similar to Little Mac's Jolt Haymaker. Is a powerful meteor smash if the opponent is hit right after the Mii Fighter begins falling. | |
| Up special | Default | Soaring Axe Kick | 4% (hit 1), 3% (hit 2), 4% (hit 3) | Performs an upward flip kick that is followed by a meteor-smashing axe kick. Similar to Kirby's Final Cutter, providing decent vertical distance and slight horizontal distance. Can be used as a Sacrificial KO. |
| Custom 1 | Helicopter Kick | 3% (ground hit 1), 2% (air hit 1), 2% (hits 2-5), 6% (hit 6) | A flurry of kicks while traveling diagonally upward, similar to Fox's forward aerial. Does good damage, with the final hit being strong and capable of KOing. Allows for long horizontal recovery, but lacks vertical lift. Also very useful for finishing aerial combos. Considered one of the Mii Brawler's best special moves overall due to its ability to be reliably combo'd into. | |
| Custom 2 | Piston Punch | 3% (hit 1), 1% (hits 2-7), 2% (hit 8) | Jumps upwards while performing a flurry of punches, similar to Little Mac's Rising Uppercut. Has good KO potential. Recovery-wise, it has the best vertical distance of the Brawler's up specials, but grants very little horizontal movement. | |
| Down special | Default | Head-On Assault | 4% (ground leap), 8% (drop), 8% (impact) | Deals a powerful headbutt downwards at a high speed, head aimed at the ground. Like Yoshi's Yoshi Bomb, the move consists of an optional hit on the ground that leads into the main headbutt. This move can bury grounded opponents and meteor smash aerial ones, although doing so is very risky and is often a sacrificial KO. Additionally, the move is overal laggy, especially in regards to ending lag. The Mii Brawler is able to sweetspot ledges if they land facing against one, allowing it to be a situational edgeguard. |
| Custom 1 | Feint Jump | 10% | Flips off the ground and, when the special button is pressed again, performs a divekick while surrounded by a purple aura. Functions very similarly to Zero Suit Samus's Flip Jump. Both the jump and the kick can be reversed if the player taps in the other direction, allowing for great horizontal distance. | |
| Custom 2 | Foot Flurry | 1% (ground hits 1-8), 6% (ground hit 9), 1% (air hits 1-7), 6% (air hit 8) | Extends their foot forwards and delivers a number of rapid kicks in front of them, ending with a strong finisher. In the air, the first use causes the Mii to stall in midair during the combo, though subsequent uses will cause them to fall while kicking. Functions like a multi-hitting version of Falcon Kick, with the grounded version being capable of dragging enemies offstage if they are near a ledge. | |
| Final Smash | Omega Blitz | 5% (startup), 0.8% (hits 1-28), 15% (hit 29) | Uppercuts the target into the air and batters them with punches and kicks before smashing them back downwards. Functions similarly to Great Aether. | |
Stats[edit]
All stats listed in the following table assumes a default Mii of perfectly average height and weight.
| Stats | Weight | Dash speed | Walk speed | Traction | Air friction | Air speed | Air acceleration | Gravity | Falling speed | Jumpsquat | Jump height | Double jump height |
|---|---|---|---|---|---|---|---|---|---|---|---|---|
| Value | 100 | 1.6 – Initial dash 1.72 – Run |
1.15 | 0.045 | 0.015 | 1.2 | 0.01 – Base 0.058 – Additional |
0.1 | 1.7 – Base 2.72 – Fast fall |
5 | 35 - Base 17 - Short hop |
35.5 |
Announcer call[edit]
English/Japanese/Chinese
On-screen appearance[edit]
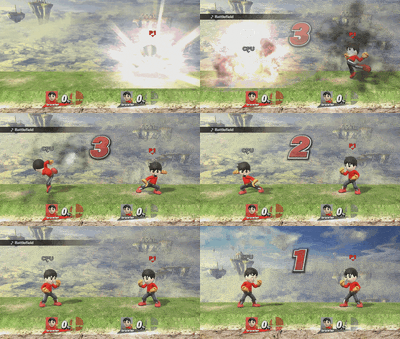
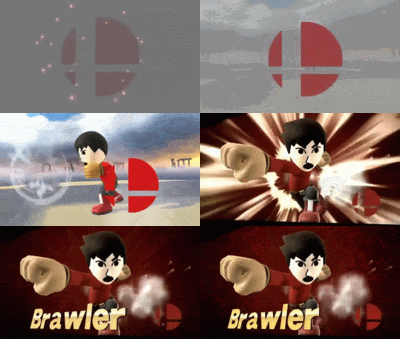
- Lands with an explosion, does a spin kick, then poses akin to its side taunt.
|
|---|
Taunts[edit]
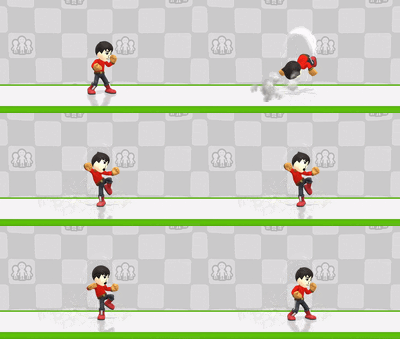
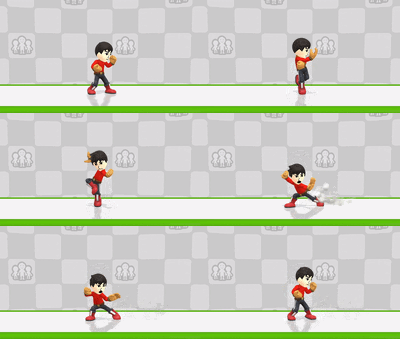
- Up taunt: Flips, then performs a crane-like pose.
- Side taunt: Moves their fists in front of them in an "X" motion, before punching downwards and swinging an open hand towards their own faces.
- Down taunt: Punches twice towards the screen.
| Up taunt | Side taunt | Down taunt |
|---|---|---|
|
|
|
Idle poses[edit]
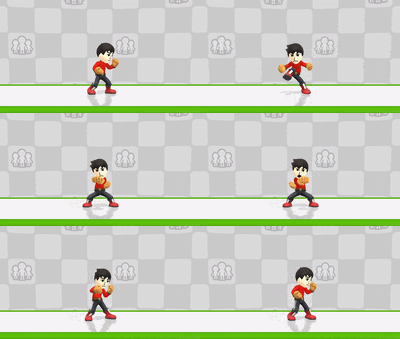
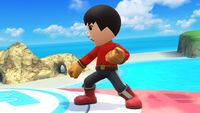
- Quickly performs four fighting stances.
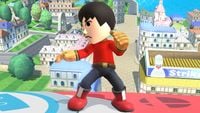
- Unclenches their fists and hops on the spot, as if poised for battle.
 |
|
|---|
Crowd cheer[edit]
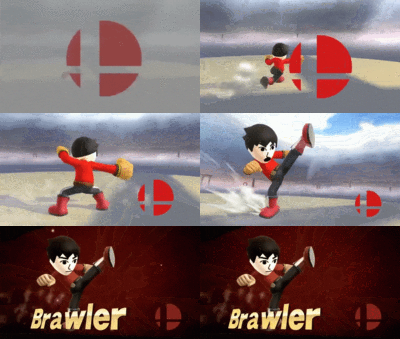
Victory poses[edit]
- Punches many times toward the screen then poses.
- Does a punch and kick combo, and poses.
- Cartwheels into the foreground, does a roundhouse kick and poses.
 |
 |

|
|---|
In competitive play[edit]
Official Custom Moveset Project[edit]
| Character | Custom sets available | ||||
|---|---|---|---|---|---|
| 2122[1] | 1122[1] | 2132[1] | 1132[1] | ||
| 2222 | 1222 | 2232 | 1232 | ||
Most historically significant players[edit]
See also: Category:Mii Brawler players (SSB4)
Dapuffster - The best Mii Brawler player of all time, finding success in the early metagame with 3rd at KTAR XII defeating 6WX and 13th at EVO 2015 defeating Tyrant. However the legality of the Mii's custom movesets eventually led to his retirement in late-2015, and he has only attended a handful of events since.
Jesse Tranum - Although known for being a Bayonetta player during Smash 4's heyday, he played Mii Brawler in a few Super Smash Con events after Ultimate's release, placing 5th at both Super Smash Con 2019 and Super Smash Con: Fall Fest with solo-Mii Brawler, the best Mii Brawler major performances since Dapuffster. He had since switched back to Bayonetta.
Tier placement and history[edit]
The Mii Brawler was met with great expectations and considered by many to be a potential high-tier character in the early metagame, due to their highly aggressive playstyle that stood out in comparison to the other Mii Fighters. This was especially apparent with smaller variants of Mii Brawler, who had superior mobility and frame data to allow their aggressive play and punish game to shine even more. However, all three kinds of Miis were quickly looked down upon due to the controversy surrounding the allowance of custom movesets in tournaments, with the Mii Brawler's aggressive playstyle and recovery being adversely affected due to the complete ban on custom moves, as well as the banning of custom Mii sizes. This forced it to deal with weaknesses such as a very poor recovery, special moves with little utility, and difficulty approaching due to a sluggish projectile and short range on their moves.
While the Mii's choice for custom movesets and sizes was initially up to a tournament director's discretion, when custom special movesets began to be discussed, the Mii's tier placements once again began to rise in the eyes of many players, and in the case of the Mii Brawler, many considered them to be, once again, a top-tier character (particularly the smaller variant) with extremely high potential. After the universal ban of custom movesets and Mii sizes post-EVO 2015, however, expectations of the Mii plummeted once again, and they would go on to being widely viewed as some of the worst characters in the game. Despite this, Mii Brawlers were considered to be more effective than their Mii Fighter counterparts due to their speed and combo ability, causing them to be ranked 48th on the first 4BR tier list, as the best kind of Mii. It would then see a notable drop to 54th on the second tier list, and 56th on the third tier list, though this time as the second best kind of default Mii for the last two placings. Some top-level players such as advocated that the Brawler was the worst Mii due to worse results and their weaknesses being more exploitable without the aid of custom moves.
Due to a very large stagnation of data on the Miis, as well as no response on whether or not they should be allowed to use custom moves, the Miis were excluded from placement voting on the fourth and most recent tier list. And with the game coming to the end of its competitive lifetime only a year after the tier list was released, it is unlikely that the Miis will be added to any tier lists in the foreseeable future. However, tournaments near and after the end of the game's competitive life were more lenient towards the Miis having access to their custom moves, which would leave Mii Brawler in a better spot than in Smash 4's heyday.
In Solo Modes[edit]
All-Star Mode[edit]
Unlike other fighters, Mii Fighters do not appear as opponents in All-Star Mode.
Congratulations Screens[edit]
3DS[edit]
Wii U[edit]
Trophies[edit]
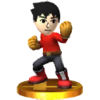
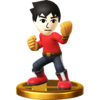
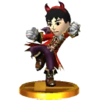
Mii Brawler's default trophy is obtained by clearing Classic Mode as Mii Brawler. Their alternate trophy is obtained by clearing All-Star Mode as Mii Brawler in the 3DS version or purchasing it in the Trophy Shop for 1000G in the Wii U version (the latter can only appear after clearing Classic or All-Star as Mii Brawler). The Omega Blitz trophy is obtained only in the Wii U version by clearing All-Star Mode as Mii Brawler.
- Mii Brawler
This fighter is based on a player's Mii. It excels at fighting with punches and kicks. This type of Mii is very agile, blending attacks with movement to get the battle flowing. It has superior dash and jump compared to other types. Stay close and keep whaling on foes—you'll KO them in no time!
A fighter based on your Mii! Brawlers focus on kicks and punches, and a lot of their specials send them hurtling towards opponents. They're better at dashing and jumping than other types of Mii Fighter, and their speedy attacks really pile on the pressure at close range. And, just for good measure, they can also lob shot-puts!
: Super Smash Bros. for Wii U
- Mii Brawler (Alt.)
 Shot Put is the only projectile attack a Mii Brawler can have. It drops quickly and only bounces a tiny bit. Try using it on foes hanging off an edge to knock them off. The down special Head-On Assault can bury enemies in the ground. It also sends the Mii Brawler downward—don't KO yourself, too!
 Shot Put is the only projectile attack a Mii Brawler can have. It drops quickly and bounces only a tiny bit. Try using it on foes hanging off edges to knock them off. The down special Head-On Assault can bury enemies in the ground. It also sends the Mii Brawler downward—don't KO yourself too!
Shot-Put is the only projectile attack a Mii Brawler can have. It drops quickly and only bounces a tiny bit. Try using it on foes hanging from the stage to knock them off. The down special Head-On Assault can bury enemies in the ground. It's also a kind of meteor smash, but if you use it while off the stage, you'll probably KO yourself, too.
: Super Smash Bros. for Wii U
- Omega Blitz
Mii Brawler's Final Smash will strike opponents with a powerful uppercut and then deliver a rush of attacks in midair. If the uppercut misses, the rush of attacks will fail as well. However, there is no escaping this move once caught in it. The final blow consists of kicking opponents down and bouncing them off the stage.
In this Final Smash, Mii Brawler lifts a foe into the air with an uppercut, then delivers a barrage of strikes. If the initial uppercut misses, the whole thing stops there – but if it hits, the other blows can't be dodged. It ends with a series of kicks followed by a chop, sending the victim smashing into the ground and bouncing way up high.
Alternate costumes[edit]
Base game[edit]
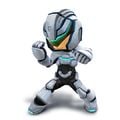
| Biker Gear | Fighter Uniform | Mecha Suit | Protective Gear | Standard Outfit | Tracksuit | Vampire Outfit |
- The color of the costume depends on the Mii's original color from the Mii Maker.
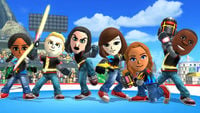
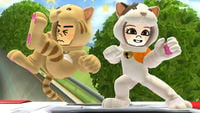
Downloadable content[edit]
 |
 |
 |
|
 |
 |
 |
|
 |
 |
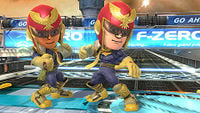 |
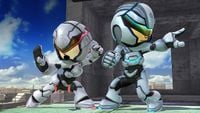
|
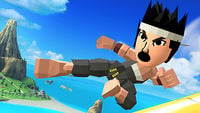
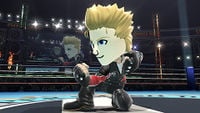
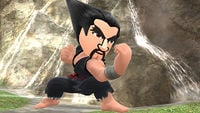
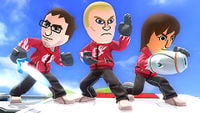
| SSB T-Shirt | Cat Suit | Akira Outfit | Jacky Outfit |
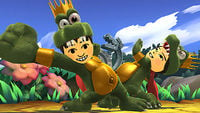
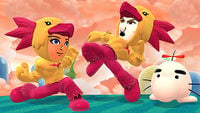
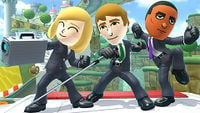
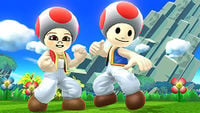
| Heihachi Outfit | Hoodie | King K. Rool Outfit | Flying Man Outfit |
| Business Suit | Toad Outfit | Captain Falcon's Outfit | Bionic Armor |
Gallery[edit]
Ice-T as a Brawler.
Shinya Arino as a Brawler.
AKB48 member Mayu Watanabe as a Brawler.
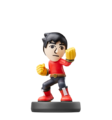
Mii Brawler's amiibo.
With a Mii Gunner and a Mii Swordfighter.
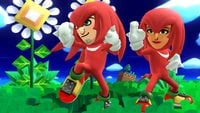
Two Brawlers attacking Donkey Kong.
Preparing to use Shot Put on Zero Suit Samus.
All three Mii types, along with Villager.
A Brawler attacking with an Exploding Side Kick.
Two Mii Brawlers of different sizes with Mario.
A Brawler attacking Pikachu with a Feint Jump.
A Brawler attacking Duck Hunt with Omega Blitz.
Trivia[edit]
- The design of the Mii Brawler used in promotional material and in-game renders is based on an edited version of Guest C, one of the pre-loaded Miis available for use in titles that feature Mii support, as well as the default male Mii in the Mii Maker. His skin is brighter than Guest C (as the default male Mii in Mii Maker has light skin), and his hair has a different design, along with the hair being black in color instead of brown.
- When one uses the Mii Brawler wearing a Fighter Uniform, there will be an odd hole located in the chest where the white undershirt should be in their battle portrait. However, the hole is not there during gameplay. This is only visible in the Wii U version.
- The lightest possible Mii Brawler has the fastest air speed of any fighter who is not a Final Smash transformation; it is only surpassed by Wario-Man and Giga Mac.
- This makes Smash 4 the second Smash game to have a playable fighter who has a faster air speed than Yoshi after Melee. However, in this game, this goes to Jigglypuff.
- Unlike other types of Mii Fighters, Mii Brawlers always face the screen regardless of what side they're facing.
- The Mii Brawler's side taunt is similar to Mario's artwork pose from Brawl, albeit with the opposite arm extended.
References[edit]
| Fighters in Super Smash Bros. 4 | |
|---|---|
| Veterans | Bowser · Captain Falcon · Charizard · Diddy Kong · Donkey Kong · Dr. Mario · Falco · Fox · Ganondorf · Ike · Jigglypuff · King Dedede · Kirby · Link · Lucario · Lucas · Luigi · Mario · Marth · Meta Knight · Mewtwo · Mr. Game & Watch · Ness · Olimar · Peach · Pikachu · Pit · R.O.B. · Roy · Samus · Sheik · Sonic · Toon Link · Wario · Yoshi · Zelda · Zero Suit Samus |
| Newcomers | Bayonetta · Bowser Jr. · Cloud · Corrin · Dark Pit · Duck Hunt · Greninja · Little Mac · Lucina · Mega Man · Mii Fighter (Mii Brawler · Mii Gunner · Mii Swordfighter) · Pac-Man · Palutena · Robin · Rosalina & Luma · Ryu · Shulk · Villager · Wii Fit Trainer |


