Crazy Hand (SSBB)
| Crazy Hand | |
|---|---|
 
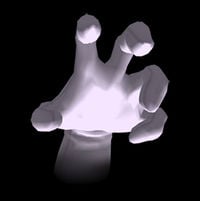
Crazy Hand's appearance in Brawl. | |
| A boss in | Brawl |
| Universe | Super Smash Bros. |
| Location | Final Destination |
| Voice actor | Pat Cashman |
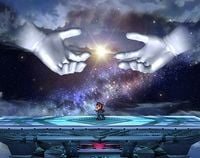
Crazy Hand appears as a boss character in Super Smash Bros. Brawl. To fight him, one must play Classic Mode on Hard or higher, and reach Master Hand in 9 minutes or less. However, unlike in Super Smash Bros. Melee, he appears at the same time as Master Hand instead of after reducing Master Hand's HP by half. Both Master Hand and Crazy Hand always have the same amount of HP.
Moveset[edit]
Like all other enemies in the game, Crazy Hand's damage output is based on a value unique to the stage and the chosen difficulty level. This value (known to range from 0.0 to 11.0) is given as "d" in the following tables.
Individual[edit]
- Notes: The "d" below is a multiplier based on the difficulty value. Final damage is rounded down to the nearest whole number. Boss Battles halves the final damage, rounding down again. The move names are fan-made in the absence of an official source.
| Name | Damage | Description |
|---|---|---|
| Floor Sweep | 10 + 2.0d | Crazy Hand uses the back of his hand and sweeps across the platform 3 times. Causes electric damage. Can be evaded by rolling behind Crazy Hand. |
| Power Punch | 25 + 2.5d |
Crazy Hand forms a fist, hovers above the player, and then punches down with an explosive fist. Produces set meteor smash knockback if it strikes. It can only hit a player close to the ground, leaving it easily evaded by just jumping into the air as he uses the move. Deals flame damage and 10% shield damage. Compared to Master Hand's version, Crazy Hand will fly up higher, making it more difficult to counterattack him during the move. |
| Fake-Out Slap | 22 + 2.2d |
Crazy Hand forms a fist, hovers above the player as if to use Power Punch, but instead opens up and comes down with a slap. Buries the player if they're grounded. Compared to the previous game's Power Slap, the animation makes the move look more like a Power Punch until just before it fires. Semi-spikes very powerfully but, just like Power Punch, this attack only hits close to the ground which, when combined with the long telegraphing of the move, leaves it easily evaded by just jumping into the air. Compared to Master Hand's version, Crazy Hand will fly up higher, making it more difficult to counterattack him during the move. |
| Tri-Poke | 9 + 1.2d (hits 1 & 2) 14 + 1.3d (hit 3) |
Crazy Hand points at the player and follows them for a few seconds, before poking the player three times. The first poke deals darkness damage, while the second poke deals electric damage, and the final third poke freezes while dealing moderate vertical knockback. The pokes can be chained together, but can be DI'd out of before the final poke. Can be evaded by just moving away from Crazy Hand before he starts poking. |
| Finger Drill | 2 + 1.0d (ascent/descent) 4 + 1.2d (multhits) 4 + 0.0d (end) |
Crazy Hand spins vertically, flies above the screen, and then corkscrews down at the player. This is by far Crazy Hand's most difficult to evade attack; the only way to dodge it is to do a roll at the right time, but this will fail with most characters if their rolling dodge don't cover great distance (like Lucario) due to a combination of how fast it comes down and deceptively wide hitboxes. It can be avoided by moving off the stage, but the move's long duration and large hitboxes can make it difficult to safely get back on stage without taking damage. Additionally, with how fast the attack activates, and with the initial hitbox it produces as it rises, the player may be unable to get offstage in time. Some characters can avoid this attack easily by using a special attack that moves character a considerable distance quickly. Despite having an SDI multiplier of 2.0, the attack is very difficult to SDI out of, ensuring players will take the attack's full remaining damage output. The final hit deals moderate fixed knockback, making this attack incapable of KOing, but its extremely high damage output will put an undamaged player in KO range of the Hand's KOing moves on Intense difficulty, making it a dangerous move. The multihits hit every 14 frames and his wrist deals electric damage. |
| Spider Walk | 14 + 2.2d (descent) 12 + 2.1d (crawl) |
Crazy Hand "crawls" across the stage, damaging anyone he touches. Can be evaded by jumping over him or air dodging through him as he passes through. All hits deal darkness damage and 20% shield damage. |
| Spasm | 10 + 2.6d | Crazy Hand lies down on the ground and has a violent spasm, damaging the player if they touch him. It can only damage grounded players, leaving Crazy Hand vulnerable to aerial assaults while using the move. In addition to the fact it can't hit aerial opponents, Crazy Hand will always do the move in the same spot, making it easily evaded by just moving away from Crazy Hand. Deals 10% shield damage and hits every 12 frames. |
| Flying Punch | 24 + 2.6d | Crazy Hand flies offscreen, and then reappears in the background flying at the player in a fist. While Crazy Hand follows the player's horizontal position, he doesn't follow vertically, so a player can evade this by just jumping into the air a moderate distance. |
| Flying Slap | 24 + 2.3d (early, sweetspot) 18 + 2.0d (early, sourspot) 13 + 1.2d (mid) 9 + 1.1d (late) |
Crazy Hand flies offscreen, and then comes crashing down trying to crush the player. The sweetspot is on the palm and deals very high semi-spike knockback. The sweetspot can hit both grounded and aerial players, however it is only active when Crazy Hand himself is close to the ground and all other hitboxes only hit grounded players, leaving it easily evaded by just jumping into the air. In addition, the sweetspot deals 25% shield damage while the rest deals 20% shield damage. |
| Jetstream | 10 + 1.3d (startup) 22 + 2.4d (attack/wrist return) 10 + 1.0d (return) |
Crazy Hand faces upward before flying offscreen, to then reappear in the background flying at the player in a spiral pattern. During the startup, his wrist deals low, downward, fixed knockback. He only tracks the player's horizontal position and not the vertical, making jumping an easy way to avoid it. The primary part of the move will deal very high vertical knockback. When he reappears on the screen, he deals very weak vertical knockback with electrical damage. The primary attack and the return wrist hit deal 20% shield damage while the rest of the return hit deals 10% shield damage. |
| Finger Bomb | 10 + 2.5d | Crazy Hand arches with his fingers above the center of the stage, and drops bombs from his fingertips. Since Crazy Hand initiates the move only in the center of the stage and never moves during it, it is simple to evade by just staying from the stage center during the move. Despite the bombs exploding, they deal normal damage. |
| Laser Nail | 4 + 1.6d | Crazy Hand shoots laser beams from his fingertips and slowly moves across the screen. The lasers will deal a decent amount of damage each time a player makes contact with them, but will produce almost no knockback. These lasers penetrate the stage, potentially hitting fighters underneath it. |
| Squeeze | 12 + 1.5d | Crazy Hand's pummel. Compared to Master Hand's, it can deal much higher damage along with its flower effect. |
| Reverse Throw | 14 + 1.6d | Crazy Hand tosses the player backwards. Will OHKO on Intense. |
| Vertical Throw | 22 + 1.8d | Crazy Hand throws the player into the ground. |
| Big Swipe | 22 + 2.1d | Crazy Hand makes a large swipe across the stage. Oddly, Crazy Hand has all of the necessary data to use this attack but never does. |
In combination with Master Hand[edit]
The damage recorded here is only for Crazy Hand's contribution to the attack. For Master Hand's contribution, see Master Hand (SSBB).
| Move | Damage | Description |
|---|---|---|
| Applause | 4 + 1.1d (sleep) (3/3/4/4/4) + 0.0d (windups) (6/6/5/6/8) + 1.1d (claps) |
The Hands slowly bring themselves together, before clapping five times. The initial hand motioning will put grounded players to sleep, ensuring they will get hit by the clapping. The claps hit the player towards the center of the stage, dealing high damage, with the final blow dealing the most knockback (though it's possible to DI out before the final hit if the player avoids getting caught in the middle). Difficult to evade, as the initial hand motioning comes out quickly and can put the player to sleep before they can react, and the claps cover the entire stage, necessitating the player to quickly get offstage (though hanging the ledge will provide complete safety from the move). The last three windups deal 20% shield damage. Each clap deals flame damage except for the 5th, which deals electric damage. |
| Cross Punch | 3 + 0.0d (approach) 24 + 2.0d (impact) |
Master Hand beckons to Crazy Hand, who then proceeds to punch Master Hand's palm. If a player is struck by Crazy Hand, they will take very strong vertical knockback. The long telegraphing and the blind spot behind Master Hand leaves the attack easily evaded however. The approach deals electric damage while the impact deals darkness damage. All hits deal 20% shield damage. |
| Sandwich Punch | 10 + 1.1d (approach) 14 + 1.4d (impact) |
The Hands slowly bring themselves together, before quickly moving back and punching into each other. The initial hand motioning is indistinguishable from Applause, but it does not produce any hitboxes (thus players can safely detect which move it is by putting their shield up as the Hands motion, which if it does not hit their shield, indicates it is this move). While powerful if it strikes, it is very easy to evade, as the long telegraphing without the initial hitbox of Applause gives the player ample time to prepare to evade, and going offstage or jumping into the air will be sufficient to evade it. Getting hit by the knuckles deals flame damage while the wrists deal normal damage. |
Attack pattern[edit]

- Move 1
- Finger Bomb
- Spider Walk
- Fake-Out Slap
- Combo Call
- Move 2
- Floor Sweep
- Tri-Poke
- Grab
- Combo Call
- Move 3
- Flying Punch
- Flying Slap
- Jetstream
- Move 4
- Spasm
- Power Punch
- Laser Nail
- Combo Call
- Move 5
- Finger Drill
- Grab
- Combo Call
HP and damage taken[edit]
| HP Values | |||||||||||||||
|---|---|---|---|---|---|---|---|---|---|---|---|---|---|---|---|
| Classic Mode | N/A | N/A | 300 | 330 | 360 | ||||||||||
| Round | 1-3 | 4-6 | 7-9 | 1-3 | 4-6 | 7-9 | 1-3 | 4-6 | 7-9 | 1-3 | 4-6 | 7-9 | 1-3 | 4-6 | 7-9 |
| Boss Battles | 84.8 | 87.2 | 92 | 96 | 104 | 106 | 108 | 122 | 120 | 120 | 140 | 137 | 152 | 188 | 175 |
| Damage taken | ×1.0 | ×1.0 | ×1.0 | ×1.0 | ×1.0 | ×1.0 | ×1.0 | ×1.0 | ×1.0 | ×1.0 | ×1.0 |
Like all bosses in Brawl, Crazy Hand gains an additional ×0.6 damage resistance modifier when fought in co-op mode, effectively gaining 67% more health. This modifier is applied whenever the second player is in-game and is no longer applied if the second player loses all their stocks.
Unlike other bosses, Crazy Hand's attacks do not change in power at low HP, instead sticking to the same difficulty set the entire match. In Classic Mode his difficulty sets are: 2 (Hard), 3 (Very Hard), and 5 (Intense). In Boss Battles his difficulty sets are: 1 (Rounds 1-6), and 2 (Rounds 7-9).
Playing via hacks[edit]
Like other bosses, there is a popular Gecko code for Crazy Hand that overrides his actions when player 3 performs certain inputs.
| Enable Boss Control | |
|---|---|
| 4A000000 | 810F1F3C |
| D2000000 | 00000002 |
| 901F058C | 5400843E |
| 90020070 | 00000000 |
| C277F780 | 00000010 |
| 7CDFF050 | 2C06414C |
| 4082006C | 2C1C0002 |
| 40810064 | 39820074 |
| 809E0038 | A0EC0000 |
| 7C043800 | 41810050 |
| A0EC0002 | 7C1C3800 |
| 41820044 | 3CC0804E |
| A0C6E4C0 | A8EC0004 |
| 2C070000 | 41820030 |
| A8EC0004 | 7C063800 |
| 4082000C | A38C0006 |
| 4800001C | 2C07FFFF |
| 4082000C | AB8C0006 |
| 4800000C | 398C0004 |
| 4BFFFFD8 | 939E0038 |
| 60000000 | 00000000 |
| 4A000000 | 805A9320 |
| 14000078 | 00000000 |
| E0000000 | 80008000 |
| Controls for Player 3 | |
|---|---|
| 4A000000 | 805A9320 |
| 30000070 | 00005A02 |
| 16000074 | 00000040 |
| 00090032 | 10800032 |
| 0288000B | 0188000E |
| 01840011 | 02800014 |
| 02840015 | 01820016 |
| 02820017 | 04840018 |
| 04800019 | 0488001A |
| 0181001D | 02810020 |
| 01800023 | FFFFFFFF |
| E0000000 | 80008000 |
| Action | Input |
|---|---|
| Big Swipe | |
| Fake-Out Slap | |
| Finger Bomb | |
| Finger Drill | |
| Floor Sweep | |
| Flying Punch | |
| Flying Slap | |
| Jetstream | |
| Laser Nail | |
| Power Punch | |
| Spasm | |
| Spider Walk | |
| Tri-Poke | |
| self destruct |
Trophy[edit]
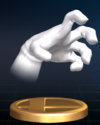
Crazy Hand's Trophy is obtained by clearing Classic Mode on Intense difficulty.

- Crazy Hand
A seeming manifestation of the destructive spirit in direct contrast to Master Hand, who is the manifestation of the creative spirit. Crazy Hand appears out of nowhere when Master Hand's power begins to ebb. His repeated attacks evoke the bizarre. Those who must face Master Hand and Crazy Hand at the same time face a long and painful battle to the death.
Seemingly a manifestation of the destructive spirit in direct contrast to Master Hand, who is the manifestation of the creative spirit. Crazy Hand appears out of nowhere when Master Hand's power begins to ebb. His repeated attacks evoke the bizarre. Those who must face Master Hand and Crazy Hand at the same time face a long and painful battle to the death.
: Super Smash Bros. Melee
: Super Smash Bros. Brawl
Trivia[edit]
- In Crazy Hand's trophy description, he is claimed to appear "when Master Hand's power begins to ebb". This information is incorrect; as long as the player reaches the final stage on Hard or above in 9 minutes or less, Crazy Hand appears at the beginning of the fight, alongside Master Hand. In Melee, however, this statement was true.
- In the Trophies menu, Crazy Hand is found under the Subspace Emissary heading, despite Crazy Hand's absence from this mode. Master Hand, however, does appear.
- Although his dying scream is found in the Sound Test, his opening laugh is not.
| Bosses | |
|---|---|
| Super Smash Bros. | Master Hand · Metal Mario · Giant Donkey Kong · Fighting Polygon Team |
| Melee | Master Hand · Crazy Hand · Giga Bowser · Fighting Wire Frames (Male · Female) |
| Brawl | Master Hand · Crazy Hand · Petey Piranha · Rayquaza · Porky · Galleom · Ridley · Duon · Meta Ridley · Tabuu · Fighting Alloy Team (Red · Blue · Yellow · Green) · False characters |
| Smash 4 | Master Hand · Crazy Hand · Master Core · Fighting Mii Team |
| Ultimate | Master Hand · Crazy Hand · Rathalos · Galleom · Giga Bowser · Galeem · Dharkon · Dracula · Ganon · Marx · Fighting Mii Team · False characters |