[dismiss]
| Welcome to SmashWiki! Log in or create an account and join the community, and don't forget to read this first! |
| Notices |
|---|
| The Skill parameter has been removed from Smasher infoboxes, and in its place are the new "Best historical ranking" and "Best tournament result" parameters. SmashWiki needs help adding these new parameters to Smasher infoboxes, refer to the guidelines here for what should be included in these new parameters. |
| When adding results to Smasher pages, include each tournament's entrant number in addition to the player's placement, and use the {{Trn}} template with the matching game specified. Please also fix old results on Smasher pages that do not abide to this standard. Refer to our Smasher article guidelines to see how results tables should be formatted. |
| Check out our project page for ongoing projects that SmashWiki needs help with. |
Pichu (SSBM)/Dash attack: Difference between revisions
From SmashWiki, the Super Smash Bros. wiki
Jump to navigationJump to search
m (Increased clarity) |
Mariogeek2 (talk | contribs) (→Overview: Minor improvements, grammar fixes, links added; →Timing: Added boost grab window, →Similar moves: Added Pika's dash attack.) |
||
| Line 3: | Line 3: | ||
{{competitive expertise}} | {{competitive expertise}} | ||
==Overview== | ==Overview== | ||
Pichu's Dash attack is an overall underwhelming move, and can even be punishable on hit at lower percents due to its low | Pichu's Dash attack is an overall underwhelming move, and can even be punishable on hit at lower percents due to its low [[hitstun]] and [[knockback]], and sluggish frame data. Better options in relevant situations would typically be {{mvsub|Pichu|SSBM|neutral air}} or one of Pichu's tilt attacks. | ||
==Hitboxes== | ==Hitboxes== | ||
| Line 43: | Line 43: | ||
!Hitbox | !Hitbox | ||
|5-16 | |5-16 | ||
|- | |||
!Boost grab window | |||
|2-4 | |||
|- | |- | ||
!Animation length | !Animation length | ||
| Line 49: | Line 52: | ||
{{FrameStripStart}} | {{FrameStripStart}} | ||
{{FrameStrip|t=Lag|c=4}}{{FrameStrip|t=Hitbox|c=12}}{{FrameStrip|t=Lag|c=33}} | !Hitboxes {{FrameStrip|t=Lag|c=4}}{{FrameStrip|t=Hitbox|c=12}}{{FrameStrip|t=Lag|c=33}} | ||
|- | |||
!Boost grab {{FrameStrip|t=Blank|c=1}}{{FrameStrip|t=Continuable|c=3}}{{FrameStrip|t=Blank|c=45}} | |||
{{FrameStripEnd}} | {{FrameStripEnd}} | ||
{{FrameIconLegend|lag=y|hitbox=y}} | {{FrameIconLegend|lag=y|hitbox=y|continuable=y}} | ||
==Similar moves== | |||
*{{mvsub|Pikachu|SSBM|dash attack|poss=y}} | |||
{{MvSubNavPichu|g=SSBM}} | {{MvSubNavPichu|g=SSBM}} | ||
[[Category:Pichu (SSBM)]] | [[Category:Pichu (SSBM)]] | ||
[[Category:Dash attacks (SSBM)]] | [[Category:Dash attacks (SSBM)]] | ||
Revision as of 01:13, December 18, 2024
Overview
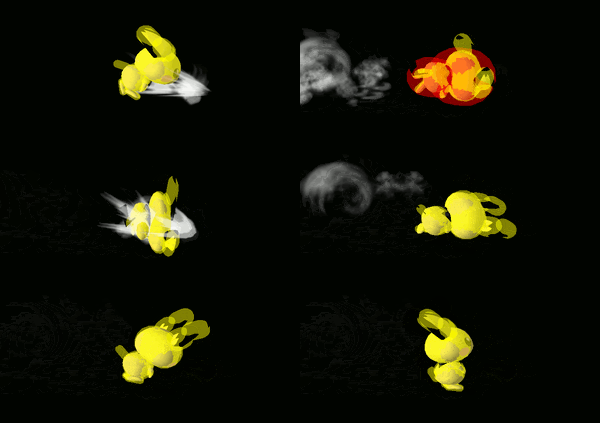
Pichu's Dash attack is an overall underwhelming move, and can even be punishable on hit at lower percents due to its low hitstun and knockback, and sluggish frame data. Better options in relevant situations would typically be neutral air or one of Pichu's tilt attacks.
Hitboxes
| ID | Part | Damage | SD | Angle | BK | KS | FKV | Radius | Bone | Offset | Clang | Rebound | Effect | G | A | Sound | ||
|---|---|---|---|---|---|---|---|---|---|---|---|---|---|---|---|---|---|---|
| 0 | 0 | 8% | 0 | 40 | 70 | 0 | 4.4919 | 15 | 0.0 | 4.6872 | 0.496062 | |||||||
| 1 | 0 | 8% | 0 | 40 | 70 | 0 | 2.991996 | 4 | 0.0 | 0.66402 | 0.0 | |||||||
Timing
| Hitbox | 5-16 |
|---|---|
| Boost grab window | 2-4 |
| Animation length | 49 |
| Hitboxes | |||||||||||||||||||||||||||||||||||||||||||||||||
|---|---|---|---|---|---|---|---|---|---|---|---|---|---|---|---|---|---|---|---|---|---|---|---|---|---|---|---|---|---|---|---|---|---|---|---|---|---|---|---|---|---|---|---|---|---|---|---|---|---|
| Boost grab |
Lag time |
Hitbox |
Continuable |
Similar moves

