Mii Brawler (SSBU)/Forward smash: Difference between revisions
From SmashWiki, the Super Smash Bros. wiki
Jump to navigationJump to search
FireThePyro (talk | contribs) (added competitive expertise.) |
mNo edit summary |
||
| Line 14: | Line 14: | ||
|} | |} | ||
==Overview== | ==Overview== | ||
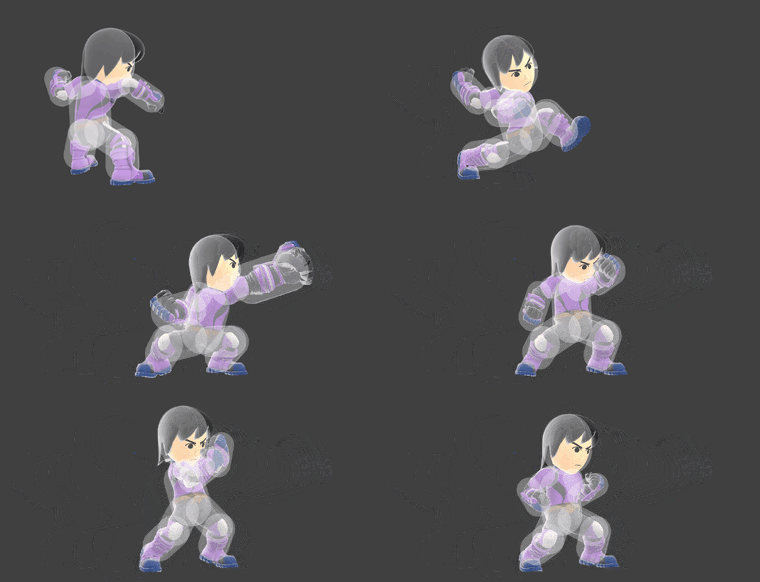
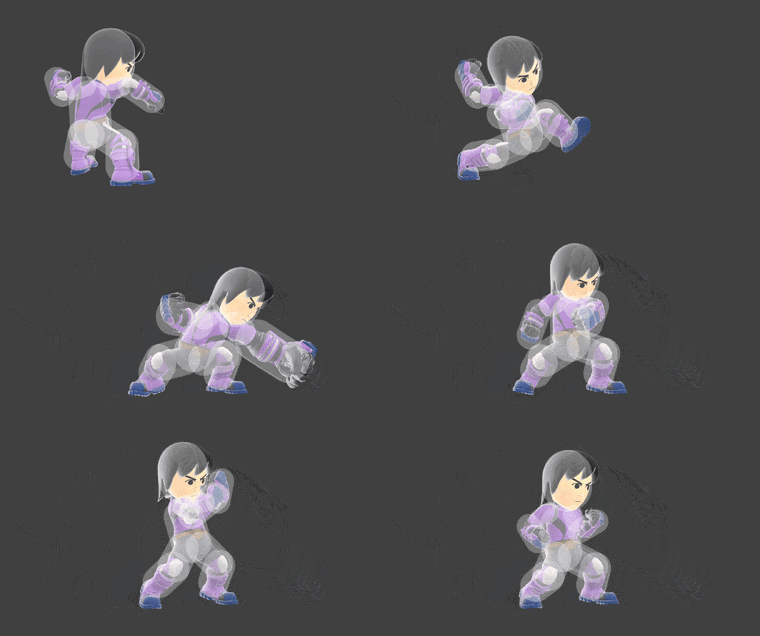
Mii Brawler puts their entire body into a forward punch. Forward smash is one of Mii Brawler's most powerful moves, the uncharged version KOing as early as 60% on cornered opponents - as well as | Mii Brawler puts their entire body into a forward punch. Forward smash is one of Mii Brawler's most powerful moves, the uncharged version KOing as early as 60% on cornered opponents - as well as their slowest normal attack. In addition, forward smash can be used as a kill confirm out of a landing neutral air around 60% or landing up air (the latter requires the smash attack be angled upwards). It's also a viable tool for reading an opponent's option, though the minimal active frames of forward smash make it difficult to time. Overall, it is the best move to use on incapacitated opponents, such as those recovering from a shield break or moves with high endlag. | ||
==Hitboxes== | ==Hitboxes== | ||
{{UltimateHitboxTableHeader}} | {{UltimateHitboxTableHeader}} | ||
| Line 20: | Line 20: | ||
|id=0 | |id=0 | ||
|damage={{ChargedSmashDmgSSBU|18.0}} | |damage={{ChargedSmashDmgSSBU|18.0}} | ||
|angle=361 | |angle=361 | ||
|af=3 | |||
|bk=35 | |bk=35 | ||
|ks=102 | |ks=102 | ||
| Line 28: | Line 28: | ||
|bn=arml | |bn=arml | ||
|xpos=4.5 | |xpos=4.5 | ||
|ff=1.5 | |ff=1.5 | ||
|type=Hand | |type=Hand | ||
|sfx=Punch | |sfx=Punch | ||
|slvl=L | |slvl=L | ||
| Line 39: | Line 36: | ||
|id=1 | |id=1 | ||
|damage={{ChargedSmashDmgSSBU|18.0}} | |damage={{ChargedSmashDmgSSBU|18.0}} | ||
|angle=361 | |angle=361 | ||
|af=3 | |||
|bk=35 | |bk=35 | ||
|ks=102 | |ks=102 | ||
| Line 47: | Line 44: | ||
|bn=arml | |bn=arml | ||
|xpos=-0.2 | |xpos=-0.2 | ||
|ff=1.5 | |ff=1.5 | ||
|type=Hand | |type=Hand | ||
|sfx=Punch | |sfx=Punch | ||
|slvl=L | |slvl=L | ||
| Line 58: | Line 52: | ||
|id=2 | |id=2 | ||
|damage={{ChargedSmashDmgSSBU|18.0}} | |damage={{ChargedSmashDmgSSBU|18.0}} | ||
|angle=361 | |angle=361 | ||
|af=3 | |||
|bk=35 | |bk=35 | ||
|ks=102 | |ks=102 | ||
| Line 66: | Line 60: | ||
|bn=arml | |bn=arml | ||
|xpos=-4.0 | |xpos=-4.0 | ||
|ff=1.5 | |ff=1.5 | ||
|type=Hand | |type=Hand | ||
|sfx=Punch | |sfx=Punch | ||
|slvl=L | |slvl=L | ||
Latest revision as of 21:33, March 24, 2022
| Mii Brawler forward smash hitbox visualizations | ||||
|---|---|---|---|---|
| ↗ | 
| |||
| → | 
| |||
| ↘ | 
| |||
Overview[edit]
Mii Brawler puts their entire body into a forward punch. Forward smash is one of Mii Brawler's most powerful moves, the uncharged version KOing as early as 60% on cornered opponents - as well as their slowest normal attack. In addition, forward smash can be used as a kill confirm out of a landing neutral air around 60% or landing up air (the latter requires the smash attack be angled upwards). It's also a viable tool for reading an opponent's option, though the minimal active frames of forward smash make it difficult to time. Overall, it is the best move to use on incapacitated opponents, such as those recovering from a shield break or moves with high endlag.
Hitboxes[edit]
Timing[edit]
| Charges between | 5-6 |
|---|---|
| Hitboxes | 17-18 |
| Interruptible | 68 |
| Animation length | 75 |
Lag time |
Charge interval |
Hitbox |
Interruptible |
|