Super Smash Bros. Ultimate

Zelda (SSBU)/Forward aerial: Difference between revisions

From SmashWiki, the Super Smash Bros. wiki
Jump to navigationJump to search
(Fun fact)
(Technically not coded as a clean hit and a late hit, just sourspots that last longer than the sweetspot, right?)
Line 1: Line 1:
{{ArticleIcons|ssbu=y}}
[[File:ZeldaFAirSSBU.gif|thumb|350px|Hitbox visualization showing Zelda's forward aerial.]]
[[File:ZeldaFAirSSBU.gif|thumb|350px|Hitbox visualization showing Zelda's forward aerial.]]
{{competitive expertise}}
==Overview==
==Overview==
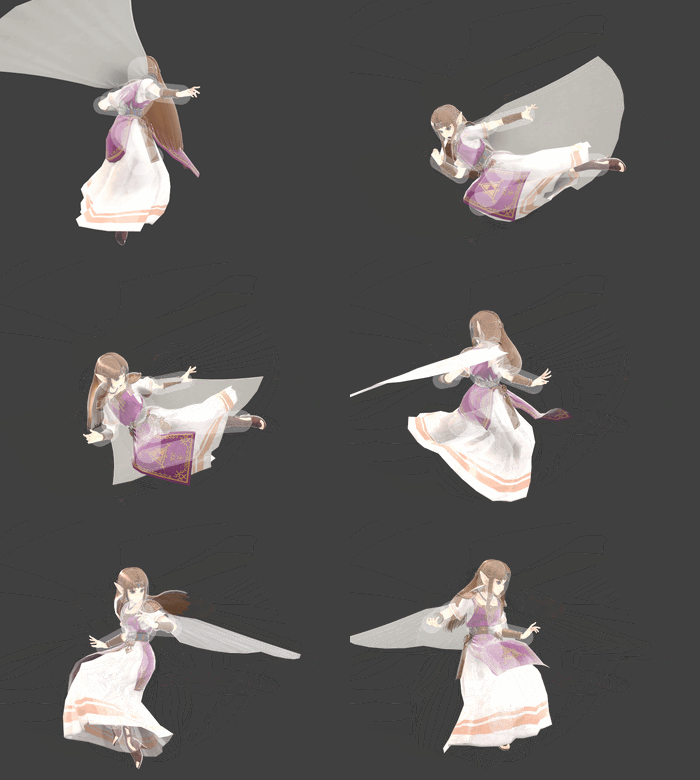
Zelda throws out a kick with immense magic power packed at the tip of her foot. [[Lightning Kick]] is one of the most polarized moves in the game. The sweetspot has incredible launching power that eclipses that of the vast majority of uncharged smash attacks in the game. At frame 6, it is a fast out of shield option, and due to its respectable horizontal reach and hurtbox shift on startup, it can interrupt strings and cause favorable trades when well-timed. It can also be a devastating finisher from many of Zelda's other moves, namely up tilt, down aerial and down throw.
However, the sweetspot is very small and lasts for a single frame. As a counterpart to the ridiculous power of the sweetspot, the sourspots, while themselves being large and long-lasting, deal extremely low knockback. Furthermore, the move has relatively high landing lag, high ending lag and cannot auto-cancel in a short hop. As a result, even on hit, the sourspots can be easily punished by even forward smashes, especially when rising. Until high percents, if Zelda uses the move, she will almost always be punished if she misses the sweetspot in any way. This makes the move poor in neutral, and inherently risky in any of the sweetspot's aforementioned uses.
While its landing lag is higher than average, it is decent relative to its massive power and can be -8 on shield. Zelda pancakes in her landing animation, which can cause various out of shield punishes that do not hit low to miss. A low-landed kick can combo into dash attack at very low percents. At high percents, especially with rage, landing sourspots become able to combo most notably into down smash and dash attack. The toe sourspot is slightly stronger than the other sourspots.
Overall, due to their unique traits, Zelda's Lightning Kicks give her an unconventional and conservative aerial game defined by high risk and precision.
==Hitboxes==
==Hitboxes==
{{UltimateHitboxTableHeader}}
{{HitboxTableTitle|Clean hit|50}}
{{HitboxTableTitle|Sweetspot|50}}
{{UltimateHitboxTableRow
|id=0
|id=0
Line 28: Line 35:
|rebound=f
|rebound=f
}}
}}
{{UltimateHitboxTableRow
{{HitboxTableTitle|Sourspots|50}}
|id=1
|damage=4.0%
|angle=361
|af=3
|bk=5
|ks=80
|fkv=0
|r=4.0
|bn=kneel
|xpos=0.0
|ypos=0.0
|zpos=0.0
|ff=1.0
|type=Foot
|effect=Normal
|sfx=Punch
|slvl=S
}}
{{UltimateHitboxTableRow
|id=2
|damage=4.0%
|angle=361
|af=3
|bk=5
|ks=80
|fkv=0
|r=4.5
|bn=hip
|xpos=0.0
|ypos=0.0
|zpos=0.0
|ff=1.0
|type=Foot
|effect=Normal
|sfx=Punch
|slvl=S
}}
{{UltimateHitboxTableRow
|id=3
|damage=4.0%
|angle=361
|af=3
|bk=5
|ks=96
|fkv=0
|r=5.0
|bn=toel
|xpos=0.0
|ypos=0.0
|zpos=0.0
|ff=1.0
|type=Foot
|effect=Normal
|sfx=Punch
|slvl=S
}}
{{HitboxTableTitle|Late hit|50}}
{{UltimateHitboxTableRow
|id=1
|id=1
Line 150: Line 100:
|1-2
|1-2
|-
|-
!Clean hit
!Sweetspot
|6
|6
|-
|-
!Late hit
!Sourspots
|7-10
|6-10
|-
|-
!Ending autocancel
!Ending autocancel

Revision as of 20:16, July 25, 2024

Hitbox visualization showing Zelda's forward aerial.

Overview

Zelda throws out a kick with immense magic power packed at the tip of her foot. Lightning Kick is one of the most polarized moves in the game. The sweetspot has incredible launching power that eclipses that of the vast majority of uncharged smash attacks in the game. At frame 6, it is a fast out of shield option, and due to its respectable horizontal reach and hurtbox shift on startup, it can interrupt strings and cause favorable trades when well-timed. It can also be a devastating finisher from many of Zelda's other moves, namely up tilt, down aerial and down throw.

However, the sweetspot is very small and lasts for a single frame. As a counterpart to the ridiculous power of the sweetspot, the sourspots, while themselves being large and long-lasting, deal extremely low knockback. Furthermore, the move has relatively high landing lag, high ending lag and cannot auto-cancel in a short hop. As a result, even on hit, the sourspots can be easily punished by even forward smashes, especially when rising. Until high percents, if Zelda uses the move, she will almost always be punished if she misses the sweetspot in any way. This makes the move poor in neutral, and inherently risky in any of the sweetspot's aforementioned uses.

While its landing lag is higher than average, it is decent relative to its massive power and can be -8 on shield. Zelda pancakes in her landing animation, which can cause various out of shield punishes that do not hit low to miss. A low-landed kick can combo into dash attack at very low percents. At high percents, especially with rage, landing sourspots become able to combo most notably into down smash and dash attack. The toe sourspot is slightly stronger than the other sourspots.

Overall, due to their unique traits, Zelda's Lightning Kicks give her an unconventional and conservative aerial game defined by high risk and precision.

Hitboxes

ID Part Rehit rate Damage SD Angle Angle type BK KS FKV Set weight Radius Bone Offset SDI× T% Clang Rebound Effect Type G A Sound Direct Hit bits Hit part Blockable Reflectable Absorbable Flinchless No GFX Heedless
Sweetspot
0 0 0 20.0% 0 Sakurai angle Forward 24 95 0 HitboxTableIcon(False).png 2.2 top -1.0 to 1.0 4.4 11.6 1.5× 0.0× 0% HitboxTableIcon(NoClang).png HitboxTableIcon(NoRebound).png Magic (effect) Magic (type) HitboxTableIcon(GroundedTrue).png HitboxTableIcon(AerialTrue).png H Magic SpecialsDirect.png All All HitboxTableIcon(Blockable).png HitboxTableIcon(Unreflectable).png HitboxTableIcon(Unabsorbable).png HitboxTableIcon(False).png HitboxTableIcon(False).png HitboxTableIcon(False).png
Sourspots
1 0 0 4.0% 0 Sakurai angle Forward 5 80 0 HitboxTableIcon(False).png 4.0 kneel 0.0 0.0 0.0 1.0× 1.0× 0% HitboxTableIcon(Clang).png HitboxTableIcon(Rebound).png Normal (effect) Foot (type) HitboxTableIcon(GroundedTrue).png HitboxTableIcon(AerialTrue).png S Punch SpecialsDirect.png All All HitboxTableIcon(Blockable).png HitboxTableIcon(Unreflectable).png HitboxTableIcon(Unabsorbable).png HitboxTableIcon(False).png HitboxTableIcon(False).png HitboxTableIcon(False).png
2 0 0 4.0% 0 Sakurai angle Forward 5 80 0 HitboxTableIcon(False).png 4.5 hip 0.0 0.0 0.0 1.0× 1.0× 0% HitboxTableIcon(Clang).png HitboxTableIcon(Rebound).png Normal (effect) Foot (type) HitboxTableIcon(GroundedTrue).png HitboxTableIcon(AerialTrue).png S Punch SpecialsDirect.png All All HitboxTableIcon(Blockable).png HitboxTableIcon(Unreflectable).png HitboxTableIcon(Unabsorbable).png HitboxTableIcon(False).png HitboxTableIcon(False).png HitboxTableIcon(False).png
3 0 0 4.0% 0 Sakurai angle Forward 5 96 0 HitboxTableIcon(False).png 5.0 toel 0.0 0.0 0.0 1.0× 1.0× 0% HitboxTableIcon(Clang).png HitboxTableIcon(Rebound).png Normal (effect) Foot (type) HitboxTableIcon(GroundedTrue).png HitboxTableIcon(AerialTrue).png S Punch SpecialsDirect.png All All HitboxTableIcon(Blockable).png HitboxTableIcon(Unreflectable).png HitboxTableIcon(Unabsorbable).png HitboxTableIcon(False).png HitboxTableIcon(False).png HitboxTableIcon(False).png

Timing

Attack

Initial autocancel 1-2
Sweetspot 6
Sourspots 6-10
Ending autocancel 43-
Interruptible 50
Animation length 58
FrameIcon(Lag).png FrameIcon(Lag).png FrameIcon(Lag).png FrameIcon(Lag).png FrameIcon(Lag).png FrameIcon(HitboxChangeS).png FrameIcon(HitboxChangeE).png FrameIcon(Hitbox).png FrameIcon(Hitbox).png FrameIcon(Hitbox).png FrameIcon(Lag).png FrameIcon(Lag).png FrameIcon(Lag).png FrameIcon(Lag).png FrameIcon(Lag).png FrameIcon(Lag).png FrameIcon(Lag).png FrameIcon(Lag).png FrameIcon(Lag).png FrameIcon(Lag).png FrameIcon(Lag).png FrameIcon(Lag).png FrameIcon(Lag).png FrameIcon(Lag).png FrameIcon(Lag).png FrameIcon(Lag).png FrameIcon(Lag).png FrameIcon(Lag).png FrameIcon(Lag).png FrameIcon(Lag).png FrameIcon(Lag).png FrameIcon(Lag).png FrameIcon(Lag).png FrameIcon(Lag).png FrameIcon(Lag).png FrameIcon(Lag).png FrameIcon(Lag).png FrameIcon(Lag).png FrameIcon(Lag).png FrameIcon(Lag).png FrameIcon(Lag).png FrameIcon(Lag).png FrameIcon(Lag).png FrameIcon(Lag).png FrameIcon(Lag).png FrameIcon(Lag).png FrameIcon(Lag).png FrameIcon(Lag).png FrameIcon(Lag).png FrameIcon(Interruptible).png FrameIcon(Interruptible).png FrameIcon(Interruptible).png FrameIcon(Interruptible).png FrameIcon(Interruptible).png FrameIcon(Interruptible).png FrameIcon(Interruptible).png FrameIcon(Interruptible).png FrameIcon(Interruptible).png
FrameIcon(Autocancel).png FrameIcon(Autocancel).png FrameIcon(Blank).png FrameIcon(Blank).png FrameIcon(Blank).png FrameIcon(Blank).png FrameIcon(Blank).png FrameIcon(Blank).png FrameIcon(Blank).png FrameIcon(Blank).png FrameIcon(Blank).png FrameIcon(Blank).png FrameIcon(Blank).png FrameIcon(Blank).png FrameIcon(Blank).png FrameIcon(Blank).png FrameIcon(Blank).png FrameIcon(Blank).png FrameIcon(Blank).png FrameIcon(Blank).png FrameIcon(Blank).png FrameIcon(Blank).png FrameIcon(Blank).png FrameIcon(Blank).png FrameIcon(Blank).png FrameIcon(Blank).png FrameIcon(Blank).png FrameIcon(Blank).png FrameIcon(Blank).png FrameIcon(Blank).png FrameIcon(Blank).png FrameIcon(Blank).png FrameIcon(Blank).png FrameIcon(Blank).png FrameIcon(Blank).png FrameIcon(Blank).png FrameIcon(Blank).png FrameIcon(Blank).png FrameIcon(Blank).png FrameIcon(Blank).png FrameIcon(Blank).png FrameIcon(Blank).png FrameIcon(Autocancel).png FrameIcon(Autocancel).png FrameIcon(Autocancel).png FrameIcon(Autocancel).png FrameIcon(Autocancel).png FrameIcon(Autocancel).png FrameIcon(Autocancel).png FrameIcon(Autocancel).png FrameIcon(Autocancel).png FrameIcon(Autocancel).png FrameIcon(Autocancel).png FrameIcon(Autocancel).png FrameIcon(Autocancel).png FrameIcon(Autocancel).png FrameIcon(Autocancel).png FrameIcon(Autocancel).png

Landing lag

Interruptible 16
Animation length 31
FrameIcon(Lag).png FrameIcon(Lag).png FrameIcon(Lag).png FrameIcon(Lag).png FrameIcon(Lag).png FrameIcon(Lag).png FrameIcon(Lag).png FrameIcon(Lag).png FrameIcon(Lag).png FrameIcon(Lag).png FrameIcon(Lag).png FrameIcon(Lag).png FrameIcon(Lag).png FrameIcon(Lag).png FrameIcon(Lag).png FrameIcon(Interruptible).png FrameIcon(Interruptible).png FrameIcon(Interruptible).png FrameIcon(Interruptible).png FrameIcon(Interruptible).png FrameIcon(Interruptible).png FrameIcon(Interruptible).png FrameIcon(Interruptible).png FrameIcon(Interruptible).png FrameIcon(Interruptible).png FrameIcon(Interruptible).png FrameIcon(Interruptible).png FrameIcon(Interruptible).png FrameIcon(Interruptible).png FrameIcon(Interruptible).png FrameIcon(Interruptible).png
Legend (1 square = 1 frame)
Lag
Lag time
Hitbox
Hitbox
FrameIcon(HitboxChangeS).pngFrameIcon(HitboxChangeE).png
Hitbox change
Auto-canceling
Autocancel
Interruptibility
Interruptible

Trivia

  • On top of the magic effect, the sweetspot has an additional unique lightning effect on hit. This is purely aesthetic and distinct from the electric attack effect the move formerly had in Melee and Brawl.