Bowser (SSBU): Difference between revisions
(More labbing) |
|||
| Line 42: | Line 42: | ||
*{{change|Bowser's [[falling speed]] (1.39 → 1.77) and fast falling speed (2.224 → 2.832) are much faster, going from 42nd fastest in ''Smash 4'' to tied for 16th in ''Ultimate'', giving him much better vertical endurance and improving his air-to-ground transitioning but making him easier to combo.}} | *{{change|Bowser's [[falling speed]] (1.39 → 1.77) and fast falling speed (2.224 → 2.832) are much faster, going from 42nd fastest in ''Smash 4'' to tied for 16th in ''Ultimate'', giving him much better vertical endurance and improving his air-to-ground transitioning but making him easier to combo.}} | ||
*{{change|Bowser is [[weight|heavier]] (130 → 135). This improves his already excellent endurance but making him easier to combo.}} | *{{change|Bowser is [[weight|heavier]] (130 → 135). This improves his already excellent endurance but making him easier to combo.}} | ||
*{{buff|[[Spot dodge]] has slightly less startup (frame 4 → 3).}} | |||
*{{nerf|Forward [[roll dodge]] has less intangibility (frames 4-19 → 4-16).}} | |||
*{{nerf|Back [[roll dodge]] has slightly more startup and less intangibility (frames 4-19 → 5-17).}} | |||
*{{buff|[[Air dodge]] grants more intangibility (frames 4-29 → 4-32).}} | |||
*{{nerf|[[Air dodge]] has significantly more endlag.}} | |||
===Ground attacks=== | ===Ground attacks=== | ||
| Line 84: | Line 89: | ||
*[[Down throw]]: | *[[Down throw]]: | ||
**{{buff|Down throw has faster startup (frame 45 → 34) and deals more damage (10%/2% → 10%/4%).}} | **{{buff|Down throw has faster startup (frame 45 → 34) and deals more damage (10%/2% → 10%/4%).}} | ||
*[[Edge attack]]: | |||
**{{buff|Edge attack deals more damage (7% → 10%).}} | |||
===Special Moves=== | ===Special Moves=== | ||
*[[Fire Breath]]: | *[[Fire Breath]]: | ||
**{{buff|Fire Breath deals more damage (1.2%xN → 1.8%xN).}} | |||
**{{change|Fire Breath is more vibrant in color as opposed to the more realistic flame in ''Smash 4''.}} | **{{change|Fire Breath is more vibrant in color as opposed to the more realistic flame in ''Smash 4''.}} | ||
*[[Flying Slam]]: | *[[Flying Slam]]: | ||
| Line 140: | Line 148: | ||
|usmashdesc=Hops a bit to thrust his shell upwards, while spinning. Deals the most damage to opponents who come into contact with Bowser's top spikes, while other opponents get hit by his landing hitboxes instead. Regardless, Bowser's up smash is one of his best KOing options. | |usmashdesc=Hops a bit to thrust his shell upwards, while spinning. Deals the most damage to opponents who come into contact with Bowser's top spikes, while other opponents get hit by his landing hitboxes instead. Regardless, Bowser's up smash is one of his best KOing options. | ||
|dsmashname= | |dsmashname= | ||
|dsmashdesc=Does a grounded claw swipe, hitting opponents in front and behind him. | |dsmashdmg=16% (hit 1), 15% (hit 2) | ||
|dsmashdesc=Does a grounded claw swipe, hitting opponents in front and behind him. Deals more knockback than his old down smash. | |||
|nairname= | |nairname= | ||
|nairdmg=6% (hits 1-4) | |nairdmg=6% (hits 1-4) | ||
| Line 154: | Line 163: | ||
|uairdesc=An upward headbutt. Although it is not as strong as in ''Brawl'', it is still a viable KOing option to KOing around 100% while near the upper blast line. By extension, it is a [[KO confirm]] follow-up from up throw at high percentages. | |uairdesc=An upward headbutt. Although it is not as strong as in ''Brawl'', it is still a viable KOing option to KOing around 100% while near the upper blast line. By extension, it is a [[KO confirm]] follow-up from up throw at high percentages. | ||
|dairname= | |dairname= | ||
}} | |dairdmg=16% (spikes), 2% (shockwave) | ||
|dairdesc=A [[stall-then-fall]] attack that involves Bowser retreating into his shell while turning upside-down, then propelling himself towards the ground while spinning on a vertical axis. The first few active frames being able to [[meteor smash]] opponents, in combination with the move's large hitbox and respectable diagonal knockback during the later active frames, make it a moderately effective [[edgeguarding]] tool. The move emits [[Quake|a small shockwave on both sides when Bowser lands]], which makes the move slightly harder to punish. Should Bowser use the move while he's off stage, it is almost guaranteed to cause a [[self-destruct]]. | |||
|edgename= | |||
|edgedmg=10% | |||
|nsdesc=Bowser slowly climbs up from the ledge, then swipes at the ground in front of him. | |||
|nsname=Fire Breath | |||
|nsdmg=1.8%xN | |||
|nsdesc= | |||
|ssname=Flying Slam | |||
|ssdmg=18% (throw), 15% (collateral) | |||
|ssdesc= | |||
|usname=Whirling Fortress | |||
|usdmg=7% (first hit), 1%x10 (intermediate hits), 2% (final hit) | |||
|usdesc= | |||
|dsname=Bowser Bomb | |||
|dsdmg= | |||
|dsdesc= | |||
|fsname=Giga Bowser Punch | |||
|fsdmg= | |||
|fsdesc=}} | |||
=={{SSBU|Classic Mode}}: The Red One. Every Red One!== | =={{SSBU|Classic Mode}}: The Red One. Every Red One!== | ||
Revision as of 10:52, December 25, 2018

| Bowser in Super Smash Bros. Ultimate | |
|---|---|
 
| |
| Universe | Mario |
| Other playable appearances | in Melee in Brawl in SSB4 |
| Availability | Unlockable |
| Final Smash | Giga Bowser Punch |
| “ | Who's the greatest nemesis of all!? It's King Bowser! In Super Smash Bros. his power and weight make him a reliable fighter. Use his Fire Breath to keep opponents at bay, then use his damaging attacks to launch them off the stage! He transforms into Giga Bowser for his Final Smash and delivers a super powerful punch! | ” |
| —Super Smash Blog, Super Smash Bros. Ultimate Official Site | ||
Bowser (クッパ, Koopa) is a playable character in Super Smash Bros. Ultimate. He was teased in a trailer released on March 8th, 2018 before being fully confirmed as playable on June 12th, 2018. As opposed to being a starter character like in previous Smash games, Bowser is now an unlockable character. Bowser is classified as fighter #14.
Bowser retains the realistic roar voice clips that he had in Super Smash Bros. 4, along with additional new clips.
How to unlock
Complete one of the following:
- Play VS. matches, with Bowser being the 3rd character to be unlocked.
- Clear Classic Mode with Donkey Kong or anyone in his unlock tree, being the first character unlocked.
- Defeat Giga Bowser in World of Light.
With the exception of the third method, Bowser must then be defeated on Mushroom Kingdom U.
Changes from Super Smash Bros. 4
Bowser received a mix of buffs and nerfs, but he is buffed overall, in spite of previously being a high-tier character (ranking 24th out of 55). Most of his changes are to make him better at defensive play through the amplification of Super Armor on tilts and smash attacks and having increased grounded and aerial mobility. In exchange, some of Bowser's heavier hitting moves were nerfed, such as up air, and his infamous up throw combos.
Aesthetics
 As with all veterans returning from Smash 4, Bowser's model features a more subdued color scheme. His colors overall are slightly darker and more monotone, similar to his appearance in Melee, while his scales, hair, horns, and spikes exhibit simple detailing, similar to his design in Brawl.
- Bowser has been made more expressive than previous installments with facial expressions reminiscent of his appearances in the Mario series.
- Bowser has a new victory pose. He now breathes fire towards the screen before striking a pose that is similar to his Smash 4 artwork. It replaces his shell spinning victory pose.
- Bowser's roaring victory pose now shows him performing a headbutt with his horns before rearing his head back to roar. His body also faces more towards the screen during said animation.
- Bowser's claw slashing victory pose now shows him running up to the victory area before slashing the air with his claws.
- Up and side taunts have been shortened, the latter also updated to match his upright stance.
- Bowser's hair has physics-based movement.
Attributes
 Like all characters, Bowser's jumpsquat animation now takes three frames to complete (down from 8).
- Bowser's universal heavy armor (officially known as "Tough Guy") seems to be amplified; he can now resist all rapid jabs, including some of rapid jabs he could not resist in SSB4 such as Captain Falcon's rapid jabs.
- Bowser dashes much faster (1.792 → 1.971). Standardized initial dash speeds vastly improve Bowser's ground mobility even further as his initial dash speed has gone from the slowest in Smash 4 to among the fastest in Ultimate.
- Bowser walks slightly faster (0.858 → 0.901).
- Bowser's air speed is faster (1 → 1.155).
- Bowser's falling speed (1.39 → 1.77) and fast falling speed (2.224 → 2.832) are much faster, going from 42nd fastest in Smash 4 to tied for 16th in Ultimate, giving him much better vertical endurance and improving his air-to-ground transitioning but making him easier to combo.
- Bowser is heavier (130 → 135). This improves his already excellent endurance but making him easier to combo.
- Spot dodge has slightly less startup (frame 4 → 3).
 Forward roll dodge has less intangibility (frames 4-19 → 4-16).
- Back roll dodge has slightly more startup and less intangibility (frames 4-19 → 5-17).
- Air dodge grants more intangibility (frames 4-29 → 4-32).
- Air dodge has significantly more endlag.
Ground attacks
- Bowser now has a percent-based heavy armor during the startup of all his tilt and smash attacks.
- Neutral attack:
- Neutral attack is now a sumo-style palm strike followed by a punch.
- Both hits of neutral attack deal slightly less damage (5%/6.5% (hits 1/2) → 4%/6% (hits 1/2)).
- The first hit of neutral attack has fewer arm intangibility frames (frames 7-9 → frames 7-8).
- Forward tilt:
- Forward tilt is now a swung backhand punch with the arm slightly bent. The fist is enlarged while the hitbox is out, so its range appears unaltered.
- Up tilt
- Up tilt deals more damage (9% → 11%).
- Up tilt now has arm intangibility (frames 11-16).
- Down tilt:
- The second hit of down tilt comes out faster (frame 20 → 15), allowing both hits to link more reliably.
- Despite each hit of down tilt dealing less individual damage (14%/11% (hits 1/2) → 7%/8% (hits 1/2)), both hits combined now deal more overall damage than the first hit in Smash 4 (14% → 15%).
- Down tilt's second hit can now trip at low percents.
- Forward smash:
- Forward smash has slightly less endlag.
- Up smash:
- Up smash deals slightly more damage (20%/15%/15% → 22%/16%/16%).
- Down smash:
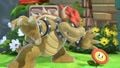
- Bowser has a new down smash: a grounded claw swipe that hits forward then backward, similar to Wolf's. This replaces his old down smash, which was notoriously outclassed by Whirling Fortress. This down smash is faster overall, has more range, and deals much more knockback.
- Down smash has fewer active frames and slightly increased startup (frame 10 → 12).
Aerial attacks
- All aerials have much less landing lag (Neutral: frame 20 → 15, Forward: 24 → 14, Back: 40 → 23, Up: 28 → 17, Down: 40 → 34).
- Neutral aerial:
- Neutral aerial's hits connect less reliably.
- Forward aerial:
- The lower hitbox no longer sends opponents behind Bowser.
- Down aerial:
- Down aerial now has full body (minus the shell) intangibility starting from frame 14, which lasts until 27 frames of the move's landing animation have passed.
Throws/other attacks
- Grab has slightly quicker startup (frame 9 → 8) but also longer endlag.
- Pummel is faster but deals significantly less damage (3.1% → 1.6%).
- Up throw:
- Up throw deals more damage (0.5%x7/1%/2% → 0.5%x7/2%/6%) and knockback.
- Up throw has more endlag, which, combined with its increased knockback, severely hinders its combo potential.
- Bowser now hops on the final hit of up throw.
- Down throw:
- Down throw has faster startup (frame 45 → 34) and deals more damage (10%/2% → 10%/4%).
- Edge attack:
- Edge attack deals more damage (7% → 10%).
Special Moves
- Fire Breath:
- Fire Breath deals more damage (1.2%xN → 1.8%xN).
- Fire Breath is more vibrant in color as opposed to the more realistic flame in Smash 4.
- Flying Slam:
- Flying Slam's grounded variant has reduced startup (frame 8 → 6), while the aerial variant now has the same amount of startup as the grounded one (frame 17 → 6).
- Flying Slam has a longer jumpsquat animation (25 frames → 33 frames).
- Flying Slam's grounded variant has more endlag and its aerial one no longer autocancels upon landing.
- Flying Slam now has Bowser spin around more dramatically on the way down and now has an explosion effect on landing.
- Whirling Fortress:
- The final hitbox of grounded Whirling Fortress deals more damage (4% → 6%).
- The final hitbox of aerial Whirling Fortress has significantly improved knockback, making its ending much harder to punish.
- Aerial Whirling Fortress has less landing lag.
- Aerial Whirling Fortress now has full body (minus the shell) intangibility starting from frame 80, which lasts until 13 frames of the move's landing animation have passed.
- Aerial Whirling Fortress travels a shorter distance.
- Aerial Whirling Fortress deals overall less damage, with the first hitbox dealing 7% damage (down from 10%), the intermediate hitboxes dealing 1% damage each, and the final hitbox dealing 2% damage, for a maximum possible total of 19% damage.
- Aerial Whirling Fortress now has Bowser spin more at an angle toward the camera.
- Bowser Bomb:
- Bowser Bomb now meteor smashes at the beginning of its descent, which grants it utility in edgeguarding, but makes its onstage KO potential less consistent.
- The second hit of Bowser Bomb has slightly less startup (frame 38 → 37).
- Aerial Bowser Bomb has slightly less startup (frame 32 → 31).
- Giga Bowser's functionality has drastically changed: rather than utilizing Bowser's Brawl moveset, he teleports to the background of the stage in giant form, and aims a single punch that can cause an instant Screen KO at high percents or launch opponents at low percents. It is now called Giga Bowser Punch.
Moveset
- Bowser can crawl.
The following damage values were calculated without the 1.2x damage multiplier that is activated during one-on-one fights.
For aerial attacks, full hop damage values are shown. Hovering over them shows the short hop damage values (aerial attacks performed during a short hop have a 0.85x multiplier.) Note: All numbers are listed as base damage, without the 1v1 multiplier.
| Name | Damage | Description | ||
|---|---|---|---|---|
| Neutral attack | 4% | Bowser performs a sumo-style palm strike, followed by a punch. Both hits of neutral attack have decent speed, and deal decent damage in total. | ||
| 6% | ||||
| Forward tilt | 12% | Bowser does a swung backhanded punch, with his arm slightly bent. Has the exact same properties as Bowser's previous forward tilt. | ||
| Up tilt | 11% | Does an arcing claw swipe. Comes with wide range, and makes Bowser's arm intangible for frames 11-16. | ||
| Down tilt | 7% (hit 1), 8% (hit 2) | Does an alternating pair of hooks. Both hits deal 15% in total, only slightly higher than the first hit's damage output in SSB4, being 14%. Down tilt's second hit comes out five frames earlier, and gains the ability to trip opponents, on a positive note. | ||
| Dash attack | 12% (clean), 10% (late) | A side kick, similar to Meta Knight's dash attack. Good for hitting prone or tumbling opponents and has high base knockback. | ||
| Forward smash | 23% (clean feet), 20% (clean body), 17% (late feet), 14% (late body) | A dropkick. Its outstanding damage output threatens shields, being able to inflict significant damage to them. When spaced properly, it can even hit opponents hanging on an edge or lingering just below it. Its clean hitboxes render Bowser's legs intangible, whereas its late hitboxes have anti-rebounding priority. Even from the center of the stage, it can KO opponents at 70%. | ||
| Up smash | 22% (spikes), 16% (sides) | Hops a bit to thrust his shell upwards, while spinning. Deals the most damage to opponents who come into contact with Bowser's top spikes, while other opponents get hit by his landing hitboxes instead. Regardless, Bowser's up smash is one of his best KOing options. | ||
| Down smash | 16% (hit 1), 15% (hit 2) | Does a grounded claw swipe, hitting opponents in front and behind him. Deals more knockback than his old down smash. | ||
| Neutral aerial | 6% (hits 1-4) | An aerial cartwheel. Its hits no longer connecr as reliably as in Smash 4, due to each hit's knockback being increased, resulting in less frequent combos. Despite this, Bowser's neutral aerial remains one of the most damaging aerials in the game. | ||
| Forward aerial | 13% (hand), 12% (arm), 11% (body) | Swipes downward with his claws. It has quick start-up, a respectable damage output, and great range, as it can even hit opponents below him. It can also autocancel from a short hop. Altogether, these traits make for, arguably, Bowser's most versatile aerial. | ||
| Back aerial | 19% | A dropkick. It is very powerful, as it can either KO around 100% from center-stage and as low as 60% at the edge, though it does not have much vertical range. | ||
| Up aerial | 15% | An upward headbutt. Although it is not as strong as in Brawl, it is still a viable KOing option to KOing around 100% while near the upper blast line. By extension, it is a KO confirm follow-up from up throw at high percentages. | ||
| Down aerial | 16% (spikes), 2% (shockwave) | A stall-then-fall attack that involves Bowser retreating into his shell while turning upside-down, then propelling himself towards the ground while spinning on a vertical axis. The first few active frames being able to meteor smash opponents, in combination with the move's large hitbox and respectable diagonal knockback during the later active frames, make it a moderately effective edgeguarding tool. The move emits a small shockwave on both sides when Bowser lands, which makes the move slightly harder to punish. Should Bowser use the move while he's off stage, it is almost guaranteed to cause a self-destruct. | ||
| Grab | {{{grabname}}} | — | {{{grabdesc}}} | |
| Pummel | {{{pummelname}}} | {{{pummeldmg}}} | {{{pummeldesc}}} | |
| Forward throw | {{{fthrowname}}} | {{{fthrowdmg}}} | {{{fthrowdesc}}} | |
| Back throw | {{{bthrowname}}} | {{{bthrowdmg}}} | {{{bthrowdesc}}} | |
| Up throw | {{{uthrowname}}} | {{{uthrowdmg}}} | {{{uthrowdesc}}} | |
| Down throw | {{{dthrowname}}} | {{{dthrowdmg}}} | {{{dthrowdesc}}} | |
| Forward roll Back roll Spot dodge Air dodge |
— | — | ||
| Techs | — | — | ||
| Floor attack (front) Floor getups (front) |
{{{floorfname}}} | {{{floorfdmg}}} | {{{floorfdesc}}} | |
| Floor attack (back) Floor getups (back) |
{{{floorbname}}} | {{{floorbdmg}}} | {{{floorbdesc}}} | |
| Floor attack (trip) Floor getups (trip) |
{{{floortname}}} | {{{floortdmg}}} | {{{floortdesc}}} | |
| Edge attack Edge getups |
10% | {{{edgedesc}}} | ||
| Neutral special | Fire Breath | 1.8%xN | ||
| Side special | Flying Slam | 18% (throw), 15% (collateral) | ||
| Up special | Whirling Fortress | 7% (first hit), 1%x10 (intermediate hits), 2% (final hit) | ||
| Down special | Bowser Bomb | |||
| Final Smash | Giga Bowser Punch | |||
Classic Mode: The Red One. Every Red One!
Bowser's opponents are all wearing attire that is red, which is a reference to his mortal enemy (Mario) wearing red clothing. Bowser unlocks Pokemon Trainer as a playable fighter at completion.
| Round | Opponent | Stage | Music |
|---|---|---|---|
| 1 | 2 Mii Brawlers, Mii Gunner, and Mii Swordfighter | Find Mii | Airship Theme - Super Mario Bros. 3 |
| 2 | Ken | Suzaku Castle | Ken Stage |
| 3 | Samus | Norfair | Brinstar (Melee) |
| 4 | Giant Charizard and Giant Incineroar | Pokémon Stadium 2 | Victory Road - Pokémon Ruby / Pokémon Sapphire |
| 5 | Diddy Kong | Kongo Jungle | Stickerbush Symphony |
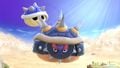
| 6 | Rathalos | ? | ? |
| Bonus Stage | |||
| Final | Mario, then Metal Mario | New Donk City Hall (Ω form) | Ground Theme (Band Performance) - Super Mario Bros. / Metal Battle (Melee) |
Note: When fighting the Mii Fighters, they all wear Mario Caps.
Role in World of Light
Bowser was among the fighters that were summoned to fight the army of Master Hands.
During the opening cutscene, Bowser was present when Galeem unleashed his beams of light. Bowser attempted to fight back against the beams, using his Fire Breath alongside the Pokémon Trainer and his Pokémon. This effort ended up being fruitless however, as Bowser was vaporized and placed under Galeem's imprisonment alongside the other fighters (except for Kirby). Presumably, it was during this time that he ended up transformed into Giga Bowser and later dispatched to a molten castle to guard it. Eventually, several fighters fought Bowser in his Giga Bowser form and, upon defeating him, he joined the group.
Bowser is later seen among several other fighters, making their last stand against Galeem and Dharkon. He also shows up in the bad ending where Galeem emerges victorious against Dharkon, witnessing Galeem engulf the world in light.
Alternate costumes

| |||||||

|

|

|

|

|

|

|

|
Gallery

Bowser's fighter card.
Bowser idling on the Umbra Clock Tower.
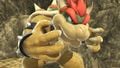
Attacking Ness and Ike with Bowser Bomb on Gaur Plain.
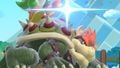
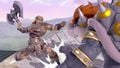
Attacking Little Mac with his down smash on Mushroomy Kingdom.
Striking Yoshi with his up smash on Super Mario Maker.
Performing Whirling Fortress with a Spiny Shell on Palutena's Temple.
Taunting next to a Fire Flower on The Great Cave Offensive.
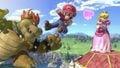
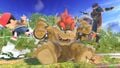
Jumping next to Mario and Peach on Princess Peach's Castle.
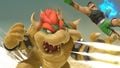
Struck by Meta Knight on Smashville.
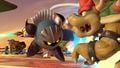
With Simon on Hyrule Castle.

With Toon Link on Bridge of Eldin.
- BowserVictoryUltimate.jpg
Breathing fire in one of his victory poses.


Character Showcase Video
<youtube>liuwszyDhXM</youtube>
Trivia
- Bowser's official artwork resembles a pose he commonly makes for Mario games, being almost identical to official art for Super Mario 64 DS, Fortune Street and Mario Party 10 (albeit mirrored in Mario Party 10).
- Like in Smash 4, he was the first Melee newcomer to be confirmed.
- During the segment of the E3 2018 Nintendo Direct focusing on Bowser, Sakurai states that the changes made to his Final Smash are an allusion to the boss fight with Baby Bowser at the end of Yoshi's Island.
- Bowser is the only fighter to be fought in a form other than their regular appearance to recruit them in World of Light.