Mii Brawler (SSBU)/Forward throw: Difference between revisions
From SmashWiki, the Super Smash Bros. wiki
Jump to navigationJump to search
(New Page: {{ArticleIcons|ssbu=y}} {{competitive expertise}} {|class="wikitable" style="float:right; margin:4pt;" !colspan=5|Mii Brawler forward throw hurtbox visualization |- |File:MiiBrawlerFT...) |
|||
| (3 intermediate revisions by 3 users not shown) | |||
| Line 1: | Line 1: | ||
{{ArticleIcons|ssbu=y}} | {{ArticleIcons|ssbu=y}} | ||
{|class="wikitable" style="float:right; margin:4pt;" | {|class="wikitable" style="float:right; margin:4pt;" | ||
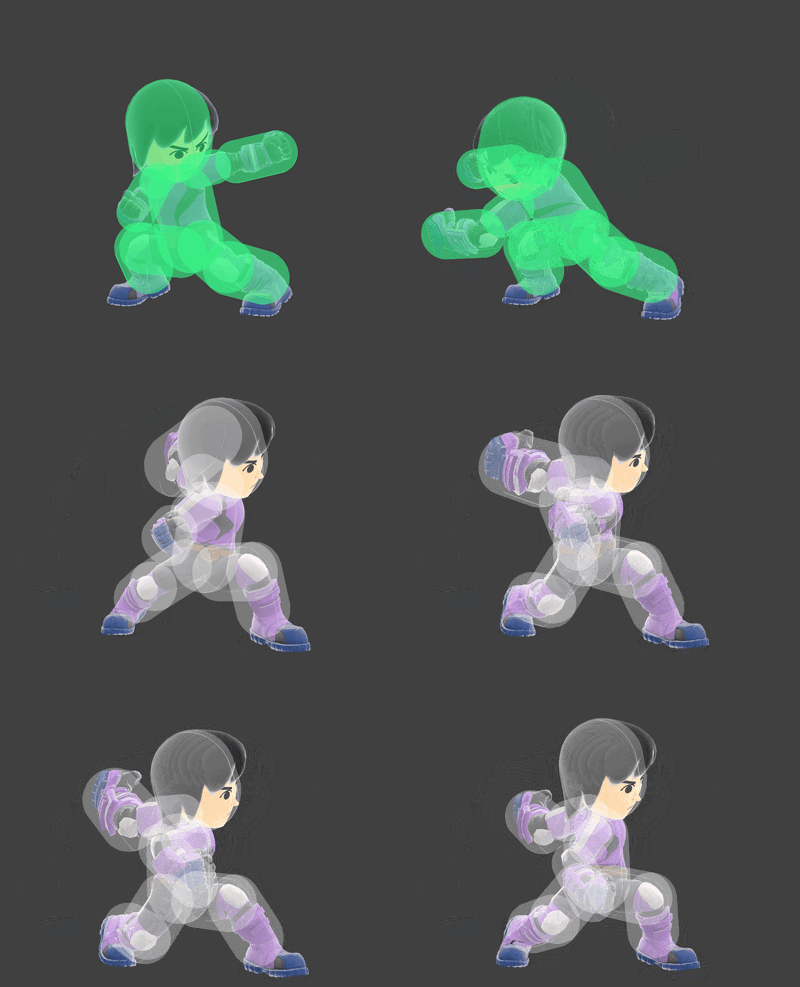
!colspan=5|Mii Brawler forward throw hurtbox visualization | !colspan=5|Mii Brawler forward throw hurtbox visualization | ||
| Line 9: | Line 8: | ||
==Overview== | ==Overview== | ||
Mii Brawler swings the arm used to grab the opponent, launching them forward. While this throw has zero combo potential, it is Mii Brawler's most reliable kill throw, capable of killing midweight characters DIing properly around 170% near ledge, and earlier with rage. The throw is also executed on frame 14, meaning that a burst dash grab into a buffered forward throw is capable of catching an opponent DIing poorly, which kills about 50% earlier compared to proper DI. | |||
==Throw Data== | ==Throw Data== | ||
{{UltimateThrowTableHeader}} | {{UltimateThrowTableHeader}} | ||
| Line 20: | Line 20: | ||
|ks=65 | |ks=65 | ||
|fkv=0 | |fkv=0 | ||
| | |sfx=None | ||
|slvl=S | |||
}} | |||
{{UltimateThrowTableRow | |||
|kind=1 | |||
|id=0 | |||
|type=Throwing | |||
|damage=3.0% | |||
|angle=361 | |||
|bk=60 | |||
|ks=100 | |||
|fkv=0 | |||
|effect=Normal | |effect=Normal | ||
|sfx=None | |sfx=None | ||
| Line 28: | Line 39: | ||
==Timing== | ==Timing== | ||
During frame 13, the move inflicts 6 frames of [[hitlag]] to both Mii Brawler and the opponent, during which the opponent is invincible. This section shows its timing without the hitlag. | |||
{|class="wikitable" | {|class="wikitable" | ||
!Invincibility | !Invincibility | ||
Latest revision as of 19:46, July 28, 2022
| Mii Brawler forward throw hurtbox visualization | ||||
|---|---|---|---|---|

| ||||
Overview[edit]
Mii Brawler swings the arm used to grab the opponent, launching them forward. While this throw has zero combo potential, it is Mii Brawler's most reliable kill throw, capable of killing midweight characters DIing properly around 170% near ledge, and earlier with rage. The throw is also executed on frame 14, meaning that a burst dash grab into a buffered forward throw is capable of catching an opponent DIing poorly, which kills about 50% earlier compared to proper DI.
Throw Data[edit]
| Kind | ID | Damage | Angle | Angle type | BK | KS | FKV | H× | Effect | Type | Sound |
|---|---|---|---|---|---|---|---|---|---|---|---|
| Throw | 0 | 9.0% | Forward | 60 | 65 | 0 | 0.0× | ||||
| Break | 0 | 3.0% | Forward | 60 | 100 | 0 | 0.0× |
Timing[edit]
During frame 13, the move inflicts 6 frames of hitlag to both Mii Brawler and the opponent, during which the opponent is invincible. This section shows its timing without the hitlag.
| Invincibility | 1-14 |
|---|---|
| Throw Release | 14 |
| Interruptible | 38 |
| Animation length | 51 |
Lag time |
Vulnerable |
Invincible |
Throw point |
Interruptible |
|