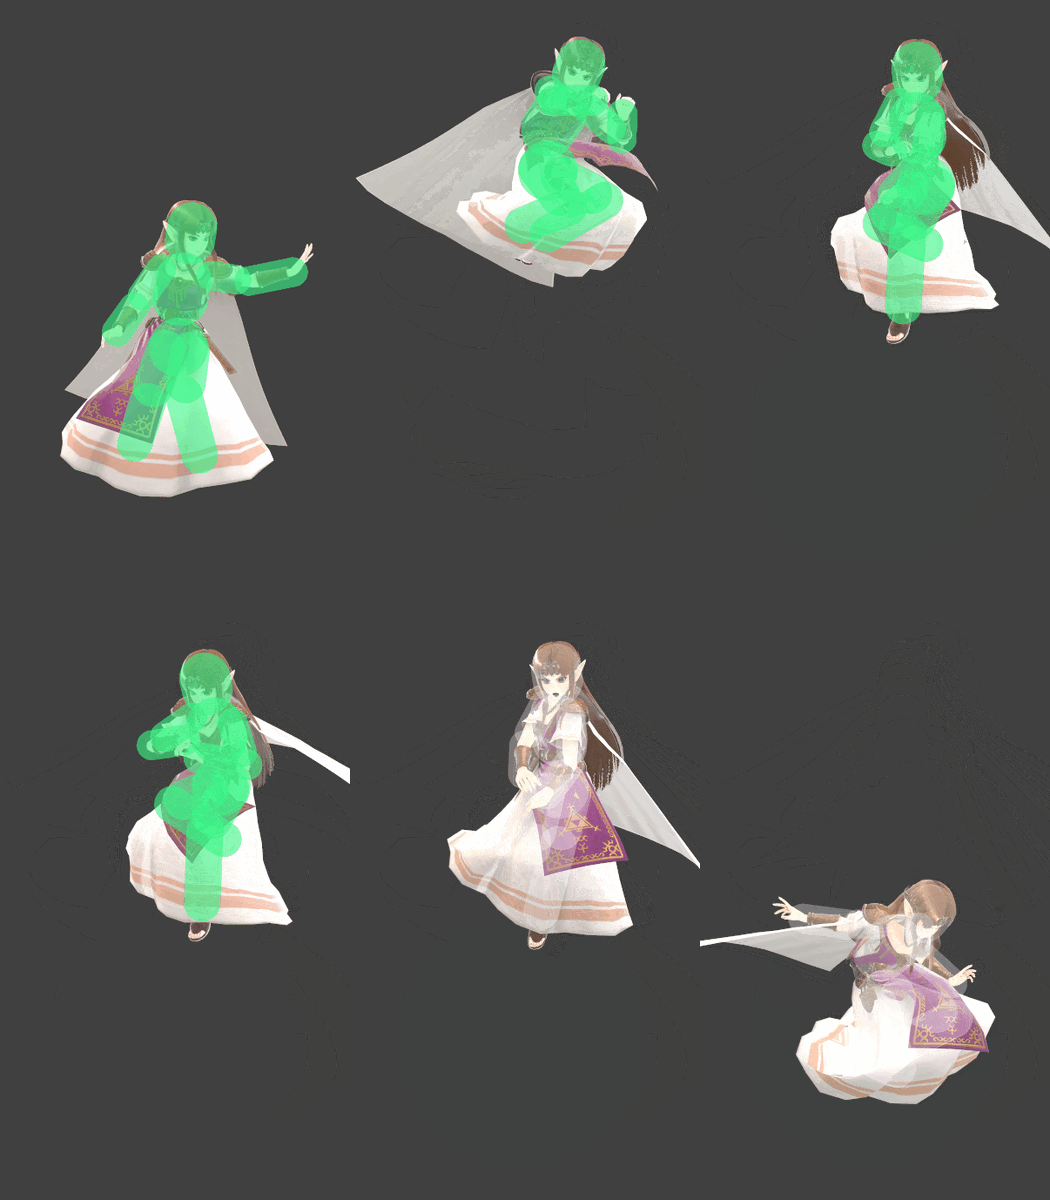
| Zelda down throw hurtbox and hitbox visualization | ||||
|---|---|---|---|---|

| ||||
Overview
Zelda casts the opponent onto the ground and beats them with multiple blasts of fiery magic while levitating. It launches behind Zelda, so inputs for DI are reversed.
It is her main combo throw from low to mid percents, and can combo regardless of DI. On no DI or DI in, neutral aerial and Lightning Kick are all possible, and at higher percents, up aerial and Farore's Wind. On DI out, a dash back Lightning Kick will consistently combo, with neutral aerial being possible at lower percents too. The opponent should mix up their DI every time to force Zelda to react and space her follow-up properly. Stages with platforms will also often interfere with down throw's direct follow-up ability by causing a tech chase.
At mid percents, down throw becomes a KO confirm. It can be especially terrifying if Zelda is facing the stage near the ledge. DI in will make a Lightning Kick follow-up slightly easier and enable other follow-ups. On the flip side, DI out will put the opponent closer to the side blast zone, where they can still potentially get hit by a Lightning Kick. Often, getting grabbed by Zelda in this range can be a pure checkmate, where the opponent will have to simply choose one option and pray. Sometimes, the Lightning Kick sweetspot can miss due to hurtbox shifting during tumble, and especially the smaller the opponent is.
At high percents, it will fully lose its combo ability with DI out. Rage will cause this to occur sooner. If the opponent happens to DI in, it will KO confirm into up aerial. However, down throw is quite slow, taking a full second to execute, and lacks DI mixup potential.
This also makes down throw Zelda's most reliable throw into a Phantom. It is very easy due to holding the opponent in place on the ground for a full second. Overall, forward throw is better for stealing stocks near the ledge, at the cost of stricter timing and spacing, while down throw is better at guaranteeing a Phantom hit to kill at high percents.
Overall, down throw is extremely potent, being able to inflict large damage and KO at low percents, and makes Zelda's grabs very threatening.
Throw and Hitbox Data
| Kind | ID | Damage | Angle | Angle type | BK | KS | FKV | H× | Effect | Type | Sound | ||||||||||||||||||||||||||||||
|---|---|---|---|---|---|---|---|---|---|---|---|---|---|---|---|---|---|---|---|---|---|---|---|---|---|---|---|---|---|---|---|---|---|---|---|---|---|---|---|---|---|
| Throw | |||||||||||||||||||||||||||||||||||||||||
| Throw | 0 | 2.0% | Forward | 75 | 85 | 0 | 0.0× | None | |||||||||||||||||||||||||||||||||
| Break | 0 | 3.0% | Forward | 40 | 100 | 0 | 0.0× | None | |||||||||||||||||||||||||||||||||
Timing
If used at an edge, the opponent is pushed 1.5 units up and away when thrown, preventing certain characters from getting stage spiked underneath.
| Invincibility | 1-51 |
|---|---|
| Hits 1-4 | 25-26, 31-32, 37-38, 43-44 |
| Throw release | 51 |
| Interruptible | 71 |
| Animation length | 89 |
| Lag time |
Hitbox |
Vulnerable |
Invincible |
Throw point |
Interruptible |
|