[dismiss]
| Welcome to SmashWiki! Log in or create an account and join the community, and don't forget to read this first! |
| Notices |
|---|
| The Skill parameter has been removed from Smasher infoboxes, and in its place are the new "Best historical ranking" and "Best tournament result" parameters. SmashWiki needs help adding these new parameters to Smasher infoboxes, refer to the guidelines here for what should be included in these new parameters. |
| When adding results to Smasher pages, include each tournament's entrant number in addition to the player's placement, and use the {{Trn}} template with the matching game specified. Please also fix old results on Smasher pages that do not abide to this standard. Refer to our Smasher article guidelines to see how results tables should be formatted. |
| Check out our project page for ongoing projects that SmashWiki needs help with. |
Snake (SSBU)/Down throw: Difference between revisions
From SmashWiki, the Super Smash Bros. wiki
Jump to navigationJump to search
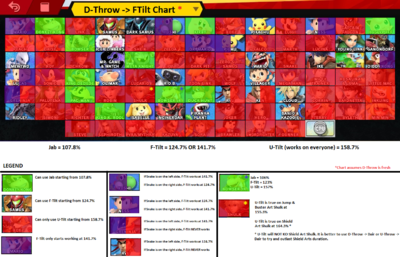
SacredFire37 (talk | contribs) (→Overview: Think this chart explains down throw follow ups better than the previous one did.) Tag: Mobile edit |
SacredFire37 (talk | contribs) mNo edit summary Tag: Mobile edit |
||
| Line 1: | Line 1: | ||
{{ArticleIcons|ssbu=y}} | {{ArticleIcons|ssbu=y}} | ||
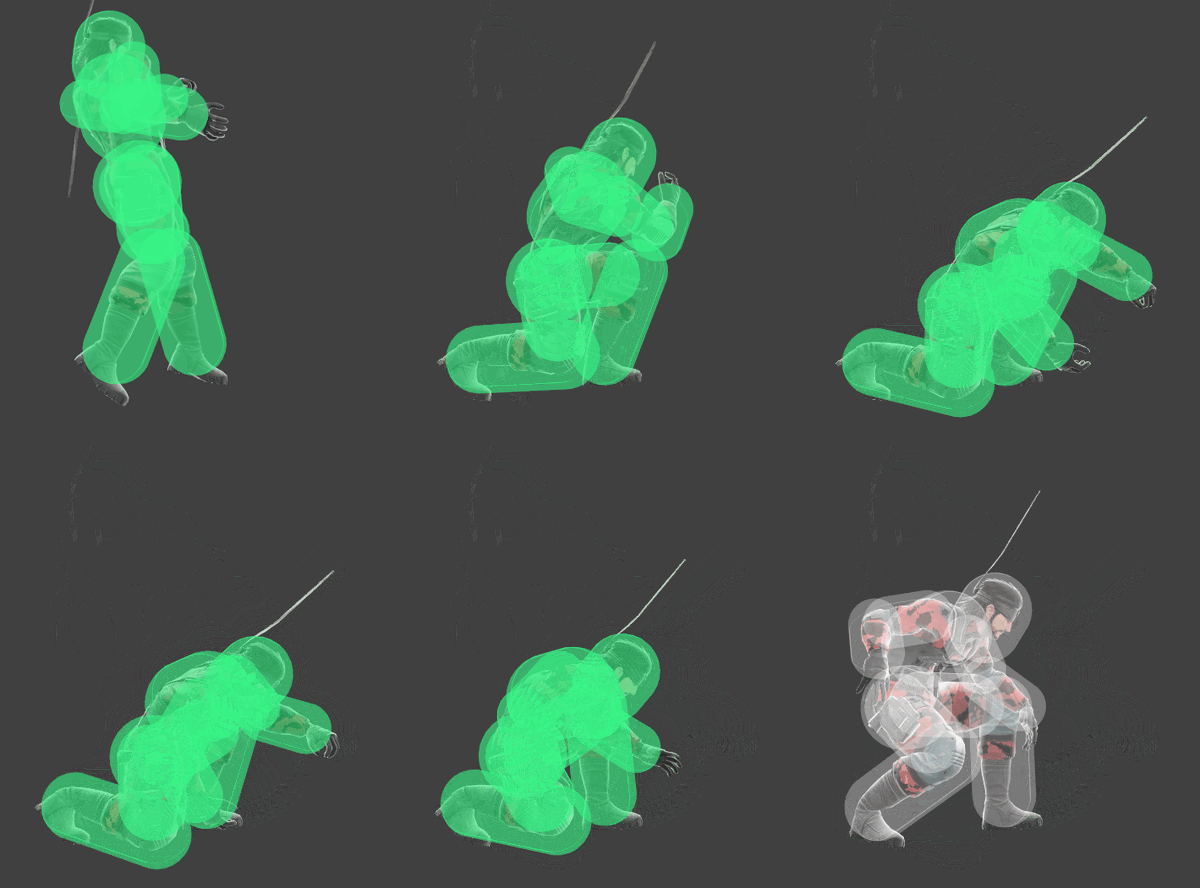
[[File:SnakeDThrowSSBU.gif|thumb|400px|Snake down throw hurtbox visualization.]] | |||
[[File:SnakeDThrowSSBU.gif|400px]] | |||
==Overview== | ==Overview== | ||
[[File:Snake dthrow chart.png|thumb|right|400px|A chart showing which follow ups work on specific | [[File:Snake dthrow chart.png|thumb|right|400px|A chart showing which follow ups work on specific characters at certain percentages after the down throw.]] | ||
==Throw Data== | ==Throw Data== | ||
The amount of frames the opponent is immobilized by the throw before they can use a getup option is equal to <code>3 + p/17</code>, with a minimum of 3 frames and a maximum of 13, where '''p''' is the opponent's percent after damage from the throw (including the [[1v1 multiplier]]). As a result, the immobility duration starts increasing with 17% post-throw damage, and caps at | The amount of frames the opponent is immobilized by the throw before they can use a getup option is equal to <code>3 + p/17</code>, with a minimum of 3 frames and a maximum of 13, where '''p''' is the opponent's percent after damage from the throw (including the [[1v1 multiplier]]). As a result, the immobility duration starts increasing with 17% post-throw damage, and caps at 160%. | ||
{{UltimateThrowTableHeader}} | {{UltimateThrowTableHeader}} | ||
Revision as of 14:37, August 14, 2022
Overview
Throw Data
The amount of frames the opponent is immobilized by the throw before they can use a getup option is equal to 3 + p/17, with a minimum of 3 frames and a maximum of 13, where p is the opponent's percent after damage from the throw (including the 1v1 multiplier). As a result, the immobility duration starts increasing with 17% post-throw damage, and caps at 160%.
| Kind | ID | Damage | Angle | Angle type | BK | KS | FKV | H× | Effect | Type | Sound |
|---|---|---|---|---|---|---|---|---|---|---|---|
| Throw | 0 | 9.0% | Backward | 0 | 0 | 0 | 0.0× | ||||
| Break | 0 | 2.0% | Backward | 60 | 100 | 0 | 0.0× |
Timing
| Invincibility | 1-35 |
|---|---|
| Throw Release | 35 |
| Interruptible | 42 |
| Animation length | 46 |
Lag time |
Vulnerable |
Invincible |
Throw point |
Interruptible |
|


