Free Four All: Difference between revisions
From SmashWiki, the Super Smash Bros. wiki
Jump to navigationJump to search
(Not sure if this is the best way to write this, but I wasn't a fan of the previous writing.) |
(→Available stages: Other stage tables have the game icons) Tag: Mobile edit |
||
| Line 146: | Line 146: | ||
!colspan=10|Stages | !colspan=10|Stages | ||
|-style="vertical-align:bottom" | |-style="vertical-align:bottom" | ||
|colspan=2|[[File:SSBU-3D Land.png|150x90px|link=3D Land]]<br>[[3D Land]]<br>{{symbol|smb|20px}} | |colspan=2|[[File:SSBU-3D Land.png|150x90px|link=3D Land]]<br>{{GameIcon|SSB4-3}} [[3D Land]]<br>{{symbol|smb|20px}} | ||
|colspan=2|[[File:SSBU-Golden Plains.png|150x90px|link=Golden Plains]]<br>[[Golden Plains]]<br>{{symbol|smb|20px}} | |colspan=2|[[File:SSBU-Golden Plains.png|150x90px|link=Golden Plains]]<br>{{GameIcon|SSB4-3}} [[Golden Plains]]<br>{{symbol|smb|20px}} | ||
|colspan=2|[[File:SSBU-Paper Mario.png|150x90px|link=Paper Mario]]<br>[[Paper Mario]]<br>{{symbol|smb|20px}} | |colspan=2|[[File:SSBU-Paper Mario.png|150x90px|link=Paper Mario]]<br>{{GameIcon|SSB4-3}} [[Paper Mario]]<br>{{symbol|smb|20px}} | ||
|colspan=2|[[File:SSBU-Gerudo Valley.png|150x90px|link=Gerudo Valley]]<br>[[Gerudo Valley]]<br>{{symbol|zelda|20px}} | |colspan=2|[[File:SSBU-Gerudo Valley.png|150x90px|link=Gerudo Valley]]<br>{{GameIcon|SSB4-3}} [[Gerudo Valley]]<br>{{symbol|zelda|20px}} | ||
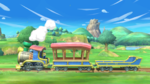
|colspan=2|[[File:SSBU-Spirit Train.png|150x90px|link=Spirit Train]]<br>[[Spirit Train]]<br>{{symbol|zelda|20px}} | |colspan=2|[[File:SSBU-Spirit Train.png|150x90px|link=Spirit Train]]<br>{{GameIcon|SSB4-3}} [[Spirit Train]]<br>{{symbol|zelda|20px}} | ||
|- | |- | ||
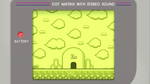
|colspan=2|[[File:SSBU-Dream Land (3DS).png|150x90px|link=Dream Land (SSB4)]]<br>[[ | |colspan=2|[[File:SSBU-Dream Land (3DS).png|150x90px|link=Dream Land (SSB4)]]<br>{{GameIcon|SSB4-3}} [[Dream Land GB]]<br>{{symbol|kirby|20px}} | ||
|colspan=2|[[File:SSBU-Unova Pokémon League.png|150x90px|link=Unova Pokémon League]]<br>[[Unova Pokémon League]]<br>{{symbol|pkmn|20px}} | |colspan=2|[[File:SSBU-Unova Pokémon League.png|150x90px|link=Unova Pokémon League]]<br>{{GameIcon|SSB4-3}} [[Unova Pokémon League]]<br>{{symbol|pkmn|20px}} | ||
|colspan=2|[[File:SSBU-Prism Tower.png|150x90px|link=Prism Tower]]<br>[[Prism Tower]]<br>{{symbol|pkmn|20px}} | |colspan=2|[[File:SSBU-Prism Tower.png|150x90px|link=Prism Tower]]<br>{{GameIcon|SSB4-3}} [[Prism Tower]]<br>{{symbol|pkmn|20px}} | ||
|colspan=2|[[File:SSBU-Mute City (3DS).png|150x90px|link=Mute City (SSB4)]]<br>[[ | |colspan=2|[[File:SSBU-Mute City (3DS).png|150x90px|link=Mute City (SSB4)]]<br>{{GameIcon|SSB4-3}} [[Mute City SNES]]<br>{{symbol|fz|20px}} | ||
|colspan=2|[[File:SSBU-Magicant.png|150x90px|link=Magicant]]<br>[[Magicant]]<br>{{symbol|eb|20px}} | |colspan=2|[[File:SSBU-Magicant.png|150x90px|link=Magicant]]<br>{{GameIcon|SSB4-3}} [[Magicant]]<br>{{symbol|eb|20px}} | ||
|- | |- | ||
|colspan=2|[[File:SSBU-Arena Ferox.png|150x90px|link=Arena Ferox]]<br>[[Arena Ferox]]<br>{{symbol|fe|20px}} | |colspan=2|[[File:SSBU-Arena Ferox.png|150x90px|link=Arena Ferox]]<br>{{GameIcon|SSB4-3}} [[Arena Ferox]]<br>{{symbol|fe|20px}} | ||
|colspan=2|[[File:SSBU-Reset Bomb Forest.png|150x90px|link=Reset Bomb Forest]]<br>[[Reset Bomb Forest]]<br>{{symbol|ki|20px}} | |colspan=2|[[File:SSBU-Reset Bomb Forest.png|150x90px|link=Reset Bomb Forest]]<br>{{GameIcon|SSB4-3}} [[Reset Bomb Forest]]<br>{{symbol|ki|20px}} | ||
|colspan=2|[[File:SSBU-Tortimer Island.png|150x90px|link=Tortimer Island]]<br>[[Tortimer Island]]<br>{{symbol|ac|20px}} | |colspan=2|[[File:SSBU-Tortimer Island.png|150x90px|link=Tortimer Island]]<br>{{GameIcon|SSB4-3}} [[Tortimer Island]]<br>{{symbol|ac|20px}} | ||
|colspan=2|[[File:SSBU-Balloon Fight.png|150x90px|link=Balloon Fight]]<br>[[Balloon Fight]]<br>{{symbol|bf|20px}} | |colspan=2|[[File:SSBU-Balloon Fight.png|150x90px|link=Balloon Fight]]<br>{{GameIcon|SSB4-3}} [[Balloon Fight]]<br>{{symbol|bf|20px}} | ||
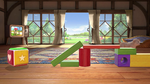
|colspan=2|[[File:SSBU-Living Room.png|150x90px|link=Living Room]]<br>[[Living Room]]<br>{{symbol|nd|20px}} | |colspan=2|[[File:SSBU-Living Room.png|150x90px|link=Living Room]]<br>{{GameIcon|SSB4-3}} [[Living Room]]<br>{{symbol|nd|20px}} | ||
|- | |- | ||
|colspan=2|[[File:SSBU-Find Mii.png|150x90px|link=Find Mii]]<br>[[Find Mii]]<br>{{symbol|streetpass|20px}} | |colspan=2|[[File:SSBU-Find Mii.png|150x90px|link=Find Mii]]<br>{{GameIcon|SSB4-3}} [[Find Mii]]<br>{{symbol|streetpass|20px}} | ||
|colspan=2|[[File:SSBU-Tomodachi Life.png|150x90px|link=Tomodachi Life]]<br>[[Tomodachi Life]]<br>{{symbol|tomodachi|20px}} | |colspan=2|[[File:SSBU-Tomodachi Life.png|150x90px|link=Tomodachi Life]]<br>{{GameIcon|SSB4-3}} [[Tomodachi Life]]<br>{{symbol|tomodachi|20px}} | ||
|colspan=2|[[File:SSBU-PictoChat 2.png|150x90px|link=PictoChat 2]]<br>[[PictoChat 2]]<br>{{symbol|ds|20px}} | |colspan=2|[[File:SSBU-PictoChat 2.png|150x90px|link=PictoChat 2]]<br>{{GameIcon|SSB4-3}} [[PictoChat 2]]<br>{{symbol|ds|20px}} | ||
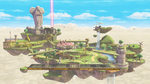
|colspan=2|[[File:SSBU-Mushroom Kingdom U.png|150x90px|link=Mushroom Kingdom U]]<br>[[Mushroom Kingdom U]]<br>{{symbol|smb|20px}} | |colspan=2|[[File:SSBU-Mushroom Kingdom U.png|150x90px|link=Mushroom Kingdom U]]<br>{{GameIcon|SSB4-U}} [[Mushroom Kingdom U]]<br>{{symbol|smb|20px}} | ||
|colspan=2|[[File:SSBU-Mario Galaxy.jpg|150x90px|link=Mario Galaxy]]<br>[[Mario Galaxy]]<br>{{symbol|smb|20px}} | |colspan=2|[[File:SSBU-Mario Galaxy.jpg|150x90px|link=Mario Galaxy]]<br>{{GameIcon|SSB4-U}} [[Mario Galaxy]]<br>{{symbol|smb|20px}} | ||
|- | |- | ||
|colspan=2|[[File:SSBU-Mario Circuit (SSB4).png|150x90px|link=Mario Circuit (SSB4)]]<br>{{SSB4|Mario Circuit}}<br>{{symbol|smb|20px}} | |colspan=2|[[File:SSBU-Mario Circuit (SSB4).png|150x90px|link=Mario Circuit (SSB4)]]<br>{{GameIcon|SSB4-U}} {{SSB4|Mario Circuit}}<br>{{symbol|smb|20px}} | ||
|colspan=2|[[File:SSBU-Skyloft.png|150x90px|link=Skyloft]]<br>[[Skyloft]]<br>{{symbol|zelda|20px}} | |colspan=2|[[File:SSBU-Skyloft.png|150x90px|link=Skyloft]]<br>{{GameIcon|SSB4-U}} [[Skyloft]]<br>{{symbol|zelda|20px}} | ||
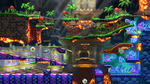
|colspan=2|[[File:SSBU-The Great Cave Offensive.png|150x90px|link=The Great Cave Offensive]]<br>[[The Great Cave Offensive]]<br>{{symbol|kirby|20px}} | |colspan=2|[[File:SSBU-The Great Cave Offensive.png|150x90px|link=The Great Cave Offensive]]<br>{{GameIcon|SSB4-U}} [[The Great Cave Offensive]]<br>{{symbol|kirby|20px}} | ||
|colspan=2|[[File:SSBU-Kalos Pokémon League.png|150x90px|link=Kalos Pokémon League]]<br>[[Kalos Pokémon League]]<br>{{symbol|pkmn|20px}} | |colspan=2|[[File:SSBU-Kalos Pokémon League.png|150x90px|link=Kalos Pokémon League]]<br>{{GameIcon|SSB4-U}} [[Kalos Pokémon League]]<br>{{symbol|pkmn|20px}} | ||
|colspan=2|[[File:SSBU-Coliseum.png|150x90px|link=Coliseum]]<br>[[Coliseum]]<br>{{symbol|fe|20px}} | |colspan=2|[[File:SSBU-Coliseum.png|150x90px|link=Coliseum]]<br>{{GameIcon|SSB4-U}} [[Coliseum]]<br>{{symbol|fe|20px}} | ||
|- | |- | ||
|colspan=2|[[File:SSBU-Flat Zone X.png|150x90px|link=Flat Zone X]]<br>[[Flat Zone X]]<br>{{symbol|gw|20px}} | |colspan=2|[[File:SSBU-Flat Zone X.png|150x90px|link=Flat Zone X]]<br>{{GameIcon|SSB4-U}} [[Flat Zone X]]<br>{{symbol|gw|20px}} | ||
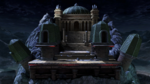
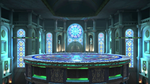
|colspan=2|[[File:SSBU-Palutena's Temple.png|150x90px|link=Palutena's Temple]]<br>[[Palutena's Temple]]<br>{{symbol|ki|20px}} | |colspan=2|[[File:SSBU-Palutena's Temple.png|150x90px|link=Palutena's Temple]]<br>{{GameIcon|SSB4-U}} [[Palutena's Temple]]<br>{{symbol|ki|20px}} | ||
|colspan=2|[[File:SSBU-Gamer.png|150x90px|link=Gamer]]<br>[[Gamer]]<br>{{symbol|wario|20px}} | |colspan=2|[[File:SSBU-Gamer.png|150x90px|link=Gamer]]<br>{{GameIcon|SSB4-U}} [[Gamer]]<br>{{symbol|wario|20px}} | ||
|colspan=2|[[File:SSBU-Garden of Hope.png|150x90px|link=Garden of Hope]]<br>[[Garden of Hope]]<br>{{symbol|pikmin|20px}} | |colspan=2|[[File:SSBU-Garden of Hope.png|150x90px|link=Garden of Hope]]<br>{{GameIcon|SSB4-U}} [[Garden of Hope]]<br>{{symbol|pikmin|20px}} | ||
|colspan=2|[[File:SSBU-Town and City.png|150x90px|link=Town and City]]<br>[[Town and City]]<br>{{symbol|ac|20px}} | |colspan=2|[[File:SSBU-Town and City.png|150x90px|link=Town and City]]<br>{{GameIcon|SSB4-U}} [[Town and City]]<br>{{symbol|ac|20px}} | ||
|- | |- | ||
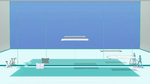
|colspan=2|[[File:SSBU-Wii Fit Studio.png|150x90px|link=Wii Fit Studio]]<br>[[Wii Fit Studio]]<br>{{symbol|wf|20px}} | |colspan=2|[[File:SSBU-Wii Fit Studio.png|150x90px|link=Wii Fit Studio]]<br>{{GameIcon|SSB4-U}} [[Wii Fit Studio]]<br>{{symbol|wf|20px}} | ||
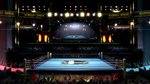
|colspan=2|[[File:SSBU-Boxing Ring.png|150x90px|link=Boxing Ring]]<br>[[Boxing Ring]]<br>{{symbol|po|20px}} | |colspan=2|[[File:SSBU-Boxing Ring.png|150x90px|link=Boxing Ring]]<br>{{GameIcon|SSB4}} [[Boxing Ring]]<br>{{symbol|po|20px}} | ||
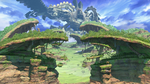
|colspan=2|[[File:SSBU-Gaur Plain.png|150x90px|link=Gaur Plain]]<br>[[Gaur Plain]]<br>{{symbol|xb|20px}} | |colspan=2|[[File:SSBU-Gaur Plain.png|150x90px|link=Gaur Plain]]<br>{{GameIcon|SSB4}} [[Gaur Plain]]<br>{{symbol|xb|20px}} | ||
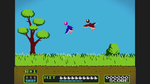
|colspan=2|[[File:SSBU-Duck Hunt.png|150x90px|link=Duck Hunt (stage)]]<br> | |colspan=2|[[File:SSBU-Duck Hunt.png|150x90px|link=Duck Hunt (stage)]]<br>{{GameIcon|SSB4}} {{b|Duck Hunt|stage}}<br>{{symbol|dh|20px}} | ||
|colspan=2|[[File:SSBU-Wrecking Crew.png|150x90px|link=Wrecking Crew]]<br>[[Wrecking Crew]]<br>{{symbol|wreckingcrew|20px}} | |colspan=2|[[File:SSBU-Wrecking Crew.png|150x90px|link=Wrecking Crew]]<br>{{GameIcon|SSB4-U}} [[Wrecking Crew]]<br>{{symbol|wreckingcrew|20px}} | ||
|- | |- | ||
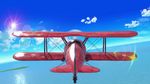
|colspan=2|[[File:SSBU-Pilotwings.png|150x90px|link=Pilotwings]]<br>[[Pilotwings]]<br>{{symbol|pw|20px}} | |colspan=2|[[File:SSBU-Pilotwings.png|150x90px|link=Pilotwings]]<br>{{GameIcon|SSB4-U}} [[Pilotwings]]<br>{{symbol|pw|20px}} | ||
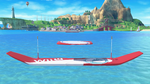
|colspan=2|[[File:SSBU-Wuhu Island.png|150x90px|link=Wuhu Island]]<br>[[Wuhu Island]]<br>{{symbol|wuhu|20px}} | |colspan=2|[[File:SSBU-Wuhu Island.png|150x90px|link=Wuhu Island]]<br>{{GameIcon|SSB4-U}} [[Wuhu Island]]<br>{{symbol|wuhu|20px}} | ||
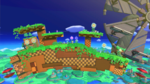
|colspan=2|[[File:SSBU-Windy Hill Zone.png|150x90px|link=Windy Hill Zone]]<br>[[Windy Hill Zone]]<br>{{symbol|sonic|20px}} | |colspan=2|[[File:SSBU-Windy Hill Zone.png|150x90px|link=Windy Hill Zone]]<br>{{GameIcon|SSB4-U}} [[Windy Hill Zone]]<br>{{symbol|sonic|20px}} | ||
|colspan=2|[[File:SSBU-Wily Castle.png|150x90px|link=Wily Castle]]<br>[[Wily Castle]]<br>{{symbol|mm|20px}} | |colspan=2|[[File:SSBU-Wily Castle.png|150x90px|link=Wily Castle]]<br>{{GameIcon|SSB4}} [[Wily Castle]]<br>{{symbol|mm|20px}} | ||
|colspan=2|[[File:SSBU-Pac-Land.png|150x90px|link=Pac-Land]]<br>[[Pac-Land]]<br>{{symbol|pm|20px}} | |colspan=2|[[File:SSBU-Pac-Land.png|150x90px|link=Pac-Land]]<br>{{GameIcon|SSB4-U}} [[Pac-Land]]<br>{{symbol|pm|20px}} | ||
|- | |- | ||
|colspan=1.5| | |colspan=1.5| | ||
|colspan=2|[[File:SSBU-Super Mario Maker.png|150x90px|link=Super Mario Maker]]<br>[[Super Mario Maker]]<br>{{symbol|smb|20px}} | |colspan=2|[[File:SSBU-Super Mario Maker.png|150x90px|link=Super Mario Maker]]<br>{{GameIcon|SSB4}} [[Super Mario Maker]]<br>{{symbol|smb|20px}} | ||
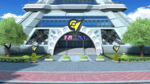
|colspan=2|[[File:SSBU-Suzaku Castle.png|150x90px|link=Suzaku Castle]]<br>[[Suzaku Castle]]<br>{{symbol|sf|20px}} | |colspan=2|[[File:SSBU-Suzaku Castle.png|150x90px|link=Suzaku Castle]]<br>{{GameIcon|SSB4}} [[Suzaku Castle]]<br>{{symbol|sf|20px}} | ||
|colspan=2|[[File:SSBU-Midgar.jpg|150x90px|link=Midgar]]<br>[[Midgar]]<br>{{symbol|ff|20px}} | |colspan=2|[[File:SSBU-Midgar.jpg|150x90px|link=Midgar]]<br>{{GameIcon|SSB4}} [[Midgar]]<br>{{symbol|ff|20px}} | ||
|colspan=2|[[File:SSBU-Umbra Clock Tower.png|150x90px|link=Umbra Clock Tower]]<br>[[Umbra Clock Tower]]<br>{{symbol|bayonetta|20px}} | |colspan=2|[[File:SSBU-Umbra Clock Tower.png|150x90px|link=Umbra Clock Tower]]<br>{{GameIcon|SSB4}} [[Umbra Clock Tower]]<br>{{symbol|bayonetta|20px}} | ||
|colspan=1.5| | |colspan=1.5| | ||
|} | |} | ||
Revision as of 00:07, April 28, 2022

Free Four All (我ら、スマブラforから参戦!, We are participants from Smash 4!) was an Event Tourney themed after Super Smash Bros. 4. It ran from from 6 a.m. on July 24, 2020 to 6 a.m. on July 27, 2020 (UTC). During the event, only the characters and stages that debuted in Smash 4, as well as nearly every item from Smash 4 that appears in Ultimate, could be used.
Description
- This tourney is limited to fighters and stages originating from Super Smash Bros. for Nintendo 3DS / Wii U! Items that appeared in that game are also available!
- The further you advance, the better the spirit you'll win![1]
Rules
- Format: Smash
- Rules: Time
- Time Limit: 2:30
- FS Meter: On
- Items: Medium
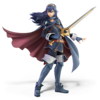
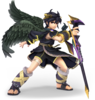
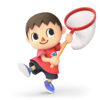
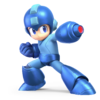
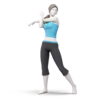
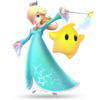
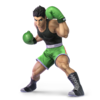
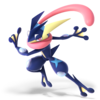
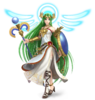
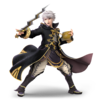
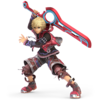
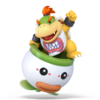
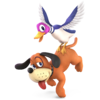
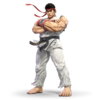
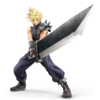
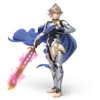
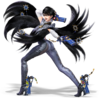
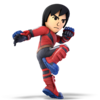
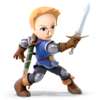
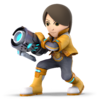
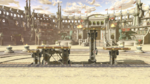
Available fighters

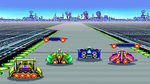
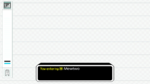
The character selection screen for Free Four All.

Available items
- Smash Ball
- Assist Trophy
- Poké Ball
- Master Ball
- Container
- Blast Box
- Sandbag
- Food
- Maxim Tomato
- Heart Container
- Fairy Bottle
- Super Mushroom
- Poison Mushroom
- Super Star
- Warp Star
- Metal Box
- Bunny Hood
- Superspicy Curry
- Timer
- Lightning
- Bullet Bill
- Beam Sword
- Star Rod
- Home-Run Bat
- Hammer
- Golden Hammer
- Lip's Stick
- Fire Bar
- Ore Club
- Ray Gun
- Fire Flower
- Super Scope
- Gust Bellows
- Steel Diver
- Drill
- Bob-omb
- Motion-Sensor Bomb
- Green Shell
- Bumper
- Freezie
- Mr. Saturn
- Gooey Bomb
- Smart Bomb
- Deku Nut
- Smoke Ball
- Pitfall
- Hothead
- Banana Peel
- Unira
- Soccer Ball
- Bombchu
- X Bomb
- Hocotate Bomb
- POW Block
- Spiny Shell
- Boomerang
- Beetle
- Cucco
- Beehive
- Killer Eye
- Boss Galaga
- Franklin Badge
- Screw Attack
- Back Shield
- Super Leaf
- Rocket Belt
- Special Flag
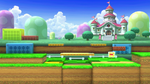
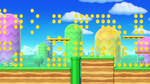
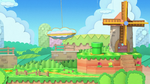
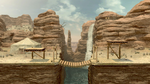
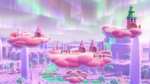
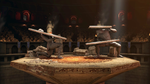
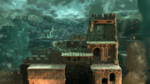
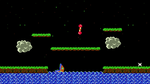
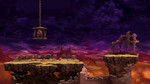
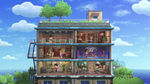
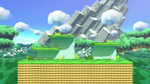
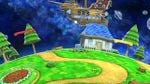
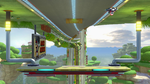
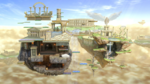
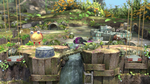
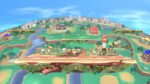
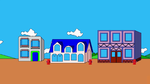
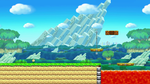
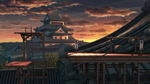
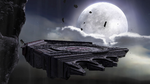
Available stages


Names in other languages
| Language | Name | Meaning |
|---|---|---|
| 我ら、スマブラforから参戦! | We're from Smash Bros. for! | |
| Free Four All | — | |
| Au quatrième Smash | The fourth Smash | |
| Die 4. Smash-Generation | The 4th generation of Smash | |
| 4.ª generación de Smash | 4th generation of Smash | |
| Evviva il quarto Smash! | Hooray for the fourth Smash! | |
| 我等来自for参战! | We're from Smash Bros. for! | |
| 我等自for參戰! | We're from Smash Bros. for! | |
| for로부터의 출전! | We're from Smash Bros. for! | |
| Vierde generatie Smash | Fourth generation of Smash | |
| Четвертaя в серии! | Fourth in the series! |
Trivia
- The banner is based on the cover art of Super Smash Bros. for Wii U, though with only the Smash 4 newcomers present. It also incorporates the thematic colors of both versions of the game: red for the 3DS version and blue for the Wii U version.
- The Mii Fighters are the only Smash 4 newcomers not included on the banner.
- Robin does not use his default costume in the banner. Instead, female Robin takes his place.
- The Spring, Team Healer, the Dragoon Parts, and Daybreak are the only items in Smash 4 that did not appear in the tournament; in the former two's case, it is due to the fact that they are not present in Ultimate.
- Despite the fact that no fighters or stages from Smash 64, Melee, or Brawl are available for the event, items from the aforementioned games are available for the event. A similar situation also happens in A Tribute to Melee and Brawl Veterans Represent!.
- Due to Alph being an alternate costume of Olimar, he is the only Smash 4 newcomer not to be present in the event, due to the latter debuting in Brawl.
- Prior to this event, Super Smash Bros. for Nintendo 3DS and Super Smash Bros. for Wii U were officially treated by Nintendo as separate games. The public treated both games as different versions of the same game, referring to them collectively as "Smash 4". This event marks the first time Nintendo themselves shared this sentiment and used the number four in reference to these games.
References