Master Core: Difference between revisions
(→Sabres) |
m (→Artwork: Master Giant's portrait is also used in the 3DS version, just pointing that out.) |
||
| (412 intermediate revisions by more than 100 users not shown) | |||
| Line 1: | Line 1: | ||
{{ArticleIcons|ssb4 | {{ArticleIcons|ssb4=y|ssbu=y}} | ||
{{image|Missing a few images of forms from each version, needs an image showing the location of the third weak point; also should show the unique defeat animations of each wave. It should also show the shadow enemies.}} | |||
{{image| | {{Boss | ||
{{Boss | |||
| name = Master Core | | name = Master Core | ||
| image = [[File: | | image = [[File:MasterCore render.png|250px]] | ||
| caption = [[File:SmashBrosSymbol. | | caption = [[File:SmashBrosSymbol.svg|50px|class=invert-dark]] | ||
Official artwork of Master Core in ''Super Smash Bros. 4'' | Official artwork of Master Core in ''Super Smash Bros. 4'' | ||
| boss = ''[[ | | boss = ''[[SSB4]]'' | ||
| universe = | | universe = {{uv|Super Smash Bros.}} | ||
| location = {{SSB4|Final Destination}} | |||
}} | }} | ||
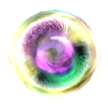
'''Master Core''' is | '''Master Core''' ({{ja|マスターコア|Masutā Koa}} ''Master Core'') is the secret final [[boss]] of ''[[Super Smash Bros. 4]]''. It appears at the end of {{SSB4|Classic Mode}}, fought after weakening {{SSB4|Master Hand}} and {{SSB4|Crazy Hand}} on higher difficulties. It erupts from Master Hand shrouded in a mass of black particles known as the "Swarm" that take on various forms depending on the [[difficulty]] level. Defeating its forms reveals the Core itself, resembling a large, prismatic cell with a purple vortex for a nucleus, surrounded by the colors of its previous forms. In battle, its surface fades into the Smash Bros. cross logo every ten seconds. | ||
==Battle== | |||
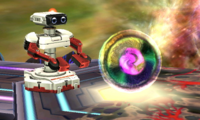
[[File:SSB3DS Final Destination.png|left|thumb|200px|{{SSB4|Master Hand}} transforming into Master Core in the 3DS version.]] | |||
Master Core can only be battled if the [[Intensity]] is set to 5.1 or higher. On the 3DS version, Master Core only appears if the player chooses to take the black path to fight both Master Hand and Crazy Hand at the end of Classic Mode; at Intensity 8.0 and above, there is no option except the black path. On the Wii U version, players will always encounter Master Core as long as they meet the Intensity requirement. | |||
The battle between Master and Crazy Hand begins as usual. The battle deviates once the Hands collectively lose approximately 100 [[HP]] (150 HP in co-op mode), leading to Crazy Hand disintegrating into dark flames while Master Hand flails about and rips open to unleash the Master Core entity. The music changes to Master Core's theme and the background changes to a swirly multi-colored warp (or a solar flare-like background in the 3DS version). Master Core has HP like other bosses, but it is never shown to the player; in the 3DS version, Master Core's character portrait on the bottom screen is concealed by a cloud of Swarm particles, while in the Wii U version, the HP meter is simply not displayed to the player at all. It is somewhat possible to tell how much remaining health each form has, as every 50 HP of damage dealt to each of the first three forms will cause a hole to burst open in its body, while Master Shadow will gradually shrink as it is damaged. | |||
{{clrl}} | |||
==Forms== | ==Forms== | ||
Master Core begins the fight in a | Master Core begins the fight in a certain form based on the difficulty setting. As it takes damage, black Swarm particles will spew out from the area it is last hit. Once a form is defeated, it progresses to the next one. As the difficulty setting increases, the forms will attack faster. | ||
===Master Giant=== | |||
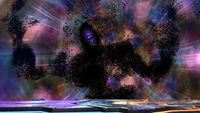
[[File:Master Giant U.png|thumb|200px|Master Giant in the Wii U version.]] | |||
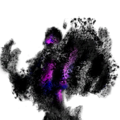
Master Giant appears as Master Core's starting form at Intensity 7.5 and higher on the 3DS version, and Intensity 7.0 and higher on the Wii U version. It appears to be a large humanoid creature. | |||
=== | ====Attacks==== | ||
Master Giant has the following attacks: | |||
* Spawns two additional arms with glowing hands. These arms will sweep the stage, then merge back into its chest. If the player is grabbed by a glowing hand, they will be consumed by the 'head', taking damage and ending with a downwards launch, but with little [[knockback]]. | |||
* Spawns two additional arms with glowing hands. These arms will sweep the stage, then merge back into its chest. If the player is grabbed by a glowing hand, | * Moves its arm quickly across the screen horizontally. The movement itself does nothing, but a split second later a horizontal slash will appear across the stage, dealing damage. The slash can [[Unblockable attack|penetrate through shields]]. | ||
* | * Creates six electric orbs that fly and wander around the top part of the screen. Master Giant will then pick up the entire stage and lift it to the level of the orbs, before dropping it back down. This attack can be avoided by jumping off the stage, then jumping back on once it is dropped back down. If the player has just been KO'd by one of Master Core's previous attacks and is in the middle of respawning, the act of Master Core lifting the stage can cause the player to be trapped underneath it and be KO'd a second time. | ||
* Creates | * Master Giant's head will split open, creating a vacuum effect around it. During this move, large electric orbs will travel across the stage horizontally. If the player is caught by the head or an electric orb, they will be 'swallowed', taking damage then being launched downward in the same manner as the 'arms' attack. The electric orbs can be avoided by perfect shielding or dodging/rolling, though it's the safest to stay away from them until Master Giant ends the attack. | ||
* Master | * Master Giant's head will transform, then attempt to headbutt the player. If this attack lands, the player will be [[buried]]. After the headbutt, 4 orbs are created in random locations, detonating after a delay and creating a cross-shaped explosion in the shape of the Smash logo. The explosions can deal huge damage if more than one hits. | ||
* Master | * Master Giant will scream, creating a massive shockwave that [[push]]es players away from the center of the stage, potentially knocking them off. Players are pushed much farther if they are in the air. The player takes damage if very close but won't be pushed as far toward the edge of the stage. Ignores [[counterattack]]s. | ||
* Master | |||
=== | After defeating the Master Giant form, Master Core will transform into Master Beast. | ||
The | |||
* Jumps | ===Master Beast=== | ||
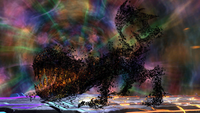
* Leaps high off the screen, then comes back down with a body slam. It will land on either | [[File:Master Beast Wii U.png|thumb|200px|Master Beast form in the Wii U version.]] | ||
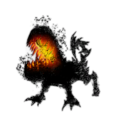
The Master Beast form appears first on Intensity 6.0 to 7.4 in the 3DS version and Intensity 6.0 to 6.9 in the Wii U version, or when the Master Giant form is defeated. It appears to be a large quadrupedal scorpion-like creature. | |||
====Attacks==== | |||
Master Beast has the following attacks: | |||
* Jumps into the background area, then dives back with a biting attack at the player, similarly to Master Hand's background punch and plane attacks. Like those attacks, it can be avoided by jumping, though the animation is much quicker so the player has less reaction time. This move may be Master Beast's strongest attack in terms of KOing power, and it also deals extreme shield damage. | |||
* Leaps high off the screen, then comes back down with a body slam. It will land on either edge of the stage, causing the whole stage to briefly tilt downwards sharply in that direction. This attack is easy to avoid by staying in the center of the stage, but if the player has been hit by a previous attack and is [[recover]]ing on the opposite side at the time, the sudden tilting of the stage can cause the player to miss [[ledge]]s. It can also spike the player downwards if they get hit by it falling while in the air. | |||
* Spawns spikes on its back, then a trail of shadows will crawl across the ground. When its horizontal position matches the player's or if it reaches the corner, spikes will spawn at that location, dealing damage. | * Spawns spikes on its back, then a trail of shadows will crawl across the ground. When its horizontal position matches the player's or if it reaches the corner, spikes will spawn at that location, dealing damage. | ||
* Emanates lightning around itself. There is a brief start-up time, which shows it being struck by lightning. | * Emanates lightning around itself. There is a brief start-up time, which shows it shrinking and being struck by lightning, similar to {{SSB4|Pikachu}}'s down special. | ||
After defeating the Master Beast form, Master Core will transform into Master Edges. | |||
===Master Edges=== | |||
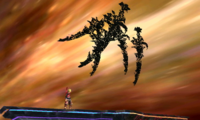
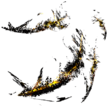
[[File:Master Core Sabres.png|thumb|200px|Master Edges in the 3DS version.]] | |||
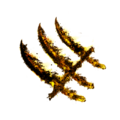
In PAL regions, this form is known as '''Master Sabres'''. This form can be encountered first on Intensity 5.1 to 5.9, or when the Master Beast form is defeated. The swirling background on the Wii U version turns yellow at this point. It appears as a group of five swords, one larger than the others. Any of the swords can be damaged equivalently. | |||
====Attacks==== | |||
Master Edges has the following attacks: | |||
* Emits a brief flash of light, then performs a single large simultaneous slash with all 5 blades. Hits at a [[semi-spike]] angle that is dangerous to fighters with weak horizontal recoveries, but also deals enough [[knockback]] to KO if the player has more than 70%-80% damage. | |||
* Launches four small spinning projectiles, two at a time, which boomerang back to the swords. These projectiles hit once and disappear, and can be absorbed with moves such as [[PSI Magnet]] and [[Oil Panic]], or reflected with moves such as [[Cape]] and [[Reflector]]. | |||
** An alternate attack causes the swords to launch two larger projectiles one at a time instead. Despite being larger, they can still be reflected and absorbed by normal means. They bypass through shields instead of disappearing on block (but can still be [[Perfect shield|perfect-shielded]] with the right timing). | |||
* The swords space themselves to surround the whole stage. The four smaller swords will slash across the stage in a set pattern, then after a brief pause, the large sword will track the player and slam downward. The large sword deals significant knockback. Can be dodged by sidestepping or airdodging with the timing of each swing, but getting hit will likely (though it can still be airdodged if timed correctly) trap the player in the rest of the combo, including the final hit. | |||
* All five swords 'ready' themselves and briefly follow the player before unleashing a flurry of slashes, ending with a very wide slash that has a large vertical radius. The initial flurry deals little damage, but serves to trap the player so that they cannot avoid the last slash, which is a semi-spike. Can be avoided by quickly moving behind the swords just before it initiates the attack. A full shield can block the entire attack, but the shield will be broken on the final slash; this can be avoided at the last second by dodging out of the shield. | |||
After defeating the Master Edges form, Master Core will transform into Master Shadow. | |||
===Master Shadow=== | |||
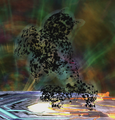
[[File:Master Shadow 3DS.jpg|thumb|200px|Master Shadow in the form of {{SSB4|Little Mac}}.]] | |||
In this form, Master Core appears as a copy of the player's character, including any [[equipment]], [[Character customization|custom movesets]], or [[alternate costume]] the player's character might have. If the player is using an alternate form of a character, such as one of the Koopalings or the male {{SSB4|Wii Fit Trainer}}, these will be copied as well. At the start of the fight, Master Shadow is noticeably larger than the player's character, but will gradually shrink as its health drops, as well as the black becoming more transparent, somewhat revealing the true colors underneath. Unlike the previous forms, there is no difficulty level where this is the first form encountered, and it can be defeated by KOing it like any normal character as well as by depleting its HP like the other Master Core forms. In the Wii U version, if Classic Mode is played on Co-Op mode, Master Shadow will only copy the first player and has a blue outline. | |||
Master Shadow's AI varies, but it normally is passive enough to allow for multiple blows on it; there are times however that it can be quite unpredictable and may instantly land killing blows as a [[punish]], especially if the player has sustained high damage from the prior forms and if they make a reckless move. | |||
After defeating the Master Shadow form, the music will abruptly cut out. Master Core will then either transform a final time into Master Fortress (only on the Wii U version, at Intensity 8.0 to 9.0, and only on single-player mode) or finally reveal itself (on the 3DS version, or on the Wii U version if the prior conditions are not met). | |||
===Master Fortress=== | |||
[[File:Master Fortress 2.png|thumb|200px|Entering Master Fortress's first wave; a few enemies and the first weak point are visible on the right.]] | |||
The Master Fortress form is exclusive to the Wii U version of the game, and only appears on Intensity 8.0 to 9.0 on single-player mode after Master Shadow's defeat. When this form appears, a different background music will play, the [[Match timer|time limit]] will be automatically extended by three minutes, and a special [[Heart Container]] will appear for the player to use, which resets the player's damage to 0% like in [[All-Star Mode]]. If the Heart Container is not used, it remains on the stage and can be picked up at any time by exiting the Fortress. | |||
Master Fortress is effectively an entire stage resembling a human body that must be traversed, and the player must search for and destroy a total of four weak points to proceed. These weak points resemble hearts, and beat audibly when the player is close. When Master Fortress first appears, a barrier will appear and deal [[set knockback]] (albeit no damage) to prevent the player from entering the fortress until it finishes forming. Once inside the fortress, shadowy versions of enemies such as [[Stalfos]], [[Geemer]]s, [[Plasma Wisp]]s, and [[Lethinium]]s will appear and attack the player. | |||
====Waves====<!-- official term from the My Music soundtrack --> | |||
Master Fortress appears in two waves, with the first wave containing the first two weak points and the second wave containing the last two. Only one weak point is accessible at the start of each wave; destroying it opens a path through the Fortress to the wave's second weak point. The second weak point in each wave has the ability to defend itself by summoning several enemies nearby the player when attacked. At the end of each wave, the background music will cut out. | |||
The first weak point is reachable by a straightforward path with few enemies and no traps. All future weak points feature the presence of the Fortress's numerous [[Danger Zone]]s, which take the form of either subtle yellow outlines on the walls or large pools of acid. If the player touches a Danger Zone when their [[damage]] is 100% or greater, they will be [[instant KO|instantly KO'd]]; if their damage is less than 100%, they will instead take 25% damage with considerable [[knockback]]. At the same time, the enemies spawned in the Fortress can be knocked into the Danger Zones to defeat them more easily. Thanks to the Fortress's walls, these Danger Zones are effectively the only way to be KO'd while inside the Fortress (thus there is effectively no way to be KO'd while going for the first weak point, and no reason to pick up the special Heart Container until after then). | |||
Upon destroying the second weak point, defeating the first wave, the screen will fade and the player will be ejected from the Fortress (giving them an opportunity to use the Heart Container if they have left it behind earlier). | |||
Entering the Fortress again will face the player with the second wave; the background music will also change once more. The second wave modifies the stage layout to include new paths as well as more enemies and Danger Zones. As before, the third weak point must be destroyed before a path opens to the final weak point. This final weak point is located in a cramped area virtually surrounded by Danger Zones, as well as containing moving platforms which can disorient the player. The limited space enables the enemies summoned by the final weak point to quickly knock the player into the multiple nearby Danger Zones to inflict very heavy damage. Destroying the fourth and final weak point will defeat Master Fortress. | |||
After defeating the Master Fortress form, Master Core will finally reveal itself. | |||
===Master Core=== | |||
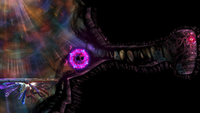
[[File:Master Core Source.png|thumb|200px|Master Core in the 3DS version.]] | |||
After all previous forms have been defeated, the black Swarm particles will completely cover the screen briefly, before abruptly dispersing to reveal the Core itself in the center of the stage. At this point, the background music goes silent and the [[Match timer|timer]] will stop. In the 3DS version, the black particles covering Master Core's HP on the bottom screen will also disperse, revealing a new character portrait for the boss and its damage percentage starting at 0%. On the Wii U version, the swirling background will turn blue. | |||
The player has approximately 45 seconds to KO it. The Core has no attacks and will gradually fade from its bright prismatic color to a deep red as it accumulates damage. If the Core does not get sent beyond the [[blast line]] with each hit, it will fly back to the center of the stage (or teleport back if it gets stuck under the ledge). Its launch distance depends solely on how much damage it has taken, meaning attacks that usually have a fixed knockback will work as regular attacks against it. | |||
If time runs out, the Core will shake violently and rise above the stage, then flash [[Tabuu]]'s [[Off Waves]] symbol before charging up and releasing five waves. Being hit by any wave will inflict 50% damage and [[one-hit KO]] the player at 8.0 difficulty and higher. The core can still be attacked during this time, making it momentarily stop releasing waves. Like Tabuu's, these waves can be avoided with precisely timed [[rolling]] or [[sidestep]] dodges. Afterwards, Master Core will self-destruct with a one-hit KO explosion dealing 50% damage. However, the player must be standing close to get hit, and it can never defeat the player as they have already won by the time this happens, marking the first times a boss's attacks kill the boss itself. | |||
==Trophy== | |||
{{Trophy | |||
|name=Master Core | |||
|image-3ds=MasterCoreTrophy3DS.png | |||
|image-wiiu=MasterCoreTrophyWiiU.png | |||
|desc-ntsc=This sinister being will appear from Master Hand. A bunch of black objects, called "Swarm," will gather and mimic a variety of shapes, changing its attack pattern with each new form. After taking enough damage, it will reveal even more forms. Defeat the Swarm's forms to reveal its true core. | |||
|desc-pal=This fearsome being is what Master Hand becomes when he transforms. The black mass around it, known as the "swarm", mimics the shape of beasts, blades and more, and changes its attack pattern with each transformation. At higher intensity levels, it'll take on even more forms. Defeat the swarm to reveal the true core. | |||
|gamelist={{Trophy games|console1=WiiU|game1=Super Smash Bros. for Wii U}} | |||
}} | |||
{{clrl}} | |||
==Spirits== | |||
Master Core appears in ''[[Super Smash Bros. Ultimate]]'' as a Legend-class [[primary spirit]], while Master Giant, Master Beast, and Master Edges appear as Ace-class primary spirits. | |||
In [[Adventure Mode: World of Light]], Master Giant is presumably one of the countless spirits captured by [[Galeem]] during his takeover of the universe. After Galeem's defeat, [[Dharkon]] takes control of Galeem's spirits, including Master Giant. Master Giant's spirit is located in the [[Mysterious Dimension]] in [[The Dark Realm]]. Prior to the battle, the player is quizzed on which spirit was the mastermind behind the Subspace Army. | |||
The spirit battles with Master Giant, Master Beast, and Master Edges are each fought on the {{SSBU|Final Destination}} stage. | |||
Master Giant uses a [[Giant]] {{SSBU|Donkey Kong}} puppet fighter. During the battle, Donkey Kong is equipped with super armor, referencing how Master Giant doesn't flinch during its boss battle, while [[Bob-omb]]s will rain from the sky, referencing Master Giant's exploding orb attack. | |||
Master Beast uses a Giant {{SSBU|Ridley}} puppet fighter. During the battle, the [[Chain Chomp]] appears as a hostile [[Assist Trophy]], referencing Master Beast's biting attacks, while Ridley deals damage while falling, referencing Master Beast's stomping attack. | |||
=== | Master Edges uses an army of {{SSBU|Cloud}} puppet fighters. During the battle, the puppet fighters have increased move speed and reduced weight, referencing Master Edge's ability to float during its boss battle. | ||
Master Core's spirit can only be summoned using the cores of Master Edges, Master Beast, and Master Giant, referencing Master Core's amorphous capabilities. | |||
{|class="wikitable sortable" | |||
! No. !! Image !! Name !! Type !! Class !! Slots | |||
! Base [[File:Equipment Icon Power Badge.png|20px|Power]] | |||
! Max [[File:Equipment Icon Power Badge.png|20px|Power]] | |||
! Base [[File:Equipment Icon Brawn Badge.png|20px|Attack]] | |||
! Max [[File:Equipment Icon Brawn Badge.png|20px|Attack]] | |||
! Base [[File:Equipment Icon Protection Badge.png|20px|Defense]] | |||
! Max [[File:Equipment Icon Protection Badge.png|20px|Defense]] | |||
! Ability !! Series | |||
|- | |||
| 1,101 || {{SpiritTableName|Master Giant}} || {{SpiritType|Grab}} || ★★★ || 2 || 3431 || 10296 || 2065 || 6197 || 1112 || 3337 || Speed ↓ || ''Super Smash Bros.'' Series | |||
|- | |||
| 1,102 || {{SpiritTableName|Master Beast}} || {{SpiritType|Shield}} || ★★★ || 1 || 3159 || 9525 || 1938 || 5841 || 1043 || 3145 || Weight ↑ || ''Super Smash Bros.'' Series | |||
|- | |||
| 1,103 || {{SpiritTableName|Master Edges}} || {{SpiritType|Attack}} || ★★★ || 1 || 3274 || 9874 || 1846 || 5566 || 1131 || 3411 || Sword Attack ↑ || ''Super Smash Bros.'' Series | |||
|- | |||
| 1,104 || {{SpiritTableName|Master Core}} || {{SpiritType|Neutral}} || ★★★★ || 3 || 4055 || 10140 || 2162 || 5405 || 1664 || 4161 || Initial Damage 30% || ''Super Smash Bros.'' Series | |||
|} | |||
==Music== | |||
In both versions of ''Smash 4'', the track "Master Core" plays directly after Master Hand's transformation, and it can also potentially play on {{SSB4|Final Destination}} in the Wii U version. Two extra tracks, "Master Fortress: First Wave" and "Master Fortress: Second Wave", also play during the first half and second half, respectively, of the Master Fortress transformation. As the Master Fortress transformation does not appear in the 3DS version, these two tracks are only available in the Wii U version, and they can also play on Final Destination when they are unlocked. | |||
Like most original tracks in ''Smash 4'', "Master Core" features several melodies and reprises from ''Smash 4''{{'}}s official theme. Of note is that periodically in the track, the music cuts out and is instead replaced by a series of beeps that are in {{s|wikipedia|Morse code}}. When decoded, the beeps spell out the phrase "MASTER CORE". | |||
Of note is that Master Fortress's fourth chamber interacts with the "Master Core" track. When players approach the fourth and final weak point, a faint heartbeat can be heard, beating in sync with the track. | |||
{{clrl}} | |||
==Gallery== | ==Gallery== | ||
<gallery> | <gallery> | ||
Master Giant 3DS.png|Master Giant in the 3DS version. | |||
Master | Master Giant low hp 3DS.jpeg|Master Giant with low HP. Notice the missing neck and the Swarm evacuating from its head. | ||
Master | Master Beast 3DS.png|Master Beast in the 3DS version. | ||
Master Beast Stage Tilt.JPG|Master Beast tilting the stage while slamming down. | |||
Mii VS | Master Beast low HP.jpeg|Master Beast with low HP. Notice the missing parts on the head and the Swarm evacuating from the top of its body. | ||
Master | Master Edges with low HP.jpeg|Master Edges with low HP. Notice each sword getting thinner and the Swarm evacuating from them. | ||
Master Core Defeated.png|Master Core being defeated | Mii VS Master Shadow.JPG|Master Shadow in the form of a {{SSB4|Mii Gunner}}. Note how Master Core copies the Mii itself. | ||
Master core last attack.JPG| | Master Fortress 1.png|Master Fortress's first wave after the first weak point has been destroyed; a new path has appeared (containing two visible Danger Zones) that leads downward to the second weak point | ||
Dark Plasma Wisp.jpg|A shadow [[Plasma Wisp]] | |||
Geemer Master Fortress.jpg|Two shadow [[Geemer|Geemers]] | |||
DarkStalfos.jpg|Shadow Stalfos | |||
LethiniumMasterFortress.png|A shadow Lethinium | |||
Master Fortress 4.png|The second weak point in Master Fortress's first wave; note the presence of more enemies and more Danger Zones | |||
Master Fortress 5.png|Part of Master Fortress's second wave; note the similarities and differences from the previous image and the new path to the right | |||
Master Fortress 3.png|The final weak point, surrounded by numerous enemies and Danger Zones | |||
Master Core Defeated.png|Master Core being defeated in the 3DS version. | |||
Master core last attack.JPG|Master Core's final attack if the player fails to finish it, on the 3DS version. | |||
</gallery> | </gallery> | ||
==Artwork== | |||
<gallery> | |||
Master Giant artwork (Wii U).png|Artwork of Master Giant found on the Wii U disc's data. This portrait is used in the 3DS version. | |||
Master Beast artwork (Wii U).png|Artwork of Master Beast found on the Wii U disc's data. This portrait is used in the 3DS version. | |||
Master Edges artwork (Wii U).png|Artwork of Master Edges found on the Wii U disc's data. | |||
Master Shadow artwork (Wii U).png|Artwork of Master Shadow found on the Wii U disc's data. This portrait is used in the 3DS version. | |||
Master Fortress artwork (Wii U).png|Artwork of Master Fortress found on the Wii U disc's data. | |||
Master Core artwork (Wii U).png|Artwork of Master Core found on the Wii U disc's data. This portrait is used in the 3DS version. | |||
</gallery> | |||
==Names in other languages== | |||
===Master Giant=== | |||
{{langtable | |||
|ja={{ja|マスタージャイアント|Masutā Jaianto}}, ''Master Giant'' | |||
|en=Master Giant | |||
|fr=Colosse suprême | |||
|es=Coloso Supremo | |||
|de=Master Giant | |||
|it=Master Colosso | |||
|nl=Master Giant | |||
|ru={{rollover|Главный гигант|Glavny gigant|?}} | |||
|ko={{rollover|마스터자이언트|Maseuteo Jai-eonteu|?}}, ''Master Giant'' | |||
|zh_cn={{rollover|大师之巨人|Dàshī zhī Jùrén|?}} | |||
|zh_tw={{rollover|大師之巨人|Dàshī zhī Jùrén|?}} | |||
}} | |||
===Master Beast=== | |||
{{langtable | |||
|ja={{ja|マスタービースト|Masutā Bīsuto}}, ''Master Beast'' | |||
|en=Master Beast | |||
|fr=Bête suprême | |||
|es=Bestia Suprema | |||
|de=Master Beast | |||
|it=Master Belva | |||
|nl=Master Beast | |||
|ru={{rollover|Главный зверь|Glavny zver|?}} | |||
|ko={{rollover|마스터비스트|Maseuteo Biseuteu|?}}, ''Master Beast'' | |||
|zh_cn={{rollover|大师之兽|Dàshī zhī Shòu|?}} | |||
|zh_tw={{rollover|大師之獸|Dàshī zhī Shòu|?}} | |||
}} | |||
===Master Edges=== | |||
{{langtable | |||
|ja={{ja|マスターエッジズ|Masutā Ejjizu}}, ''Master Edges'' | |||
|en=Master Edges | |||
|fr=Lames suprême | |||
|es=Espadas Supremas | |||
|de=Master Sabres | |||
|it=Master Lame | |||
|nl=Master Sabres | |||
|ru={{rollover|Главные лезвия|Glavnye lezviya|?}} | |||
|ko={{rollover|마스터사브르|Maseuteo Sabeureu|?}}, ''Master Sabre'' | |||
|zh_cn={{rollover|大师之刃|Dàshī zhī Rèn|?}} | |||
|zh_tw={{rollover|大師之刃|Dàshī zhī Rèn|?}} | |||
}} | |||
===Master Core=== | |||
{{langtable | |||
|ja={{ja|マスターコア|Masutā Koa}}, ''Master Core'' | |||
|en=Master Core | |||
|fr=Créa-Main suprême | |||
|es=Master Core | |||
|de=Master Core | |||
|it=Master Core | |||
|nl=Master Core | |||
|ru={{rollover|Главное ядро|Glavnoe yadro|?}} | |||
|ko={{rollover|마스터코어|Maseuteo Ko-eo|?}}, ''Master Core'' | |||
|zh_cn={{rollover|大师之核|Dàshī zhī Hé|?}} | |||
|zh_tw={{rollover|大師之核|Dàshī zhī Hé|?}} | |||
}} | |||
==Trivia== | ==Trivia== | ||
*The | *The Swarm resembles the [[Shadow Bug]]s from ''Brawl''{{'}}s [[Subspace Emissary]] and the burned {{s|icaruspedia|Chaos Kin}} from ''Kid Icarus: Uprising'', both games directed by Masahiro Sakurai. | ||
* | **It also resembles {{s|wikirby|Uja}} from ''Kirby: Squeak Squad''. Uja's name literally translates to "Swarm" and takes the form of Master Hand and a scimitar, visually similar to Master Edges. | ||
*Master Core's | *Master Core's Giant, Beast, and Fortress forms are the only bosses in the game capable of moving or modifying the stage to attack ([[Meta Ridley]] shares this distinction in ''Brawl''). | ||
*The | *Hitting Master Core's first 3 forms or either Hand won't trigger First Striker equipment, but hitting Master Shadow will. | ||
*When fighting Master Core on Intensity 8.0 and higher in the Wii U version, the pause camera can only zoom in and out, instead of having free movement. Akin to [[Smash Run]], this behavior is due to Master Fortress's maze-like design. | |||
*If the player pauses during the defeat animation for the second and fourth weak points of Master Fortress, the camera will focus on the player instead of the weak points after unpausing. Doing so can cause the player to self-destruct. | |||
*A glitch occurs in ''for Nintendo 3DS'' where pausing right after defeating Master Shadow causes all sound effects to be muted after unpausing. Unpausing a second time causes the sound effect for Master Shadow's defeat to play as well as other sounds effects that were intended to play (such as taunts or attack sounds). | |||
*Moves with unique sound effects upon connecting with an opponent (such as {{SSB4|Peach}}'s [[forward smash]]) will not play when hitting any of the four weak points in Master Fortress. | |||
*The acid in Master Fortress is a solid surface, and as such can be walked on by [[Mechakoopa]]s and by fighters with [[invincibility]]. | |||
*Although somewhat rare, Master Core may occasionally get stuck behind either of the stage's ledges if knocked towards them, in which case it will instantly teleport back to the center. In addition, the red-lightning freeze frame can sometimes appear after an attack that doesn't fully KO it. | |||
*Master Core prior to revealing itself is the only boss to have a covered character portrait. | |||
*Master Core seems to control the Swarm as if it were normal limbs, the same case happens with the Plasm Wraith. | |||
*The weak points of Master Fortress resemble the amoeba that Starlow is caught in at the start of ''Mario & Luigi: Bowser's Inside Story''. | |||
==References== | |||
{{reflist}} | |||
{{Bosses}} | {{Bosses}} | ||
{{Smash universe}} | {{Smash universe}} | ||
[[Category:Trophies (SSB4-3DS)]] | [[Category:Trophies (SSB4-3DS)]] | ||
[[Category:Trophies (SSB4-Wii U)]] | |||
[[Category:Bosses]] | |||
[[Category:Spirits]] | |||
[[es:Master Core]] | |||
Latest revision as of 10:29, November 30, 2024
| Master Core | |
|---|---|
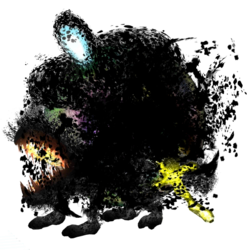 
Official artwork of Master Core in Super Smash Bros. 4 | |
| A boss in | SSB4 |
| Universe | Super Smash Bros. |
| Location | Final Destination |
Master Core (マスターコア Master Core) is the secret final boss of Super Smash Bros. 4. It appears at the end of Classic Mode, fought after weakening Master Hand and Crazy Hand on higher difficulties. It erupts from Master Hand shrouded in a mass of black particles known as the "Swarm" that take on various forms depending on the difficulty level. Defeating its forms reveals the Core itself, resembling a large, prismatic cell with a purple vortex for a nucleus, surrounded by the colors of its previous forms. In battle, its surface fades into the Smash Bros. cross logo every ten seconds.
Battle[edit]
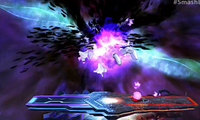
Master Core can only be battled if the Intensity is set to 5.1 or higher. On the 3DS version, Master Core only appears if the player chooses to take the black path to fight both Master Hand and Crazy Hand at the end of Classic Mode; at Intensity 8.0 and above, there is no option except the black path. On the Wii U version, players will always encounter Master Core as long as they meet the Intensity requirement.
The battle between Master and Crazy Hand begins as usual. The battle deviates once the Hands collectively lose approximately 100 HP (150 HP in co-op mode), leading to Crazy Hand disintegrating into dark flames while Master Hand flails about and rips open to unleash the Master Core entity. The music changes to Master Core's theme and the background changes to a swirly multi-colored warp (or a solar flare-like background in the 3DS version). Master Core has HP like other bosses, but it is never shown to the player; in the 3DS version, Master Core's character portrait on the bottom screen is concealed by a cloud of Swarm particles, while in the Wii U version, the HP meter is simply not displayed to the player at all. It is somewhat possible to tell how much remaining health each form has, as every 50 HP of damage dealt to each of the first three forms will cause a hole to burst open in its body, while Master Shadow will gradually shrink as it is damaged.
Forms[edit]
Master Core begins the fight in a certain form based on the difficulty setting. As it takes damage, black Swarm particles will spew out from the area it is last hit. Once a form is defeated, it progresses to the next one. As the difficulty setting increases, the forms will attack faster.
Master Giant[edit]
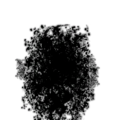
Master Giant appears as Master Core's starting form at Intensity 7.5 and higher on the 3DS version, and Intensity 7.0 and higher on the Wii U version. It appears to be a large humanoid creature.
Attacks[edit]
Master Giant has the following attacks:
- Spawns two additional arms with glowing hands. These arms will sweep the stage, then merge back into its chest. If the player is grabbed by a glowing hand, they will be consumed by the 'head', taking damage and ending with a downwards launch, but with little knockback.
- Moves its arm quickly across the screen horizontally. The movement itself does nothing, but a split second later a horizontal slash will appear across the stage, dealing damage. The slash can penetrate through shields.
- Creates six electric orbs that fly and wander around the top part of the screen. Master Giant will then pick up the entire stage and lift it to the level of the orbs, before dropping it back down. This attack can be avoided by jumping off the stage, then jumping back on once it is dropped back down. If the player has just been KO'd by one of Master Core's previous attacks and is in the middle of respawning, the act of Master Core lifting the stage can cause the player to be trapped underneath it and be KO'd a second time.
- Master Giant's head will split open, creating a vacuum effect around it. During this move, large electric orbs will travel across the stage horizontally. If the player is caught by the head or an electric orb, they will be 'swallowed', taking damage then being launched downward in the same manner as the 'arms' attack. The electric orbs can be avoided by perfect shielding or dodging/rolling, though it's the safest to stay away from them until Master Giant ends the attack.
- Master Giant's head will transform, then attempt to headbutt the player. If this attack lands, the player will be buried. After the headbutt, 4 orbs are created in random locations, detonating after a delay and creating a cross-shaped explosion in the shape of the Smash logo. The explosions can deal huge damage if more than one hits.
- Master Giant will scream, creating a massive shockwave that pushes players away from the center of the stage, potentially knocking them off. Players are pushed much farther if they are in the air. The player takes damage if very close but won't be pushed as far toward the edge of the stage. Ignores counterattacks.
After defeating the Master Giant form, Master Core will transform into Master Beast.
Master Beast[edit]
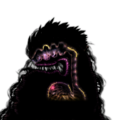
The Master Beast form appears first on Intensity 6.0 to 7.4 in the 3DS version and Intensity 6.0 to 6.9 in the Wii U version, or when the Master Giant form is defeated. It appears to be a large quadrupedal scorpion-like creature.
Attacks[edit]
Master Beast has the following attacks:
- Jumps into the background area, then dives back with a biting attack at the player, similarly to Master Hand's background punch and plane attacks. Like those attacks, it can be avoided by jumping, though the animation is much quicker so the player has less reaction time. This move may be Master Beast's strongest attack in terms of KOing power, and it also deals extreme shield damage.
- Leaps high off the screen, then comes back down with a body slam. It will land on either edge of the stage, causing the whole stage to briefly tilt downwards sharply in that direction. This attack is easy to avoid by staying in the center of the stage, but if the player has been hit by a previous attack and is recovering on the opposite side at the time, the sudden tilting of the stage can cause the player to miss ledges. It can also spike the player downwards if they get hit by it falling while in the air.
- Spawns spikes on its back, then a trail of shadows will crawl across the ground. When its horizontal position matches the player's or if it reaches the corner, spikes will spawn at that location, dealing damage.
- Emanates lightning around itself. There is a brief start-up time, which shows it shrinking and being struck by lightning, similar to Pikachu's down special.
After defeating the Master Beast form, Master Core will transform into Master Edges.
Master Edges[edit]
In PAL regions, this form is known as Master Sabres. This form can be encountered first on Intensity 5.1 to 5.9, or when the Master Beast form is defeated. The swirling background on the Wii U version turns yellow at this point. It appears as a group of five swords, one larger than the others. Any of the swords can be damaged equivalently.
Attacks[edit]
Master Edges has the following attacks:
- Emits a brief flash of light, then performs a single large simultaneous slash with all 5 blades. Hits at a semi-spike angle that is dangerous to fighters with weak horizontal recoveries, but also deals enough knockback to KO if the player has more than 70%-80% damage.
- Launches four small spinning projectiles, two at a time, which boomerang back to the swords. These projectiles hit once and disappear, and can be absorbed with moves such as PSI Magnet and Oil Panic, or reflected with moves such as Cape and Reflector.
- An alternate attack causes the swords to launch two larger projectiles one at a time instead. Despite being larger, they can still be reflected and absorbed by normal means. They bypass through shields instead of disappearing on block (but can still be perfect-shielded with the right timing).
- The swords space themselves to surround the whole stage. The four smaller swords will slash across the stage in a set pattern, then after a brief pause, the large sword will track the player and slam downward. The large sword deals significant knockback. Can be dodged by sidestepping or airdodging with the timing of each swing, but getting hit will likely (though it can still be airdodged if timed correctly) trap the player in the rest of the combo, including the final hit.
- All five swords 'ready' themselves and briefly follow the player before unleashing a flurry of slashes, ending with a very wide slash that has a large vertical radius. The initial flurry deals little damage, but serves to trap the player so that they cannot avoid the last slash, which is a semi-spike. Can be avoided by quickly moving behind the swords just before it initiates the attack. A full shield can block the entire attack, but the shield will be broken on the final slash; this can be avoided at the last second by dodging out of the shield.
After defeating the Master Edges form, Master Core will transform into Master Shadow.
Master Shadow[edit]
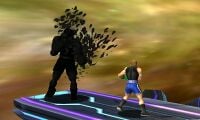
In this form, Master Core appears as a copy of the player's character, including any equipment, custom movesets, or alternate costume the player's character might have. If the player is using an alternate form of a character, such as one of the Koopalings or the male Wii Fit Trainer, these will be copied as well. At the start of the fight, Master Shadow is noticeably larger than the player's character, but will gradually shrink as its health drops, as well as the black becoming more transparent, somewhat revealing the true colors underneath. Unlike the previous forms, there is no difficulty level where this is the first form encountered, and it can be defeated by KOing it like any normal character as well as by depleting its HP like the other Master Core forms. In the Wii U version, if Classic Mode is played on Co-Op mode, Master Shadow will only copy the first player and has a blue outline.
Master Shadow's AI varies, but it normally is passive enough to allow for multiple blows on it; there are times however that it can be quite unpredictable and may instantly land killing blows as a punish, especially if the player has sustained high damage from the prior forms and if they make a reckless move.
After defeating the Master Shadow form, the music will abruptly cut out. Master Core will then either transform a final time into Master Fortress (only on the Wii U version, at Intensity 8.0 to 9.0, and only on single-player mode) or finally reveal itself (on the 3DS version, or on the Wii U version if the prior conditions are not met).
Master Fortress[edit]
The Master Fortress form is exclusive to the Wii U version of the game, and only appears on Intensity 8.0 to 9.0 on single-player mode after Master Shadow's defeat. When this form appears, a different background music will play, the time limit will be automatically extended by three minutes, and a special Heart Container will appear for the player to use, which resets the player's damage to 0% like in All-Star Mode. If the Heart Container is not used, it remains on the stage and can be picked up at any time by exiting the Fortress.
Master Fortress is effectively an entire stage resembling a human body that must be traversed, and the player must search for and destroy a total of four weak points to proceed. These weak points resemble hearts, and beat audibly when the player is close. When Master Fortress first appears, a barrier will appear and deal set knockback (albeit no damage) to prevent the player from entering the fortress until it finishes forming. Once inside the fortress, shadowy versions of enemies such as Stalfos, Geemers, Plasma Wisps, and Lethiniums will appear and attack the player.
Waves[edit]
Master Fortress appears in two waves, with the first wave containing the first two weak points and the second wave containing the last two. Only one weak point is accessible at the start of each wave; destroying it opens a path through the Fortress to the wave's second weak point. The second weak point in each wave has the ability to defend itself by summoning several enemies nearby the player when attacked. At the end of each wave, the background music will cut out.
The first weak point is reachable by a straightforward path with few enemies and no traps. All future weak points feature the presence of the Fortress's numerous Danger Zones, which take the form of either subtle yellow outlines on the walls or large pools of acid. If the player touches a Danger Zone when their damage is 100% or greater, they will be instantly KO'd; if their damage is less than 100%, they will instead take 25% damage with considerable knockback. At the same time, the enemies spawned in the Fortress can be knocked into the Danger Zones to defeat them more easily. Thanks to the Fortress's walls, these Danger Zones are effectively the only way to be KO'd while inside the Fortress (thus there is effectively no way to be KO'd while going for the first weak point, and no reason to pick up the special Heart Container until after then).
Upon destroying the second weak point, defeating the first wave, the screen will fade and the player will be ejected from the Fortress (giving them an opportunity to use the Heart Container if they have left it behind earlier).
Entering the Fortress again will face the player with the second wave; the background music will also change once more. The second wave modifies the stage layout to include new paths as well as more enemies and Danger Zones. As before, the third weak point must be destroyed before a path opens to the final weak point. This final weak point is located in a cramped area virtually surrounded by Danger Zones, as well as containing moving platforms which can disorient the player. The limited space enables the enemies summoned by the final weak point to quickly knock the player into the multiple nearby Danger Zones to inflict very heavy damage. Destroying the fourth and final weak point will defeat Master Fortress.
After defeating the Master Fortress form, Master Core will finally reveal itself.
Master Core[edit]
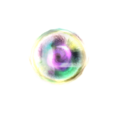
After all previous forms have been defeated, the black Swarm particles will completely cover the screen briefly, before abruptly dispersing to reveal the Core itself in the center of the stage. At this point, the background music goes silent and the timer will stop. In the 3DS version, the black particles covering Master Core's HP on the bottom screen will also disperse, revealing a new character portrait for the boss and its damage percentage starting at 0%. On the Wii U version, the swirling background will turn blue.
The player has approximately 45 seconds to KO it. The Core has no attacks and will gradually fade from its bright prismatic color to a deep red as it accumulates damage. If the Core does not get sent beyond the blast line with each hit, it will fly back to the center of the stage (or teleport back if it gets stuck under the ledge). Its launch distance depends solely on how much damage it has taken, meaning attacks that usually have a fixed knockback will work as regular attacks against it.
If time runs out, the Core will shake violently and rise above the stage, then flash Tabuu's Off Waves symbol before charging up and releasing five waves. Being hit by any wave will inflict 50% damage and one-hit KO the player at 8.0 difficulty and higher. The core can still be attacked during this time, making it momentarily stop releasing waves. Like Tabuu's, these waves can be avoided with precisely timed rolling or sidestep dodges. Afterwards, Master Core will self-destruct with a one-hit KO explosion dealing 50% damage. However, the player must be standing close to get hit, and it can never defeat the player as they have already won by the time this happens, marking the first times a boss's attacks kill the boss itself.
Trophy[edit]
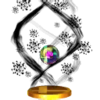
- Master Core
This sinister being will appear from Master Hand. A bunch of black objects, called "Swarm," will gather and mimic a variety of shapes, changing its attack pattern with each new form. After taking enough damage, it will reveal even more forms. Defeat the Swarm's forms to reveal its true core.
This fearsome being is what Master Hand becomes when he transforms. The black mass around it, known as the "swarm", mimics the shape of beasts, blades and more, and changes its attack pattern with each transformation. At higher intensity levels, it'll take on even more forms. Defeat the swarm to reveal the true core.
: Super Smash Bros. for Wii U
Spirits[edit]
Master Core appears in Super Smash Bros. Ultimate as a Legend-class primary spirit, while Master Giant, Master Beast, and Master Edges appear as Ace-class primary spirits.
In Adventure Mode: World of Light, Master Giant is presumably one of the countless spirits captured by Galeem during his takeover of the universe. After Galeem's defeat, Dharkon takes control of Galeem's spirits, including Master Giant. Master Giant's spirit is located in the Mysterious Dimension in The Dark Realm. Prior to the battle, the player is quizzed on which spirit was the mastermind behind the Subspace Army.
The spirit battles with Master Giant, Master Beast, and Master Edges are each fought on the Final Destination stage.
Master Giant uses a Giant Donkey Kong puppet fighter. During the battle, Donkey Kong is equipped with super armor, referencing how Master Giant doesn't flinch during its boss battle, while Bob-ombs will rain from the sky, referencing Master Giant's exploding orb attack.
Master Beast uses a Giant Ridley puppet fighter. During the battle, the Chain Chomp appears as a hostile Assist Trophy, referencing Master Beast's biting attacks, while Ridley deals damage while falling, referencing Master Beast's stomping attack.
Master Edges uses an army of Cloud puppet fighters. During the battle, the puppet fighters have increased move speed and reduced weight, referencing Master Edge's ability to float during its boss battle.
Master Core's spirit can only be summoned using the cores of Master Edges, Master Beast, and Master Giant, referencing Master Core's amorphous capabilities.
Music[edit]
In both versions of Smash 4, the track "Master Core" plays directly after Master Hand's transformation, and it can also potentially play on Final Destination in the Wii U version. Two extra tracks, "Master Fortress: First Wave" and "Master Fortress: Second Wave", also play during the first half and second half, respectively, of the Master Fortress transformation. As the Master Fortress transformation does not appear in the 3DS version, these two tracks are only available in the Wii U version, and they can also play on Final Destination when they are unlocked.
Like most original tracks in Smash 4, "Master Core" features several melodies and reprises from Smash 4's official theme. Of note is that periodically in the track, the music cuts out and is instead replaced by a series of beeps that are in Morse code. When decoded, the beeps spell out the phrase "MASTER CORE".
Of note is that Master Fortress's fourth chamber interacts with the "Master Core" track. When players approach the fourth and final weak point, a faint heartbeat can be heard, beating in sync with the track.
Gallery[edit]
Master Shadow in the form of a Mii Gunner. Note how Master Core copies the Mii itself.
A shadow Plasma Wisp
Two shadow Geemers
Artwork[edit]
Names in other languages[edit]
Master Giant[edit]
Master Beast[edit]
Master Edges[edit]
Master Core[edit]
Trivia[edit]
- The Swarm resembles the Shadow Bugs from Brawl's Subspace Emissary and the burned Chaos Kin from Kid Icarus: Uprising, both games directed by Masahiro Sakurai.
- It also resembles Uja from Kirby: Squeak Squad. Uja's name literally translates to "Swarm" and takes the form of Master Hand and a scimitar, visually similar to Master Edges.
- Master Core's Giant, Beast, and Fortress forms are the only bosses in the game capable of moving or modifying the stage to attack (Meta Ridley shares this distinction in Brawl).
- Hitting Master Core's first 3 forms or either Hand won't trigger First Striker equipment, but hitting Master Shadow will.
- When fighting Master Core on Intensity 8.0 and higher in the Wii U version, the pause camera can only zoom in and out, instead of having free movement. Akin to Smash Run, this behavior is due to Master Fortress's maze-like design.
- If the player pauses during the defeat animation for the second and fourth weak points of Master Fortress, the camera will focus on the player instead of the weak points after unpausing. Doing so can cause the player to self-destruct.
- A glitch occurs in for Nintendo 3DS where pausing right after defeating Master Shadow causes all sound effects to be muted after unpausing. Unpausing a second time causes the sound effect for Master Shadow's defeat to play as well as other sounds effects that were intended to play (such as taunts or attack sounds).
- Moves with unique sound effects upon connecting with an opponent (such as Peach's forward smash) will not play when hitting any of the four weak points in Master Fortress.
- The acid in Master Fortress is a solid surface, and as such can be walked on by Mechakoopas and by fighters with invincibility.
- Although somewhat rare, Master Core may occasionally get stuck behind either of the stage's ledges if knocked towards them, in which case it will instantly teleport back to the center. In addition, the red-lightning freeze frame can sometimes appear after an attack that doesn't fully KO it.
- Master Core prior to revealing itself is the only boss to have a covered character portrait.
- Master Core seems to control the Swarm as if it were normal limbs, the same case happens with the Plasm Wraith.
- The weak points of Master Fortress resemble the amoeba that Starlow is caught in at the start of Mario & Luigi: Bowser's Inside Story.
References[edit]
| Bosses | |
|---|---|
| Super Smash Bros. | Master Hand · Metal Mario · Giant Donkey Kong · Fighting Polygon Team |
| Melee | Master Hand · Crazy Hand · Giga Bowser · Fighting Wire Frames (Male · Female) |
| Brawl | Master Hand · Crazy Hand · Petey Piranha · Rayquaza · Porky · Galleom · Ridley · Duon · Meta Ridley · Tabuu · Fighting Alloy Team (Red · Blue · Yellow · Green) · False characters |
| Smash 4 | Master Hand · Crazy Hand · Master Core · Fighting Mii Team |
| Ultimate | Master Hand · Crazy Hand · Rathalos · Galleom · Giga Bowser · Galeem · Dharkon · Dracula · Ganon · Marx · Fighting Mii Team · False characters |

