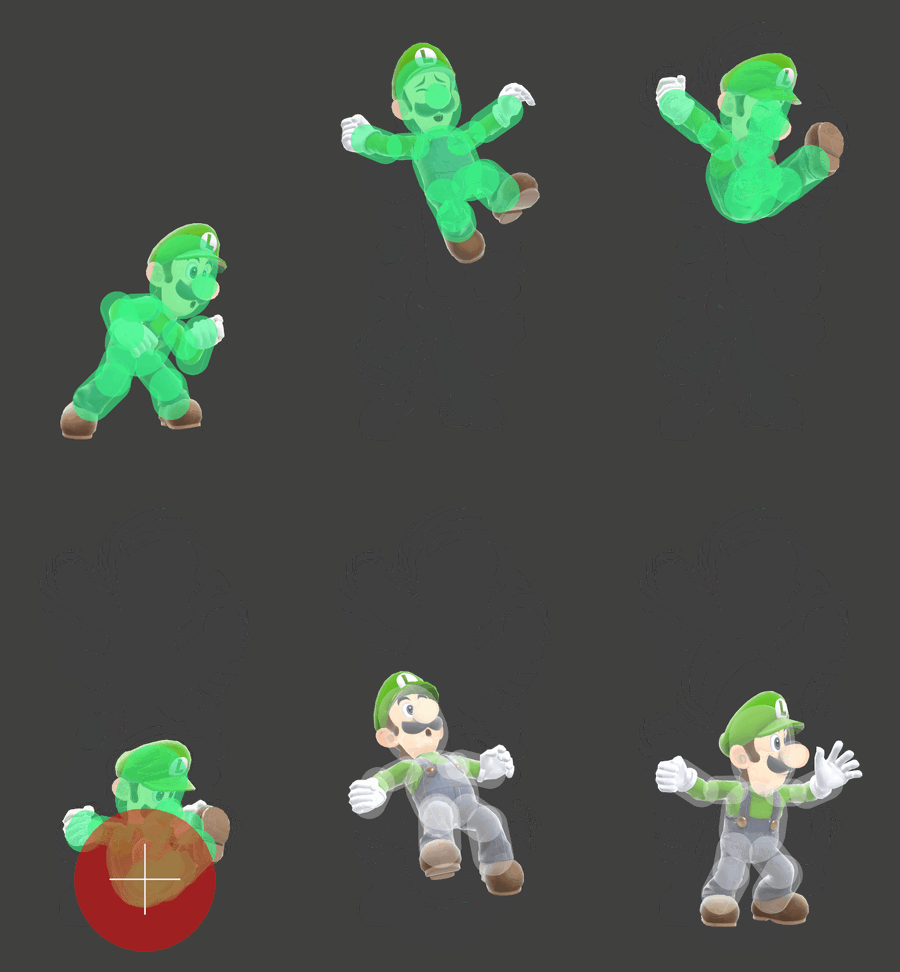
Luigi (SSBU)/Down throw: Difference between revisions
From SmashWiki, the Super Smash Bros. wiki
Jump to navigationJump to search
No edit summary |
Tag: Mobile edit |
||
| (7 intermediate revisions by 4 users not shown) | |||
| Line 1: | Line 1: | ||
{{ArticleIcons|ssbu=y}} | {{ArticleIcons|ssbu=y}} | ||
{{competitive expertise}} | {{competitive expertise}} | ||
[[File:LuigiDThrowSSBU.gif|thumb|300px|Hitbox visualization showing Luigi's down throw.]] | |||
==Overview== | ==Overview== | ||
Luigi ground-pounds the opponent. This is Luigi's best combo starter. It can combo into several moves, including all of Luigi's aerials, and he can act as soon as his feet touch the ground. | Luigi ground-pounds the opponent. This is Luigi's best combo starter. As it’s useful both for racking up damage and setting up for kills. It can combo into several moves, including all of Luigi's aerials, and he can act as soon as his feet touch the ground. | ||
==Update History== | ==Update History== | ||
'''{{GameIcon|ssbu}} {{SSBU|8.0.0}}''' | '''{{GameIcon|ssbu}} {{SSBU|8.0.0}}''' | ||
*{{change|Down throw functions correctly near edges, preventing characters like Ridley from being stage spiked away.}} | *{{change|Down throw functions correctly near edges, preventing characters like Ridley from being stage spiked away.}} | ||
==Throw and Hitbox Data== | ==Throw and Hitbox Data== | ||
{{UltimateHitboxTableHeader}} | {{UltimateHitboxTableHeader}} | ||
{{HitboxTableTitle|Hitbox| | {{HitboxTableTitle|Hitbox|50}} | ||
{{UltimateHitboxTableRow | {{UltimateHitboxTableRow | ||
|id=0 | |id=0 | ||
|damage=3.0% | |damage=3.0% | ||
|angle=361 | |angle=361 | ||
|af=3 | |||
|bk=30 | |bk=30 | ||
|ks=100 | |ks=100 | ||
| Line 31: | Line 29: | ||
|type=Body | |type=Body | ||
|effect=Normal | |effect=Normal | ||
|sfx= | |sfx=None | ||
|slvl=S | |slvl=S | ||
|clang=f | |clang=f | ||
| Line 48: | Line 46: | ||
|fkv=0 | |fkv=0 | ||
|ff=0.0 | |ff=0.0 | ||
|effect=Normal | |||
|sfx=None | |||
|slvl=S | |||
}} | |||
{{UltimateThrowTableRow | |||
|kind=1 | |||
|id=0 | |||
|type=Throwing | |||
|damage=3.0% | |||
|angle=361 | |||
|bk=40 | |||
|ks=100 | |||
|fkv=0 | |||
|effect=Normal | |effect=Normal | ||
|sfx=None | |sfx=None | ||
| Line 55: | Line 66: | ||
==Timing== | ==Timing== | ||
If used at an edge, the opponent is pushed 1 unit up and away when thrown, preventing certain characters from getting [[stage spike]]d underneath. | |||
{|class="wikitable" | {|class="wikitable" | ||
!Invincibility | !Invincibility | ||
| Line 78: | Line 90: | ||
{{FrameIconLegend|lag=y|hitbox=y|throw=y|interruptible=y|vulnerable=y|invincible=y}} | {{FrameIconLegend|lag=y|hitbox=y|throw=y|interruptible=y|vulnerable=y|invincible=y}} | ||
{{MvSubNavLuigi|g=SSBU}} | {{MvSubNavLuigi|g=SSBU}} | ||
Latest revision as of 03:16, January 1, 2024
Overview[edit]
Luigi ground-pounds the opponent. This is Luigi's best combo starter. As it’s useful both for racking up damage and setting up for kills. It can combo into several moves, including all of Luigi's aerials, and he can act as soon as his feet touch the ground.
Update History[edit]
 Down throw functions correctly near edges, preventing characters like Ridley from being stage spiked away.
Throw and Hitbox Data[edit]
| Kind | ID | Damage | Angle | Angle type | BK | KS | FKV | H× | Effect | Type | Sound | ||||||||||||
|---|---|---|---|---|---|---|---|---|---|---|---|---|---|---|---|---|---|---|---|---|---|---|---|
| Throw | |||||||||||||||||||||||
| Throw | 0 | 3.0% | Forward | 45 | 135 | 0 | 0.0× | ||||||||||||||||
| Break | 0 | 3.0% | Forward | 40 | 100 | 0 | 0.0× | ||||||||||||||||
Timing[edit]
If used at an edge, the opponent is pushed 1 unit up and away when thrown, preventing certain characters from getting stage spiked underneath.
| Invincibility | 1-29 |
|---|---|
| Hitbox | 18-28 |
| Throw Release | 29 |
| Interruptible | 41 |
| Animation length | 57 |
Lag time |
Hitbox |
Vulnerable |
Invincible |
Throw point |
Interruptible |
|

