Kirby (SSB4)/Down aerial: Difference between revisions
From SmashWiki, the Super Smash Bros. wiki
Jump to navigationJump to search
mNo edit summary |
m (Text replacement - " " to " ") |
||
| (7 intermediate revisions by 5 users not shown) | |||
| Line 1: | Line 1: | ||
{{ArticleIcons|ssb4=y}} | {{ArticleIcons|ssb4=y}} | ||
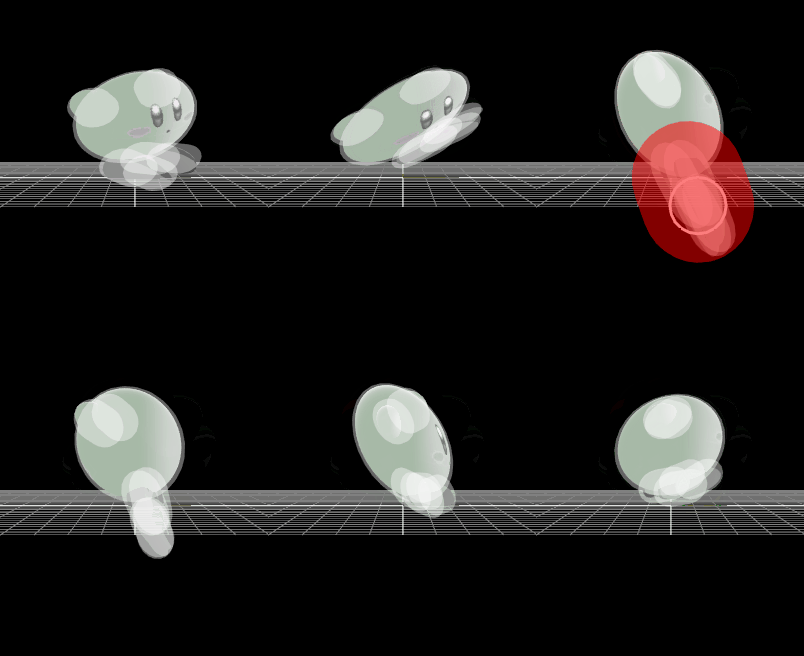
[[File:KirbyDAir.gif|thumb|270px|Hitbox visualization showing Kirby's down aerial.]] | [[File:KirbyDAir.gif|thumb|270px|Hitbox visualization showing Kirby's down aerial.]] | ||
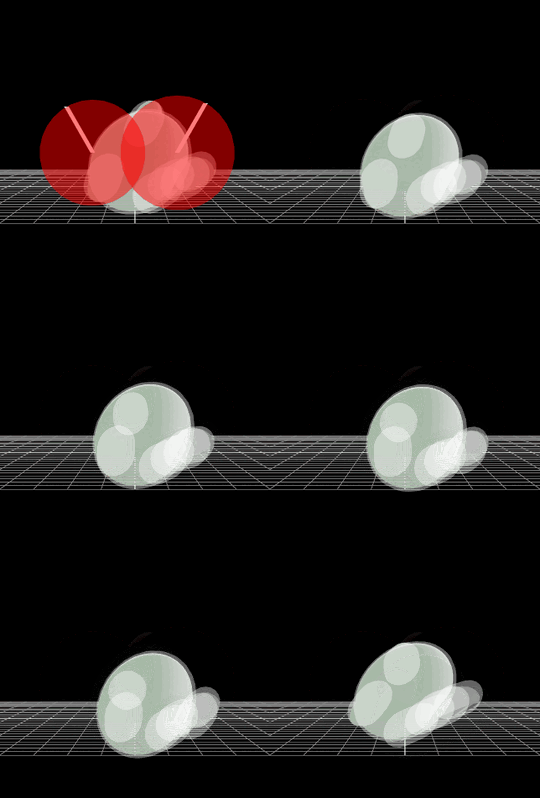
[[File:KirbyDAirLanding.gif|thumb|270px|Hitbox visualization showing Kirby's down aerial's landing hitbox.]] | |||
==Overview== | ==Overview== | ||
A drill kick. The final hit has a weak meteor effect. An effective combo starter on grounded opponents, and a dangerous edge-guarding move on recovering opponents. Low ending lag makes it relatively safe to use off-stage. It can also | A drill kick. The final hit has a weak meteor effect. An effective combo starter on grounded opponents, and a dangerous edge-guarding move on recovering opponents. Low ending lag makes it relatively safe to use off-stage. It can also lead in to a [[Footstool jump|footstool jump]]. This move can combo into a vast majority of Kirby's arsenal at almost any percent. Perhaps the most classic combination sequence to a successful down aerial used toward the ground is one to three up tilts (depending on opponent weight and damage percentage) followed either by one or two up aerials or an up smash. | ||
==Hitboxes== | ==Hitboxes== | ||
{|class="wikitable | {{SSB4HitboxTableHeader}} | ||
{{HitboxTableTitle|Hits 1-5|42}} | |||
{{SSB4HitboxTableRow | |||
|id=0 | |||
|damage=1% | |||
|angle=366 | |||
|bk=20 | |||
|ks=107 | |||
|fkv=0 | |||
|r=5.0 | |||
|bn=0 | |||
|ff=1.5 | |||
|zpos=2.4 | |||
|ypos=-2.5 | |||
|xpos=0.0 | |||
|type=Foot | |||
|sfx=Kick | |||
|slvl=S | |||
}} | |||
{{HitboxTableTitle|Hit 6|42}} | |||
{{SSB4HitboxTableRow | |||
|id=0 | |||
|damage=2% | |||
|angle=270 | |||
|bk=20 | |||
|ks=110 | |||
|fkv=0 | |||
|r=6.2 | |||
|bn=0 | |||
|zpos=2.4 | |||
|ypos=-2.5 | |||
|xpos=0.0 | |||
|type=Foot | |||
|ff=1.0 | |||
|sfx=Kick | |||
|slvl=S | |||
}} | |||
{{HitboxTableTitle|Landing|42}} | |||
{{SSB4HitboxTableRow | |||
|id=0 | |||
|part=0 | |||
|damage=2% | |||
|angle=60 | |||
|bk=0 | |||
|ks=100 | |||
|fkv=40 | |||
|r=5.4 | |||
|bn=0 | |||
|zpos=4.0 | |||
|ypos=3.2 | |||
|xpos=0.0 | |||
|type=Foot | |||
|sdi=1.0 | |||
|ff=1.0 | |||
|trip=0 | |||
|sfx=Kick | |||
|slvl=M | |||
}} | |||
{{SSB4HitboxTableRow | |||
|id=1 | |||
|part=0 | |||
|damage=2% | |||
|angle=60 | |||
|bk=0 | |||
|ks=100 | |||
|fkv=40 | |||
|r=5.0 | |||
|bn=0 | |||
|zpos=-4.0 | |||
|ypos=3.2 | |||
|xpos=0.0 | |||
|type=Foot | |||
|sdi=1.0 | |||
|ff=1.0 | |||
|trip=0 | |||
|sfx=Kick | |||
|slvl=M | |||
}} | |||
|} | |||
==Timing== | |||
===Attack=== | |||
{|class="wikitable" | |||
!Initial autocancel | |||
|1-17 | |||
|- | |- | ||
! | !Hits 1-5 | ||
|- | |18-19, 21-22, 24-25, 27-28, 30-31 | ||
| | |- | ||
!Hit 6 | |||
|34 | |||
|- | |||
!Ending autocancel | |||
|48- | |||
|- | |||
!Interruptible | |||
|55 | |||
|- | |||
!Animation length | |||
|59 | |||
|} | |} | ||
===Landing lag=== | {{FrameStripStart}} | ||
{{FrameStrip|t=Lag|c=17}}{{FrameStrip|t=Hitbox|c=2}}{{FrameStrip|t=Lag|c=1}}{{FrameStrip|t=Hitbox|c=2}}{{FrameStrip|t=Lag|c=1}}{{FrameStrip|t=Hitbox|c=2}}{{FrameStrip|t=Lag|c=1}}{{FrameStrip|t=Hitbox|c=2}}{{FrameStrip|t=Lag|c=1}}{{FrameStrip|t=Hitbox|c=2}}{{FrameStrip|t=Lag|c=2}}{{FrameStrip|t=Hitbox|c=1}}{{FrameStrip|t=Lag|c=20}}{{FrameStrip|t=Interruptible|c=5}} | |||
|- | |||
{{FrameStrip|t=Autocancel|c=17}}{{FrameStrip|t=Blank|c=30}}{{FrameStrip|t=Autocancel|c=12}} | |||
{{FrameStripEnd}} | |||
===[[Landing lag]]=== | |||
{|class="wikitable" | {|class="wikitable" | ||
!Hitboxes | |||
|1-3 | |||
|- | |- | ||
!Animation length | !Animation length | ||
| Line 20: | Line 124: | ||
{{FrameStripStart}} | {{FrameStripStart}} | ||
{{FrameStrip|t=Lag|c= | {{FrameStrip|t=Hitbox|c=3}}{{FrameStrip|t=Lag|c=14}} | ||
{{FrameStripEnd}} | {{FrameStripEnd}} | ||
{{FrameIconLegend|lag=y|hitbox | {{FrameIconLegend|lag=y|hitbox=y|autocancel=y|interruptible=y}} | ||
{{MvSubNavKirby|g=SSB4}} | |||
{{MvSubNavKirby}} | |||
[[Category:Kirby (SSB4)]] | [[Category:Kirby (SSB4)]] | ||
[[Category:Down aerials (SSB4)]] | [[Category:Down aerials (SSB4)]] | ||
[[Category:Meteor smashes (SSB4)]] | |||
Latest revision as of 15:19, September 13, 2020
Overview[edit]
A drill kick. The final hit has a weak meteor effect. An effective combo starter on grounded opponents, and a dangerous edge-guarding move on recovering opponents. Low ending lag makes it relatively safe to use off-stage. It can also lead in to a footstool jump. This move can combo into a vast majority of Kirby's arsenal at almost any percent. Perhaps the most classic combination sequence to a successful down aerial used toward the ground is one to three up tilts (depending on opponent weight and damage percentage) followed either by one or two up aerials or an up smash.
Hitboxes[edit]
Timing[edit]
Attack[edit]
| Initial autocancel | 1-17 |
|---|---|
| Hits 1-5 | 18-19, 21-22, 24-25, 27-28, 30-31 |
| Hit 6 | 34 |
| Ending autocancel | 48- |
| Interruptible | 55 |
| Animation length | 59 |
Landing lag[edit]
| Hitboxes | 1-3 |
|---|---|
| Animation length | 17 |
Lag time |
Hitbox |
Autocancel |
Interruptible |
|

