Welcome to SmashWiki! Log in or create an account and join the community, and don't forget to read this first!
Notices
The Skill parameter has been removed from Smasher infoboxes, and in its place are the new "Best historical ranking" and "Best tournament result" parameters. SmashWiki needs help adding these new parameters to Smasher infoboxes, refer to the guidelines here for what should be included in these new parameters.
When adding results to Smasher pages, include each tournament's entrant number in addition to the player's placement, and use the {{Trn}} template with the matching game specified. Please also fix old results on Smasher pages that do not abide to this standard. Refer to our Smasher article guidelines to see how results tables should be formatted.
Check out our project page for ongoing projects that SmashWiki needs help with.
Super Smash Bros. Ultimate

Bowser (SSBU)/Down special

From SmashWiki, the Super Smash Bros. wiki
< Bowser (SSBU)
Revision as of 20:08, February 25, 2022 by Juju1995 (talk | contribs)
Jump to navigationJump to search
This article is about the hitbox visualization in Super Smash Bros. Ultimate. For the move itself, see Bowser Bomb.


Competitive.png This article or section may require competitive expertise.
You can discuss this issue on the talk page or edit this page to improve it.
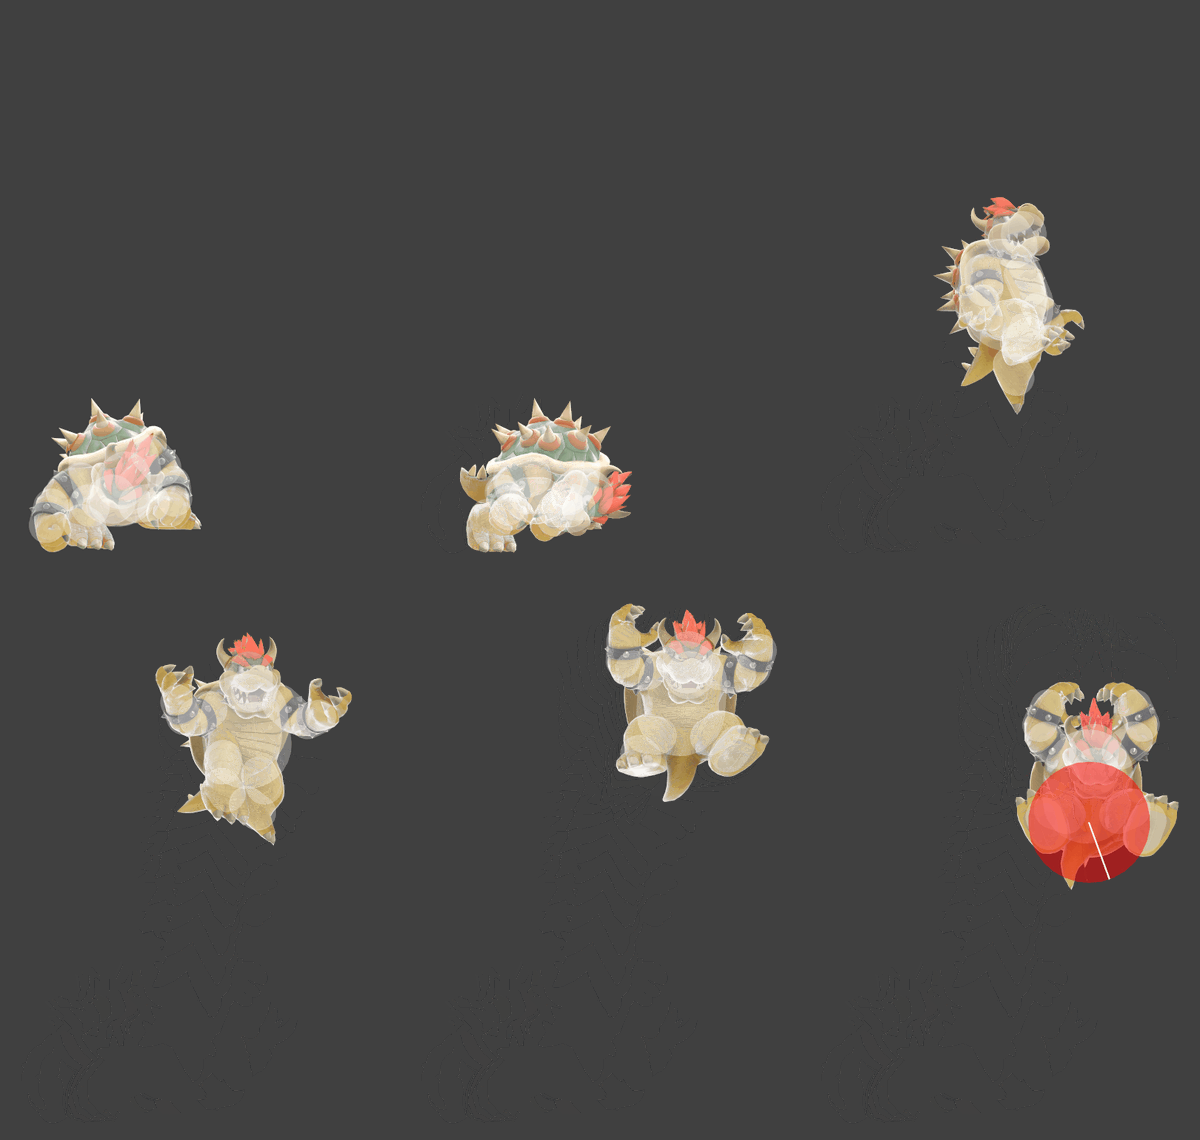
Hitbox visualization showing Bowser's grounded down special, Bowser Bomb
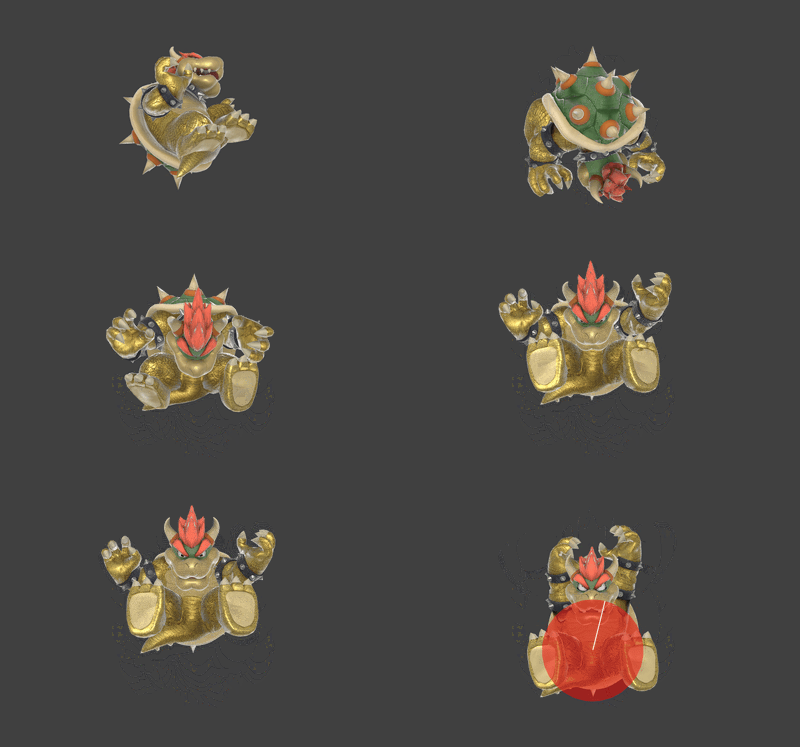
Hitbox visualization showing Bowser's aerial down special, Bowser Bomb
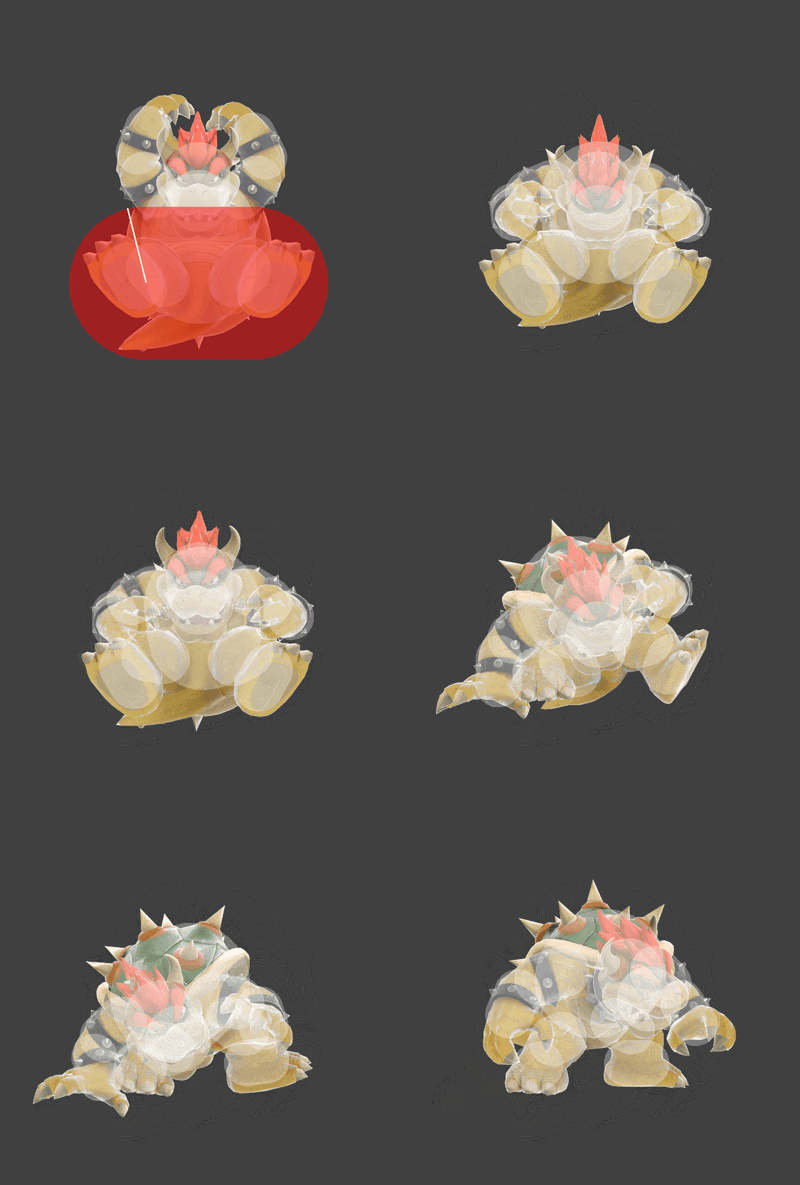
Hitbox visualization showing Bowser's down special landing, Bowser Bomb

Overview

Hitboxes

Grounded

ID Part Rehit rate Damage SD Angle Angle type BK KS FKV Set weight Radius Bone Offset SDI× T% Clang Rebound Effect Type G A Sound Direct Hit bits Hit part Blockable Reflectable Absorbable Flinchless No GFX Heedless Hitstun
Start
0 0 0 4.0% 0 AngleIcon80.png Standard 0 100 60 HitboxTableIcon(True).png 4.0 top 0.0 1.0 to 9.0 17.0 1.0× 0.5× 0% HitboxTableIcon(NoClang).png HitboxTableIcon(NoRebound).png Normal (effect) Body (type) HitboxTableIcon(GroundedTrue).png HitboxTableIcon(AerialTrue).png M Kick SpecialsDirect.png All All HitboxTableIcon(Blockable).png HitboxTableIcon(Unreflectable).png HitboxTableIcon(Unabsorbable).png HitboxTableIcon(False).png HitboxTableIcon(False).png HitboxTableIcon(False).png +8 frames
1 0 0 4.0% 0 AngleIcon100.png Standard 0 100 60 HitboxTableIcon(True).png 2.0 top 0.0 0.5 to 9.5 22.5 1.0× 0.5× 0% HitboxTableIcon(NoClang).png HitboxTableIcon(NoRebound).png Normal (effect) Body (type) HitboxTableIcon(GroundedTrue).png HitboxTableIcon(AerialTrue).png M Kick SpecialsDirect.png All All HitboxTableIcon(Blockable).png HitboxTableIcon(Unreflectable).png HitboxTableIcon(Unabsorbable).png HitboxTableIcon(False).png HitboxTableIcon(False).png HitboxTableIcon(False).png +8 frames
2 0 0 4.0% 0 AngleIcon90.png Standard 0 100 60 HitboxTableIcon(True).png 4.0 top 0.0 2.5 to 7.5 13.0 1.0× 0.5× 0% HitboxTableIcon(NoClang).png HitboxTableIcon(NoRebound).png Normal (effect) Body (type) HitboxTableIcon(GroundedTrue).png HitboxTableIcon(AerialTrue).png M Kick SpecialsDirect.png All All HitboxTableIcon(Blockable).png HitboxTableIcon(Unreflectable).png HitboxTableIcon(Unabsorbable).png HitboxTableIcon(False).png HitboxTableIcon(False).png HitboxTableIcon(False).png +8 frames
Fall
0 0 0 20.0% 5 AngleIcon290.png Forward 13 65 0 HitboxTableIcon(True).png 8.3 top 0.0 5.2 0.0 1.0× 0.5× 0% HitboxTableIcon(Clang).png HitboxTableIcon(Rebound).png Normal (effect) Body (type) HitboxTableIcon(GroundedTrue).png HitboxTableIcon(AerialTrue).png L Kick SpecialsDirect.png All All HitboxTableIcon(Blockable).png HitboxTableIcon(Unreflectable).png HitboxTableIcon(Unabsorbable).png HitboxTableIcon(False).png HitboxTableIcon(False).png HitboxTableIcon(False).png

Aerial

ID Part Rehit rate Damage SD Angle Angle type BK KS FKV Set weight Radius Bone Offset SDI× T% Clang Rebound Effect Type G A Sound Direct Hit bits Hit part Blockable Reflectable Absorbable Flinchless No GFX Heedless
Clean
0 0 0 20.0% 5 AngleIcon290.png Standard 13 65 0 HitboxTableIcon(False).png 8.6 top 0.0 5.2 0.0 1.0× 1.0× 0% HitboxTableIcon(Clang).png HitboxTableIcon(Rebound).png Normal (effect) Body (type) HitboxTableIcon(GroundedTrue).png HitboxTableIcon(AerialTrue).png L Kick SpecialsDirect.png All All HitboxTableIcon(Blockable).png HitboxTableIcon(Unreflectable).png HitboxTableIcon(Unabsorbable).png HitboxTableIcon(False).png HitboxTableIcon(False).png HitboxTableIcon(False).png
Late
0 0 0 20.0% 5 AngleIcon76.png Forward 45 75 0 HitboxTableIcon(False).png 8.3 top 0.0 5.2 0.0 1.0× 1.0× 0% HitboxTableIcon(Clang).png HitboxTableIcon(Rebound).png Normal (effect) Body (type) HitboxTableIcon(GroundedTrue).png HitboxTableIcon(AerialTrue).png L Kick SpecialsDirect.png All All HitboxTableIcon(Blockable).png HitboxTableIcon(Unreflectable).png HitboxTableIcon(Unabsorbable).png HitboxTableIcon(False).png HitboxTableIcon(False).png HitboxTableIcon(False).png

Landing

ID Part Rehit rate Damage SD Angle Angle type BK KS FKV Set weight Radius Bone Offset SDI× T% Clang Rebound Effect Type G A Sound Direct Hit bits Hit part Blockable Reflectable Absorbable Flinchless No GFX Heedless
0 0 0 11.0% 5 AngleIcon76.png Standard 60 72 60 HitboxTableIcon(False).png 8.0 top 0.0 1.5 -5.5 to 5.5 1.0× 1.0× 0% HitboxTableIcon(Clang).png HitboxTableIcon(Rebound).png Normal (effect) Body (type) HitboxTableIcon(GroundedTrue).png HitboxTableIcon(AerialFalse).png M Kick SpecialsDirect.png All All HitboxTableIcon(Blockable).png HitboxTableIcon(Unreflectable).png HitboxTableIcon(Unabsorbable).png HitboxTableIcon(False).png HitboxTableIcon(False).png HitboxTableIcon(False).png

Timing

Data.png This article or section may require additional technical data.
The editor who added this tag elaborates: Frame data.
You can discuss this issue on the talk page or edit this page to improve it.