Enhanceable spirit: Difference between revisions
SafariKid2 (talk | contribs) No edit summary |
(Spirit Name Standardization. Note: Lotus doesn't use the template as it doesn't support jpg) |
||
| Line 1: | Line 1: | ||
{{articleIcons|ultimate=y | {{articleIcons|ultimate=y}} | ||
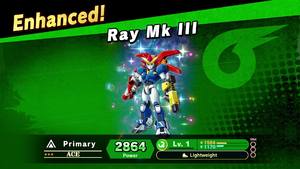
[[File:Echance03.png|thumb|300px|A newly enhanced spirit]] | [[File:Echance03.png|thumb|300px|A newly enhanced spirit]] | ||
'''Enhanceable spirits''' are [[primary spirit]]s that can be transformed into another [[spirit]] after reaching level 99. | '''Enhanceable spirits''' are [[primary spirit]]s that can be transformed into another [[spirit]] after reaching level 99. | ||
| Line 35: | Line 35: | ||
! Ability | ! Ability | ||
|- | |- | ||
|31 | |31 | ||
|{{SpiritTableName|Toad|link=y}} | |||
|{{ | |||
|{{SpiritType|Grab}} | |{{SpiritType|Grab}} | ||
|★★ | |★★ | ||
|•Battle via Spirit Board<br>•Battle via World of Light (The Light Realm)<br>•Purchase from the Vault Shop for 1000G<br>•Scan the Toad amiibo | |•Battle via Spirit Board<br>•Battle via World of Light (The Light Realm)<br>•Purchase from the Vault Shop for 1000G<br>•Scan the Toad amiibo | ||
|32 | |32 | ||
| | |{{SpiritTableName|Captain Toad}} | ||
|Captain Toad | |||
|★★★ | |★★★ | ||
|Item Gravitation | |Item Gravitation | ||
| Line 50: | Line 48: | ||
|- | |- | ||
|41 | |41 | ||
|{{SpiritTableName|Bullet Bill|link=y}} | |||
|{{ | |||
|{{SpiritType|Attack}} | |{{SpiritType|Attack}} | ||
|★ | |★ | ||
|•Battle via World of Light (The Light Realm)<br>•Battle via Spirit Board<br>•Purchase from the Vault Shop for 500G | |•Battle via World of Light (The Light Realm)<br>•Battle via Spirit Board<br>•Purchase from the Vault Shop for 500G | ||
|42 | |42 | ||
|{{SpiritTableName|Banzai Bill|link=y}} | |||
|{{ | |||
|★★ | |★★ | ||
|Impact Run | |Impact Run | ||
| Line 63: | Line 59: | ||
|- | |- | ||
|48 | |48 | ||
|{{SpiritTableName|Boo|link=y}} | |||
|{{ | |||
|{{SpiritType|Neutral}} | |{{SpiritType|Neutral}} | ||
|★ | |★ | ||
|•Battle via World of Light (Dracula's Castle)<br>•Battle via Spirit Board<br>•Purchase from the Vault Shop for 500G<br>•Scan the Boo amiibo | |•Battle via World of Light (Dracula's Castle)<br>•Battle via Spirit Board<br>•Purchase from the Vault Shop for 500G<br>•Scan the Boo amiibo | ||
|49 | |49 | ||
| | |{{SpiritTableName|King Boo}} | ||
|King Boo | |||
|★★ | |★★ | ||
|Floaty Jumps | |Floaty Jumps | ||
| Line 77: | Line 71: | ||
|- | |- | ||
|53 | |53 | ||
| | |{{SpiritTableName|Nipper Plant}} | ||
|Nipper Plant | |||
|{{SpiritType|Grab}} | |{{SpiritType|Grab}} | ||
|★ | |★ | ||
|•Purchase at Beedle's Tent for 500SP<br>•Battle via Spirit Board | |•Purchase at Beedle's Tent for 500SP<br>•Battle via Spirit Board | ||
|54 | |54 | ||
|{{SpiritTableName|Petey Piranha|link=y}} | |||
|{{ | |||
|★★★ | |★★★ | ||
|Giant | |Giant | ||
| Line 90: | Line 82: | ||
|- | |- | ||
|55 | |55 | ||
| | |{{SpiritTableName|Boom Boom}} | ||
|Boom Boom | |||
|{{SpiritType|Attack}} | |{{SpiritType|Attack}} | ||
|★★ | |★★ | ||
|•Battle via World of Light (The Light Realm)<br>•Battle via Spirit Board<br>•Purchase from the Vault Shop for 1000G | |•Battle via World of Light (The Light Realm)<br>•Battle via Spirit Board<br>•Purchase from the Vault Shop for 1000G | ||
|56 | |56 | ||
| | |{{SpiritTableName|Boom Boom & Pom Pom}} | ||
|Boom Boom & Pom Pom | |||
|★★★ | |★★★ | ||
|Hyper Smash Attacks | |Hyper Smash Attacks | ||
| Line 103: | Line 93: | ||
|- | |- | ||
|95 | |95 | ||
|{{SpiritTableName|Paper Bowser}} | |||
|{{ | |||
|{{SpiritType|Attack}} | |{{SpiritType|Attack}} | ||
|★★★ | |★★★ | ||
|•Battle via Spirit Board<br>•Purchase from the Vault Shop for 6000G | |•Battle via Spirit Board<br>•Purchase from the Vault Shop for 6000G | ||
|96 | |96 | ||
|{{SpiritTableName|Paper Bowser (Paper Mario: Sticker Star)}} | |||
|{{ | |||
|★★★★ | |★★★★ | ||
|Mouthful of [[Curry]] | |Mouthful of [[Curry]] | ||
| Line 116: | Line 104: | ||
|- | |- | ||
|126 | |126 | ||
|{{SpiritTableName|Mini Mario}} | |||
|{{ | |||
|{{SpiritType|Neutral}} | |{{SpiritType|Neutral}} | ||
|★★ | |★★ | ||
|•Purchase at Timmy and Tommy's for 1000SP | |•Purchase at Timmy and Tommy's for 1000SP | ||
|127 | |127 | ||
|{{SpiritTableName|Mini Mario & Hammers}} | |||
|{{ | |||
|★★★ | |★★★ | ||
|Hammer Duration ↑ | |Hammer Duration ↑ | ||
| Line 129: | Line 115: | ||
|- | |- | ||
|145 | |145 | ||
|{{SpiritTableName|Dixie Kong|link=y}} | |||
|{{ | |||
|{{SpiritType|Grab}} | |{{SpiritType|Grab}} | ||
|★★★ | |★★★ | ||
|•Summon with cores from Tiny Kong and Candy Kong<br>•Battle via Spirit Board (unlocked after obtaining spirit once)<br>•Purchase from the Vault Shop for 6000G (unlocked after obtaining spirit once) | |•Summon with cores from Tiny Kong and Candy Kong<br>•Battle via Spirit Board (unlocked after obtaining spirit once)<br>•Purchase from the Vault Shop for 6000G (unlocked after obtaining spirit once) | ||
|146 | |146 | ||
|{{SpiritTableName|Dixie Kong & Kiddy Kong}} | |||
|{{ | |||
|★★★★ | |★★★★ | ||
||Thrown Items ↑ | ||Thrown Items ↑ | ||
| Line 142: | Line 126: | ||
|- | |- | ||
|189 | |189 | ||
|{{SpiritTableName|Young Zelda|customname=Young [[Zelda]]}} | |||
|{{ | |||
|{{SpiritType|Shield}} | |{{SpiritType|Shield}} | ||
|★★ | |★★ | ||
|•Battle via Spirit Board<br>•Purchase from the Vault Shop for 1000G | |•Battle via Spirit Board<br>•Purchase from the Vault Shop for 1000G | ||
|190 | |190 | ||
|{{SpiritTableName|Zelda (Ocarina of Time)}} | |||
|{{ | |||
|★★★★ | |★★★★ | ||
|Assist Killer | |Assist Killer | ||
| Line 155: | Line 137: | ||
|- | |- | ||
|202 | |202 | ||
|{{SpiritTableName|Koume & Kotake|link=y}} | |||
|{{ | |||
|{{SpiritType|Neutral}} | |{{SpiritType|Neutral}} | ||
|★★ | |★★ | ||
|•Battle via Spirit Board (unlocked after obtaining spirit once)<br>•Purchase from the Vault Shop for 6000G (unlocked after obtaining spirit once) | |•Battle via Spirit Board (unlocked after obtaining spirit once)<br>•Purchase from the Vault Shop for 6000G (unlocked after obtaining spirit once) | ||
|203 | |203 | ||
|{{SpiritTableName|Twinrova}} | |||
|{{ | |||
|★★★ | |★★★ | ||
|Magic Attack ↑ | |Magic Attack ↑ | ||
| Line 168: | Line 148: | ||
|- | |- | ||
|205 | |205 | ||
|{{SpiritTableName|Skull Kid|link=y}} | |||
|{{ | |||
|{{SpiritType|Grab}} | |{{SpiritType|Grab}} | ||
|★★ | |★★ | ||
|•Battle via World of Light (Sacred Land)<br>•Battle via Spirit Board<br>•Purchase from the Vault Shop for 1000G | |•Battle via World of Light (Sacred Land)<br>•Battle via Spirit Board<br>•Purchase from the Vault Shop for 1000G | ||
|206 | |206 | ||
|{{SpiritTableName|Skull Kid & Majora's Mask|customname=Skull Kid & [[Majora's Mask]]}} | |||
|{{ | |||
|★★★★ | |★★★★ | ||
|Lifesteal | |Lifesteal | ||
| Line 181: | Line 159: | ||
|- | |- | ||
|220 | |220 | ||
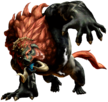
|{{SpiritTableName|Ganondorf (Twilight Princess)|customname=[[Ganondorf]] (Twilight Princess)}} | |||
|{{ | |||
|{{SpiritType|Attack}} | |{{SpiritType|Attack}} | ||
|★★★ | |★★★ | ||
|•Battle via World of Light (Mysterious Dimension)<br>•Battle via Spirit Board<br>•Purchase from the Vault Shop for 6000G | |•Battle via World of Light (Mysterious Dimension)<br>•Battle via Spirit Board<br>•Purchase from the Vault Shop for 6000G | ||
|221 | |221 | ||
|{{SpiritTableName|Beast Ganon|link=y}} | |||
|{{ | |||
|★★★★ | |★★★★ | ||
|Impact Run | |Impact Run | ||
| Line 194: | Line 170: | ||
|- | |- | ||
|222 | |222 | ||
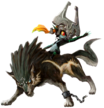
|{{SpiritTableName|Midna|link=y}} | |||
|{{ | |||
|{{SpiritType|Grab}} | |{{SpiritType|Grab}} | ||
|★★★ | |★★★ | ||
|•Battle via World of Light (The Final Battle - Dark)<br>•Battle via Spirit Board<br>•Purchase from the Vault Shop for 6000G<br>•Scan the Wolf Link amiibo | |•Battle via World of Light (The Final Battle - Dark)<br>•Battle via Spirit Board<br>•Purchase from the Vault Shop for 6000G<br>•Scan the Wolf Link amiibo | ||
|223 | |223 | ||
| | |{{SpiritTableName|Wolf Link & Midna}} | ||
|Wolf Link & Midna | |||
|★★★★ | |★★★★ | ||
|Dash Attack ↑ | |Dash Attack ↑ | ||
| Line 207: | Line 181: | ||
|- | |- | ||
|233 | |233 | ||
|{{SpiritTableName|Wall-Merged Link|customname=Wall-Merged [[Link]]}} | |||
|{{ | |||
|{{SpiritType|Neutral}} | |{{SpiritType|Neutral}} | ||
|★★ | |★★ | ||
|•Treasure Chest in World of Light (Sacred Land)<br>•Battle via Spirit Board<br>•Purchase from the Vault Shop for 1000G | |•Treasure Chest in World of Light (Sacred Land)<br>•Battle via Spirit Board<br>•Purchase from the Vault Shop for 1000G | ||
|234 | |234 | ||
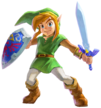
|{{SpiritTableName|Link (A Link Between Worlds)}} | |||
|{{ | |||
|★★★ | |★★★ | ||
|Weapon Attack ↑ | |Weapon Attack ↑ | ||
| Line 220: | Line 192: | ||
|- | |- | ||
|246 | |246 | ||
|{{SpiritTableName|Tetra|link=y}} | |||
|{{ | |||
|{{SpiritType|Shield}} | |{{SpiritType|Shield}} | ||
|★★★ | |★★★ | ||
|•Battle via World of Light (The Final Battle - Light)<br>•Battle via Spirit Board<br>•Purchase from the Vault Shop for 6000G | |•Battle via World of Light (The Final Battle - Light)<br>•Battle via Spirit Board<br>•Purchase from the Vault Shop for 6000G | ||
|247 | |247 | ||
|{{SpiritTableName|Zelda (The Wind Waker)}} | |||
|{{ | |||
|★★★★ | |★★★★ | ||
|Chance of Double Final Smash | |Chance of Double Final Smash | ||
| Line 233: | Line 203: | ||
|- | |- | ||
|248 | |248 | ||
|{{SpiritTableName|King of Red Lions|link=y}} | |||
|{{ | |||
|{{SpiritType|Attack}} | |{{SpiritType|Attack}} | ||
|★★ | |★★ | ||
|•Purchase at Funky Kong's Shack for 1000SP | |•Purchase at Funky Kong's Shack for 1000SP | ||
|249 | |249 | ||
|{{SpiritTableName|King of Hyrule}} | |||
|{{ | |||
|★★★ | |★★★ | ||
|Transformation Duration ↑ | |Transformation Duration ↑ | ||
| Line 246: | Line 214: | ||
|- | |- | ||
|258 | |258 | ||
|{{SpiritTableName|Phantom|link=y}} | |||
|{{ | |||
|{{SpiritType|Shield}} | |{{SpiritType|Shield}} | ||
|★★ | |★★ | ||
|•Battle via World of Light (The Light Realm)<br>•Battle via Spirit Board<br>•Purchase from the Vault Shop for 1000G | |•Battle via World of Light (The Light Realm)<br>•Battle via Spirit Board<br>•Purchase from the Vault Shop for 1000G | ||
|259 | |259 | ||
|{{SpiritTableName|Zelda (Spirit Tracks)}} | |||
|{{ | |||
|★★★ | |★★★ | ||
|Trade-Off Ability ↑ | |Trade-Off Ability ↑ | ||
| Line 259: | Line 225: | ||
|- | |- | ||
|272 | |272 | ||
|{{SpiritTableName|Dark Suit}} | |||
|{{ | |||
|{{SpiritType|Shield}} | |{{SpiritType|Shield}} | ||
|★★ | |★★ | ||
|•Purchase at Sheldon's Place for 1000SP | |•Purchase at Sheldon's Place for 1000SP | ||
|273 | |273 | ||
|{{SpiritTableName|Light Suit}} | |||
|{{ | |||
|★★★★ | |★★★★ | ||
|Healing Shield | |Healing Shield | ||
| Line 272: | Line 236: | ||
|- | |- | ||
|278 | |278 | ||
|{{SpiritTableName|Mother Brain|link=y}} | |||
|{{ | |||
|{{SpiritType|Shield}} | |{{SpiritType|Shield}} | ||
|★★★ | |★★★ | ||
|•Battle via World of Light (The Final Battle - Dark)<br>•Battle via Spirit Board<br>•Purchase from the Vault Shop for 6000G | |•Battle via World of Light (The Final Battle - Dark)<br>•Battle via Spirit Board<br>•Purchase from the Vault Shop for 6000G | ||
|279 | |279 | ||
|{{SpiritTableName|Mother Brain (2nd Form)}} | |||
|{{ | |||
|★★★★ | |★★★★ | ||
|Giant | |Giant | ||
| Line 285: | Line 247: | ||
|- | |- | ||
|285 | |285 | ||
|{{SpiritTableName|X Parasite}} | |||
|{{ | |||
|{{SpiritType|Attack}} | |{{SpiritType|Attack}} | ||
|★ | |★ | ||
|•Purchase at Beedle's Tent for 500SP<br>•Battle via Spirit Board | |•Purchase at Beedle's Tent for 500SP<br>•Battle via Spirit Board | ||
|286 | |286 | ||
|{{SpiritTableName|Nightmare}} | |||
|{{ | |||
|★★★ | |★★★ | ||
|Lifesteal | |Lifesteal | ||
| Line 298: | Line 258: | ||
|- | |- | ||
|299 | |299 | ||
|{{SpiritTableName|Baby Mario}} | |||
|{{ | |||
|{{SpiritType|Neutral}} | |{{SpiritType|Neutral}} | ||
|★★★ | |★★★ | ||
|•Battle via World of Light (The Final Battle - Light)<br>•Battle via Spirit Board<br>•Purchase from the Vault Shop for 6000G | |•Battle via World of Light (The Final Battle - Light)<br>•Battle via Spirit Board<br>•Purchase from the Vault Shop for 6000G | ||
|300 | |300 | ||
|{{SpiritTableName|Baby Mario (Superstar Mario)}} | |||
|{{ | |||
|★★★★ | |★★★★ | ||
|First-Strike Advantage | |First-Strike Advantage | ||
| Line 311: | Line 269: | ||
|- | |- | ||
|341 | |341 | ||
|{{SpiritTableName|Nightmare's Power Orb|customname=[[Nightmare]]'s Power Orb}} | |||
|{{ | |||
|{{SpiritType|Grab}} | |{{SpiritType|Grab}} | ||
|★★ | |★★ | ||
|•Battle via Spirit Board<br>•Purchase from the Vault Shop for 1000G | |•Battle via Spirit Board<br>•Purchase from the Vault Shop for 1000G | ||
|342 | |342 | ||
|{{SpiritTableName|Nightmare Wizard}} | |||
|{{ | |||
|★★★★ | |★★★★ | ||
|Jam FS Charge | |Jam FS Charge | ||
| Line 324: | Line 280: | ||
|- | |- | ||
|347 | |347 | ||
|{{SpiritTableName|Marx|link=y}} | |||
|{{ | |||
|{{SpiritType|Grab}} | |{{SpiritType|Grab}} | ||
|★★ | |★★ | ||
|•Defeat the Mysterious Dimension boss in World of Light | |•Defeat the Mysterious Dimension boss in World of Light | ||
|348 | |348 | ||
|{{SpiritTableName|Marx (True Form)}} | |||
|{{ | |||
|★★★★ | |★★★★ | ||
|Magic Attack ↑ | |Magic Attack ↑ | ||
| Line 337: | Line 291: | ||
|- | |- | ||
|351 | |351 | ||
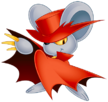
|{{SpiritTableName|Daroach}} | |||
|{{ | |||
|{{SpiritType|Attack}} | |{{SpiritType|Attack}} | ||
|★★★ | |★★★ | ||
|•Summon with cores from Count Cannoli, Mouser, and any two {{SpiritType|Neutral|a=inline}} cores | |•Summon with cores from Count Cannoli, Mouser, and any two {{SpiritType|Neutral|a=inline}} cores | ||
|352 | |352 | ||
|{{SpiritTableName|Dark Daroach}} | |||
|{{ | |||
|★★★★ | |★★★★ | ||
|Fire & Explosion Attack ↑ | |Fire & Explosion Attack ↑ | ||
| Line 350: | Line 302: | ||
|- | |- | ||
|360 | |360 | ||
|{{SpiritTableName|Waddle Dee|link=y}} | |||
|{{ | |||
|{{SpiritType|Neutral}} | |{{SpiritType|Neutral}} | ||
|★★ | |★★ | ||
|•Battle via World of Light (Gourmet Race)<br>•Battle via Spirit Board<br>•Purchase from the Vault Shop for 1000G<br>•Scan the Waddle Dee amiibo | |•Battle via World of Light (Gourmet Race)<br>•Battle via Spirit Board<br>•Purchase from the Vault Shop for 1000G<br>•Scan the Waddle Dee amiibo | ||
|361 | |361 | ||
|{{SpiritTableName|Bandana Waddle Dee}} | |||
|{{ | |||
|★★★ | |★★★ | ||
|Battering Items ↑ | |Battering Items ↑ | ||
| Line 363: | Line 313: | ||
|- | |- | ||
|366 | |366 | ||
|{{SpiritTableName|Scarfy}} | |||
|{{ | |||
|{{SpiritType|Shield}} | |{{SpiritType|Shield}} | ||
|★ | |★ | ||
|•Battle via World of Light (Mysterious Dimension)<br>•Battle via Spirit Board<br>•Purchase from the Vault Shop for 500G | |•Battle via World of Light (Mysterious Dimension)<br>•Battle via Spirit Board<br>•Purchase from the Vault Shop for 500G | ||
|367 | |367 | ||
|{{SpiritTableName|Angry Scarfy}} | |||
|{{ | |||
|★★ | |★★ | ||
|Unflinching Charged Smashes | |Unflinching Charged Smashes | ||
| Line 376: | Line 324: | ||
|- | |- | ||
|401 | |401 | ||
| | |{{SpiritTableName|Andross (Star Fox 64 3D)|customname=[[Andross]] (Star Fox 64 3D)}} | ||
|[[Andross]] (Star Fox 64 3D) | |||
|{{SpiritType|Grab}} | |{{SpiritType|Grab}} | ||
|★★★ | |★★★ | ||
|•Battle via World of Light (Mysterious Dimension)<br>•Battle via Spirit Board<br>•Purchase from the Vault Shop for 6000G | |•Battle via World of Light (Mysterious Dimension)<br>•Battle via Spirit Board<br>•Purchase from the Vault Shop for 6000G | ||
|402 | |402 | ||
| | |{{SpiritTableName|Andross (True Form)}} | ||
|Andross (True Form) | |||
|★★★★ | |★★★★ | ||
|Critical-Health Stats ↑ | |Critical-Health Stats ↑ | ||
| Line 389: | Line 335: | ||
|- | |- | ||
|450 | |450 | ||
|{{SpiritTableName|Kangaskhan}} | |||
|{{ | |||
|{{SpiritType|Grab}} | |{{SpiritType|Grab}} | ||
|★★ | |★★ | ||
|•Battle via Spirit Board<br>•Purchase from the Vault Shop for 1000G | |•Battle via Spirit Board<br>•Purchase from the Vault Shop for 1000G | ||
|451 | |451 | ||
|{{SpiritTableName|Mega Kangaskhan}} | |||
|{{ | |||
|★★★ | |★★★ | ||
|Chance of Double Final Smash | |Chance of Double Final Smash | ||
| Line 402: | Line 346: | ||
|- | |- | ||
|496 | |496 | ||
|{{SpiritTableName|Kyogre|link=y}} | |||
|{{ | |||
|{{SpiritType|Shield}} | |{{SpiritType|Shield}} | ||
|★★ | |★★ | ||
|•Battle via Spirit Board<br>•Purchase from the Vault Shop for 1000G | |•Battle via Spirit Board<br>•Purchase from the Vault Shop for 1000G | ||
|497 | |497 | ||
|{{SpiritTableName|Primal Kyogre}} | |||
|{{ | |||
|★★★ | |★★★ | ||
|Water/Freezing Resist ↑ | |Water/Freezing Resist ↑ | ||
| Line 415: | Line 357: | ||
|- | |- | ||
|498 | |498 | ||
|{{SpiritTableName|Groudon|link=y}} | |||
|{{ | |||
|{{SpiritType|Attack}} | |{{SpiritType|Attack}} | ||
|★★ | |★★ | ||
|•Battle via World of Light (Molten Fortress)<br>•Battle via Spirit Board<br>•Purchase from the Vault Shop for 1000G | |•Battle via World of Light (Molten Fortress)<br>•Battle via Spirit Board<br>•Purchase from the Vault Shop for 1000G | ||
|499 | |499 | ||
|{{SpiritTableName|Primal Groudon}} | |||
|{{ | |||
|★★★ | |★★★ | ||
|Fire/Explosion Resist ↑ | |Fire/Explosion Resist ↑ | ||
| Line 428: | Line 368: | ||
|- | |- | ||
|512 | |512 | ||
|{{SpiritTableName|Giratina (Altered Forme)|customname=[[Giratina]] (Altered Forme)}} | |||
|{{ | |||
|{{SpiritType|Neutral}} | |{{SpiritType|Neutral}} | ||
|★★★ | |★★★ | ||
|•Battle via Spirit Board<br>•Purchase from the Vault Shop for 6000G | |•Battle via Spirit Board<br>•Purchase from the Vault Shop for 6000G | ||
|513 | |513 | ||
|{{SpiritTableName|Giratina (Origin Forme)}} | |||
|{{ | |||
|★★★★ | |★★★★ | ||
|Shield Damage ↑ | |Shield Damage ↑ | ||
| Line 441: | Line 379: | ||
|- | |- | ||
|517 | |517 | ||
|{{SpiritTableName|Shaymin (Land Forme)}} | |||
|{{ | |||
|{{SpiritType|Grab}} | |{{SpiritType|Grab}} | ||
|★★★ | |★★★ | ||
|•Battle via Spirit Board<br>•Purchase from the Vault Shop for 6000G | |•Battle via Spirit Board<br>•Purchase from the Vault Shop for 6000G | ||
|518 | |518 | ||
|{{SpiritTableName|Shaymin (Sky Forme)}} | |||
|{{ | |||
|★★★★ | |★★★★ | ||
|Jump ↑ | |Jump ↑ | ||
| Line 454: | Line 390: | ||
|- | |- | ||
|534 | |534 | ||
|{{SpiritTableName|Keldeo (Ordinary Form)|customname=[[Keldeo]] (Ordinary Form)}} | |||
|{{ | |||
|{{SpiritType|Shield}} | |{{SpiritType|Shield}} | ||
|★★ | |★★ | ||
|•Battle via Spirit Board<br>•Purchase from the Vault Shop for 1000G | |•Battle via Spirit Board<br>•Purchase from the Vault Shop for 1000G | ||
|535 | |535 | ||
|{{SpiritTableName|Keldeo (Resolute Form)}} | |||
|{{ | |||
|★★★★ | |★★★★ | ||
|Hyper Smash Attacks | |Hyper Smash Attacks | ||
| Line 467: | Line 401: | ||
|- | |- | ||
|544 | |544 | ||
|{{SpiritTableName|Zygarde (50% Forme)}} | |||
|{{ | |||
|{{SpiritType|Grab}} | |{{SpiritType|Grab}} | ||
|★ | |★ | ||
|•Battle via Spirit Board<br>•Purchase from the Vault Shop for 500G | |•Battle via Spirit Board<br>•Purchase from the Vault Shop for 500G | ||
|545 | |545 | ||
|{{SpiritTableName|Zygarde (Complete Forme)}} | |||
|{{ | |||
|★★★★ | |★★★★ | ||
|Critical-Health Healing | |Critical-Health Healing | ||
| Line 480: | Line 412: | ||
|- | |- | ||
|546 | |546 | ||
|{{SpiritTableName|Diancie}} | |||
|{{ | |||
|{{SpiritType|Grab}} | |{{SpiritType|Grab}} | ||
|★★ | |★★ | ||
|•Battle via Spirit Board<br>•Purchase from the Vault Shop for 1000G | |•Battle via Spirit Board<br>•Purchase from the Vault Shop for 1000G | ||
|547 | |547 | ||
|{{SpiritTableName|Mega Diancie}} | |||
|{{ | |||
|★★★★ | |★★★★ | ||
|Franklin Badge Equipped | |Franklin Badge Equipped | ||
| Line 493: | Line 423: | ||
|- | |- | ||
|548 | |548 | ||
|{{SpiritTableName|Hoopa (Confined)}} | |||
|{{ | |||
|{{SpiritType|Grab}} | |{{SpiritType|Grab}} | ||
|★★ | |★★ | ||
|•Battle via Spirit Board<br>•Purchase from the Vault Shop for 1000G | |•Battle via Spirit Board<br>•Purchase from the Vault Shop for 1000G | ||
|549 | |549 | ||
|{{SpiritTableName|Hoopa (Unbound)}} | |||
|{{ | |||
|★★★ | |★★★ | ||
|Toss & Meteor | |Toss & Meteor | ||
| Line 506: | Line 434: | ||
|- | |- | ||
|630 | |630 | ||
| | |{{SpiritTableName|Tiki|link=y}} | ||
| | |||
|{{SpiritType|Neutral}} | |{{SpiritType|Neutral}} | ||
|★★ | |★★ | ||
|•Summon with cores from Ninian, Medeus, and any {{SpiritType|Neutral|a=inline}} core<br>•Battle via World of Light (The Light Realm)<br>•Purchase from the Vault Shop for 1000G (unlocked after obtaining spirit once)<br>•Scan the Tiki amiibo | |•Summon with cores from Ninian, Medeus, and any {{SpiritType|Neutral|a=inline}} core<br>•Battle via World of Light (The Light Realm)<br>•Purchase from the Vault Shop for 1000G (unlocked after obtaining spirit once)<br>•Scan the Tiki amiibo | ||
|631 | |631 | ||
| | |{{SpiritTableName|Tiki (Naga's Voice)}} | ||
|Tiki (Naga's Voice) | |||
|★★★ | |★★★ | ||
|Fire/Explosion Resist ↑ | |Fire/Explosion Resist ↑ | ||
| Line 519: | Line 445: | ||
|- | |- | ||
|633 | |633 | ||
| | |{{SpiritTableName|Camus}} | ||
|Camus | |||
|{{SpiritType|Shield}} | |{{SpiritType|Shield}} | ||
|★★★ | |★★★ | ||
|•Battle via World of Light (Sacred Land)<br>•Battle via Spirit Board<br>•Purchase from the Vault Shop for 6000G | |•Battle via World of Light (Sacred Land)<br>•Battle via Spirit Board<br>•Purchase from the Vault Shop for 6000G | ||
|634 | |634 | ||
| | |{{SpiritTableName|Sirius}} | ||
|Sirius | |||
|★★★★ | |★★★★ | ||
|Weapon Attack ↑ | |Weapon Attack ↑ | ||
| Line 532: | Line 456: | ||
|- | |- | ||
|637 | |637 | ||
| | |{{SpiritTableName|Alm & Celica (Young)}} | ||
|Alm & Celica (Young) | |||
|{{SpiritType|Neutral}} | |{{SpiritType|Neutral}} | ||
|★ | |★ | ||
|•Battle via World of Light (The Light Realm)<br>•Battle via Spirit Board<br>•Purchase from the Vault Shop for 500G<br>•Scan the Alm amiibo or Celica amiibo | |•Battle via World of Light (The Light Realm)<br>•Battle via Spirit Board<br>•Purchase from the Vault Shop for 500G<br>•Scan the Alm amiibo or Celica amiibo | ||
|638 | |638 | ||
| | |{{SpiritTableName|Alm & Celica}} | ||
|Alm & Celica | |||
|★★★ | |★★★ | ||
|Back Shield Equipped | |Back Shield Equipped | ||
| Line 545: | Line 467: | ||
|- | |- | ||
|645 | |645 | ||
| | |{{SpiritTableName|Lyn|link=y}} | ||
| | |||
|{{SpiritType|Attack}} | |{{SpiritType|Attack}} | ||
|★★★ | |★★★ | ||
|•Battle via Spirit Board<br>•Purchase from the Vault Shop for 6000G | |•Battle via Spirit Board<br>•Purchase from the Vault Shop for 6000G | ||
|646 | |646 | ||
| | |{{SpiritTableName|Lyn (Blade Lord)}} | ||
|Lyn (Blade Lord) | |||
|★★★★ | |★★★★ | ||
|Critical Hit ↑ ↑ | |Critical Hit ↑ ↑ | ||
| Line 558: | Line 478: | ||
|- | |- | ||
|661 | |661 | ||
| | |{{SpiritTableName|Elincia}} | ||
|Elincia | |||
|{{SpiritType|Shield}} | |{{SpiritType|Shield}} | ||
|★★ | |★★ | ||
|•Battle via World of Light (Mysterious Dimension)<br>•Battle via Spirit Board<br>•Purchase from the Vault Shop for 1000G | |•Battle via World of Light (Mysterious Dimension)<br>•Battle via Spirit Board<br>•Purchase from the Vault Shop for 1000G | ||
|662 | |662 | ||
| | |{{SpiritTableName|Queen Elincia}} | ||
|Queen Elincia | |||
|★★★★ | |★★★★ | ||
|Additional Midair Jump | |Additional Midair Jump | ||
| Line 571: | Line 489: | ||
|- | |- | ||
|664 | |664 | ||
| | |{{SpiritTableName|Zelgius}} | ||
|Zelgius | |||
|{{SpiritType|Attack}} | |{{SpiritType|Attack}} | ||
|★★★ | |★★★ | ||
|•Battle via Spirit Board<br>•Purchase from the Vault Shop for 6000G | |•Battle via Spirit Board<br>•Purchase from the Vault Shop for 6000G | ||
|665 | |665 | ||
| | |{{SpiritTableName|Black Knight|link=y}} | ||
|★★★★ | |★★★★ | ||
|Armor Knight | |Armor Knight | ||
| Line 584: | Line 500: | ||
|- | |- | ||
|687 | |687 | ||
| | |{{SpiritTableName|Tsubasa Oribe}} | ||
|Tsubasa Oribe | |||
|{{SpiritType|Shield}} | |{{SpiritType|Shield}} | ||
|★ | |★ | ||
|•Battle via World of Light (The Light Realm)<br>•Battle via Spirit Board<br>•Purchase from the Vault Shop for 500G | |•Battle via World of Light (The Light Realm)<br>•Battle via Spirit Board<br>•Purchase from the Vault Shop for 500G | ||
|688 | |688 | ||
| | |{{SpiritTableName|Tsubasa Oribe (Carnage Form)}} | ||
|Tsubasa Oribe (Carnage Form) | |||
|★★★ | |★★★ | ||
|Jump ↑ | |Jump ↑ | ||
| Line 597: | Line 511: | ||
|- | |- | ||
|710 | |710 | ||
| | |{{SpiritTableName|Medusa}} | ||
|Medusa | |||
|{{SpiritType|Attack}} | |{{SpiritType|Attack}} | ||
|★★ | |★★ | ||
|•Battle via World of Light (Mysterious Dimension)<br>•Battle via Spirit Board (unlocked after obtaining spirit once)<br>•Purchase from the Vault Shop for 1000G (unlocked after obtaining spirit once) | |•Battle via World of Light (Mysterious Dimension)<br>•Battle via Spirit Board (unlocked after obtaining spirit once)<br>•Purchase from the Vault Shop for 1000G (unlocked after obtaining spirit once) | ||
|711 | |711 | ||
| | |{{SpiritTableName|Medusa (Kid Icarus: Uprising)}} | ||
|Medusa (Kid Icarus: Uprising) | |||
|★★★★ | |★★★★ | ||
|Giant | |Giant | ||
| Line 610: | Line 522: | ||
|- | |- | ||
|714 | |714 | ||
| | |{{SpiritTableName|Pandora}} | ||
|Pandora | |||
|{{SpiritType|Grab}} | |{{SpiritType|Grab}} | ||
|★★ | |★★ | ||
|•Battle via World of Light (The Dark Realm)<br>•Battle via Spirit Board<br>•Purchase from the Vault Shop for 1000G | |•Battle via World of Light (The Dark Realm)<br>•Battle via Spirit Board<br>•Purchase from the Vault Shop for 1000G | ||
|715 | |715 | ||
| | |{{SpiritTableName|Amazon Pandora}} | ||
|Amazon Pandora | |||
|★★★ | |★★★ | ||
|Easier Dodging | |Easier Dodging | ||
| Line 623: | Line 533: | ||
|- | |- | ||
|717 | |717 | ||
| | |{{SpiritTableName|Hades}} | ||
|Hades | |||
|{{SpiritType|Shield}} | |{{SpiritType|Shield}} | ||
|★★★ | |★★★ | ||
|•Battle via Spirit Board<br>•Purchase from the Vault Shop for 6000G | |•Battle via Spirit Board<br>•Purchase from the Vault Shop for 6000G | ||
|718 | |718 | ||
| | |{{SpiritTableName|Hades (Final Form)}} | ||
|Hades (Final Form) | |||
|★★★★ | |★★★★ | ||
|Trade-Off Attacks ↑ | |Trade-Off Attacks ↑ | ||
| Line 636: | Line 544: | ||
|- | |- | ||
|741 | |741 | ||
|{{SpiritTableName| | |{{SpiritTableName|5-Volt|link=y}} | ||
|{{SpiritType|Neutral}} | |{{SpiritType|Neutral}} | ||
|★★ | |★★ | ||
|•Battle via Spirit Board<br>•Purchase from the Vault Shop for 1000G | |•Battle via Spirit Board<br>•Purchase from the Vault Shop for 1000G | ||
|742 | |742 | ||
|{{SpiritTableName| | |{{SpiritTableName|5-Volt (Angry)}} | ||
|★★★ | |★★★ | ||
|Critical-Health Attack ↑ | |Critical-Health Attack ↑ | ||
| Line 647: | Line 555: | ||
|- | |- | ||
|758 | |758 | ||
| | |{{SpiritTableName|Naked Snake}} | ||
|Naked Snake | |||
|{{SpiritType|Grab}} | |{{SpiritType|Grab}} | ||
|★★★ | |★★★ | ||
|•Battle via World of Light (The Final Battle - Dark)<br>•Battle via Spirit Board<br>•Purchase from the Vault Shop for 6000G | |•Battle via World of Light (The Final Battle - Dark)<br>•Battle via Spirit Board<br>•Purchase from the Vault Shop for 6000G | ||
|759 | |759 | ||
|{{ | |{{SpiritTableName|Big Boss}} | ||
|★★★★ | |★★★★ | ||
|Metal Killer | |Metal Killer | ||
| Line 660: | Line 566: | ||
|- | |- | ||
|762 | |762 | ||
| | |{{SpiritTableName|Revolver Ocelot (Metal Gear Solid 3)}} | ||
|Revolver Ocelot (Metal Gear Solid 3) | |||
|{{SpiritType|Grab}} | |{{SpiritType|Grab}} | ||
|★★ | |★★ | ||
|•Battle via World of Light (Base)<br>•Battle via Spirit Board<br>•Purchase from the Vault Shop for 1000G | |•Battle via World of Light (Base)<br>•Battle via Spirit Board<br>•Purchase from the Vault Shop for 1000G | ||
|763 | |763 | ||
| | |{{SpiritTableName|Revolver Ocelot (Metal Gear Solid V)}} | ||
|Revolver Ocelot (Metal Gear Solid V) | |||
|★★★ | |★★★ | ||
|Shooting Attack ↑ | |Shooting Attack ↑ | ||
| Line 673: | Line 577: | ||
|- | |- | ||
|772 | |772 | ||
| | |{{SpiritTableName|Metal Gear ZEKE}} | ||
|Metal Gear ZEKE | |||
|{{SpiritType|Shield}} | |{{SpiritType|Shield}} | ||
|★ | |★ | ||
|•Purchase at Sheldon's Place for 500SP<br>•Battle via Spirit Board | |•Purchase at Sheldon's Place for 500SP<br>•Battle via Spirit Board | ||
|773 | |773 | ||
| | |{{SpiritTableName|Sahelanthropus}} | ||
|Sahelanthropus | |||
|★★★ | |★★★ | ||
|Metal and Giant | |Metal and Giant | ||
| Line 686: | Line 588: | ||
|- | |- | ||
|788 | |788 | ||
|{{ | |{{SpiritTableName|Shadow the Hedgehog|link=y}} | ||
|{{SpiritType|Attack}} | |{{SpiritType|Attack}} | ||
|★★★ | |★★★ | ||
|•Battle via Spirit Board<br>•Purchase from the Vault Shop for 6000G | |•Battle via Spirit Board<br>•Purchase from the Vault Shop for 6000G | ||
|789 | |789 | ||
| | |{{SpiritTableName|Super Shadow}} | ||
|Super Shadow | |||
|★★★★ | |★★★★ | ||
|Undamaged Attack & Speed ↑ | |Undamaged Attack & Speed ↑ | ||
| Line 699: | Line 599: | ||
|- | |- | ||
|786 | |786 | ||
| | |{{SpiritTableName|Chao}} | ||
|Chao | |||
|{{SpiritType|Shield}} | |{{SpiritType|Shield}} | ||
|★ | |★ | ||
|•Battle via World of Light (The Light Realm)<br>•Battle via Spirit Board<br>•Purchase from the Vault Shop for 500G | |•Battle via World of Light (The Light Realm)<br>•Battle via Spirit Board<br>•Purchase from the Vault Shop for 500G | ||
|787 | |787 | ||
| | |{{SpiritTableName|Hero Chao}} | ||
|Hero Chao | |||
|★★★ | |★★★ | ||
|Fast Final Smash Meter | |Fast Final Smash Meter | ||
| Line 712: | Line 610: | ||
|- | |- | ||
|810 | |810 | ||
|{{SpiritTableName|Bulborb|link=y}} | |||
|{{ | |||
|{{SpiritType|Shield}} | |{{SpiritType|Shield}} | ||
|★★ | |★★ | ||
|•Battle via World of Light (Sacred Land)<br>•Battle via Spirit Board<br>•Purchase from the Vault Shop for 1000G | |•Battle via World of Light (Sacred Land)<br>•Battle via Spirit Board<br>•Purchase from the Vault Shop for 1000G | ||
|811 | |811 | ||
| | |{{SpiritTableName|Empress Bulblax}} | ||
|Empress Bulblax | |||
|★★★★ | |★★★★ | ||
|Stats ↑ ↑ after Eating | |Stats ↑ ↑ after Eating | ||
| Line 725: | Line 621: | ||
|- | |- | ||
|828 | |828 | ||
| | |{{SpiritTableName|Tom Nook|link=y}} | ||
|{{SpiritType|Neutral}} | |{{SpiritType|Neutral}} | ||
|★★ | |★★ | ||
|•Summon with cores from Maruhige Shop Owner, Shop Assistant, and any {{SpiritType|Neutral|a=inline}} core<br>•Battle via Spirit Board (unlocked after obtaining spirit once)<br>•Purchase from the Vault Shop for 1000G (unlocked after obtaining spirit once)<br>•Scan the Tom Nook amiibo | |•Summon with cores from Maruhige Shop Owner, Shop Assistant, and any {{SpiritType|Neutral|a=inline}} core<br>•Battle via Spirit Board (unlocked after obtaining spirit once)<br>•Purchase from the Vault Shop for 1000G (unlocked after obtaining spirit once)<br>•Scan the Tom Nook amiibo | ||
|829 | |829 | ||
| | |{{SpiritTableName|Tom Nook (Nookington's)}} | ||
|Tom Nook (Nookington's) | |||
|★★★ | |★★★ | ||
|Item Gravitation | |Item Gravitation | ||
| Line 738: | Line 632: | ||
|- | |- | ||
|831 | |831 | ||
| | |{{SpiritTableName|DJ K.K.}} | ||
|DJ K.K. | |||
|{{SpiritType|Neutral}} | |{{SpiritType|Neutral}} | ||
|★★ | |★★ | ||
|•Summon with cores from 9-Volt & 18-Volt and Labrador Retriever<br>•Battle via Spirit Board (unlocked after obtaining spirit once)<br>•Purchase from the Vault Shop for 1000G (unlocked after obtaining spirit once)<br>•Scan the K.K. amiibo | |•Summon with cores from 9-Volt & 18-Volt and Labrador Retriever<br>•Battle via Spirit Board (unlocked after obtaining spirit once)<br>•Purchase from the Vault Shop for 1000G (unlocked after obtaining spirit once)<br>•Scan the K.K. amiibo | ||
|832 | |832 | ||
| | |{{SpiritTableName|K.K. Slider|link=y}} | ||
| | |||
|★★★ | |★★★ | ||
|Running Start | |Running Start | ||
| Line 751: | Line 643: | ||
|- | |- | ||
|905 | |905 | ||
| | |{{SpiritTableName|X|customname={{b|X|Mega Man}}}} | ||
|{{b|X|Mega Man}} | |||
|{{SpiritType|Grab}} | |{{SpiritType|Grab}} | ||
|★★★ | |★★★ | ||
|•Battle via World of Light (The Final Battle - Light)<br>•Battle via Spirit Board<br>•Purchase from the Vault Shop for 6000G | |•Battle via World of Light (The Final Battle - Light)<br>•Battle via Spirit Board<br>•Purchase from the Vault Shop for 6000G | ||
|906 | |906 | ||
| | |{{SpiritTableName|Full Armor X}} | ||
|Full Armor X | |||
|★★★★ | |★★★★ | ||
|Super Armor | |Super Armor | ||
| Line 764: | Line 654: | ||
|- | |- | ||
|907 | |907 | ||
|{{ | |{{SpiritTableName|Zero (Zero Buster)|customname={{b|Zero|Mega Man}} (Zero Buster)}} | ||
|{{b|Zero|Mega Man}} (Zero Buster) | |||
|{{SpiritType|Attack}} | |{{SpiritType|Attack}} | ||
|★★ | |★★ | ||
|•Battle via World of Light (The Final Battle - Dark)<br>•Battle via Spirit Board<br>•Purchase from the Vault Shop for 1000G | |•Battle via World of Light (The Final Battle - Dark)<br>•Battle via Spirit Board<br>•Purchase from the Vault Shop for 1000G | ||
|908 | |908 | ||
| | |{{SpiritTableName|Zero (Z-Saber)}} | ||
|Zero (Z-Saber) | |||
|★★★★ | |★★★★ | ||
|Weapon Attack & Move Speed ↑ | |Weapon Attack & Move Speed ↑ | ||
| Line 777: | Line 665: | ||
|- | |- | ||
|916 | |916 | ||
|{{ | |{{SpiritTableName|Geo Stelar & Omega-Xis}} | ||
|{{SpiritType|Neutral}} | |{{SpiritType|Neutral}} | ||
|★★ | |★★ | ||
|•Complete Challenge (Adventure): Awaken 25 fighters.<br>•Battle via Spirit Board (unlocked after obtaining spirit once)<br>•Purchase from the Vault Shop for 1000G (unlocked after obtaining spirit once) | |•Complete Challenge (Adventure): Awaken 25 fighters.<br>•Battle via Spirit Board (unlocked after obtaining spirit once)<br>•Purchase from the Vault Shop for 1000G (unlocked after obtaining spirit once) | ||
|917 | |917 | ||
| | |{{SpiritTableName|Star Force Mega Man|link=y}} | ||
| | |||
|★★★ | |★★★ | ||
|Shooting Items ↑ | |Shooting Items ↑ | ||
| Line 790: | Line 676: | ||
|- | |- | ||
|919 | |919 | ||
|{{ | |{{SpiritTableName|Model X}} | ||
|{{SpiritType|Grab}} | |{{SpiritType|Grab}} | ||
|★ | |★ | ||
|•Battle via World of Light (The Light Realm)<br>•Battle via Spirit Board<br>•Purchase from the Vault Shop for 500G | |•Battle via World of Light (The Light Realm)<br>•Battle via Spirit Board<br>•Purchase from the Vault Shop for 500G | ||
|920 | |920 | ||
| | |{{SpiritTableName|Model ZX}} | ||
|Model ZX | |||
|★★ | |★★ | ||
|Transformation Duration ↑ | |Transformation Duration ↑ | ||
| Line 803: | Line 687: | ||
|- | |- | ||
|959 | |959 | ||
| | |{{SpiritTableName|Mumkhar}} | ||
|Mumkhar | |||
|{{SpiritType|Attack}} | |{{SpiritType|Attack}} | ||
|★★ | |★★ | ||
|•Battle via World of Light (The Final Battle - Dark)<br>•Battle via Spirit Board<br>•Purchase from the Vault Shop for 1000G | |•Battle via World of Light (The Final Battle - Dark)<br>•Battle via Spirit Board<br>•Purchase from the Vault Shop for 1000G | ||
|960 | |960 | ||
| | |{{SpiritTableName|Metal Face|link=y}} | ||
|★★★★ | |★★★★ | ||
|Metal and Giant | |Metal and Giant | ||
| Line 816: | Line 698: | ||
|- | |- | ||
|980 | |980 | ||
| | |{{SpiritTableName|Chun-Li (Street Fighter Alpha)}} | ||
|Chun-Li (Street Fighter Alpha) | |||
|{{SpiritType|Grab}} | |{{SpiritType|Grab}} | ||
|★★ | |★★ | ||
|•Battle via World of Light (World Tour)<br>•Battle via Spirit Board<br>•Purchase from the Vault Shop for 1000G | |•Battle via World of Light (World Tour)<br>•Battle via Spirit Board<br>•Purchase from the Vault Shop for 1000G | ||
|981 | |981 | ||
| | |{{SpiritTableName|Chun-Li}} | ||
|Chun-Li | |||
|★★★ | |★★★ | ||
|Physical Attack ↑ | |Physical Attack ↑ | ||
| Line 829: | Line 709: | ||
|- | |- | ||
|1,010 | |1,010 | ||
| | |{{SpiritTableName|Jeanne}} | ||
|Jeanne | |||
|{{SpiritType|Attack}} | |{{SpiritType|Attack}} | ||
|★★★ | |★★★ | ||
|•Battle via World of Light (The Final Battle - Dark)<br>•Battle via Spirit Board<br>•Purchase from the Vault Shop for 6000G | |•Battle via World of Light (The Final Battle - Dark)<br>•Battle via Spirit Board<br>•Purchase from the Vault Shop for 6000G | ||
|1,011 | |1,011 | ||
| | |{{SpiritTableName|Cutie J}} | ||
|Cutie J | |||
|★★★★ | |★★★★ | ||
|Easier Dodging | |Easier Dodging | ||
| Line 842: | Line 720: | ||
|- | |- | ||
|1,012 | |1,012 | ||
| | |{{SpiritTableName|Rodin|link=y}} | ||
| | |||
|{{SpiritType|Attack}} | |{{SpiritType|Attack}} | ||
|★★★ | |★★★ | ||
|•Summon with cores from Brewster and Aegislash | |•Summon with cores from Brewster and Aegislash | ||
|1,013 | |1,013 | ||
| | |{{SpiritTableName|Rodin, the Infinite One}} | ||
|Rodin, the Infinite One | |||
|★★★★ | |★★★★ | ||
|Critical-Health Attack ↑ | |Critical-Health Attack ↑ | ||
| Line 855: | Line 731: | ||
|- | |- | ||
|1,017 | |1,017 | ||
| | |{{SpiritTableName|Balder}} | ||
|Balder | |||
|{{SpiritType|Shield}} | |{{SpiritType|Shield}} | ||
|★★ | |★★ | ||
|•Battle via World of Light (The Final Battle - Light)<br>•Battle via Spirit Board<br>•Purchase from the Vault Shop for 1000G | |•Battle via World of Light (The Final Battle - Light)<br>•Battle via Spirit Board<br>•Purchase from the Vault Shop for 1000G | ||
|1,018 | |1,018 | ||
| | |{{SpiritTableName|Father Balder}} | ||
|Father Balder | |||
|★★★ | |★★★ | ||
|[[Franklin Badge]] Equipped | |[[Franklin Badge]] Equipped | ||
| Line 868: | Line 742: | ||
|- | |- | ||
|1,043 | |1,043 | ||
| | |{{SpiritTableName|DJ Octavio}} | ||
|DJ Octavio | |||
|{{SpiritType|Neutral}} | |{{SpiritType|Neutral}} | ||
|★★ | |★★ | ||
|•Summon with cores from Octoling, Octorok, and any {{SpiritType|Neutral|a=inline}} core | |•Summon with cores from Octoling, Octorok, and any {{SpiritType|Neutral|a=inline}} core | ||
|1,044 | |1,044 | ||
| | |{{SpiritTableName|Octobot King}} | ||
|Octobot King | |||
|★★★ | |★★★ | ||
|Made of Metal | |Made of Metal | ||
| Line 881: | Line 753: | ||
|- | |- | ||
|1,053 | |1,053 | ||
| | |{{SpiritTableName|Maria Renard}} | ||
|Maria Renard | |||
|{{SpiritType|Grab}} | |{{SpiritType|Grab}} | ||
|★★ | |★★ | ||
|•Battle via World of Light (Dracula's Castle)<br>•Battle via Spirit Board<br>•Purchase from the Vault Shop for 1000G | |•Battle via World of Light (Dracula's Castle)<br>•Battle via Spirit Board<br>•Purchase from the Vault Shop for 1000G | ||
|1,054 | |1,054 | ||
| | |{{SpiritTableName|Maria Renard (Symphony of the Night)}} | ||
|Maria Renard (Symphony of the Night) | |||
|★★★ | |★★★ | ||
|Additional Midair Jump | |Additional Midair Jump | ||
| Line 894: | Line 764: | ||
|- | |- | ||
|1,075 | |1,075 | ||
| | |{{SpiritTableName|Dracula|link=y}} | ||
| | |||
|{{SpiritType|Neutral}} | |{{SpiritType|Neutral}} | ||
|★★★ | |★★★ | ||
|•Defeat the Dracula's Castle boss in World of Light | |•Defeat the Dracula's Castle boss in World of Light | ||
|1,076 | |1,076 | ||
| | |{{SpiritTableName|Soma Cruz}} | ||
|Soma Cruz | |||
|★★★★ | |★★★★ | ||
|Giant Killer | |Giant Killer | ||
| Line 907: | Line 775: | ||
|- | |- | ||
|1,130 | |1,130 | ||
|{{ | |{{SpiritTableName|Donbe & Hikari}} | ||
|{{SpiritType|Neutral}} | |{{SpiritType|Neutral}} | ||
|★★ | |★★ | ||
|•Battle via World of Light (Sacred Land)<br>•Battle via Spirit Board<br>•Purchase from the Vault Shop for 1000G | |•Battle via World of Light (Sacred Land)<br>•Battle via Spirit Board<br>•Purchase from the Vault Shop for 1000G | ||
|1,131 | |1,131 | ||
| | |{{SpiritTableName|Donbe & Hikari (Shin Onigashima Kouhen)}} | ||
|Donbe & Hikari (Shin Onigashima Kouhen) | |||
|★★★ | |★★★ | ||
|Stamina ↑ | |Stamina ↑ | ||
| Line 920: | Line 786: | ||
|- | |- | ||
|1,143 | |1,143 | ||
|{{ | |{{SpiritTableName|Frog & Snake}} | ||
|Frog & Snake | |||
|{{SpiritType|Shield}} | |{{SpiritType|Shield}} | ||
|★★ | |★★ | ||
|•Summon with cores from Prince Peasley, Winky, and Rattly<br>•Battle via World of Light (The Dark Realm)<br>•Purchase from the Vault Shop for 1000G (unlocked after obtaining spirit once) | |•Summon with cores from Prince Peasley, Winky, and Rattly<br>•Battle via World of Light (The Dark Realm)<br>•Purchase from the Vault Shop for 1000G (unlocked after obtaining spirit once) | ||
|1,144 | |1,144 | ||
| | |{{SpiritTableName|Prince of Sablé|link=y}} | ||
|★★★★ | |★★★★ | ||
|Transformation Duration ↑ | |Transformation Duration ↑ | ||
| Line 933: | Line 797: | ||
|- | |- | ||
|1,160 | |1,160 | ||
|{{SpiritTableName|Ray Mk II}} | |||
|{{ | |||
|{{SpiritType|Grab}} | |{{SpiritType|Grab}} | ||
|★★ | |★★ | ||
|•Treasure Chest in World of Light (The Light Realm)<br>•Battle via Spirit Board (unlocked after obtaining spirit once)<br>•Purchase from the Vault Shop for 1000G (unlocked after obtaining spirit once) | |•Treasure Chest in World of Light (The Light Realm)<br>•Battle via Spirit Board (unlocked after obtaining spirit once)<br>•Purchase from the Vault Shop for 1000G (unlocked after obtaining spirit once) | ||
|1,161 | |1,161 | ||
| | |{{SpiritTableName|Ray Mk III|link=y}} | ||
|★★★ | |★★★ | ||
|Lightweight | |Lightweight | ||
| Line 946: | Line 808: | ||
|- | |- | ||
|1,168 | |1,168 | ||
| | |{{SpiritTableName|Isaac|link=y}} | ||
| | |||
|{{SpiritType|Grab}} | |{{SpiritType|Grab}} | ||
|★★★ | |★★★ | ||
|•Summon with cores from Garet, Mia, and Ivan<br>•Battle via World of Light (The Final Battle - Light)<br>•Purchase from the Vault Shop for 6000G (unlocked after obtaining spirit once) | |•Summon with cores from Garet, Mia, and Ivan<br>•Battle via World of Light (The Final Battle - Light)<br>•Purchase from the Vault Shop for 6000G (unlocked after obtaining spirit once) | ||
|1,169 | |1,169 | ||
| | |{{SpiritTableName|Isaac (Dark Dawn)}} | ||
|Isaac (Dark Dawn) | |||
|★★★★ | |★★★★ | ||
|Energy Shot Attack/Resistance ↑ | |Energy Shot Attack/Resistance ↑ | ||
| Line 959: | Line 819: | ||
|- | |- | ||
|1,193 | |1,193 | ||
|{{ | |{{SpiritTableName|The Wandering Samurai}} | ||
|{{SpiritType|Attack}} | |{{SpiritType|Attack}} | ||
|★★ | |★★ | ||
|•Summon with cores from Sakura Samurai and Ghosts | |•Summon with cores from Sakura Samurai and Ghosts | ||
|1,194 | |1,194 | ||
| | |{{SpiritTableName|Wandering Samurai (Rhythm Heaven Fever)}} | ||
|Wandering Samurai (Rhythm Heaven Fever) | |||
|★★★ | |★★★ | ||
|Critical Hit ↑ | |Critical Hit ↑ | ||
| Line 972: | Line 830: | ||
|- | |- | ||
|1,206 | |1,206 | ||
|{{ | |{{SpiritTableName|Chibi-Robo|link=y}} | ||
|{{SpiritType|Grab}} | |{{SpiritType|Grab}} | ||
|★★ | |★★ | ||
|•Battle via World of Light (The Final Battle - Light)<br>•Battle via Spirit Board<br>•Purchase from the Vault Shop for 1000G<br>•Scan the Chibi-Robo amiibo | |•Battle via World of Light (The Final Battle - Light)<br>•Battle via Spirit Board<br>•Purchase from the Vault Shop for 1000G<br>•Scan the Chibi-Robo amiibo | ||
|1,207 | |1,207 | ||
|{{ | |{{SpiritTableName|Super Chibi-Robo}} | ||
|★★★ | |★★★ | ||
|Thrown Items ↑ | |Thrown Items ↑ | ||
| Line 985: | Line 841: | ||
|- | |- | ||
|1,214 | |1,214 | ||
| | |{{SpiritTableName|Dr. Kawashima|link=y}} | ||
|{{SpiritType|Neutral}} | |{{SpiritType|Neutral}} | ||
|★★ | |★★ | ||
|•Battle via Spirit Board<br>•Purchase from the Vault Shop for 1000G | |•Battle via Spirit Board<br>•Purchase from the Vault Shop for 1000G | ||
|1,215 | |1,215 | ||
| | |{{SpiritTableName|Dr. Kawashima (Concentration Training)}} {{Flag|North America}}<br>Dr. Kawashima (Devilish Brain Training) {{Flag|PAL}} | ||
|Dr. Kawashima (Concentration Training) {{Flag|North America}}<br>Dr. Kawashima (Devilish Brain Training) {{Flag|PAL}} | |||
|★★★★ | |★★★★ | ||
|Unflinching Charged Smashes | |Unflinching Charged Smashes | ||
| Line 998: | Line 852: | ||
|- | |- | ||
|1,242 | |1,242 | ||
|{{ | |{{SpiritTableName|Nick}} | ||
|{{SpiritType|Neutral}} | |{{SpiritType|Neutral}} | ||
|★ | |★ | ||
|•Battle via World of Light (The Light Realm)<br>•Battle via Spirit Board<br>•Purchase from the Vault Shop for 500G | |•Battle via World of Light (The Light Realm)<br>•Battle via Spirit Board<br>•Purchase from the Vault Shop for 500G | ||
|1,243 | |1,243 | ||
|{{ | |{{SpiritTableName|Captain Rainbow}} | ||
|★★★ | |★★★ | ||
|First-Strike Advantage | |First-Strike Advantage | ||
| Line 1,011: | Line 863: | ||
|- | |- | ||
|1,330 | |1,330 | ||
| | |{{SpiritTableName|Slime (Dragon Quest)|customname=[[Slime]] (Dragon Quest)}} | ||
|[[Slime]] (Dragon Quest) | |||
|{{SpiritType|Grab}} | |{{SpiritType|Grab}} | ||
|★ | |★ | ||
|•Battle via DLC Spirit Board<br>•Purchase from the Vault Shop for 500G (since v4.0.0) | |•Battle via DLC Spirit Board<br>•Purchase from the Vault Shop for 500G (since v4.0.0) | ||
|1,331 | |1,331 | ||
| | |{{SpiritTableName|King Slime}} | ||
|King Slime | |||
|★★★ | |★★★ | ||
|Weight ↑ ↑ | |Weight ↑ ↑ | ||
| Line 1,024: | Line 874: | ||
|- | |- | ||
|1,334 | |1,334 | ||
| | |{{SpiritTableName|Great Sabrecub}} | ||
|Great Sabrecub | |||
|{{SpiritType|Attack}} | |{{SpiritType|Attack}} | ||
|★ | |★ | ||
|•Battle via DLC Spirit Board<br>•Purchase from the Vault Shop for 500G (since v4.0.0) | |•Battle via DLC Spirit Board<br>•Purchase from the Vault Shop for 500G (since v4.0.0) | ||
|1,335 | |1,335 | ||
| | |{{SpiritTableName|Great Sabrecat}} | ||
|Great Sabrecat | |||
|★★★ | |★★★ | ||
|Physical Attack ↑ | |Physical Attack ↑ | ||
| Line 1,037: | Line 885: | ||
|- | |- | ||
|1,341 | |1,341 | ||
| | |{{SpiritTableName|Jinjos|customname=[[Jinjo]]s}} | ||
|[[Jinjo]]s | |||
|{{SpiritType|Neutral}} | |{{SpiritType|Neutral}} | ||
|★★ | |★★ | ||
|•Battle via DLC Spirit Board<br>•Purchase from the Vault Shop for 1000G (since v5.0.0) | |•Battle via DLC Spirit Board<br>•Purchase from the Vault Shop for 1000G (since v5.0.0) | ||
|1,342 | |1,342 | ||
| | |{{SpiritTableName|The Mighty Jinjonator|link=y}} | ||
| | |||
|★★★ | |★★★ | ||
|Giant | |Giant | ||
| Line 1,050: | Line 896: | ||
|- | |- | ||
|1,382 | |1,382 | ||
| | |{{SpiritTableName|Edelgard}} | ||
|Edelgard | |||
|{{SpiritType|Attack}} | |{{SpiritType|Attack}} | ||
|★★ | |★★ | ||
|•Battle via DLC Spirit Board<br>•Purchase from the Vault Shop for 1000G (since v7.0.0) | |•Battle via DLC Spirit Board<br>•Purchase from the Vault Shop for 1000G (since v7.0.0) | ||
|1,383 | |1,383 | ||
| | |{{SpiritTableName|Edelgard - Five Years Later}} | ||
|Edelgard - Five Years Later | |||
|★★★ | |★★★ | ||
|Armor Knight | |Armor Knight | ||
| Line 1,063: | Line 907: | ||
|- | |- | ||
|1,384 | |1,384 | ||
| | |{{SpiritTableName|Dimitri (Fire Emblem)}} | ||
|Dimitri (Fire Emblem) | |||
|{{SpiritType|Shield}} | |{{SpiritType|Shield}} | ||
|★★ | |★★ | ||
|•Battle via DLC Spirit Board<br>•Purchase from the Vault Shop for 1000G (since v7.0.0) | |•Battle via DLC Spirit Board<br>•Purchase from the Vault Shop for 1000G (since v7.0.0) | ||
|1,385 | |1,385 | ||
| | |{{SpiritTableName|Dimitri - Five Years Later (Fire Emblem)}} | ||
|Dimitri - Five Years Later (Fire Emblem) | |||
|★★★ | |★★★ | ||
|Hyper Smash Attacks | |Hyper Smash Attacks | ||
| Line 1,076: | Line 918: | ||
|- | |- | ||
|1,386 | |1,386 | ||
| | |{{SpiritTableName|Claude}} | ||
|Claude | |||
|{{SpiritType|Grab}} | |{{SpiritType|Grab}} | ||
|★★ | |★★ | ||
|•Battle via DLC Spirit Board<br>•Purchase from the Vault Shop for 1000G (since v7.0.0) | |•Battle via DLC Spirit Board<br>•Purchase from the Vault Shop for 1000G (since v7.0.0) | ||
|1,387 | |1,387 | ||
| | |{{SpiritTableName|Claude - Five Years Later}} | ||
|Claude - Five Years Later | |||
|★★★ | |★★★ | ||
|Weapon Attack & Move Speed ↑ | |Weapon Attack & Move Speed ↑ | ||
| Line 1,089: | Line 929: | ||
|- | |- | ||
|1,402 | |1,402 | ||
|{{anchor|Lotus}}[[File:Lotus | |{{anchor|Lotus}}[[File:SSBU spirit Lotus.jpg|center|108x108px]] | ||
|Lotus | |Lotus | ||
|{{SpiritType|Neutral}} | |{{SpiritType|Neutral}} | ||
| Line 1,095: | Line 935: | ||
|•Battle via Spirit Board (during the event Spirits in Black) | |•Battle via Spirit Board (during the event Spirits in Black) | ||
|1,403 | |1,403 | ||
|{{ | |{{SpiritTableName|Natah}} | ||
|★★★ | |★★★ | ||
|Transformation Duration ↑ | |Transformation Duration ↑ | ||
Revision as of 14:50, November 22, 2020
Enhanceable spirits are primary spirits that can be transformed into another spirit after reaching level 99.
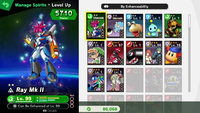
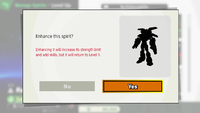
Enhanceable spirits do not have a trait other than their enhanceability. Once it has reached level 99, an enhanceable spirit can be enhanced, transforming it into a higher-class spirit; typically, the enhanced spirit's trait is not normally available to primary spirits. The enhanced spirit reverts to level 1 after being enhanced. There are currently 82 enhanceable spirits.
Enhanced spirits are always numbered directly after their unenhanced counterpart. Enhanced spirits always have the same type and number of support spirit slots as their unenhanced counterpart. While some enhanced spirits do have a different series to their unenhanced counterpart, they always remain in the same universe.
List of enhanceable spirits
| Base Spirit | Enhanced Spirit | Series | |||||||||
|---|---|---|---|---|---|---|---|---|---|---|---|
| No. | Image | Name | Type | Class | Acquisition | No. | Image | Name | Class | Ability | |
| 31 | Toad | ★★ | •Battle via Spirit Board •Battle via World of Light (The Light Realm) •Purchase from the Vault Shop for 1000G •Scan the Toad amiibo |
32 | Captain Toad | ★★★ | Item Gravitation | ||||
| 41 | Bullet Bill | ★ | •Battle via World of Light (The Light Realm) •Battle via Spirit Board •Purchase from the Vault Shop for 500G |
42 | Banzai Bill | ★★ | Impact Run | ||||
| 48 | Boo | ★ | •Battle via World of Light (Dracula's Castle) •Battle via Spirit Board •Purchase from the Vault Shop for 500G •Scan the Boo amiibo |
49 | King Boo | ★★ | Floaty Jumps | ||||
| 53 | Nipper Plant | ★ | •Purchase at Beedle's Tent for 500SP •Battle via Spirit Board |
54 | Petey Piranha | ★★★ | Giant | ||||
| 55 | Boom Boom | ★★ | •Battle via World of Light (The Light Realm) •Battle via Spirit Board •Purchase from the Vault Shop for 1000G |
56 | Boom Boom & Pom Pom | ★★★ | Hyper Smash Attacks | ||||
| 95 | Paper Bowser | ★★★ | •Battle via Spirit Board •Purchase from the Vault Shop for 6000G |
96 | Paper Bowser (Paper Mario: Sticker Star) | ★★★★ | Mouthful of Curry | ||||
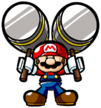
| 126 | Mini Mario | ★★ | •Purchase at Timmy and Tommy's for 1000SP | 127 | Mini Mario & Hammers | ★★★ | Hammer Duration ↑ | ||||
| 145 | Dixie Kong | ★★★ | •Summon with cores from Tiny Kong and Candy Kong •Battle via Spirit Board (unlocked after obtaining spirit once) •Purchase from the Vault Shop for 6000G (unlocked after obtaining spirit once) |
146 | Dixie Kong & Kiddy Kong | ★★★★ | Thrown Items ↑ | ||||
| 189 | Young Zelda | ★★ | •Battle via Spirit Board •Purchase from the Vault Shop for 1000G |
190 | Zelda (Ocarina of Time) | ★★★★ | Assist Killer | ||||
| 202 | Koume & Kotake | ★★ | •Battle via Spirit Board (unlocked after obtaining spirit once) •Purchase from the Vault Shop for 6000G (unlocked after obtaining spirit once) |
203 | Twinrova | ★★★ | Magic Attack ↑ | ||||
| 205 | Skull Kid | ★★ | •Battle via World of Light (Sacred Land) •Battle via Spirit Board •Purchase from the Vault Shop for 1000G |
206 | Skull Kid & Majora's Mask | ★★★★ | Lifesteal | ||||
| 220 | Ganondorf (Twilight Princess) | ★★★ | •Battle via World of Light (Mysterious Dimension) •Battle via Spirit Board •Purchase from the Vault Shop for 6000G |
221 | Beast Ganon | ★★★★ | Impact Run | ||||
| 222 | Midna | ★★★ | •Battle via World of Light (The Final Battle - Dark) •Battle via Spirit Board •Purchase from the Vault Shop for 6000G •Scan the Wolf Link amiibo |
223 | Wolf Link & Midna | ★★★★ | Dash Attack ↑ | ||||
| 233 | Wall-Merged Link | ★★ | •Treasure Chest in World of Light (Sacred Land) •Battle via Spirit Board •Purchase from the Vault Shop for 1000G |
234 | Link (A Link Between Worlds) | ★★★ | Weapon Attack ↑ | ||||
| 246 | Tetra | ★★★ | •Battle via World of Light (The Final Battle - Light) •Battle via Spirit Board •Purchase from the Vault Shop for 6000G |
247 | Zelda (The Wind Waker) | ★★★★ | Chance of Double Final Smash | ||||
| 248 | King of Red Lions | ★★ | •Purchase at Funky Kong's Shack for 1000SP | 249 | King of Hyrule | ★★★ | Transformation Duration ↑ | ||||
| 258 | Phantom | ★★ | •Battle via World of Light (The Light Realm) •Battle via Spirit Board •Purchase from the Vault Shop for 1000G |
259 | Zelda (Spirit Tracks) | ★★★ | Trade-Off Ability ↑ | ||||
| 272 | Dark Suit | ★★ | •Purchase at Sheldon's Place for 1000SP | 273 | Light Suit | ★★★★ | Healing Shield | ||||
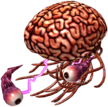
| 278 | Mother Brain | ★★★ | •Battle via World of Light (The Final Battle - Dark) •Battle via Spirit Board •Purchase from the Vault Shop for 6000G |
279 | Mother Brain (2nd Form) | ★★★★ | Giant | ||||
| 285 | X Parasite | ★ | •Purchase at Beedle's Tent for 500SP •Battle via Spirit Board |
286 | Nightmare | ★★★ | Lifesteal | ||||
| 299 | Baby Mario | ★★★ | •Battle via World of Light (The Final Battle - Light) •Battle via Spirit Board •Purchase from the Vault Shop for 6000G |
300 | Baby Mario (Superstar Mario) | ★★★★ | First-Strike Advantage | ||||
| 341 | Nightmare's Power Orb | ★★ | •Battle via Spirit Board •Purchase from the Vault Shop for 1000G |
342 | Nightmare Wizard | ★★★★ | Jam FS Charge | ||||
| 347 | Marx | ★★ | •Defeat the Mysterious Dimension boss in World of Light | 348 | Marx (True Form) | ★★★★ | Magic Attack ↑ | ||||
| 351 | Daroach | ★★★ | •Summon with cores from Count Cannoli, Mouser, and any two |
352 | Dark Daroach | ★★★★ | Fire & Explosion Attack ↑ | ||||
| 360 | Waddle Dee | ★★ | •Battle via World of Light (Gourmet Race) •Battle via Spirit Board •Purchase from the Vault Shop for 1000G •Scan the Waddle Dee amiibo |
361 | Bandana Waddle Dee | ★★★ | Battering Items ↑ | ||||
| 366 | Scarfy | ★ | •Battle via World of Light (Mysterious Dimension) •Battle via Spirit Board •Purchase from the Vault Shop for 500G |
367 | Angry Scarfy | ★★ | Unflinching Charged Smashes | ||||
| 401 | Andross (Star Fox 64 3D) | ★★★ | •Battle via World of Light (Mysterious Dimension) •Battle via Spirit Board •Purchase from the Vault Shop for 6000G |
402 | Andross (True Form) | ★★★★ | Critical-Health Stats ↑ | ||||
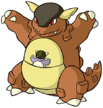
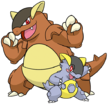
| 450 | Kangaskhan | ★★ | •Battle via Spirit Board •Purchase from the Vault Shop for 1000G |
451 | Mega Kangaskhan | ★★★ | Chance of Double Final Smash | ||||
| 496 | Kyogre | ★★ | •Battle via Spirit Board •Purchase from the Vault Shop for 1000G |
497 | Primal Kyogre | ★★★ | Water/Freezing Resist ↑ | ||||
| 498 | Groudon | ★★ | •Battle via World of Light (Molten Fortress) •Battle via Spirit Board •Purchase from the Vault Shop for 1000G |
499 | Primal Groudon | ★★★ | Fire/Explosion Resist ↑ | ||||
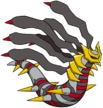
| 512 | Giratina (Altered Forme) | ★★★ | •Battle via Spirit Board •Purchase from the Vault Shop for 6000G |
513 | Giratina (Origin Forme) | ★★★★ | Shield Damage ↑ | ||||
| 517 | Shaymin (Land Forme) | ★★★ | •Battle via Spirit Board •Purchase from the Vault Shop for 6000G |
518 | Shaymin (Sky Forme) | ★★★★ | Jump ↑ | ||||
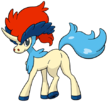
| 534 | Keldeo (Ordinary Form) | ★★ | •Battle via Spirit Board •Purchase from the Vault Shop for 1000G |
535 | Keldeo (Resolute Form) | ★★★★ | Hyper Smash Attacks | ||||
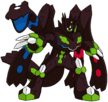
| 544 | Zygarde (50% Forme) | ★ | •Battle via Spirit Board •Purchase from the Vault Shop for 500G |
545 | Zygarde (Complete Forme) | ★★★★ | Critical-Health Healing | ||||
| 546 | Diancie | ★★ | •Battle via Spirit Board •Purchase from the Vault Shop for 1000G |
547 | Mega Diancie | ★★★★ | Franklin Badge Equipped | ||||
| 548 | Hoopa (Confined) | ★★ | •Battle via Spirit Board •Purchase from the Vault Shop for 1000G |
549 | Hoopa (Unbound) | ★★★ | Toss & Meteor | ||||
| 630 | Tiki | ★★ | •Summon with cores from Ninian, Medeus, and any •Battle via World of Light (The Light Realm) •Purchase from the Vault Shop for 1000G (unlocked after obtaining spirit once) •Scan the Tiki amiibo |
631 | Tiki (Naga's Voice) | ★★★ | Fire/Explosion Resist ↑ | ||||
| 633 | Camus | ★★★ | •Battle via World of Light (Sacred Land) •Battle via Spirit Board •Purchase from the Vault Shop for 6000G |
634 | Sirius | ★★★★ | Weapon Attack ↑ | ||||
| 637 | Alm & Celica (Young) | ★ | •Battle via World of Light (The Light Realm) •Battle via Spirit Board •Purchase from the Vault Shop for 500G •Scan the Alm amiibo or Celica amiibo |
638 | Alm & Celica | ★★★ | Back Shield Equipped | ||||
| 645 | Lyn | ★★★ | •Battle via Spirit Board •Purchase from the Vault Shop for 6000G |
646 | Lyn (Blade Lord) | ★★★★ | Critical Hit ↑ ↑ | ||||
| 661 | Elincia | ★★ | •Battle via World of Light (Mysterious Dimension) •Battle via Spirit Board •Purchase from the Vault Shop for 1000G |
662 | Queen Elincia | ★★★★ | Additional Midair Jump | ||||
| 664 | Zelgius | ★★★ | •Battle via Spirit Board •Purchase from the Vault Shop for 6000G |
665 | Black Knight | ★★★★ | Armor Knight | ||||
| 687 | Tsubasa Oribe | ★ | •Battle via World of Light (The Light Realm) •Battle via Spirit Board •Purchase from the Vault Shop for 500G |
688 | Tsubasa Oribe (Carnage Form) | ★★★ | Jump ↑ | ||||
| 710 | Medusa | ★★ | •Battle via World of Light (Mysterious Dimension) •Battle via Spirit Board (unlocked after obtaining spirit once) •Purchase from the Vault Shop for 1000G (unlocked after obtaining spirit once) |
711 | Medusa (Kid Icarus: Uprising) | ★★★★ | Giant | ||||
| 714 | Pandora | ★★ | •Battle via World of Light (The Dark Realm) •Battle via Spirit Board •Purchase from the Vault Shop for 1000G |
715 | Amazon Pandora | ★★★ | Easier Dodging | ||||
| 717 | Hades | ★★★ | •Battle via Spirit Board •Purchase from the Vault Shop for 6000G |
718 | Hades (Final Form) | ★★★★ | Trade-Off Attacks ↑ | ||||
| 741 | 5-Volt | ★★ | •Battle via Spirit Board •Purchase from the Vault Shop for 1000G |
742 | 5-Volt (Angry) | ★★★ | Critical-Health Attack ↑ | ||||
| 758 | Naked Snake | ★★★ | •Battle via World of Light (The Final Battle - Dark) •Battle via Spirit Board •Purchase from the Vault Shop for 6000G |
759 | Big Boss | ★★★★ | Metal Killer | ||||
| 762 | Revolver Ocelot (Metal Gear Solid 3) | ★★ | •Battle via World of Light (Base) •Battle via Spirit Board •Purchase from the Vault Shop for 1000G |
763 | Revolver Ocelot (Metal Gear Solid V) | ★★★ | Shooting Attack ↑ | ||||
| 772 | Metal Gear ZEKE | ★ | •Purchase at Sheldon's Place for 500SP •Battle via Spirit Board |
773 | Sahelanthropus | ★★★ | Metal and Giant | ||||
| 788 | Shadow the Hedgehog | ★★★ | •Battle via Spirit Board •Purchase from the Vault Shop for 6000G |
789 | Super Shadow | ★★★★ | Undamaged Attack & Speed ↑ | ||||
| 786 | Chao | ★ | •Battle via World of Light (The Light Realm) •Battle via Spirit Board •Purchase from the Vault Shop for 500G |
787 | Hero Chao | ★★★ | Fast Final Smash Meter | ||||
| 810 | Bulborb | ★★ | •Battle via World of Light (Sacred Land) •Battle via Spirit Board •Purchase from the Vault Shop for 1000G |
811 | Empress Bulblax | ★★★★ | Stats ↑ ↑ after Eating | ||||
| 828 | Tom Nook | ★★ | •Summon with cores from Maruhige Shop Owner, Shop Assistant, and any •Battle via Spirit Board (unlocked after obtaining spirit once) •Purchase from the Vault Shop for 1000G (unlocked after obtaining spirit once) •Scan the Tom Nook amiibo |
829 | Tom Nook (Nookington's) | ★★★ | Item Gravitation | ||||
| 831 | DJ K.K. | ★★ | •Summon with cores from 9-Volt & 18-Volt and Labrador Retriever •Battle via Spirit Board (unlocked after obtaining spirit once) •Purchase from the Vault Shop for 1000G (unlocked after obtaining spirit once) •Scan the K.K. amiibo |
832 | K.K. Slider | ★★★ | Running Start | ||||
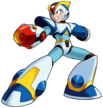
| 905 | X | ★★★ | •Battle via World of Light (The Final Battle - Light) •Battle via Spirit Board •Purchase from the Vault Shop for 6000G |
906 | Full Armor X | ★★★★ | Super Armor | ||||
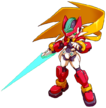
| 907 | Zero (Zero Buster) | ★★ | •Battle via World of Light (The Final Battle - Dark) •Battle via Spirit Board •Purchase from the Vault Shop for 1000G |
908 | Zero (Z-Saber) | ★★★★ | Weapon Attack & Move Speed ↑ | ||||
| 916 | Geo Stelar & Omega-Xis | ★★ | •Complete Challenge (Adventure): Awaken 25 fighters. •Battle via Spirit Board (unlocked after obtaining spirit once) •Purchase from the Vault Shop for 1000G (unlocked after obtaining spirit once) |
917 | Star Force Mega Man | ★★★ | Shooting Items ↑ | ||||
| 919 | Model X | ★ | •Battle via World of Light (The Light Realm) •Battle via Spirit Board •Purchase from the Vault Shop for 500G |
920 | Model ZX | ★★ | Transformation Duration ↑ | ||||
| 959 | Mumkhar | ★★ | •Battle via World of Light (The Final Battle - Dark) •Battle via Spirit Board •Purchase from the Vault Shop for 1000G |
960 | Metal Face | ★★★★ | Metal and Giant | ||||
| 980 | Chun-Li (Street Fighter Alpha) | ★★ | •Battle via World of Light (World Tour) •Battle via Spirit Board •Purchase from the Vault Shop for 1000G |
981 | Chun-Li | ★★★ | Physical Attack ↑ | ||||
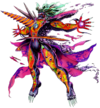
| 1,010 | Jeanne | ★★★ | •Battle via World of Light (The Final Battle - Dark) •Battle via Spirit Board •Purchase from the Vault Shop for 6000G |
1,011 | Cutie J | ★★★★ | Easier Dodging | ||||
| 1,012 | Rodin | ★★★ | •Summon with cores from Brewster and Aegislash | 1,013 | Rodin, the Infinite One | ★★★★ | Critical-Health Attack ↑ | ||||
| 1,017 | Balder | ★★ | •Battle via World of Light (The Final Battle - Light) •Battle via Spirit Board •Purchase from the Vault Shop for 1000G |
1,018 | Father Balder | ★★★ | Franklin Badge Equipped | ||||
| 1,043 | DJ Octavio | ★★ | •Summon with cores from Octoling, Octorok, and any |
1,044 | Octobot King | ★★★ | Made of Metal | ||||
| 1,053 | Maria Renard | ★★ | •Battle via World of Light (Dracula's Castle) •Battle via Spirit Board •Purchase from the Vault Shop for 1000G |
1,054 | Maria Renard (Symphony of the Night) | ★★★ | Additional Midair Jump | ||||
| 1,075 | Dracula | ★★★ | •Defeat the Dracula's Castle boss in World of Light | 1,076 | Soma Cruz | ★★★★ | Giant Killer | ||||
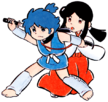
| 1,130 | Donbe & Hikari | ★★ | •Battle via World of Light (Sacred Land) •Battle via Spirit Board •Purchase from the Vault Shop for 1000G |
1,131 | Donbe & Hikari (Shin Onigashima Kouhen) | ★★★ | Stamina ↑ | ||||
| 1,143 | Frog & Snake | ★★ | •Summon with cores from Prince Peasley, Winky, and Rattly •Battle via World of Light (The Dark Realm) •Purchase from the Vault Shop for 1000G (unlocked after obtaining spirit once) |
1,144 | Prince of Sablé | ★★★★ | Transformation Duration ↑ | ||||
| 1,160 | Ray Mk II | ★★ | •Treasure Chest in World of Light (The Light Realm) •Battle via Spirit Board (unlocked after obtaining spirit once) •Purchase from the Vault Shop for 1000G (unlocked after obtaining spirit once) |
1,161 | Ray Mk III | ★★★ | Lightweight | ||||
| 1,168 | Isaac | ★★★ | •Summon with cores from Garet, Mia, and Ivan •Battle via World of Light (The Final Battle - Light) •Purchase from the Vault Shop for 6000G (unlocked after obtaining spirit once) |
1,169 | Isaac (Dark Dawn) | ★★★★ | Energy Shot Attack/Resistance ↑ | ||||
| 1,193 | The Wandering Samurai | ★★ | •Summon with cores from Sakura Samurai and Ghosts | 1,194 | Wandering Samurai (Rhythm Heaven Fever) | ★★★ | Critical Hit ↑ | ||||
| 1,206 | Chibi-Robo | ★★ | •Battle via World of Light (The Final Battle - Light) •Battle via Spirit Board •Purchase from the Vault Shop for 1000G •Scan the Chibi-Robo amiibo |
1,207 | Super Chibi-Robo | ★★★ | Thrown Items ↑ | ||||
| 1,214 | Dr. Kawashima | ★★ | •Battle via Spirit Board •Purchase from the Vault Shop for 1000G |
1,215 | Dr. Kawashima (Concentration Training) Dr. Kawashima (Devilish Brain Training) |
★★★★ | Unflinching Charged Smashes | ||||
| 1,242 | Nick | ★ | •Battle via World of Light (The Light Realm) •Battle via Spirit Board •Purchase from the Vault Shop for 500G |
1,243 | Captain Rainbow | ★★★ | First-Strike Advantage | ||||
| 1,330 | Slime (Dragon Quest) | ★ | •Battle via DLC Spirit Board •Purchase from the Vault Shop for 500G (since v4.0.0) |
1,331 | King Slime | ★★★ | Weight ↑ ↑ | ||||
| 1,334 | Great Sabrecub | ★ | •Battle via DLC Spirit Board •Purchase from the Vault Shop for 500G (since v4.0.0) |
1,335 | Great Sabrecat | ★★★ | Physical Attack ↑ | ||||
| 1,341 | Jinjos | ★★ | •Battle via DLC Spirit Board •Purchase from the Vault Shop for 1000G (since v5.0.0) |
1,342 | The Mighty Jinjonator | ★★★ | Giant | ||||
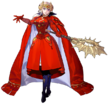
| 1,382 | Edelgard | ★★ | •Battle via DLC Spirit Board •Purchase from the Vault Shop for 1000G (since v7.0.0) |
1,383 | Edelgard - Five Years Later | ★★★ | Armor Knight | ||||
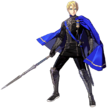
| 1,384 | Dimitri (Fire Emblem) | ★★ | •Battle via DLC Spirit Board •Purchase from the Vault Shop for 1000G (since v7.0.0) |
1,385 | Dimitri - Five Years Later (Fire Emblem) | ★★★ | Hyper Smash Attacks | ||||
| 1,386 | Claude | ★★ | •Battle via DLC Spirit Board •Purchase from the Vault Shop for 1000G (since v7.0.0) |
1,387 | Claude - Five Years Later | ★★★ | Weapon Attack & Move Speed ↑ | ||||
| 1,402 | Lotus | ★★ | •Battle via Spirit Board (during the event Spirits in Black) | 1,403 | Natah | ★★★ | Transformation Duration ↑ | ||||
Trivia
- The Fire Emblem universe have the most enhanceable spirits, with 10 in total.
- The Donkey Kong, Yoshi, Star Fox, Wario, Pikmin, Xenoblade, Street Fighter, Splatoon, and Banjo-Kazooie universes all have the fewest enhanceable spirits of universes that have enhanceable spirits, with 1 each.
- While Mini Mario is from the Mario vs. Donkey Kong series, the game considers it to be from the Mario universe, so Dixie Kong is the only enhanceable spirit from the Donkey Kong universe.
- Other than the Final Fantasy universe (as it has no spirits other than fighter spirits), Pac-Man, Persona, and Fatal Fury are the only third-party universes represented by a fighter not to have any enhanceable spirits.
- Zygarde (50% Forme) is the only enhanceable Novice-class spirit whose enhanced form (its Complete Forme) is a Legend-class spirit.
- All Pokémon universe enhanced spirits are form changes rather than evolution, despite the enhancing mechanic's irreversibility making it more similar to evolution.
- Banzai Bill, King Boo, Angry Scarfy, and Model ZX are the only Advanced class enhanced spirits. All other enhanced spirits are either Ace or Legend class.
- All of these spirits are of a different primary type, resulting in each type having its own Advanced-class enhanced spirit.
- Zelda has more enhanceable spirits associated with her than any other character, with a total of 3.
- Full Armor X is the only enhanced spirit with less power than its original form when at level 99.
- Both the "Giant" and "Transformation Duration ↑" effects are given to all main primary types, those being;
- Medusa (Kid Icarus Uprising), Mother Brain (2nd Form), Petey Piranha, and The Mighty Jinjonator for the "Giant" effect
- King of Hyrule, Prince of Sablé, Model ZX, and Natah for the "Transformation Duration ↑" effect
- The Black Knight and Edelgard - Five Years Later spirits are the only enhanced spirits that share the same skill and primary type to also be from the same universe, that being the Fire Emblem universe.
- Lotus is the first DLC enhanceable spirit to not be exclusive to a DLC Spirit Board, instead making her debut in a Spirit Board event.
- Toad and Boo are the only enhanceable spirits that are not listed under the same series as their enhanced forms.
| Spirits | |
|---|---|
| by categories | Primary spirit (Enhanceable spirit) · Support spirit · Master spirit · Fighter spirit · (All spirits) · Summon · DLC Spirits (DLC changes) |
| by series | Super Mario · Donkey Kong · The Legend of Zelda · Metroid · Yoshi · Kirby · Star Fox · Pokémon · EarthBound · F-Zero · Ice Climber · Fire Emblem · Game & Watch · Kid Icarus · Wario · Metal Gear · Sonic the Hedgehog · Pikmin · R.O.B. · Animal Crossing · Mega Man · Wii Fit · Punch-Out!! · Pac-Man · Xenoblade Chronicles · Duck Hunt · Street Fighter · Final Fantasy · Bayonetta · Splatoon · Castlevania · Mii · Super Smash Bros. · Others · Persona · Dragon Quest · Banjo-Kazooie · Fatal Fury · ARMS · Minecraft · Tekken · Kingdom Hearts |
