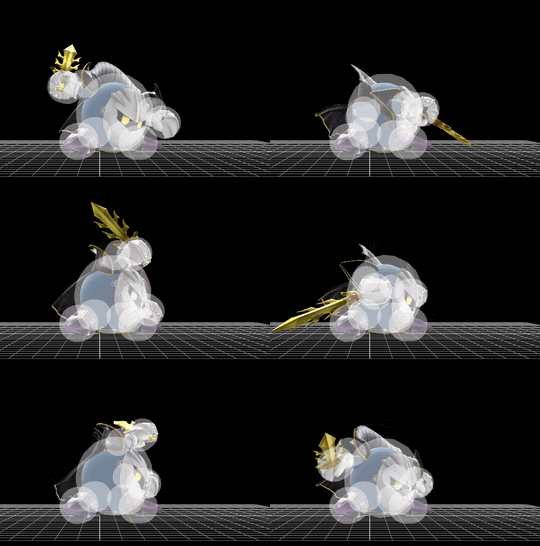
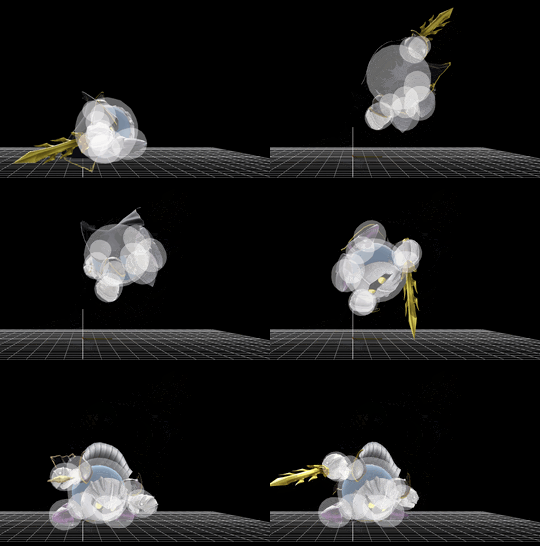
Meta Knight (SSB4)/Neutral attack: Difference between revisions
From SmashWiki, the Super Smash Bros. wiki
Jump to navigationJump to search
Dhiaalhanai (talk | contribs) (Added info and data) |
SuperSqank (talk | contribs) No edit summary |
||
| (14 intermediate revisions by 10 users not shown) | |||
| Line 1: | Line 1: | ||
{ArticleIcons|ssb4=y}} | {{ArticleIcons|ssb4=y}} | ||
[[File:MetaKnightJab.gif|thumb|270px|Hitbox visualization showing Meta Knights's jab infinite.]] | |||
[[File:MetaKnightJabFinisher.gif|thumb|270px|Hitbox visualization showing Meta Knights's jab finisher.]] | |||
Meta Knight executes a | ==Overview== | ||
Meta Knight's '''Flurry Attack''' executes a lightning-fast series of slashes, ending with him doing a swift uppercut with Galaxia. One of Meta Knight's most reliable damage rackers, always dealing at least 10-11% damage. However, due to its nature, it is easily punishable if missed entirely. | |||
==Update History== | |||
'''{{GameIcon|ssb4}} [[1.0.8]]''' | |||
*{{buff|Neutral attack's loop hits deal 0.2% more damage|1%|1.2%, its loop hits' knockback scaling decreased: 40 → 30, its last hit's hitbox size increased: 5.7u → 8u, its ending lag decreased: frame 47 → 35, its SDI multiplier decreased: 1× → 0.6×, and its hitboxes split to cover more space. Altogether, these changes improve its damage racking potential, range and safety.}} | |||
==Hitboxes== | ==Hitboxes== | ||
{|class="wikitable | All five of the loop hits have a separate set of hitboxes but they are all identical. | ||
{{SSB4HitboxTableHeader|stretch=y}} | |||
{{HitboxTableTitle|Loop hits|27}} | |||
{{SSB4HitboxTableRow | |||
|id=0 | |||
|damage=1.2% | |||
|sd=1 | |||
|angle=60 | |||
|bk=8 | |||
|ks=30 | |||
|fkv=0 | |||
|r=5.8 | |||
|bn=0 | |||
|xpos=0.0 | |||
|ypos=5.3 | |||
|zpos=8.5 | |||
|ystretch=5.2 | |||
|zstretch=8.0 | |||
|sdi=0.6 | |||
|trip=0 | |||
|type=Sword | |||
|effect=Slash | |||
|clang=t | |||
|slvl=S | |||
|sfx=Slash | |||
}} | |||
{{SSB4HitboxTableRow | |||
|id=0 | |||
|damage=1.2% | |||
|sd=1 | |||
|angle=84 | |||
|bk=8 | |||
|ks=30 | |||
|fkv=0 | |||
|r=6.8 | |||
|bn=0 | |||
|xpos=0.0 | |||
|ypos=5.3 | |||
|zpos=13.0 | |||
|ystretch=5.2 | |||
|zstretch=8.0 | |||
|sdi=0.6 | |||
|trip=0 | |||
|type=Sword | |||
|effect=Slash | |||
|clang=t | |||
|slvl=S | |||
|sfx=Slash | |||
}} | |||
{{HitboxTableTitle|Final hit|27}} | |||
{{SSB4HitboxTableRow | |||
|id=0 | |||
|damage=2% | |||
|sd=0 | |||
|angle=361 | |||
|bk=60 | |||
|ks=140 | |||
|fkv=0 | |||
|r=8.0 | |||
|bn=0 | |||
|xpos=0.0 | |||
|ypos=7.0 | |||
|zpos=20.0 | |||
|ystretch=7.0 | |||
|zstretch=13.0 | |||
|ff=2.5 | |||
|trip=0 | |||
|type=Sword | |||
|effect=Slash | |||
|clang=t | |||
|slvl=M | |||
|sfx=Slash | |||
}} | |||
|} | |||
==Timing== | |||
{|class="wikitable" | |||
!First loop frame | |||
|6 | |||
|- | |||
!Hitboxes | |||
|7, 11, 15, 20, 24, 29... | |||
|- | |||
!Finisher | |||
|3 | |||
|- | |- | ||
! | !Interruptible (Finisher) | ||
|- | |35 | ||
| | |- | ||
!Animation length (Finisher) | |||
|51 | |||
|} | |} | ||
{{FrameStripStart}} | |||
{{FrameStrip|t=Lag|c=5|e=LagLoopS}}{{FrameStrip|t=Lag|c=1|s=LagLoopE}}{{FrameStrip|t=Hitbox|c=1}}{{FrameStrip|t=Lag|c=3}}{{FrameStrip|t=Hitbox|c=1}}{{FrameStrip|t=Lag|c=3}}{{FrameStrip|t=Hitbox|c=1}}{{FrameStrip|t=Lag|c=4}}{{FrameStrip|t=Hitbox|c=1}}{{FrameStrip|t=Lag|c=3}}{{FrameStrip|t=Hitbox|c=1}}{{FrameStrip|t=Lag|c=3|e=LagLoopS}}{{FrameStrip|t=Lag|c=2|s=LagLoopE}}{{FrameStrip|t=Hitbox|c=1}}{{FrameStrip|t=Lag|c=31}}{{FrameStrip|t=Interruptible|c=17}} | |||
{{FrameStripEnd}} | |||
{{FrameIconLegend|lag=y|hitbox=y|loop=y|interruptible=y}} | |||
==Trivia== | |||
*Like in ''[[Brawl]]'', this is the only neutral attack in the game that is purely a rapid jab. | |||
{{MvSubNavMetaKnight|g=SSB4}} | {{MvSubNavMetaKnight|g=SSB4}} | ||
[[Category:Sword attacks (SSB4)]] | |||
[[Category:Slash attacks (SSB4)]] | |||
[[Category:Neutral attacks (SSB4)]] | |||
[[Category:Meta Knight (SSB4)]] | |||
Latest revision as of 15:37, June 1, 2021
Overview[edit]
Meta Knight's Flurry Attack executes a lightning-fast series of slashes, ending with him doing a swift uppercut with Galaxia. One of Meta Knight's most reliable damage rackers, always dealing at least 10-11% damage. However, due to its nature, it is easily punishable if missed entirely.
Update History[edit]
 Neutral attack's loop hits deal 0.2% more damage: 1% → 1.2%, its loop hits' knockback scaling decreased: 40 → 30, its last hit's hitbox size increased: 5.7u → 8u, its ending lag decreased: frame 47 → 35, its SDI multiplier decreased: 1× → 0.6×, and its hitboxes split to cover more space. Altogether, these changes improve its damage racking potential, range and safety.
Hitboxes[edit]
All five of the loop hits have a separate set of hitboxes but they are all identical.
Timing[edit]
| First loop frame | 6 |
|---|---|
| Hitboxes | 7, 11, 15, 20, 24, 29... |
| Finisher | 3 |
| Interruptible (Finisher) | 35 |
| Animation length (Finisher) | 51 |
Lag time |
Hitbox |
Loop point |
Interruptible |
Trivia[edit]
- Like in Brawl, this is the only neutral attack in the game that is purely a rapid jab.
|

