Toon Link (SSBB): Difference between revisions
(Minor Edit) |
|||
| (734 intermediate revisions by more than 100 users not shown) | |||
| Line 1: | Line 1: | ||
{{ArticleIcons|brawl=y}} | |||
{{disambig2|Toon Link's appearance in ''Super Smash Bros. Brawl''|the character in other contexts|Toon Link}} | |||
{{Infobox Character | {{Infobox Character | ||
|name | |name = Toon Link | ||
|image | |image = [[File:Toon Link SSBB.jpg|250px]] | ||
| | |game = SSBB | ||
| | |ssbgame1 = SSB4 | ||
| | |ssbgame2 = SSBU | ||
|availability = [[Unlockable character|Unlockable]] | |availability = [[Unlockable character|Unlockable]] | ||
|tier | |tier = C+ | ||
|ranking | |ranking = 13 | ||
}} | }} | ||
'''Toon Link''' ({{ja|トゥーンリンク|Tūn Rinku}}, ''Toon Link'') is a playable character in ''[[Super Smash Bros. Brawl]]''. He was revealed on March 28th, 2008. He is a semi-clone of {{SSBB|Link}}, and thus has some similar moves but different attributes. | |||
Sachi Matsumoto provides the voice of Toon Link in all regions of ''Brawl.'' Continuing a trend for Link's appearance starting in ''Super Smash Bros.'', Toon Link's voice clips are re-purposed directly from ''{{s|zeldawiki|The Legend of Zelda: The Wind Waker}}'' and ''{{s|zeldawiki|The Legend of Zelda: Phantom Hourglass}}'', featuring a combination of returning voice clips and ones that were leftover from the recording sessions for ''The Wind Waker.'' | |||
Toon Link is ranked 13th on the [[tier list]] at the top of the mid-high tier, making this his best placement in the series. Toon Link's biggest asset is his variety of versatile [[projectile]]s, which when combined with his great [[jump]]ing ability and air mobility, gives him one of the strongest [[camp]]ing abilities and makes him one of the most difficult characters to [[approach]]. Toon Link additionally has a strong aerial game, with the aforementioned efficient jumping and aerial mobility, and access to fast, powerful [[aerial attack]]s, in addition to a damaging [[zair]], which is useful for keeping opponents at a distance and setting up subsequent attacks. Toon Link also has two great [[combo]] starters in his [[up tilt]] and [[back aerial]] that can combo into themselves, a far reaching and relatively safe [[recovery]], and strong approaching capabilities from his fast movement speed and projectiles. Toon Link however suffers from underwhelming [[KO]]ing ability, possessing finishers that aren't very powerful with short reach, or in the case of his [[up smash]], being too predictable while lacking strong enough traits to make up for it. Toon Link additionally possesses short [[reach]] throughout his moveset, and a very punishable [[grab]] that lacks the reach to make up for its high [[ending lag]] (in addition to possessing rather poor [[throw]]s). Toon Link overall has strong [[matchup]]s (with his only {{b|counter|matchup}} being {{SSBB|Meta Knight}}), and has achieved above average [[tournament]] results (which have been especially strong in Meta Knight-banned tournaments). | |||
== | ==How to unlock== | ||
Complete one of the following: | |||
*Play 400 [[VS. match]]es. | |||
*Complete {{SSBB|Classic Mode}} with any character on any difficulty after finishing [[The Subspace Emissary]]. | |||
*Find Toon Link in [[The Forest]] stage after completing The Subspace Emissary. It can be found by entering a secret door close to the beginning of the level. Note that this method will not show the challenger approaching screen, as that is replaced by a cutscene of Toon Link challenging the player. | |||
The player must then defeat Toon Link on [[Pirate Ship]]. | |||
==Attributes== | ==Attributes== | ||
Toon Link falls under the archetype of a small but nimble character. True to his small frame, he is a floaty middleweight. Toon Link also has the ability to wall jump. His attacks generally have decent range and disjointed hitboxes (although poor compared to other swordsmen), and little lag. Toon Link has an above average aerial game and overall mobility, but he has problems KOing due to his few reliable KO moves. His best KO move is his up smash, but it is predictable. His down smash has semi-spike knockback at low damages, but it is not as powerful. The second hit of his forward smash has good knockback, but it can easily be evaded with [[DI]], thus leaving him vulnerable. His tether grab has decent range, but it leaves him vulnerable if it misses. Projectiles, his bombs in particular, are also part of Toon Link's game, which are great for [[mindgames]], and (like Boomerangs) can be used to combine with other attacks. | |||
He has a decently powerful ranged game due to having 3 projectiles and a [[grab aerial]], as well as a [[shield]] to automatically block most other projectiles while standing in a stationary position (although his idle poses negate this). His [[Stall-Then-Fall]] down aerial can negate horizontal knockback (although it can also cause some unwanted [[self destruct]]s), which sets up the rest of his recovery, and can also make use of bomb and [[tether recovery|tether recoveries]]. On the downside, his recovery is predictable, fairly easy to edge guard due his floatiness, and gives only decent distance overall. Ultimately, Toon Link becomes what his player makes of him in combining and using his advantages to mitigate disadvantage. | |||
==Differences between {{SSBM|Young Link}} and Toon Link== | |||
Toon Link replaces Young Link from ''Melee'', with some noticeable changes in his fighting style and is overall a much stronger character than Young Link. Toon Link has a much better recovery due to a higher midair jump, lower fall speed and his spin attack covering more distance (although his grab aerial is less useful for recovering). Toon Link has some moves which are very different to Young Link's with some of Toon Link's new moves being superior in almost every single way (such as his up smash and back air). His grab aerial is also much more effective as a spacing tool due to its much lower landing lag. | |||
Some of Toon Link's tools are weaker than Young Link's however. While Toon Link's dash attack has less end lag and a lot of new utility, it is significantly weaker no longer being a viable KO option. The first hit of Toon Link's down smash is also worse as it now sends opponents into the second hit removing its KO potential and making down smash much less reliable. Lastly, Toon Link's down aerial sourspot is much weaker no longer being a viable KO option. | |||
Overall, Toon Link is a significantly better character than Young Link. While Young Link's weaknesses have kept him in the low-mid tiers throughout ''Melee'''s life, Toon Link has consolidated himself as a solid high tier in ''Brawl''. | |||
===Aesthetics=== | |||
*{{change|While Young Link is based on Link's younger appearance in ''The Legend of Zelda: Ocarina of Time'', Toon Link is based on Link's appearance in ''The Legend of Zelda: The Wind Waker''.}} | |||
*{{change|Toon Link's taunt and victory poses are all different from Young Link's.}} | |||
===Attributes=== | |||
*{{buff|Toon Link walks slightly faster (1.2 → 1.22).}} | |||
*{{buff|Toon Link dashes slightly faster than Young Link in ''Melee'' (1.6 → 1.65).}} | |||
*{{buff|Toon Link's [[double jump]] gains more vertical height than Young Link's does.}} | |||
*{{nerf|Toon Link sustains more knockback than Young Link despite being heavier, due to the change in the knockback formula although this can be negated once he enters [[tumble]] with the introduction of [[hitstun canceling]].}} | |||
*{{change|Toon Link is heavier than Young Link (85 → 92). This improves his endurance but makes him more susceptible to combos and [[chaingrab]]s.}} | |||
**{{nerf|This weight increase makes Toon Link vulnerable to {{SSBB|King Dedede}}'s down throw chaingrab in particular whereas Young Link's weight was low enough to avoid {{SSBM|Fox}}'s [[waveshine]] combos. Both ''Brawl'' King Dedede's down throw and ''Melee'' Fox's [[Reflector (Fox)|shine]] knock down opponents whose weight is under 87 units but don't knock down opponents whose weight is 87 units or higher.}} | |||
*{{change|Toon Link falls much slower than Young Link (2.13 → 1.28) having the 28th fastest fall speed out of 39 characters compared to Young Link having the 7th highest fall speed out of 26 characters. While this significantly hinders his vertical endurance, it also makes him less vulnerable to combos.}} | |||
**{{nerf|his [[fast-falling]] speed is also slower (2.2 → 1.9).}} | |||
*{{change|Toon Link's [[gravity]] is lower (0.11 → 0.07).}} | |||
*{{nerf|Toon Link [[air speed]] is slower (1 → 0.94).}} | |||
*{{buff|Toon Link's [[air acceleration]] is higher (0.06 → 0.09).}} | |||
*{{change|Toon Link's [[air friction]] is higher (0.005 → 0.01)}} | |||
*{{nerf|Toon Link's traction is lower then Young Link's in Melee (0.08 → 0.0547), especially when comparing with the returning veterans, making it harder to punish out of shield while providing minimal benefits due to the removal of [[wavedashing]].}} | |||
*{{nerf|Toon Links [[Jump|jumpsquat]] is longer (4 frames → 5).}} | |||
*{{buff|Toon Link's [[spot dodge]] has a longer duration (frames 2-15 → 2-20).}} | |||
*{{buff|Toon Link uses the Master Sword instead of the Kokiri Sword, giving him more disjointed range than Young Link.}} | |||
===Ground attacks=== | |||
*[[Neutral attack]]: | |||
**{{buff|The third hit of Toon Link's neutral attack has a larger hitbox.}} | |||
**{{change|Toon Link does not have a neutral infinite like Young Link did. Rather, Toon Link has the same neutral attack as {{SSBB|Link}}.}} | |||
***{{nerf|Toon Link's neutral attack overall has less damage potential.}} | |||
**{{nerf|The first hit of Toon Link's neutral attack has a shorter duration (frames 6-8 → 6-7).}} | |||
*[[Forward tilt]]: | |||
**{{buff|Toon Link's forward tilt has less startup lag with a longer duration (frames 11-13 → 10-13).}} | |||
**{{nerf|Toon Link's forward tilt deals less damage (12%/11%/10% → 9%) without its knockback being fully compensated (5/2 (base), 100 (scaling) → 20/96, 20/90).}} | |||
*{{buff|Toon Link's [[up tilt]] has less startup (frame 9 → 8) and ending lag (frame 32 → 30), deals more damage (8% → 9%) and has higher base knockback (20 → 30) improving its KO potential.}} | |||
*[[Down tilt]]: | |||
**{{change|Toon Link's down tilt does not meteor smash. Instead it knocks opponents horizontally at the [[Sakurai angle]] (280°/70° → 361°). It also deals consistent damage (7%/9%/10% → 9%) and has altered knockback (80 (base), 50 (scaling) → 20/88).}} | |||
**{{buff|Toon Link's down tilt has less startup lag (frame 14 → 9), ending lag (frame 32 → 23), can [[lock]] opponents and it has a 40% chance of [[tripping]] opponents.}} | |||
**{{nerf|Toon Link's down tilt has a shorter duration (frames 14-16 → 9-10).}} | |||
*[[Dash attack]]: | |||
**{{buff|Toon Link's dash attack has less ending lag (frame 55 → 40). It also sends opponents at a lower angle (361° → 0°) making it better for edgeguarding. It also has a 30% tripping chance.}} | |||
**{{nerf|Toon Link's dash attack has more startup lag with a shorter duration (frames 7-12 → 9-11). The tipper hitbox also deals less damage (11% → 8%) and his dash attack deals much less knockback (10 (base), 100 (scaling) → 35/32) significantly hindering its KO potential.}} | |||
*[[Forward smash]]: | |||
**{{buff|The second hit of Toon Link's forward smash deals more damage (9%/11%/12% → 11%/13%) although its knockback was somewhat compensated (30 (base), 120 (scaling) → 32/25/20 (base), 110 (scaling)), has a much bigger hitbox which extends behind Toon Link and cannot be [[SDI]]'d. The first hit also has a lower SDI multiplier (1x → 0.8x).}} | |||
**{{nerf|The first hit of Toon Link's forward smash sends opponents higher due to the universally decreased falling speeds making it harder to connect with the second hit and it also has more ending lag (frame 41 → 49). The second hit also has a shorter duration (4 frames → 3) and a higher hitlag multiplier (1x → 2x) making it easier to DI.}} | |||
*[[Up smash]]: | |||
**{{buff|Toon Link's up smash is a single upward slash rather than three slashes, making it a more reliable and stronger finisher. Its clean hit also deals more damage (11% → 15% (clean), 10% (late)) and knockback (70 (base), 70 (scaling) → 30/93). It also has less ending lag (frame 52 → 38).}} | |||
**{{change|Toon Link's up smash has a longer duration than the first hit of Young Link's up smash (frames 11-14 → 11-13 (clean), 14-17 (late)).}} | |||
*[[Down smash]]: | |||
**{{buff|The second hit of Toon Link's down smash has less startup lag (frame 21 → 17), deals more knockback (30/25 (base), 90/70 (scaling) → 30/107) and now lacks a very weak sourspot.}} | |||
**{{change|The first hit of Toon Link's down smash now launches opponents onto the second hit and has set knockback, making it less useful for launching opponents in front of Toon Link however, it increases the maximum damage output of the move (13% → 17%). The second hit also no longer [[semi-spike]]s opponents but launches them vertically (30° → 72°).}} | |||
**{{nerf|As the front hit of Toon Link's down smash sends opponents into the second hit, it makes his down smash much less reliable than Young Link's down smash as his opponents can avoid the second hit. The first hit also does not have a hitbox which deals 13% damage making it deal 7% much like Young Link's sourspot and the back hit deals less damage (12% → 11%).}} | |||
===Aerial attacks=== | |||
*[[Neutral aerial]]: | |||
**{{change|Toon Link has a different neutral aerial. He swipes his sword in front and behind him. Both hits deal 10% damage with their base knockback compensated (10 → 20).}} | |||
**{{buff|Toon Link's neutral aerial [[auto-cancel]]s earlier (frame 30 → 28) and as it has two hits, its maximum damage output is higher (12% → 20%). It can also lock and trip opponents.}} | |||
**{{nerf|Toon Link's neutral aerial has more startup lag with a shorter duration (frames 4-27 → 6-7 (front), 13-14 (back)).}} | |||
*[[Forward aerial]]: | |||
**{{buff|Toon Link's forward aerial only consists of one hit instead of two making it much more reliable. It deals higher consistent damage than the first hit of Young Link's forward aerial (12%/10%/9% → 13%) and has increased knockback (0 (base), 90 (scaling) → 22/100), has less ending lag (frame 47 → 38), has a bigger hitbox, can lock and trip opponents at very low percents and despite having a later auto-cancel window (frame 47 → 51), its lower ending lag effectively makes it auto-cancel earlier allowing it to auto-cancel in a [[short hop]].}} | |||
**{{nerf|Toon Link's forward aerial has a much shorter duration (frames 14-32 → 14-15) and has more landing lag (15 frames → 18).}} | |||
*[[Back aerial]]: | |||
**{{buff|Toon Link's has a different back aerial. He swings his sword behind him consisting of one hit. It has a longer duration than the first hit of Young Link's back aerial (frames 6-9 → 6-10), has less landing lag (15 frames → 10) and it auto-cancels earlier (frame 29 → 23) with Toon Link being able to very easily perform two back aerials in a short hop. Toon Link's back aerial has very strong combo potential at lower percents and can kill at very high percents giving it a lot more reliability and utility than Young Link's back aerial. It also has a larger disjointed hitbox and it has increased knockback (15 (base), 100 (scaling) → 18/117). | |||
**{{nerf|Due to Toon Link's back aerial only consisting of one hit instead of two, its maximum damage output is lower (13% → 10%). It also has one more frame of ending lag (frame 30 → 31).}} | |||
*[[Up aerial]]: | |||
**{{buff|Toon Link's up aerial is a much stronger KO move than Young Link's due to its increased knockback scaling (85 → 95) combined with the universally decreased falling speeds. It also has less landing lag (30 frames → 21) and auto-cancels earlier (frame 56 → 47).}} | |||
**{{nerf|Toon Link's up aerial has more startup lag and a shorter duration (frames 5-50 → 11-40).}} The clean hit also deals less damage (15% → 14%) and it has less range.}} | |||
*[[Down aerial]]: | |||
**{{buff|Toon Link's down aerial has less startup lag (frame 13 → 12) and the sweetspot is drastically easier to land. The sweetspot can also trip opponents at very low percents. It also has less landing lag (50 frames → 40).}} | |||
**{{change|Toon Link's down aerial is a [[stall-then-fall]] that makes him fall straight down (making it more akin to the down thrust used in his ''Zelda'' game appearances). This significantly hinders its safety off stage but allows him to reach his opponents much faster and it aids his vertical endurance due to the introduction of [[momentum canceling]]. It also deals consistent damage (14%/16% → 16% (clean), 17%/12% → 13% (late) 8%/9% → 8% (after bounce)).}} | |||
**{{change|Down aerial now [[meteor smash]]es opponents during the beginning of the plunge, rather than having a sweetspot at the hilt of Young Link's sword. Toon Link's sweetspot also does not have a fire effect.}} | |||
**{{nerf|Toon Link's down aerial is much weaker especially the late hit as both hits have reduced knockback scaling (100 → 80) and the sweetspot has less base knockback (70 → 40). It also does not cover his body unlike Young Link's.}} | |||
*[[Grab aerial]]: | |||
**{{buff|Toon Link's grab aerial has significantly lower landing lag (30 frames → 2) and can lead into guaranteed follow ups. It's overall much more effective as a spacing tool on stage compared to Young Link's grab aerial. Toon Link's grab aerial also doesn't leave him [[helpless]] after using it.}} | |||
**{{nerf|Toon Link's grab aerial has more startup lag (frame 9 → 11), ending lag (frame 61 → 71), and deals less damage (5% → 4%). It also has much less range and is a tether recovery rather than a wall grapple greatly reducing its recovery potential.}} | |||
===Throws/other attacks=== | |||
*[[Grab]]: | |||
**{{nerf|Toon Link's grabs has more startup lag (frame 10 → 12 (standing), frame 13 → 14 (dash)).}} | |||
**{{buff|Toon Link's [[hookshot]] has more range than Young Link's.}} | |||
**{{buff|Both of Toon Link's grabs have longer durations (frame 10-13 → 12-16 (standing), 13-16 → 14-18 (dash)).}} | |||
*[[Pummel]]: | |||
**{{buff|Toon Link's pummel has less ending lag (frame 26 → 16).}} | |||
**{{nerf|Toon Link's pummel deals less damage (3% → 2%).}} | |||
*{{buff|All of Toon Link's throws deal more damage (6% → 7%).}} | |||
*[[Forward throw]]: | |||
**{{change|Toon Link's forward and back throws have different animations.}} | |||
**{{buff|Toon Link's forward throw deals more knockback (25 (base), 110 (scaling) → 40/120).}} | |||
*[[Back throw]]: | |||
**{{change|Toon Link's back throw launches opponents at a lower angle (130° → 150°) and more base knockback (24 → 30).}} | |||
*[[Down throw]]: | |||
**{{buff|Toon Link's down throw does not put opponents into [[tumble]] at lower percents preventing [[hitstun canceling]] and potentially allowing him to follow up after it. It also has higher knockback scaling (50 → 60).}} | |||
Toon Link | ===Special moves=== | ||
*[[Hero's Bow]]: | |||
**{{change|Toon Link uses Hero's Bow instead of [[Fire Bow]]. Toon Link's Hero's Bow fires arrows that are exceedingly floaty and hang in the air for much longer.}} | |||
***{{buff|This allows it to stay in air for much longer and travel further when uncharged.}} | |||
***{{nerf|The arrows are slower and deals less damage (8-15% → 4-12%).}} | |||
***{{change|Hero's Bow does not set targets on fire like Fire Bow does.}} | |||
**{{buff|Toon Link can [[B-reverse]] Hero's Bow unlike Young Link.}} | |||
**{{buff|Toon Link's Hero's Bow charges faster and shoots farther. Toon Link can auto cancel an uncharged Hero's Bow in a short hop. It can also lock opponents and Toon Link has access to {{b|Quickdraw|technique}}ing improving its utility. Toon Link is capable of firing an arrow out of a short hop followed up with a quickdrawn arrow.}} | |||
*[[Boomerang]]: | |||
**{{buff|Toon Link's Boomerang is larger and it deals more damage from mid range (7% → 8%) and when it returns (2% → 3%). Toon Link also doesn't stop all momentum when using it and can use it while running off a ledge to gain a significant amount of horizontal momentum giving Boomerang additional edgeguarding potential.}} | |||
**{{nerf|Toon Link's boomerang is slower and doesn't fly as far as Young Link's. It also deals less damage when thrown (16%/19% → 12%).}} | |||
**{{buff|Toon Link can B-reverse Boomerang unlike Young Link.}} | |||
*[[Spin Attack]]: | |||
**{{buff|Spin Attack has more vertical distance and has better horizontal control. Grounded Spin Attack also has much larger hitboxes (especially the final hit) and can also be charged and deals more damage than Young Link's when fully charged (13% → 19%).}} | |||
**{{nerf|Uncharged grounded Spin Attack deals less damage than Young Link's grounded spin attack (13% → 12%).}} | |||
*{{b|Bomb|Toon Link}}: | |||
**{{nerf|Toon Link's Bombs have less combo potential and are weaker compared to Young Link's {{b|Bomb|Young Link}} with their maximum damage output being lower (14% → 7%).}} | |||
**{{buff|The hitboxes from the explosion are bigger. It is also easier for Toon Link to make use of [[jump cancel throw]]s due to his longer jumpsquat.}} | |||
**{{change|The bombs' design and explosion effects are based off of ''The Legend of Zelda: The Wind Waker''.}} | |||
*[[Triforce Slash]]: | |||
**{{change|Toon Link has a Final Smash: Triforce Slash. Toon Link traps his opponents with the Triforce of Power and continuously slashes them finishing it off with a devastating blow which can easily KO the opponent. It deals a total of 86% damage. Young Link would later receive Triforce Slash as his Final Smash in [[Super Smash Bros. Ultimate]].}} | |||
==Moveset== | ==Moveset== | ||
'' | ''For a more detailed information regarding Toon Link's moveset and attack hitboxes, see [[Toon Link (SSBB)/Moveset|this page]].'' | ||
=== | {{MovesetTable | ||
==== | |game=SSBB | ||
|neutralcount=3 | |||
|neutralname=Slash ({{ja|なぎ払い|Nagiharai}}) / Counter Slash ({{ja|返し|Kaeshi}}) / Stab ({{ja|突き|Tsuki}}) | |||
|neutral1dmg=3% | |||
|neutral2dmg=2% | |||
|neutral3dmg=5% | |||
|neutraldesc=Toon Link slashes twice then thrusts his sword forward. Primarily used as a way to create space against close-up opponents. | |||
|ftiltname=Bamboo Splitter ({{ja|からたけわり|Karatake Wari}}) | |||
|ftiltdmg=9% | |||
|ftiltdesc=Toon Link raises his sword and swings it to the floor, similar to Link's, but with less KO power. Decent horizontal knockback makes it tolerable for edge-guarding if the blast line is nearby. | |||
|utiltname=Half-Moon Slash ({{ja|半月斬り|Hangetsu Kiri}}) | |||
|utiltdmg=9% | |||
|utiltdesc=Quickly does a swipe overhead. Can hit on the left or right side of Toon Link. Can combo into itself at low percents, and then an aerial at higher percents. | |||
|dtiltname=Grass Cutter ({{ja|草薙ぎ|Kusa Nagi}}) | |||
|dtiltdmg=9% | |||
|dtiltdesc=Swipes his sword along the ground. Ideal for edge-guarding if an off-stage opponent is trying to grab a ledge. Can sometimes cause opponents to [[trip]]. | |||
|dashname=Running Hack ({{ja|追い斬り|Oi Kiri}}) | |||
|dashdmg=10% (blade), 8% (tip) | |||
|dashdesc=Slashes directly in front of him, dealing diagonal knockback. Deals slightly less damage at the tip. | |||
|fsmashname=Sword Slice ({{ja|スマッシュ斬り|Sumasshu Giri}}, ''Smash Slice'') / Double Sword Slice ({{ja|二段スマッシュ斬り|Nidan Sumasshu Giri}}, ''Double Smash Slice'') | |||
|fsmashcount=2 | |||
|fsmashdmg={{ChargedSmashDmgSSBB|10}} | |||
|fsmash2dmg={{ChargedSmashDmgSSBB|13}} (front), {{ChargedSmashDmgSSBB|11}} (rear) | |||
|fsmashdesc=Toon Link pulls back and swings his sword in front of him. When the [[A button|attack button]] is pressed again, he does another slash. The first slash leads into the second, with good horizontal knockback. | |||
|usmashname=Sky Slash ({{ja|天空斬り|Tenkū Kiri}}) | |||
|usmashdmg={{ChargedSmashDmgSSBB|15}} (clean), {{ChargedSmashDmgSSBB|10}} (late) | |||
|usmashdesc=Toon Link performs a single overhead strike. Has a very similar appearance and range to his up tilt, but with much more knockback and damage. | |||
|dsmashname=Front and Back Sword Slice ({{ja|前後足元斬り|Zengo Ashimoto Giri}}) | |||
|dsmashdmg={{ChargedSmashDmgSSBB|6}} (hit 1 grounded), {{ChargedSmashDmgSSBB|7}} (hit 1 aerial), {{ChargedSmashDmgSSBB|11}} (hit 2) | |||
|dsmashdesc=Toon Link sweeps his sword in front of and then behind him along the ground. The first hit leads into the second hit on grounded opponents and cannot be [[SDI]]'d. The first hit deals more damage on aerial opponents, which knocks them upwards with decent knockback. | |||
|nairname=Two Part Slash ({{ja|二段斬り|Nidan Kiri}}) | |||
|nairdmg=10% (hits 1-2) | |||
|nairdesc=Slashes on both sides, front then back, in mid-air. The first hit can bring the target into the second hit, provided the enemy is positioned properly. Good to use as a quick approach. | |||
|fairname=Slash Up ({{ja|斬り上げ|Kiri Age}}) | |||
|fairdmg=13% | |||
|fairdesc=Swings his sword upward. Good for edge-guarding in terms of leaving the stage to intercept the recovering enemy. | |||
|bairname=Backward Slash Up ({{ja|後方斬り上げ|Kōhō Kiri Age}}) | |||
|bairdmg=10% | |||
|bairdesc=Slashes backwards with his sword. Can chain into itself at low percents and can KO foes at higher percents. | |||
|uairname=Jump Thrust ({{ja|上突き|Ue Tsuki}}, ''Up Thrust'') | |||
|uairdmg=14% (clean), 12% (late) | |||
|uairdesc=Sticks his sword above him, like Link's up aerial, though it has more knockback. A great move for juggling at mid percents, and a good KO move at later percents. | |||
|dairname=Sword Plant ({{ja|下突き急降下|Shita Tsuki Kyūkōka}}, ''Down Thrust Dive'') | |||
|dairdmg=16% (clean), 13% (late), 8% (after bounce), 5% (landing) | |||
|dairdesc=Sticks his sword straight down, similar {{SSBB|Link}}'s down aerial. However, Toon Link stalling momentarily in midair before launching straight downwards very quickly with no horizontal control. The beginning of the downwards descent can [[meteor smash]] the opponent powerfully, but it's very risky because if he misses, he will most likely [[self-destruct]]. Resembles his final strike to Ganondorf's head in ''The Legend of Zelda: The Wind Waker''. | |||
|zairname=Midair [[Hookshot]] ({{ja|空中フックショット|Kūchū Fukkushotto}}) | |||
|zairdmg=4% | |||
|zairdesc=Fires his Hookshot straight in front of him, just like Link's [[tether recovery]] but with shorter range. The only part of the attack which hits is the tip of the Hookshot. This attack is unique in the sense it can be used instantly out of an air dodge (a typical combo is a short hop, air dodge, tether recovery), and is practically lagless when Toon Link hits the ground. | |||
|grabname=Hookshot ({{ja|フックショット|Fukkushotto}}) | |||
|grabdesc= | |||
|pummelname=Grab Hilt Strike ({{ja|つかみ柄なぐり|Tsukami Gara Naguri}}) | |||
|pummeldmg=2% | |||
|pummeldesc=Hits opponent with the hilt of the Master Sword. A fairly fast pummel. | |||
|fthrowname=Tackle ({{ja|タックル|Takkuru}}) | |||
|fthrowdmg=3% (hit), 4% (throw) | |||
|fthrowdesc=Drops opponent quickly and shoulder tackles them forward. Oddly, the first hit of his forward throw is considered a [[leg]] attack despite being clearly a shoulder tackle. This is possibly due to an error in his moveset coding. | |||
|bthrowname=Circle Throw ({{ja|巴投げ|Tomoe Nage}}) | |||
|bthrowdmg=3% (hit), 4% (throw) | |||
|bthrowdesc=Rolls on his back with the foe and kicks the foe backward. | |||
|uthrowname=Throw Away Slash ({{ja|投げ捨て斬り|Nagasute Kiri}}) | |||
|uthrowdmg=5% (hit), 2% (throw) | |||
|uthrowdesc=Throws opponent upward and slashes them. Good combo tool. | |||
|dthrowname=Elbow Strike ({{ja|ヒジ打ち|Hiji Uchi}}) | |||
|dthrowdmg=3% (hit), 4% (throw) | |||
|dthrowdesc=Brings the foe down and shoulder tackles them on the floor. Opponents gets launched behind Toon Link. Oddly, the first hit cannot hit {{SSBB|Jigglypuff}}. It is believed that this is because Jigglypuff's low weight causes the animation to occur too quickly, the hitbox appearing and vanishing before it is checked for. | |||
|floorfname= | |||
|floorfdmg=6% | |||
|floorfdesc=Does two slashes front and back. | |||
|floorbname= | |||
|floorbdmg=6% | |||
|floorbdesc=Does another two slashes front and back. | |||
|floortname= | |||
|floortdmg=5% | |||
|floortdesc=Essentially the same as his other two floor attacks. | |||
|edgefname= | |||
|edgefdmg=8% | |||
|edgefdesc=Pulls himself up into a front flip and slices downward. | |||
|edgesname= | |||
|edgesdmg=10% | |||
|edgesdesc=Slowly climbs up and stabs in front of himself. | |||
|nsname=Hero's Bow | |||
|nsdmg=4-12% | |||
|nsdesc=Link equips his bow, with the arrows serving as projectiles. Charging increases the speed, distance and damage dealt by an arrow. Arrows are much floatier than {{SSBB|Link}}'s, making them very useful even with no charge, but are also notably slower. | |||
|ssname=Boomerang | |||
|ssdmg=8% (near), 5% (middle), 3% (return) | |||
|ssdesc=Tosses a boomerang that flies forward to hit opponents, and returns to the user while still being able to hit foes. Can be angled up or down. A "smash throw" (similar to performing a smash attack) increases the distance the boomerang can travel. Close up, it can be used to follow up with another attack, and on the way back, can disrupt foes (Ex. If Toon Link gets grabbed) and turn the tide of battle albeit with weak knockback. | |||
|usname=Spin Attack | |||
|usdmg=Uncharged 1% (hits 1-9), 3% (hit 10)<br/>Charged: 1.6% (hits 1-9), 4.8% (hit 10)<br/>Aerial: 4% (hit 1), 2% (hits 2-4), 4% (hit 5) | |||
|usdesc=Toon Link sticks his blade out and spins around rapidly, hitting opponents multiple times before knocking them in different directions. Useful for catching rolls. The grounded version can be charged for more damage, while the aerial version gives him vertical and horizontal ascension. | |||
|dsname=Bomb | |||
|dspage=Bomb_(Link) | |||
|dsdmg=3% (explosion), 5% (throw), 6% (smash throw), 2-7% (dropped) | |||
|dsdesc=Toon Link pulls out a bomb. The bomb can be thrown upwards, downwards, left, or right, and if Toon Link is in the air, he can press the grab button to drop the bomb on the ground. If Toon Link drops a bomb while he is close to the ground, the bomb will land on the ground and will not explode until the fuse runs out, but other players can pick up the bomb and use it themselves. The blast radius of the bombs larger that {{SSBB|Link}}’s bombs, but deals less damage. This move is a very good move for setting up combos and can grant him an extra Spin attack if used skillfully. | |||
|fsname=Triforce Slash | |||
|fsdmg=5% (trapping), 4% (hits 1-15), 18% (hit 16) | |||
|fsdesc=Toon Link locks onto an opponent and proceeds to slash them repeatedly with his Master Sword. A luminous image of the Triforce appears around the opponent as Toon Link slashes them. The final strike launches the opponent. | |||
}} | |||
==== | ===Stats=== | ||
{{technical data|Needs short hop and double jump heights}} | |||
{{Attributes | |||
|cast = 39 | |||
|weight = 92 | |||
|rweight = 24-25 | |||
|dash = 1.5 | |||
|rdash = 14-21 | |||
|run = 1.65 | |||
|rrun = 12 | |||
|walk = 1.22 | |||
|rwalk = 10-11 | |||
|trac = 0.0547 | |||
|rtrac = 23 | |||
|airfric = 0.01 | |||
|rairfric = 17-21 | |||
|air = 0.94 | |||
|rair = 19-21 | |||
|baseaccel = 0.01 | |||
|rbaseaccel = 7-36 | |||
|addaccel = 0.08 | |||
|raddaccel = 10-17 | |||
|gravity = 0.07 | |||
|rgravity = 28-29 | |||
|fall = 1.28 | |||
|rfall = 28-29 | |||
|ff = 1.9 | |||
|rff = 22-24 | |||
|jumpsquat = 5 | |||
|rjumpsquat = 11-26 | |||
|jumpheight = 33.48017857 | |||
|rjumpheight= 20 | |||
|shorthop = ? | |||
|rshorthop = ? | |||
|djump = ? | |||
|rdjump = ? | |||
}} | |||
=== | ===[[Announcer]] call=== | ||
{{audio|Needs announcer calls from other languages.}} | |||
<gallery> | |||
Toon Link English Announcer SSBB.wav|English/Japanese | |||
</gallery> | |||
=== | ===[[Wii Remote selection sound]]=== | ||
{{SelectSound|char=Toon Link|desc=Toon Link makes a noise from ''The Wind Waker'' and shouts similar to his up smash.}} | |||
=== | ===[[On-screen appearance]]=== | ||
{{Appearance | |||
|desc=Appears from an explosion that is similar to the ones used in ''The Wind Waker'', and then quickly equips his sword and shield. | |||
|char=ToonLink | |||
|game=SSBB}} | |||
=== | ===[[Taunt]]s=== | ||
{{Toon Link | {{Taunt/SSBB | ||
|char=ToonLink | |||
|desc-up=Conducts with his Wind Waker baton, at the end of which, a sound from when Toon Link plays a melody in ''The Wind Waker'' is heard. | |||
|desc-side=Puts his sword away and looks around the environment. | |||
|desc-down=Panics while slashing his sword around wildly, which tires him out.}} | |||
===[[Idle pose]]s=== | |||
{{Idle | |||
|desc-1=Looks around cautiously. | |||
|desc-2=Taps the tip of his boot on the ground. | |||
|image-1=Toon Link Idle Pose 1 Brawl.png | |||
|image-2=Toon Link Idle Pose 2 Brawl.png}} | |||
===[[Crowd cheer]]=== | |||
{{Crowd | |||
|char=Toon Link | |||
|game=Brawl | |||
|desc-us=Toon-Link! | |||
|desc-jp=Lin-k! | |||
|pitch-us=Group chant | |||
|pitch-jp=Group chant}} | |||
===[[Victory pose]]s=== | |||
{{Victory/SSBB | |||
|victory-theme=ZeldaUniverseTheme.ogg | |||
|victory-desc=This flourish is a cover of the music that played whenever Link obtained a Triforce Piece in ''The Legend of Zelda''. | |||
|desc-up=He catches a pig and holds it above his head. | |||
|desc-left=He waves the Wind Waker baton. This pose is extremely similar to his Up Taunt. | |||
|desc-right=He tries to catch a pig, but ends up [[tripping]] and falling on his bottom. | |||
|char=ToonLink}} | |||
== | ==In [[competitive play]]== | ||
===Notable players=== | |||
{{cleanup|[[SmashWiki:Cleanup of the Notable Players sections|To fit these guidelines]]}} | |||
:''See also: [[:Category:Toon Link players (SSBB)]]'' | |||
*{{Sm|Hyro|USA}} - A top Toon Link player from Louisiana. | |||
*{{Sm|Jash|USA}} - Was known as the best Toon Link in the United States before his inactivity in 2012. | |||
* | *{{Sm|Hyuga|Mexico}} - The best Toon Link player in Mexico and one of the best ones in the world. | ||
* | *{{Sm|Jerm|USA}} - A top Toon Link player from Texas. | ||
* | *{{Sm|Kingtoon|USA}} - Often considered to be the second best Toon Link behind MJG. | ||
*{{Sm|MJG|USA}} - One of the best Toon Link players in the world. | |||
* | |||
* Toon Link | |||
* Toon Link | |||
==[[ | ==Role in [[The Subspace Emissary]]== | ||
Toon Link | [[File:Toon Link Subspace Brawl.png|thumb|250px|Toon Link in ''[[SSE]]''.]] | ||
Toon Link is an optional character in The Subspace Emissary, along with {{SSBB|Jigglypuff}} and {{SSBB|Wolf}}, who can only be unlocked after the mode has been completed. To find him, players must enter a new door in [[The Forest]] which appears after defeating [[Tabuu]] for the first time that takes them to the [[Pirate Ship]], where Toon Link prepares for battle. Defeating Toon Link will add him to the player's team. He does not have an actual role in the overall plot. | |||
== | ===Using stickers=== | ||
===[[ | Toon Link uses his sword for all of his attacks except his back throw, forward throw, and down throw. Because of this, he benefits greatly from [Slash] and [Weapon] Damage boosts. Toon Link has more ranged specials than direct, so a [Specials: Indirect] boost would also be beneficial to him. | ||
===Exclusive stickers=== | |||
These stickers can only be used by Toon Link, or a select few including him: | |||
*Boomerang: [Weapon] Attack +4 | |||
*Colin: [Specials: Direct] Attack +4 | |||
*Daphnes Nohansen Hyrule: [Electric] Attack +31 | |||
*Darknut: [Slash] Attack +13 | |||
*Epona & Link: [Arm, Leg] Attack +9 | |||
*Fierce Deity Link: [Slash] Attack +21 | |||
*Happy Mask Salesman: [Leg] Attack +9 | |||
*Hylian Shield (The Legend of Zelda: Twilight Princess): [Slash] Resistance +10 | |||
*Lantern: [Flame] Resistance +7 | |||
*Legend of Outset: [Arm] Attack +26 | |||
*Linebeck: [Throwing] Attack +20 | |||
*Link (The Legend of Zelda: A Link to the Past): [Electric] Resistance +31 | |||
*Link (The Legend of Zelda: Twilight Princess): [Slash] Resistance +27 | |||
*Link (The Legend of Zelda: The Wind Waker): [Flame] Attack +31 | |||
*Link with Goron Mask: [Slash] Attack +17 | |||
*Link's Grandma: [Arm, Leg] Attack +2 | |||
*Lon Lon Milk: Launch Power +18 | |||
*Midna & Wolf Link: [Leg] Attack +26 | |||
*Moblin: [Slash] Attack +15 | |||
*Octorok: [Leg] Attack +4 | |||
*Piece of Heart: Heart Container Effect +50 | |||
*Salvatore: [Electric] Attack +9 | |||
*Sheik: [Body, Spin] Attack +17 | |||
*Tingle (The Legend of Zelda: The Wind Waker): [Flame] Resistance +24 | |||
*Young Zelda (The Legend of Zelda: The Minish Cap): [Normal] Resistance +16 | |||
*Zant: [Weapon] Attack +7 | |||
*Zelda (The Legend of Zelda: Ocarina of Time): [Flame] Resistance +18 | |||
==In Solo Modes== | |||
==={{SSBB|Classic Mode}}=== | |||
In Classic Mode, Toon Link can appear as an opponent or ally in Stage 1 if he has been unlocked along with {{SSBB|Link}}, {{SSBB|Zelda}}/{{SSBB|Sheik}}, and {{SSBB|Ganondorf}} on [[Bridge of Eldin]] or [[Pirate Ship]]. Toon Link can also appear as an opponent in Stage 11, but only if he hasn't appeared in Stage 1. | |||
===[[All-Star Mode]]=== | |||
In All-Star Mode, Toon Link is fought in Stage 6 alongside {{SSBB|Link}}, {{SSBB|Zelda}}/{{SSBB|Sheik}}, and {{SSBB|Ganondorf}} on [[Bridge of Eldin]] or [[Pirate Ship]]. | |||
''' | ===[[Event Match]]es=== | ||
====Solo Events==== | |||
*'''[[Event 35: The Visitor to Flat Zone]]''': As {{SSBB|Mr. Game & Watch}}, the player must defeat {{SSBB|Peach}}, Toon Link, and {{SSBB|Jigglypuff}} on [[Flat Zone 2]]. All three opponents have the "Game & Watch" effect on their models. | |||
*'''[[Event 37: The Pirate Airship]]''': As Toon Link, the player must KO both {{SSBB|Yoshi}}s on [[Pirate Ship]] while the ship is in the air. | |||
*'''[[Event 39: All-Star Battle x2]]''': Toon Link is one of the eight opponents fought in this event along with {{SSBB|King Dedede}}, {{SSBB|Ike}}, {{SSBB|Lucario}}, {{SSBB|R.O.B.}}, {{SSBB|Snake}}, {{SSBB|Sonic}}, and {{SSBB|Wolf}}. | |||
''' | ====Co-Op Events==== | ||
*'''[[Co-Op Event 15: Four Swords Brawl]]''': Both players control Toon Link and face off against two other Toon Links. Both players must work together to collect 500 coins before the opposing team does. | |||
*'''[[Co-Op Event 21: The True All-Star Battle]]''': Two players select a character and take on the entire roster on [[Battlefield (SSBB)|Battlefield]]. | |||
===[[ | ===[[Congratulations_screen#Super_Smash_Bros._Brawl|Ending Images]]=== | ||
<center> | |||
<gallery> | |||
Toon Link Classic Mode Congratulations Screen Brawl.png|Classic Mode | |||
Toon Link Congratulations Screen All-Star Brawl.png|All-Star Mode | |||
</gallery> | |||
</center> | |||
==[[Trophies]]== | |||
' | Toon Link's main and [[Final Smash]] trophies can be obtained by clearing {{SSBB|Classic Mode}} and [[All-Star]] mode respectively with Toon Link. | ||
=== | {{Trophy/Fighter | ||
|name=Toon Link | |||
|image=Toon Link - Brawl Trophy.png | |||
|mode=Classic | |||
|desc=Link as he appeared in The Wind Waker and Phantom Hourglass, with big eyes and an expressive face. He lived peacefully on Outset Island until a bird captured his little sister, and he came to her rescue. In The Wind Waker, he had to crawl, press up to walls, and the like. His green clothes were worn on his 12th birthday and are the lucky outfit of the hero of legend. | |||
|gamelist={{Trophy games|console1=GCN|game1=The Legend of Zelda: The Wind Waker|console2=DS|game2=The Legend of Zelda: Phantom Hourglass}} | |||
|game=Brawl | |||
}} | |||
{{clrl}} | |||
== | {{Trophy/Fighter | ||
|name=Triforce Slash (Toon Link) | |||
|image=Triforce Slash (Toon Link) - Brawl Trophy.png | |||
|desc=Toon Link's Final Smash. Hit an enemy with the light emanating from the Triforce mark on his hand to initiate the move. The enemy will be trapped within the Triforce and be unable to move--Toon Link will then rush in close and carve up his foe at lightning speed. The final blow will break the Triforce prison and send the opponent off the screen. | |||
|gamelist={{Trophy games|console1=Wii|game1=Super Smash Bros. Brawl}} | |||
|game=Brawl | |||
}} | |||
{{clrl}} | |||
== | ==[[Alternate costume (SSBB)#Toon Link|Alternate costumes]]== | ||
Toon Link | {|style="margin:1em auto 1em auto;text-align:center" | ||
|- | |||
|colspan=6|[[File:Toon Link Palette (SSBB).png]] | |||
|- | |||
|{{Head|Toon Link|g=SSBB|s=25px}} | |||
|{{Head|Toon Link|g=SSBB|s=25px|cl=Red}} | |||
|{{Head|Toon Link|g=SSBB|s=25px|cl=Blue}} | |||
|{{Head|Toon Link|g=SSBB|s=25px|cl=Purple}} | |||
|{{Head|Toon Link|g=SSBB|s=25px|cl=Brown}} | |||
|{{Head|Toon Link|g=SSBB|s=25px|cl=Black}} | |||
|} | |||
== Trivia == | ==Gallery== | ||
*Toon Link | <gallery> | ||
*Toon Link | SSBBDojoToonLink1.jpg|Using [[Spin Attack]] on [[Skyworld]]. | ||
*Despite being able to crawl voluntarily in ''Wind Waker'', Toon Link | SSBBDojoToonLink2.jpg|[[Crouching]] next to {{SSBB|Squirtle}} on [[Delfino Plaza]]. | ||
SSBBDojoToonLink3.jpg|[[Taunt]]ing alongside {{SSBB|Peach}} on Delfino Plaza. | |||
*Toon Link holds the world record for Level 4 and Level 5 [[Target Smash!!|Target Smash]] (Level 4 completed in 9.05 seconds, and Level 5 completed in 6.65 seconds), Co-op Target Smash Level 1 with | SSBBDojoToonLink4.jpg|Using his [[neutral attack]] on [[Lylat Cruise]]. | ||
* | ToonlinkBoom.jpg|Using his [[Boomerang]]. | ||
* | SSBBDojoToonLink5.jpg|Using forward tilt against {{SSBB|Link}} on [[Mushroomy Kingdom]]. | ||
*If Toon Link | SSBBDojoToonLink6.jpg|Jumping near Link on [[Mushroomy Kingdom]]. | ||
SSBBDojoToonLink7.jpg|Taunting with Link on [[Mushroomy Kingdom]]. | |||
*Toon Link' | SSBBDojoToonLink8.jpg|Using neutral air with Link on [[Mushroomy Kingdom]]. | ||
* | SSBBDojoToonLink9.jpg|Using down air on [[Summit]]. | ||
* | SSBBDojoToonLink10.jpg|Attacking {{SSBB|Ness}} on [[Lylat Cruise]]. | ||
SSBBDojoToonLink11.jpg|Using Bomb on [[Mushroomy Kingdom]]. | |||
SSBBDojoToonLink12.jpg|Using Triforce Slash against {{SSBB|Diddy Kong}}. | |||
SSBBDojoToonLink13.jpg|Starting Triforce Slash against {{SSBB|Marth}}. | |||
</gallery> | |||
==Trivia== | |||
*Toon Link's render is identical to an [[zeldawiki:File:TWW Link Artwork 3.png|official piece of artwork of him for ''The Wind Waker'']], albeit with his eyes facing forward and the inclusion of his sword and shield. | |||
*Toon Link's [[grab aerial]] can be used to [http://www.youtube.com/watch?v=0JZObyeS_jQ&t=6m44s save him from a KO at extremely high damages], ranging up to even higher than 300%, if an attack hits him low enough that his tether is within grabbing distance of the ledge as he passes by it. This requires very fast reaction to pull off, and is not often seen in competitive play due to there being few semi-spikes with KO power (which are the only type of moves that can hit Toon Link low enough to being within grabbing distance of the ledge). | |||
*Despite being able to crawl voluntarily when unequipped in ''The Wind Waker'', Toon Link is unable to crawl in ''Brawl''; {{SSBB|Mario}} and {{SSBB|Pit}} are the only other characters who act this way. | |||
*Toon Link holds the world record for Level 4 and Level 5 [[Target Smash!!|Target Smash]] (Level 4 completed in 9.05 seconds, and Level 5 completed in 6.65 seconds), Co-op Target Smash Level 1 with {{SSBB|Falco}} (2.66 seconds), and Co-op Target Smash Level 5 with another Toon Link (4.11 seconds). | |||
*Along with his hair, his hat disobeys gravity, with the hat usually staying in a limp position while falling, as opposed to the tip being above the rest of his body. | |||
*Toon Link has the same idle poses as Young Link in ''Melee''. | |||
*If Toon Link eats [[Superspicy Curry]] and doesn't move or attack after the effect wears off, he will not take his sword and shield back out until he finally moves or attacks. | |||
*Toon Link is one of the few known characters to have an obvious error in his moveset coding: while the first hit of his forward throw is quite clearly a shoulder tackle, for [[sticker]] purposes it is considered a [[leg]] attack. This is likely an error caused by copying moveset data from Link. | |||
*Toon Link has the most semi-spikes in ''Brawl''. | |||
*[[Masahiro Sakurai]] stated that Toon Link, {{SSBB|Jigglypuff}}, and {{SSBB|Wolf}} were almost cut from ''Brawl'' due to time constraints and their late consideration for inclusion in the game, hence why they are excluded from and cannot be unlocked while playing through the main [[Subspace Emissary]] story.<ref>[http://www.sourcegaming.info/2015/08/17/sakuraibrawlquestions/]</ref> | |||
*Unlike in ''SSB4'' and ''Ultimate'', Toon Link is portrayed here as having realistic hair and detailed fabric on his clothing. Later appearances changed his hair and clothing to more closely resemble his original cartoony artstyle. | |||
**Additionally, only in this game does Toon Link hold the Wind Waker in his artwork; all other appearances feature the Master Sword. | |||
==External links== | ==External links== | ||
* [http://www.smashbros.com/en_us/characters/hidden11.html DOJO!! Page ] | *[http://www.smashbros.com/wii/en_us/characters/hidden11.html DOJO!! Page ] | ||
* [http:// | *[http://www.smashboards.com/showthread.php?t=214072 Toon Link Character Guide on SmashBoards] | ||
*[http://www.smashboards.com/showthread.php?t=228712 All Of Toon Link's Advanced Techniques on SmashBoards] | |||
*[http://www.youtube.com/watch?v=DCRQ7h0S3q4 Toon Link's hitbox size of each of his moves] | |||
==References== | |||
{{reflist}} | |||
{{SSBBCharacters}} | {{SSBBCharacters}} | ||
{{Zelda universe}} | {{Zelda universe}} | ||
[[Category: | [[Category:Toon Link (SSBB)| ]] | ||
[[Category: | [[Category:Trophies (SSBB)]] | ||
[[es:Toon Link (SSBB)]] | |||
Latest revision as of 18:53, September 17, 2024
| Toon Link in Super Smash Bros. Brawl | |
|---|---|
 
| |
| Universe | The Legend of Zelda |
| Other playable appearances | in SSB4 in Ultimate |
| Availability | Unlockable |
| Final Smash | Triforce Slash |
| Tier | C+ (13) |
Toon Link (トゥーンリンク, Toon Link) is a playable character in Super Smash Bros. Brawl. He was revealed on March 28th, 2008. He is a semi-clone of Link, and thus has some similar moves but different attributes.
Sachi Matsumoto provides the voice of Toon Link in all regions of Brawl. Continuing a trend for Link's appearance starting in Super Smash Bros., Toon Link's voice clips are re-purposed directly from The Legend of Zelda: The Wind Waker and The Legend of Zelda: Phantom Hourglass, featuring a combination of returning voice clips and ones that were leftover from the recording sessions for The Wind Waker.
Toon Link is ranked 13th on the tier list at the top of the mid-high tier, making this his best placement in the series. Toon Link's biggest asset is his variety of versatile projectiles, which when combined with his great jumping ability and air mobility, gives him one of the strongest camping abilities and makes him one of the most difficult characters to approach. Toon Link additionally has a strong aerial game, with the aforementioned efficient jumping and aerial mobility, and access to fast, powerful aerial attacks, in addition to a damaging zair, which is useful for keeping opponents at a distance and setting up subsequent attacks. Toon Link also has two great combo starters in his up tilt and back aerial that can combo into themselves, a far reaching and relatively safe recovery, and strong approaching capabilities from his fast movement speed and projectiles. Toon Link however suffers from underwhelming KOing ability, possessing finishers that aren't very powerful with short reach, or in the case of his up smash, being too predictable while lacking strong enough traits to make up for it. Toon Link additionally possesses short reach throughout his moveset, and a very punishable grab that lacks the reach to make up for its high ending lag (in addition to possessing rather poor throws). Toon Link overall has strong matchups (with his only counter being Meta Knight), and has achieved above average tournament results (which have been especially strong in Meta Knight-banned tournaments).
How to unlock[edit]
Complete one of the following:
- Play 400 VS. matches.
- Complete Classic Mode with any character on any difficulty after finishing The Subspace Emissary.
- Find Toon Link in The Forest stage after completing The Subspace Emissary. It can be found by entering a secret door close to the beginning of the level. Note that this method will not show the challenger approaching screen, as that is replaced by a cutscene of Toon Link challenging the player.
The player must then defeat Toon Link on Pirate Ship.
Attributes[edit]
Toon Link falls under the archetype of a small but nimble character. True to his small frame, he is a floaty middleweight. Toon Link also has the ability to wall jump. His attacks generally have decent range and disjointed hitboxes (although poor compared to other swordsmen), and little lag. Toon Link has an above average aerial game and overall mobility, but he has problems KOing due to his few reliable KO moves. His best KO move is his up smash, but it is predictable. His down smash has semi-spike knockback at low damages, but it is not as powerful. The second hit of his forward smash has good knockback, but it can easily be evaded with DI, thus leaving him vulnerable. His tether grab has decent range, but it leaves him vulnerable if it misses. Projectiles, his bombs in particular, are also part of Toon Link's game, which are great for mindgames, and (like Boomerangs) can be used to combine with other attacks.
He has a decently powerful ranged game due to having 3 projectiles and a grab aerial, as well as a shield to automatically block most other projectiles while standing in a stationary position (although his idle poses negate this). His Stall-Then-Fall down aerial can negate horizontal knockback (although it can also cause some unwanted self destructs), which sets up the rest of his recovery, and can also make use of bomb and tether recoveries. On the downside, his recovery is predictable, fairly easy to edge guard due his floatiness, and gives only decent distance overall. Ultimately, Toon Link becomes what his player makes of him in combining and using his advantages to mitigate disadvantage.
Differences between Young Link and Toon Link[edit]
Toon Link replaces Young Link from Melee, with some noticeable changes in his fighting style and is overall a much stronger character than Young Link. Toon Link has a much better recovery due to a higher midair jump, lower fall speed and his spin attack covering more distance (although his grab aerial is less useful for recovering). Toon Link has some moves which are very different to Young Link's with some of Toon Link's new moves being superior in almost every single way (such as his up smash and back air). His grab aerial is also much more effective as a spacing tool due to its much lower landing lag.
Some of Toon Link's tools are weaker than Young Link's however. While Toon Link's dash attack has less end lag and a lot of new utility, it is significantly weaker no longer being a viable KO option. The first hit of Toon Link's down smash is also worse as it now sends opponents into the second hit removing its KO potential and making down smash much less reliable. Lastly, Toon Link's down aerial sourspot is much weaker no longer being a viable KO option.
Overall, Toon Link is a significantly better character than Young Link. While Young Link's weaknesses have kept him in the low-mid tiers throughout Melee's life, Toon Link has consolidated himself as a solid high tier in Brawl.
Aesthetics[edit]
 While Young Link is based on Link's younger appearance in The Legend of Zelda: Ocarina of Time, Toon Link is based on Link's appearance in The Legend of Zelda: The Wind Waker.
- Toon Link's taunt and victory poses are all different from Young Link's.
Attributes[edit]
 Toon Link walks slightly faster (1.2 → 1.22).
- Toon Link dashes slightly faster than Young Link in Melee (1.6 → 1.65).
- Toon Link's double jump gains more vertical height than Young Link's does.
 Toon Link sustains more knockback than Young Link despite being heavier, due to the change in the knockback formula although this can be negated once he enters tumble with the introduction of hitstun canceling.
- Toon Link is heavier than Young Link (85 → 92). This improves his endurance but makes him more susceptible to combos and chaingrabs.
- This weight increase makes Toon Link vulnerable to King Dedede's down throw chaingrab in particular whereas Young Link's weight was low enough to avoid Fox's waveshine combos. Both Brawl King Dedede's down throw and Melee Fox's shine knock down opponents whose weight is under 87 units but don't knock down opponents whose weight is 87 units or higher.
- Toon Link falls much slower than Young Link (2.13 → 1.28) having the 28th fastest fall speed out of 39 characters compared to Young Link having the 7th highest fall speed out of 26 characters. While this significantly hinders his vertical endurance, it also makes him less vulnerable to combos.
- his fast-falling speed is also slower (2.2 → 1.9).
- Toon Link's gravity is lower (0.11 → 0.07).
- Toon Link air speed is slower (1 → 0.94).
- Toon Link's air acceleration is higher (0.06 → 0.09).
- Toon Link's air friction is higher (0.005 → 0.01)
- Toon Link's traction is lower then Young Link's in Melee (0.08 → 0.0547), especially when comparing with the returning veterans, making it harder to punish out of shield while providing minimal benefits due to the removal of wavedashing.
- Toon Links jumpsquat is longer (4 frames → 5).
- Toon Link's spot dodge has a longer duration (frames 2-15 → 2-20).
- Toon Link uses the Master Sword instead of the Kokiri Sword, giving him more disjointed range than Young Link.
Ground attacks[edit]
- Neutral attack:
- The third hit of Toon Link's neutral attack has a larger hitbox.
- Toon Link does not have a neutral infinite like Young Link did. Rather, Toon Link has the same neutral attack as Link.
- Toon Link's neutral attack overall has less damage potential.
- The first hit of Toon Link's neutral attack has a shorter duration (frames 6-8 → 6-7).
- Forward tilt:
- Toon Link's forward tilt has less startup lag with a longer duration (frames 11-13 → 10-13).
- Toon Link's forward tilt deals less damage (12%/11%/10% → 9%) without its knockback being fully compensated (5/2 (base), 100 (scaling) → 20/96, 20/90).
- Toon Link's up tilt has less startup (frame 9 → 8) and ending lag (frame 32 → 30), deals more damage (8% → 9%) and has higher base knockback (20 → 30) improving its KO potential.
- Down tilt:
- Toon Link's down tilt does not meteor smash. Instead it knocks opponents horizontally at the Sakurai angle (280°/70° → 361°). It also deals consistent damage (7%/9%/10% → 9%) and has altered knockback (80 (base), 50 (scaling) → 20/88).
- Toon Link's down tilt has less startup lag (frame 14 → 9), ending lag (frame 32 → 23), can lock opponents and it has a 40% chance of tripping opponents.
- Toon Link's down tilt has a shorter duration (frames 14-16 → 9-10).
- Dash attack:
- Toon Link's dash attack has less ending lag (frame 55 → 40). It also sends opponents at a lower angle (361° → 0°) making it better for edgeguarding. It also has a 30% tripping chance.
- Toon Link's dash attack has more startup lag with a shorter duration (frames 7-12 → 9-11). The tipper hitbox also deals less damage (11% → 8%) and his dash attack deals much less knockback (10 (base), 100 (scaling) → 35/32) significantly hindering its KO potential.
- Forward smash:
- The second hit of Toon Link's forward smash deals more damage (9%/11%/12% → 11%/13%) although its knockback was somewhat compensated (30 (base), 120 (scaling) → 32/25/20 (base), 110 (scaling)), has a much bigger hitbox which extends behind Toon Link and cannot be SDI'd. The first hit also has a lower SDI multiplier (1x → 0.8x).
- The first hit of Toon Link's forward smash sends opponents higher due to the universally decreased falling speeds making it harder to connect with the second hit and it also has more ending lag (frame 41 → 49). The second hit also has a shorter duration (4 frames → 3) and a higher hitlag multiplier (1x → 2x) making it easier to DI.
- Up smash:
- Toon Link's up smash is a single upward slash rather than three slashes, making it a more reliable and stronger finisher. Its clean hit also deals more damage (11% → 15% (clean), 10% (late)) and knockback (70 (base), 70 (scaling) → 30/93). It also has less ending lag (frame 52 → 38).
- Toon Link's up smash has a longer duration than the first hit of Young Link's up smash (frames 11-14 → 11-13 (clean), 14-17 (late)).
- Down smash:
- The second hit of Toon Link's down smash has less startup lag (frame 21 → 17), deals more knockback (30/25 (base), 90/70 (scaling) → 30/107) and now lacks a very weak sourspot.
- The first hit of Toon Link's down smash now launches opponents onto the second hit and has set knockback, making it less useful for launching opponents in front of Toon Link however, it increases the maximum damage output of the move (13% → 17%). The second hit also no longer semi-spikes opponents but launches them vertically (30° → 72°).
- As the front hit of Toon Link's down smash sends opponents into the second hit, it makes his down smash much less reliable than Young Link's down smash as his opponents can avoid the second hit. The first hit also does not have a hitbox which deals 13% damage making it deal 7% much like Young Link's sourspot and the back hit deals less damage (12% → 11%).
Aerial attacks[edit]
- Neutral aerial:
- Toon Link has a different neutral aerial. He swipes his sword in front and behind him. Both hits deal 10% damage with their base knockback compensated (10 → 20).
- Toon Link's neutral aerial auto-cancels earlier (frame 30 → 28) and as it has two hits, its maximum damage output is higher (12% → 20%). It can also lock and trip opponents.
- Toon Link's neutral aerial has more startup lag with a shorter duration (frames 4-27 → 6-7 (front), 13-14 (back)).
- Forward aerial:
- Toon Link's forward aerial only consists of one hit instead of two making it much more reliable. It deals higher consistent damage than the first hit of Young Link's forward aerial (12%/10%/9% → 13%) and has increased knockback (0 (base), 90 (scaling) → 22/100), has less ending lag (frame 47 → 38), has a bigger hitbox, can lock and trip opponents at very low percents and despite having a later auto-cancel window (frame 47 → 51), its lower ending lag effectively makes it auto-cancel earlier allowing it to auto-cancel in a short hop.
- Toon Link's forward aerial has a much shorter duration (frames 14-32 → 14-15) and has more landing lag (15 frames → 18).
- Back aerial:
- Toon Link's has a different back aerial. He swings his sword behind him consisting of one hit. It has a longer duration than the first hit of Young Link's back aerial (frames 6-9 → 6-10), has less landing lag (15 frames → 10) and it auto-cancels earlier (frame 29 → 23) with Toon Link being able to very easily perform two back aerials in a short hop. Toon Link's back aerial has very strong combo potential at lower percents and can kill at very high percents giving it a lot more reliability and utility than Young Link's back aerial. It also has a larger disjointed hitbox and it has increased knockback (15 (base), 100 (scaling) → 18/117).
- Due to Toon Link's back aerial only consisting of one hit instead of two, its maximum damage output is lower (13% → 10%). It also has one more frame of ending lag (frame 30 → 31).
- Up aerial:
- Toon Link's up aerial is a much stronger KO move than Young Link's due to its increased knockback scaling (85 → 95) combined with the universally decreased falling speeds. It also has less landing lag (30 frames → 21) and auto-cancels earlier (frame 56 → 47).
- Toon Link's up aerial has more startup lag and a shorter duration (frames 5-50 → 11-40). The clean hit also deals less damage (15% → 14%) and it has less range.
- Down aerial:
- Toon Link's down aerial has less startup lag (frame 13 → 12) and the sweetspot is drastically easier to land. The sweetspot can also trip opponents at very low percents. It also has less landing lag (50 frames → 40).
- Toon Link's down aerial is a stall-then-fall that makes him fall straight down (making it more akin to the down thrust used in his Zelda game appearances). This significantly hinders its safety off stage but allows him to reach his opponents much faster and it aids his vertical endurance due to the introduction of momentum canceling. It also deals consistent damage (14%/16% → 16% (clean), 17%/12% → 13% (late) 8%/9% → 8% (after bounce)).
- Down aerial now meteor smashes opponents during the beginning of the plunge, rather than having a sweetspot at the hilt of Young Link's sword. Toon Link's sweetspot also does not have a fire effect.
- Toon Link's down aerial is much weaker especially the late hit as both hits have reduced knockback scaling (100 → 80) and the sweetspot has less base knockback (70 → 40). It also does not cover his body unlike Young Link's.
- Grab aerial:
- Toon Link's grab aerial has significantly lower landing lag (30 frames → 2) and can lead into guaranteed follow ups. It's overall much more effective as a spacing tool on stage compared to Young Link's grab aerial. Toon Link's grab aerial also doesn't leave him helpless after using it.
- Toon Link's grab aerial has more startup lag (frame 9 → 11), ending lag (frame 61 → 71), and deals less damage (5% → 4%). It also has much less range and is a tether recovery rather than a wall grapple greatly reducing its recovery potential.
Throws/other attacks[edit]
- Grab:
- Toon Link's grabs has more startup lag (frame 10 → 12 (standing), frame 13 → 14 (dash)).
- Toon Link's hookshot has more range than Young Link's.
- Both of Toon Link's grabs have longer durations (frame 10-13 → 12-16 (standing), 13-16 → 14-18 (dash)).
- Pummel:
- Toon Link's pummel has less ending lag (frame 26 → 16).
- Toon Link's pummel deals less damage (3% → 2%).
- All of Toon Link's throws deal more damage (6% → 7%).
- Forward throw:
- Toon Link's forward and back throws have different animations.
- Toon Link's forward throw deals more knockback (25 (base), 110 (scaling) → 40/120).
- Back throw:
- Toon Link's back throw launches opponents at a lower angle (130° → 150°) and more base knockback (24 → 30).
- Down throw:
- Toon Link's down throw does not put opponents into tumble at lower percents preventing hitstun canceling and potentially allowing him to follow up after it. It also has higher knockback scaling (50 → 60).
Special moves[edit]
- Hero's Bow:
- Toon Link uses Hero's Bow instead of Fire Bow. Toon Link's Hero's Bow fires arrows that are exceedingly floaty and hang in the air for much longer.
- This allows it to stay in air for much longer and travel further when uncharged.
- The arrows are slower and deals less damage (8-15% → 4-12%).
- Hero's Bow does not set targets on fire like Fire Bow does.
- Toon Link can B-reverse Hero's Bow unlike Young Link.
- Toon Link's Hero's Bow charges faster and shoots farther. Toon Link can auto cancel an uncharged Hero's Bow in a short hop. It can also lock opponents and Toon Link has access to Quickdrawing improving its utility. Toon Link is capable of firing an arrow out of a short hop followed up with a quickdrawn arrow.
- Boomerang:
- Toon Link's Boomerang is larger and it deals more damage from mid range (7% → 8%) and when it returns (2% → 3%). Toon Link also doesn't stop all momentum when using it and can use it while running off a ledge to gain a significant amount of horizontal momentum giving Boomerang additional edgeguarding potential.
- Toon Link's boomerang is slower and doesn't fly as far as Young Link's. It also deals less damage when thrown (16%/19% → 12%).
- Toon Link can B-reverse Boomerang unlike Young Link.
- Spin Attack:
- Spin Attack has more vertical distance and has better horizontal control. Grounded Spin Attack also has much larger hitboxes (especially the final hit) and can also be charged and deals more damage than Young Link's when fully charged (13% → 19%).
- Uncharged grounded Spin Attack deals less damage than Young Link's grounded spin attack (13% → 12%).
- Bomb:
- Toon Link's Bombs have less combo potential and are weaker compared to Young Link's Bomb with their maximum damage output being lower (14% → 7%).
- The hitboxes from the explosion are bigger. It is also easier for Toon Link to make use of jump cancel throws due to his longer jumpsquat.
- The bombs' design and explosion effects are based off of The Legend of Zelda: The Wind Waker.
- Triforce Slash:
- Toon Link has a Final Smash: Triforce Slash. Toon Link traps his opponents with the Triforce of Power and continuously slashes them finishing it off with a devastating blow which can easily KO the opponent. It deals a total of 86% damage. Young Link would later receive Triforce Slash as his Final Smash in Super Smash Bros. Ultimate.
Moveset[edit]
For a more detailed information regarding Toon Link's moveset and attack hitboxes, see this page.
| Name | Damage | Description | ||
|---|---|---|---|---|
| Neutral attack | Slash (なぎ払い) / Counter Slash (返し) / Stab (突き) | 3% | Toon Link slashes twice then thrusts his sword forward. Primarily used as a way to create space against close-up opponents. | |
| 2% | ||||
| 5% | ||||
| Forward tilt | Bamboo Splitter (からたけわり) | 9% | Toon Link raises his sword and swings it to the floor, similar to Link's, but with less KO power. Decent horizontal knockback makes it tolerable for edge-guarding if the blast line is nearby. | |
| Up tilt | Half-Moon Slash (半月斬り) | 9% | Quickly does a swipe overhead. Can hit on the left or right side of Toon Link. Can combo into itself at low percents, and then an aerial at higher percents. | |
| Down tilt | Grass Cutter (草薙ぎ) | 9% | Swipes his sword along the ground. Ideal for edge-guarding if an off-stage opponent is trying to grab a ledge. Can sometimes cause opponents to trip. | |
| Dash attack | Running Hack (追い斬り) | 10% (blade), 8% (tip) | Slashes directly in front of him, dealing diagonal knockback. Deals slightly less damage at the tip. | |
| Forward smash | Sword Slice (スマッシュ斬り, Smash Slice) / Double Sword Slice (二段スマッシュ斬り, Double Smash Slice) | 10% | Toon Link pulls back and swings his sword in front of him. When the attack button is pressed again, he does another slash. The first slash leads into the second, with good horizontal knockback. | |
| 13% (front), 11% (rear) | ||||
| Up smash | Sky Slash (天空斬り) | 15% (clean), 10% (late) | Toon Link performs a single overhead strike. Has a very similar appearance and range to his up tilt, but with much more knockback and damage. | |
| Down smash | Front and Back Sword Slice (前後足元斬り) | 6% (hit 1 grounded), 7% (hit 1 aerial), 11% (hit 2) | Toon Link sweeps his sword in front of and then behind him along the ground. The first hit leads into the second hit on grounded opponents and cannot be SDI'd. The first hit deals more damage on aerial opponents, which knocks them upwards with decent knockback. | |
| Neutral aerial | Two Part Slash (二段斬り) | 10% (hits 1-2) | Slashes on both sides, front then back, in mid-air. The first hit can bring the target into the second hit, provided the enemy is positioned properly. Good to use as a quick approach. | |
| Forward aerial | Slash Up (斬り上げ) | 13% | Swings his sword upward. Good for edge-guarding in terms of leaving the stage to intercept the recovering enemy. | |
| Back aerial | Backward Slash Up (後方斬り上げ) | 10% | Slashes backwards with his sword. Can chain into itself at low percents and can KO foes at higher percents. | |
| Up aerial | Jump Thrust (上突き, Up Thrust) | 14% (clean), 12% (late) | Sticks his sword above him, like Link's up aerial, though it has more knockback. A great move for juggling at mid percents, and a good KO move at later percents. | |
| Down aerial | Sword Plant (下突き急降下, Down Thrust Dive) | 16% (clean), 13% (late), 8% (after bounce), 5% (landing) | Sticks his sword straight down, similar Link's down aerial. However, Toon Link stalling momentarily in midair before launching straight downwards very quickly with no horizontal control. The beginning of the downwards descent can meteor smash the opponent powerfully, but it's very risky because if he misses, he will most likely self-destruct. Resembles his final strike to Ganondorf's head in The Legend of Zelda: The Wind Waker. | |
| Grab aerial | Midair Hookshot (空中フックショット) | 4% | Fires his Hookshot straight in front of him, just like Link's tether recovery but with shorter range. The only part of the attack which hits is the tip of the Hookshot. This attack is unique in the sense it can be used instantly out of an air dodge (a typical combo is a short hop, air dodge, tether recovery), and is practically lagless when Toon Link hits the ground. | |
| Grab | Hookshot (フックショット) | — | ||
| Pummel | Grab Hilt Strike (つかみ柄なぐり) | 2% | Hits opponent with the hilt of the Master Sword. A fairly fast pummel. | |
| Forward throw | Tackle (タックル) | 3% (hit), 4% (throw) | Drops opponent quickly and shoulder tackles them forward. Oddly, the first hit of his forward throw is considered a leg attack despite being clearly a shoulder tackle. This is possibly due to an error in his moveset coding. | |
| Back throw | Circle Throw (巴投げ) | 3% (hit), 4% (throw) | Rolls on his back with the foe and kicks the foe backward. | |
| Up throw | Throw Away Slash (投げ捨て斬り) | 5% (hit), 2% (throw) | Throws opponent upward and slashes them. Good combo tool. | |
| Down throw | Elbow Strike (ヒジ打ち) | 3% (hit), 4% (throw) | Brings the foe down and shoulder tackles them on the floor. Opponents gets launched behind Toon Link. Oddly, the first hit cannot hit Jigglypuff. It is believed that this is because Jigglypuff's low weight causes the animation to occur too quickly, the hitbox appearing and vanishing before it is checked for. | |
| Forward roll Back roll Spot dodge Air dodge |
— | — | ||
| Techs | — | — | ||
| Floor attack (front) Floor getups (front) |
6% | Does two slashes front and back. | ||
| Floor attack (back) Floor getups (back) |
6% | Does another two slashes front and back. | ||
| Floor attack (trip) Floor getups (trip) |
5% | Essentially the same as his other two floor attacks. | ||
| Edge attack (fast) Edge getups (fast) |
8% | Pulls himself up into a front flip and slices downward. | ||
| Edge attack (slow) Edge getups (slow) |
10% | Slowly climbs up and stabs in front of himself. | ||
| Neutral special | Hero's Bow | 4-12% | Link equips his bow, with the arrows serving as projectiles. Charging increases the speed, distance and damage dealt by an arrow. Arrows are much floatier than Link's, making them very useful even with no charge, but are also notably slower. | |
| Side special | Boomerang | 8% (near), 5% (middle), 3% (return) | Tosses a boomerang that flies forward to hit opponents, and returns to the user while still being able to hit foes. Can be angled up or down. A "smash throw" (similar to performing a smash attack) increases the distance the boomerang can travel. Close up, it can be used to follow up with another attack, and on the way back, can disrupt foes (Ex. If Toon Link gets grabbed) and turn the tide of battle albeit with weak knockback. | |
| Up special | Spin Attack | Uncharged 1% (hits 1-9), 3% (hit 10) Charged: 1.6% (hits 1-9), 4.8% (hit 10) Aerial: 4% (hit 1), 2% (hits 2-4), 4% (hit 5) |
Toon Link sticks his blade out and spins around rapidly, hitting opponents multiple times before knocking them in different directions. Useful for catching rolls. The grounded version can be charged for more damage, while the aerial version gives him vertical and horizontal ascension. | |
| Down special | Bomb | 3% (explosion), 5% (throw), 6% (smash throw), 2-7% (dropped) | Toon Link pulls out a bomb. The bomb can be thrown upwards, downwards, left, or right, and if Toon Link is in the air, he can press the grab button to drop the bomb on the ground. If Toon Link drops a bomb while he is close to the ground, the bomb will land on the ground and will not explode until the fuse runs out, but other players can pick up the bomb and use it themselves. The blast radius of the bombs larger that Link’s bombs, but deals less damage. This move is a very good move for setting up combos and can grant him an extra Spin attack if used skillfully. | |
| Final Smash | Triforce Slash | 5% (trapping), 4% (hits 1-15), 18% (hit 16) | Toon Link locks onto an opponent and proceeds to slash them repeatedly with his Master Sword. A luminous image of the Triforce appears around the opponent as Toon Link slashes them. The final strike launches the opponent. | |
Stats[edit]

| Stats | Weight | Dash speed | Walk speed | Traction | Air friction | Air speed | Air acceleration | Gravity | Falling speed | Jumpsquat | Jump Height | Double jump Height |
|---|---|---|---|---|---|---|---|---|---|---|---|---|
| Value | 92 | 1.5 – Initial dash 1.65 – Run |
1.22 | 0.0547 | 0.01 | 0.94 | 0.01 – Base 0.08 – Additional |
0.07 | 1.28 – Base 1.9 – Fast-fall |
5 | 33.48017857 - Base ? - Short hop |
? |
Announcer call[edit]

English/Japanese
Wii Remote selection sound[edit]
- Toon Link makes a noise from The Wind Waker and shouts similar to his up smash.
On-screen appearance[edit]
- Appears from an explosion that is similar to the ones used in The Wind Waker, and then quickly equips his sword and shield.

|
|---|
Taunts[edit]
- Up taunt: Conducts with his Wind Waker baton, at the end of which, a sound from when Toon Link plays a melody in The Wind Waker is heard.
- Side taunt: Puts his sword away and looks around the environment.
- Down taunt: Panics while slashing his sword around wildly, which tires him out.
| Up taunt | Side taunt | Down taunt |
|---|---|---|

|

|

|
Idle poses[edit]
- Looks around cautiously.
- Taps the tip of his boot on the ground.
 |

|
|---|
Crowd cheer[edit]
| English | Japanese | |
|---|---|---|
| Cheer | ||
| Description | Toon-Link! | Lin-k! |
| Pitch | Group chant | Group chant |
Victory poses[edit]
- Up: He catches a pig and holds it above his head.
- Left: He waves the Wind Waker baton. This pose is extremely similar to his Up Taunt.
- Right: He tries to catch a pig, but ends up tripping and falling on his bottom.
| Up | Left | Right |
|---|---|---|

|

|

|
In competitive play[edit]
Notable players[edit]

- See also: Category:Toon Link players (SSBB)
 Hyro - A top Toon Link player from Louisiana.
- Jash - Was known as the best Toon Link in the United States before his inactivity in 2012.
 Hyuga - The best Toon Link player in Mexico and one of the best ones in the world.
- Jerm - A top Toon Link player from Texas.
- Kingtoon - Often considered to be the second best Toon Link behind MJG.
- MJG - One of the best Toon Link players in the world.
Role in The Subspace Emissary[edit]

Toon Link is an optional character in The Subspace Emissary, along with Jigglypuff and Wolf, who can only be unlocked after the mode has been completed. To find him, players must enter a new door in The Forest which appears after defeating Tabuu for the first time that takes them to the Pirate Ship, where Toon Link prepares for battle. Defeating Toon Link will add him to the player's team. He does not have an actual role in the overall plot.
Using stickers[edit]
Toon Link uses his sword for all of his attacks except his back throw, forward throw, and down throw. Because of this, he benefits greatly from [Slash] and [Weapon] Damage boosts. Toon Link has more ranged specials than direct, so a [Specials: Indirect] boost would also be beneficial to him.
Exclusive stickers[edit]
These stickers can only be used by Toon Link, or a select few including him:
- Boomerang: [Weapon] Attack +4
- Colin: [Specials: Direct] Attack +4
- Daphnes Nohansen Hyrule: [Electric] Attack +31
- Darknut: [Slash] Attack +13
- Epona & Link: [Arm, Leg] Attack +9
- Fierce Deity Link: [Slash] Attack +21
- Happy Mask Salesman: [Leg] Attack +9
- Hylian Shield (The Legend of Zelda: Twilight Princess): [Slash] Resistance +10
- Lantern: [Flame] Resistance +7
- Legend of Outset: [Arm] Attack +26
- Linebeck: [Throwing] Attack +20
- Link (The Legend of Zelda: A Link to the Past): [Electric] Resistance +31
- Link (The Legend of Zelda: Twilight Princess): [Slash] Resistance +27
- Link (The Legend of Zelda: The Wind Waker): [Flame] Attack +31
- Link with Goron Mask: [Slash] Attack +17
- Link's Grandma: [Arm, Leg] Attack +2
- Lon Lon Milk: Launch Power +18
- Midna & Wolf Link: [Leg] Attack +26
- Moblin: [Slash] Attack +15
- Octorok: [Leg] Attack +4
- Piece of Heart: Heart Container Effect +50
- Salvatore: [Electric] Attack +9
- Sheik: [Body, Spin] Attack +17
- Tingle (The Legend of Zelda: The Wind Waker): [Flame] Resistance +24
- Young Zelda (The Legend of Zelda: The Minish Cap): [Normal] Resistance +16
- Zant: [Weapon] Attack +7
- Zelda (The Legend of Zelda: Ocarina of Time): [Flame] Resistance +18
In Solo Modes[edit]
Classic Mode[edit]
In Classic Mode, Toon Link can appear as an opponent or ally in Stage 1 if he has been unlocked along with Link, Zelda/Sheik, and Ganondorf on Bridge of Eldin or Pirate Ship. Toon Link can also appear as an opponent in Stage 11, but only if he hasn't appeared in Stage 1.
All-Star Mode[edit]
In All-Star Mode, Toon Link is fought in Stage 6 alongside Link, Zelda/Sheik, and Ganondorf on Bridge of Eldin or Pirate Ship.
Event Matches[edit]
Solo Events[edit]
- Event 35: The Visitor to Flat Zone: As Mr. Game & Watch, the player must defeat Peach, Toon Link, and Jigglypuff on Flat Zone 2. All three opponents have the "Game & Watch" effect on their models.
- Event 37: The Pirate Airship: As Toon Link, the player must KO both Yoshis on Pirate Ship while the ship is in the air.
- Event 39: All-Star Battle x2: Toon Link is one of the eight opponents fought in this event along with King Dedede, Ike, Lucario, R.O.B., Snake, Sonic, and Wolf.
Co-Op Events[edit]
- Co-Op Event 15: Four Swords Brawl: Both players control Toon Link and face off against two other Toon Links. Both players must work together to collect 500 coins before the opposing team does.
- Co-Op Event 21: The True All-Star Battle: Two players select a character and take on the entire roster on Battlefield.
Ending Images[edit]
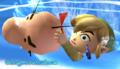
Classic Mode
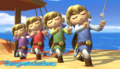
All-Star Mode


Trophies[edit]
Toon Link's main and Final Smash trophies can be obtained by clearing Classic Mode and All-Star mode respectively with Toon Link.

- Toon Link
- Link as he appeared in The Wind Waker and Phantom Hourglass, with big eyes and an expressive face. He lived peacefully on Outset Island until a bird captured his little sister, and he came to her rescue. In The Wind Waker, he had to crawl, press up to walls, and the like. His green clothes were worn on his 12th birthday and are the lucky outfit of the hero of legend.
 : The Legend of Zelda: The Wind Waker
 : The Legend of Zelda: Phantom Hourglass
_-_Brawl_Trophy.png)
- Triforce Slash (Toon Link)
- Toon Link's Final Smash. Hit an enemy with the light emanating from the Triforce mark on his hand to initiate the move. The enemy will be trapped within the Triforce and be unable to move--Toon Link will then rush in close and carve up his foe at lightning speed. The final blow will break the Triforce prison and send the opponent off the screen.
 : Super Smash Bros. Brawl
Alternate costumes[edit]
.png)
| |||||
Gallery[edit]
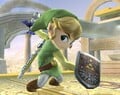
Using Spin Attack on Skyworld.
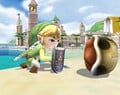
Crouching next to Squirtle on Delfino Plaza.
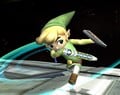
Using his neutral attack on Lylat Cruise.
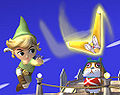
Using his Boomerang.

Using forward tilt against Link on Mushroomy Kingdom.
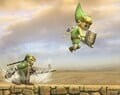
Jumping near Link on Mushroomy Kingdom.
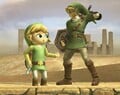
Taunting with Link on Mushroomy Kingdom.
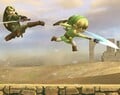
Using neutral air with Link on Mushroomy Kingdom.
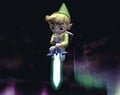
Using down air on Summit.
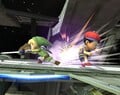
Attacking Ness on Lylat Cruise.

Using Bomb on Mushroomy Kingdom.
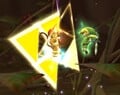
Using Triforce Slash against Diddy Kong.
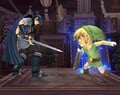
Starting Triforce Slash against Marth.


Trivia[edit]
- Toon Link's render is identical to an official piece of artwork of him for The Wind Waker, albeit with his eyes facing forward and the inclusion of his sword and shield.
- Toon Link's grab aerial can be used to save him from a KO at extremely high damages, ranging up to even higher than 300%, if an attack hits him low enough that his tether is within grabbing distance of the ledge as he passes by it. This requires very fast reaction to pull off, and is not often seen in competitive play due to there being few semi-spikes with KO power (which are the only type of moves that can hit Toon Link low enough to being within grabbing distance of the ledge).
- Despite being able to crawl voluntarily when unequipped in The Wind Waker, Toon Link is unable to crawl in Brawl; Mario and Pit are the only other characters who act this way.
- Toon Link holds the world record for Level 4 and Level 5 Target Smash (Level 4 completed in 9.05 seconds, and Level 5 completed in 6.65 seconds), Co-op Target Smash Level 1 with Falco (2.66 seconds), and Co-op Target Smash Level 5 with another Toon Link (4.11 seconds).
- Along with his hair, his hat disobeys gravity, with the hat usually staying in a limp position while falling, as opposed to the tip being above the rest of his body.
- Toon Link has the same idle poses as Young Link in Melee.
- If Toon Link eats Superspicy Curry and doesn't move or attack after the effect wears off, he will not take his sword and shield back out until he finally moves or attacks.
- Toon Link is one of the few known characters to have an obvious error in his moveset coding: while the first hit of his forward throw is quite clearly a shoulder tackle, for sticker purposes it is considered a leg attack. This is likely an error caused by copying moveset data from Link.
- Toon Link has the most semi-spikes in Brawl.
- Masahiro Sakurai stated that Toon Link, Jigglypuff, and Wolf were almost cut from Brawl due to time constraints and their late consideration for inclusion in the game, hence why they are excluded from and cannot be unlocked while playing through the main Subspace Emissary story.[1]
- Unlike in SSB4 and Ultimate, Toon Link is portrayed here as having realistic hair and detailed fabric on his clothing. Later appearances changed his hair and clothing to more closely resemble his original cartoony artstyle.
- Additionally, only in this game does Toon Link hold the Wind Waker in his artwork; all other appearances feature the Master Sword.
External links[edit]
- DOJO!! Page
- Toon Link Character Guide on SmashBoards
- All Of Toon Link's Advanced Techniques on SmashBoards
- Toon Link's hitbox size of each of his moves
References[edit]
| Fighters in Super Smash Bros. Brawl | |
|---|---|
| Veterans | Bowser · Captain Falcon · Donkey Kong · Falco · Fox · Ganondorf · Ice Climbers · Jigglypuff · Kirby · Link · Luigi · Mario · Marth · Mr. Game & Watch · Ness · Peach · Pikachu · Samus · Yoshi · Zelda / Sheik |
| Newcomers | Diddy Kong · Ike · King Dedede · Lucario · Lucas · Meta Knight · Olimar · Pit · Pokémon Trainer (Charizard · Ivysaur · Squirtle) · R.O.B. · Snake · Sonic · Toon Link · Wario · Wolf · (Zero Suit Samus) |