Palutena (SSB4): Difference between revisions
m (→Moveset) |
|||
| (3 intermediate revisions by 2 users not shown) | |||
| Line 103: | Line 103: | ||
{{MovesetTable | {{MovesetTable | ||
|game=SSB4 | |game=SSB4 | ||
|neutralname=Radiance ({{ja|輝き|Kagayaki}}) | |neutralname=Radiance ({{ja|輝き|Kagayaki}})<br>Glimmer ({{ja|煌めき|Kirameki}})<br>Glimmer Finish ({{ja|煌めきフィニッシュ|Kirameki Finisshu}}) | ||
|neutralcount=1 | |neutralcount=1 | ||
|neutralinf=y | |neutralinf=y | ||
| Line 109: | Line 109: | ||
|neutralinfdmg=0.8% (loop), 3.5% (last) | |neutralinfdmg=0.8% (loop), 3.5% (last) | ||
|neutraldesc=Thrusts her staff forward to emit a blast of light from its orb that hits multiple times, followed by an upward swipe. It is Palutena's best ground attack and arguably one of the best neutral attacks in the game, thanks to its spacing, damage racking and [[jab cancel]]ing potential. Jab cancel follow-ups include itself and standing/dash grabs at low to high percentages, and neutral aerial, back aerial, and smash attacks at very high percentages. Its neutral infinite's finisher is useful for spacing, thanks to its extremely high knockback scaling. Due to it hitting on frame 8, however, it is tied with {{SSB4|Wario}}'s neutral attack for the fourth slowest in the game. Its neutral infinite also has high ending lag. | |neutraldesc=Thrusts her staff forward to emit a blast of light from its orb that hits multiple times, followed by an upward swipe. It is Palutena's best ground attack and arguably one of the best neutral attacks in the game, thanks to its spacing, damage racking and [[jab cancel]]ing potential. Jab cancel follow-ups include itself and standing/dash grabs at low to high percentages, and neutral aerial, back aerial, and smash attacks at very high percentages. Its neutral infinite's finisher is useful for spacing, thanks to its extremely high knockback scaling. Due to it hitting on frame 8, however, it is tied with {{SSB4|Wario}}'s neutral attack for the fourth slowest in the game. Its neutral infinite also has high ending lag. | ||
|ftiltname=Circle of Protection ({{ja|守りの環| | |ftiltname=Circle of Protection ({{ja|守りの環|Mamori no Wa}}) | ||
|ftiltdmg=6% (staff's head), 4% (staff's tail) | |ftiltdmg=6% (staff's head), 4% (staff's tail) | ||
|ftiltdesc=Telekinetically twirls her staff in front of herself. Hitting with the staff's tail can make it hit twice altogether, while its long duration and good range can allow it to punish [[sidestep]]s and backward [[roll]]s. It has [[Priority#Moves that cannot rebound|anti-rebounding priority]], which means that it will not suffer ending lag if it collides with an attack that does not have [[transcendent priority]]. Due to it hitting on frame 17, however, it is her slowest tilt attack. When coupled with its high ending lag and long duration, it is very punishable. | |ftiltdesc=Telekinetically twirls her staff in front of herself. Hitting with the staff's tail can make it hit twice altogether, while its long duration and good range can allow it to punish [[sidestep]]s and backward [[roll]]s. It has [[Priority#Moves that cannot rebound|anti-rebounding priority]], which means that it will not suffer ending lag if it collides with an attack that does not have [[transcendent priority]]. Due to it hitting on frame 17, however, it is her slowest tilt attack. When coupled with its high ending lag and long duration, it is very punishable. | ||
| Line 121: | Line 121: | ||
|dashdmg=9% (clean), 5% (late) | |dashdmg=9% (clean), 5% (late) | ||
|dashdesc=Rams into the opponent with her shield. Due to it hitting on frame 6, it is one of the fastest dash attacks in the game. It also has deceptive range, thanks to it slightly boosting Palutena. Thanks to its clean hitbox's high knockback scaling, it can function as a situational KOing option; it KOs middleweights at 157%/145% (''3DS''/''Wii U'') while near the edge of Final Destination. Its clean hitbox also grants partial [[invincibility]] to Palutena's body on frames 4-15. However, its high ending lag makes it very punishable. | |dashdesc=Rams into the opponent with her shield. Due to it hitting on frame 6, it is one of the fastest dash attacks in the game. It also has deceptive range, thanks to it slightly boosting Palutena. Thanks to its clean hitbox's high knockback scaling, it can function as a situational KOing option; it KOs middleweights at 157%/145% (''3DS''/''Wii U'') while near the edge of Final Destination. Its clean hitbox also grants partial [[invincibility]] to Palutena's body on frames 4-15. However, its high ending lag makes it very punishable. | ||
|fsmashname=Goddess Wings ({{ja|女神の翼|Megami no Tsubasa}}) | |fsmashname=Goddess' Wings ({{ja|女神の翼|Megami no Tsubasa}}) | ||
|fsmashdmg={{ChargedSmashDmgSSB4|16}} (near), {{ChargedSmashDmgSSB4|13}} (far), — (tip) | |fsmashdmg={{ChargedSmashDmgSSB4|16}} (near), {{ChargedSmashDmgSSB4|13}} (far), — (tip) | ||
|fsmashdesc=Conjures ethereal wings and flaps them forward. It has impressive horizontal range, while its respectable damage output and high knockback scaling make it very strong. Its sweetspot covers the majority of the wings, whereas its sourspot is on their tips. Its sweetspot KOs middleweights at 84%/74% (''3DS''/''Wii U'') while near the edge of Final Destination. Conversely, its sourspot latter KOs them at 108%/97% (''3DS''/''Wii U'') while near the edge of Final Destination. It also has a windbox near the tips of the wings that can [[push]] away opponents and potentially [[gimp]] recoveries. Due to it hitting on frame 18 and having 47 frames of ending lag, however, it is very punishable and thus best suited as a punishment option. Occasionally, Palutena utters "Goddess Wings!" while using the move. | |fsmashdesc=Conjures ethereal wings and flaps them forward. It has impressive horizontal range, while its respectable damage output and high knockback scaling make it very strong. Its sweetspot covers the majority of the wings, whereas its sourspot is on their tips. Its sweetspot KOs middleweights at 84%/74% (''3DS''/''Wii U'') while near the edge of Final Destination. Conversely, its sourspot latter KOs them at 108%/97% (''3DS''/''Wii U'') while near the edge of Final Destination. It also has a windbox near the tips of the wings that can [[push]] away opponents and potentially [[gimp]] recoveries. Due to it hitting on frame 18 and having 47 frames of ending lag, however, it is very punishable and thus best suited as a punishment option. Occasionally, Palutena utters "Goddess Wings!" while using the move. | ||
| Line 127: | Line 127: | ||
|usmashdmg={{ChargedSmashDmgSSB4|16}} (base), {{ChargedSmashDmgSSB4|12}} (middle), {{ChargedSmashDmgSSB4|9}} (top) | |usmashdmg={{ChargedSmashDmgSSB4|16}} (base), {{ChargedSmashDmgSSB4|12}} (middle), {{ChargedSmashDmgSSB4|9}} (top) | ||
|usmashdesc=Conjures a cyan beam of light that erupts from the ground. It has the highest vertical range of any up smash in the game, and the second highest vertical range of all up smashes in the series, surpassed only by {{SSBB|Snake}}'s. It has three hitboxes: one at the base of the beam, one at the middle, and one at the top. Its high vertical range and base hitbox's great KO potential make it very useful for edge-guarding. Its base hitbox KOs middleweights at 102%/94% (''3DS''/''Wii U'') from anywhere on Final Destination. Although its middle hitbox deals slightly less damage, it also KOs reliably; it KOs aerial middleweights at 117%/106% (''3DS''/''Wii U'') from anywhere on Final Destination. Due to it hitting on frame 18, and having both 42 frames of ending lag and very minimal horizontal range, it is best suited as a punishment option. In addition, its top hitbox KOs noticeably later because of its average damage output. | |usmashdesc=Conjures a cyan beam of light that erupts from the ground. It has the highest vertical range of any up smash in the game, and the second highest vertical range of all up smashes in the series, surpassed only by {{SSBB|Snake}}'s. It has three hitboxes: one at the base of the beam, one at the middle, and one at the top. Its high vertical range and base hitbox's great KO potential make it very useful for edge-guarding. Its base hitbox KOs middleweights at 102%/94% (''3DS''/''Wii U'') from anywhere on Final Destination. Although its middle hitbox deals slightly less damage, it also KOs reliably; it KOs aerial middleweights at 117%/106% (''3DS''/''Wii U'') from anywhere on Final Destination. Due to it hitting on frame 18, and having both 42 frames of ending lag and very minimal horizontal range, it is best suited as a punishment option. In addition, its top hitbox KOs noticeably later because of its average damage output. | ||
|dsmashname=Goddess Wings ({{ja|女神の翼|Megami no Tsubasa}}) | |dsmashname=Goddess' Wings ({{ja|女神の翼|Megami no Tsubasa}}) | ||
|dsmashdmg={{ChargedSmashDmgSSB4|15}} (near), {{ChargedSmashDmgSSB4|13}} (far), — (tip) | |dsmashdmg={{ChargedSmashDmgSSB4|15}} (near), {{ChargedSmashDmgSSB4|13}} (far), — (tip) | ||
|dsmashdesc=Conjures ethereal wings and flaps them downward on both sides. Its clean hitbox has the highest knockback scaling out of her smash attacks. When coupled with its respectable damage output, it KOs middleweights at 110%/102% (''3DS''/''Wii U'') while near the edge of Final Destination. Although its late hitbox deals slightly less damage, it is also reliable thanks to being a [[semi-spike]] that is strong enough to KO middleweights at 115%/104% (''3DS''/''Wii U'') while near the edge of Final Destination. Like forward smash, it has a windbox near the tips of the wings. However, it hits on frame 17 and has 52 frames of ending lag; the latter of which is the highest amount of ending lag of all down smashes in the game, and the second highest ending lag of all smash attacks in the game. As a result, it is best used as a punishment option. Occasionally, Palutena utters "Goddess Wings!" while using the move. | |dsmashdesc=Conjures ethereal wings and flaps them downward on both sides. Its clean hitbox has the highest knockback scaling out of her smash attacks. When coupled with its respectable damage output, it KOs middleweights at 110%/102% (''3DS''/''Wii U'') while near the edge of Final Destination. Although its late hitbox deals slightly less damage, it is also reliable thanks to being a [[semi-spike]] that is strong enough to KO middleweights at 115%/104% (''3DS''/''Wii U'') while near the edge of Final Destination. Like forward smash, it has a windbox near the tips of the wings. However, it hits on frame 17 and has 52 frames of ending lag; the latter of which is the highest amount of ending lag of all down smashes in the game, and the second highest ending lag of all smash attacks in the game. As a result, it is best used as a punishment option. Occasionally, Palutena utters "Goddess Wings!" while using the move. | ||
|nairname=Omnidirectional Circle ({{ja|四方の環| | |nairname=Omnidirectional Circle ({{ja|四方の環|Shihō no Wa}}, ''Four-Directions' Circle'') | ||
|nairdmg=1.7% (loop), 5% (last) | |nairdmg=1.7% (loop), 5% (last) | ||
|nairdesc=Telekinetically spins her staff around herself. Its loop hits have the [[Autolink angle|auto-link angle]], which makes it reliably trap opponents. When coupled with its long duration, it is a great pressuring and juggling option against opponents in the air or on platforms. Its last hit's extremely high knockback scaling also allows it to function as a decent edge-guarding option, and combo into grounded or other aerial attacks at low percentages. | |nairdesc=Telekinetically spins her staff around herself. Its loop hits have the [[Autolink angle|auto-link angle]], which makes it reliably trap opponents. When coupled with its long duration, it is a great pressuring and juggling option against opponents in the air or on platforms. Its last hit's extremely high knockback scaling also allows it to function as a decent edge-guarding option, and combo into grounded or other aerial attacks at low percentages. | ||
| Line 139: | Line 139: | ||
|bairdmg=12% (shield), 9% (arm) | |bairdmg=12% (shield), 9% (arm) | ||
|bairdesc=Rotates her body to slam her shield into the opponent. Due to it hitting on frame 8, it is tied with up aerial as her second fastest aerial. It also has the second lowest amount of landing lag out of her aerials, and can be auto-canceled from a short hop. When these traits are coupled with its shield hitbox's respectable damage and high knockback scaling, it is one of Palutena's most viable KOing options. Its shield hitbox KOs middleweights at 135%/123% (''3DS''/''Wii U'') while near the edge of Final Destination. Like dash attack's clean hitbox, it grants partial invincibility around her body, but does so for its entire duration instead of for several frames. However, it has very high ending lag and a very small sourspot on her arm that deals less damage. Due to having its hitboxes positioned only on her shielded arm, it can also potentially miss an opponent that is too close to her. | |bairdesc=Rotates her body to slam her shield into the opponent. Due to it hitting on frame 8, it is tied with up aerial as her second fastest aerial. It also has the second lowest amount of landing lag out of her aerials, and can be auto-canceled from a short hop. When these traits are coupled with its shield hitbox's respectable damage and high knockback scaling, it is one of Palutena's most viable KOing options. Its shield hitbox KOs middleweights at 135%/123% (''3DS''/''Wii U'') while near the edge of Final Destination. Like dash attack's clean hitbox, it grants partial invincibility around her body, but does so for its entire duration instead of for several frames. However, it has very high ending lag and a very small sourspot on her arm that deals less damage. Due to having its hitboxes positioned only on her shielded arm, it can also potentially miss an opponent that is too close to her. | ||
|uairname=Halo ({{ja|後光|Gokō}}) | |uairname=Halo/Nimbus ({{ja|後光|Gokō}}) | ||
|uairdmg=1% (hits 1-4), 5% (hit 5) | |uairdmg=1% (hits 1-4), 5% (hit 5) | ||
|uairdesc=Twirls while emitting her halo. Due to it hitting on frame 8, it is tied with back aerial as her second fastest aerial. Like neutral aerial, it has a long duration, hits multiple times and its last hit has extremely high knockback scaling. These traits allow it to reliably pressure aerial opponents above Palutena, and make it one of her most viable KOing options. Its last hit KOs middleweights at 104%/95% (''3DS''/''Wii U'') while near the upper blast line of Final Destination. However, it has a noticeable amount of ending lag. Due to having more interruptible frames than auto-canceling frames, it also cannot be auto-canceled at all, even a few frames after its animation ends. Despite this, its auto-cancel issue can be mitigated by using another attack with less ending lag, such as forward aerial, before Palutena lands on solid ground. | |uairdesc=Twirls while emitting her halo. Due to it hitting on frame 8, it is tied with back aerial as her second fastest aerial. Like neutral aerial, it has a long duration, hits multiple times and its last hit has extremely high knockback scaling. These traits allow it to reliably pressure aerial opponents above Palutena, and make it one of her most viable KOing options. Its last hit KOs middleweights at 104%/95% (''3DS''/''Wii U'') while near the upper blast line of Final Destination. However, it has a noticeable amount of ending lag. Due to having more interruptible frames than auto-canceling frames, it also cannot be auto-canceled at all, even a few frames after its animation ends. Despite this, its auto-cancel issue can be mitigated by using another attack with less ending lag, such as forward aerial, before Palutena lands on solid ground. | ||
|dairname=Purging Kick ({{ja|追放キック|Tsuihō Kikku}}) | |dairname=Purging/Exile Kick ({{ja|追放キック|Tsuihō Kikku}}) | ||
|dairdmg=9% | |dairdmg=9% | ||
|dairdesc=A downward roundhouse kick. Unlike other meteor smashes, it will always meteor smash aerial opponents, thanks to its consistent hitbox. Conversely, it will obliquely launch grounded opponents, which allows it to be used as a punishment option from [[out of shield]] when SHFF'd. Due to it hitting on frame 10 and having the highest ending lag of any aerial attack in the game, it is her slowest aerial and thus very punishable. In addition, it only lasts for only 1 frame, has very minimal horizontal range, and cannot auto-cancel unless used from a jump. As a result of its flaws, it is unarguably Palutena's least effective aerial attack. | |dairdesc=A downward roundhouse kick. Unlike other meteor smashes, it will always meteor smash aerial opponents, thanks to its consistent hitbox. Conversely, it will obliquely launch grounded opponents, which allows it to be used as a punishment option from [[out of shield]] when SHFF'd. Due to it hitting on frame 10 and having the highest ending lag of any aerial attack in the game, it is her slowest aerial and thus very punishable. In addition, it only lasts for only 1 frame, has very minimal horizontal range, and cannot auto-cancel unless used from a jump. As a result of its flaws, it is unarguably Palutena's least effective aerial attack. | ||
| Line 150: | Line 150: | ||
|pummeldmg=3.1% | |pummeldmg=3.1% | ||
|pummeldesc=A small blast of light. Moderately slow, but tied with {{SSB4|Sheik}}'s for the sixth most damaging pummel in the game. | |pummeldesc=A small blast of light. Moderately slow, but tied with {{SSB4|Sheik}}'s for the sixth most damaging pummel in the game. | ||
|fthrowname=Zero-Contact Throw ({{ja|触れない投げ|Sawarenai Nage}}) | |fthrowname=Zero-Contact Throw ({{ja|触れない投げ|Sawarenai Nage}}, ''No Touching Throw'') | ||
|fthrowdmg=9% | |fthrowdmg=9% | ||
|fthrowdesc=Slightly curls herself and then telekinetically pushes the opponent forward. It is Palutena's second most damaging throw, but only has utility as an edge-guard set-up. | |fthrowdesc=Slightly curls herself and then telekinetically pushes the opponent forward. It is Palutena's second most damaging throw, but only has utility as an edge-guard set-up. | ||
|bthrowname=Zero-Contact Reverse Throw ({{ja|触れない逆投げ|Sawarenai Sakanage}}) | |bthrowname=Zero-Contact Reverse Throw ({{ja|触れない逆投げ|Sawarenai Sakanage}}, ''No Touching Inverted Throw'') | ||
|bthrowdmg=10% | |bthrowdmg=10% | ||
|bthrowdesc=Telekinetically lifts the opponent and then performs an inverted version of the [[wikipedia:Arabesque (ballet position)|Arabesque]], a ballet position, to fling the opponent backward. It is Palutena's most damaging throw, and her only throw that KOs at reasonable percentages. It is also useful for setting up an edge-guard. It KOs middleweights at 156%/146% (''3DS''/''Wii U'') while near the edge of Final Destination. | |bthrowdesc=Telekinetically lifts the opponent and then performs an inverted version of the [[wikipedia:Arabesque (ballet position)|Arabesque]], a ballet position, to fling the opponent backward. It is Palutena's most damaging throw, and her only throw that KOs at reasonable percentages. It is also useful for setting up an edge-guard. It KOs middleweights at 156%/146% (''3DS''/''Wii U'') while near the edge of Final Destination. | ||
| Line 159: | Line 159: | ||
|uthrowdmg=8% | |uthrowdmg=8% | ||
|uthrowdesc=Telekinetically heaves the opponent upward. Despite having high base knockback, its average damage output and below-average knockback scaling make it unreliable at KOing without the use of a highly elevated [[platform]], such as {{SSB4|Battlefield}}'s top platform. As a result, it is better suited for setting up aerial pressure. | |uthrowdesc=Telekinetically heaves the opponent upward. Despite having high base knockback, its average damage output and below-average knockback scaling make it unreliable at KOing without the use of a highly elevated [[platform]], such as {{SSB4|Battlefield}}'s top platform. As a result, it is better suited for setting up aerial pressure. | ||
|dthrowname=Knock Down ({{ja|叩き落とし|Tataki Otoshi}}) | |dthrowname=Knock Down ({{ja|叩き落とし|Tataki Otoshi}}, ''Thrashing Dropper'') | ||
|dthrowdmg=5% | |dthrowdmg=5% | ||
|dthrowdesc=Telekinetically slams the opponent onto the ground. It is Palutena's most useful throw, thanks to its high base knockback, very low knockback growth, and diagonal launching angle. Depending on the opponent's DI, it can combo into any of her aerials, most notably up aerial. At high percentages, its up aerial combo is a reliable KO combo against almost the entirety of the cast, similarly to {{SSB4|Zelda}}'s own respective combo. Its back aerial combo also has decent KO potential, but must be used with a [[reverse aerial rush]]. In comparison, its down aerial combo requires both a successful read of the opponent's air dodge, and the opponent failing to DI properly. It can also combo into up smash, although it has the same requirements as the down aerial combo. However, down throw's combos are susceptible to DI, and it loses its effectiveness while Palutena has high [[rage]]. | |dthrowdesc=Telekinetically slams the opponent onto the ground. It is Palutena's most useful throw, thanks to its high base knockback, very low knockback growth, and diagonal launching angle. Depending on the opponent's DI, it can combo into any of her aerials, most notably up aerial. At high percentages, its up aerial combo is a reliable KO combo against almost the entirety of the cast, similarly to {{SSB4|Zelda}}'s own respective combo. Its back aerial combo also has decent KO potential, but must be used with a [[reverse aerial rush]]. In comparison, its down aerial combo requires both a successful read of the opponent's air dodge, and the opponent failing to DI properly. It can also combo into up smash, although it has the same requirements as the down aerial combo. However, down throw's combos are susceptible to DI, and it loses its effectiveness while Palutena has high [[rage]]. | ||
| Line 290: | Line 290: | ||
|- | |- | ||
! scope="row"|Cheer | ! scope="row"|Cheer | ||
|[[File:Palutena Cheer | |[[File:Palutena Cheer English SSB4 SSBU.ogg|center]]||[[File:Palutena Cheer Japanese SSB4.ogg|center]]||{{NTSC}} [[File:Palutena Cheer Spanish NTSC SSB4 SSBU.ogg|center]] <br> {{PAL}} [[File:Palutena Cheer Spanish PAL SSB4.ogg|center]] | ||
|- | |- | ||
! scope="row"|Description | ! scope="row"|Description | ||
Latest revision as of 16:48, January 15, 2025
| Palutena in Super Smash Bros. 4 | |
|---|---|
 
| |
| Universe | Kid Icarus |
| Other playable appearance | in Ultimate |
| Availability | Starter |
| Final Smash | Black Hole Laser |
| Tier | E (44) |
| “ | Palutena Alights! | ” |
| —Introduction Tagline | ||
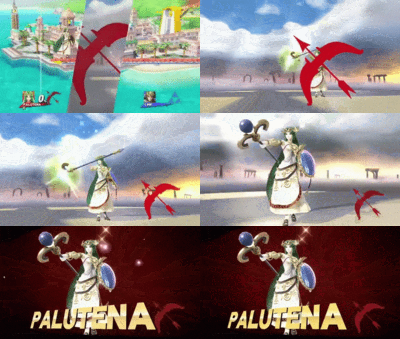
Palutena (パルテナ, Palutena) is a playable character in Super Smash Bros. 4. She was revealed on June 10th, 2014 during Nintendo's E3 Digital Event.[1]
Due to Ali Hillis being unavailable to reprise her role from Kid Icarus: Uprising, Palutena is instead voiced by Brandy Kopp in the English version.[2] However, the Japanese version features Aya Hisakawa reprising her role from Kid Icarus: Uprising.
Palutena is ranked 44th out of 54 on the tier list, placing her at the bottom the E tier. Palutena has good overall mobility, which is especially noticeable on the ground, thanks to her fast walking and dashing speeds and high traction. She also boasts a potent air game, thanks to her aerial attacks' utility: neutral aerial is useful for pressuring and damage racking; forward aerial is very useful for starting combos when SHFF'd and for spacing; back aerial grants partial invincibility and its clean hitbox KOs reliably; up aerial hits multiple times and its last hit KOs rather early; and down aerial is a fairly quick meteor smash.
Palutena's ground game also has some utility. Her grab game, in particular, is very effective: her overall grab range is long-ranged; her pummel deals impressive damage and has average speed; and her down throw is an excellent combo starter at low to high percentages. Outside of this, Palutena's neutral attack is very reliable for damage racking and jab canceling, while her smash attacks possess impressive ranges and considerable power.
However, Palutena's weaknesses are quite glaring. She has very sluggish frame data in relation to her power and weight, which is especially noticeable in regard to her grounded moves. As a result, her neutral game is predictable, and her grounded approach is abysmal. Palutena's KO potential is also inconsistent, since her smash attacks' ranges and power are offset by their awkward hitbox placements and extremely high amounts of overall lag.
Palutena's special moves also have poor synergy with the rest of her moveset and, in some cases, minimal utility. In addition, Palutena's tall height, below-average weight and high gravity collectively make her susceptible to combos, juggles and early KOs. Although her custom moves significantly remedy the problems involving her approach and bolster her mobility, damage racking potential and combo game, the ban on custom movesets prevents Palutena from taking advantage of them in tournaments.
As a result of these factors, Palutena has a very small playerbase, which has been reflected in representation and top-level results being very sparse. Nevertheless, her playerbase has managed to achieve decent amounts of national and regional-level success thanks to the likes of TLTC, Iceninja and El Pitikla and Prince Ramen.
Attributes[edit]
Palutena possesses a unique blend of archetypes: she has a tall frame, yet is tied with Duck Hunt as the third lightest middleweight. Palutena also boasts fast walking and dashing speeds; the seventh highest traction; a high jump and double jump; and is tied with Rosalina, Peach and Mega Man for the fastest air acceleration in the game. On the other hand, she has below-average falling speed, slow air speed and high gravity.
These attributes grant Palutena quick grounded movement, make her very capable at ground-to-air transitions, and allow her to quickly change direction in midair. However, they also make her susceptible to heavy pressure, and she can sometimes have difficulty at resetting the neutral game against some characters. Palutena's reliance on shielding at close range can also result in her shield being whittled down often. This is further compounded by her poor out of shield options in spite of her high traction. Therefore, Palutena's attributes make her unreliable at air-to-ground transitions, and render her susceptible to juggling, combos and being KO'd early from strong vertical attacks.
Palutena's air game is impressive, thanks to her aerial moves' utility, minimal start-up lag and, aside from her neutral and up aerials, low landing lag. Neutral aerial has a large hitbox that uses the auto-link angle, which makes it a useful damage racking option. When coupled with its fairly long duration, it is also capable of pressuring the opponent while they are on a platform, or from out of their air dodge. Its last hit's extremely high knockback scaling also makes it decent for edge-guarding, and even capable of setting up combos at low percentages. Forward aerial has the longest horizontal range of Palutena's aerial moves, the lowest amount of landing lag, and the ability to auto-cancel when SHFF'd. Altogether, these traits make it very useful for spacing and allow it to reliably start combos at low to medium percentages, with follow-ups including neutral attack, standing/dash grab, her tilts or her other aerials.
In comparison, back aerial grants partial invincibility around Palutena's body throughout its duration, while its shield hitbox is strong enough to reliably KO either on-stage or via edge-guarding. Up aerial has good vertical range, hits multiple times, and uses the auto-link angle, which make it ideal for juggling. Most notably, its final hit's extremely high knockback growth also makes it arguably her most viable KOing option. However, some of her aerial moves have rather high ending lag in proportion to their power, durations and ranges, which means that they must be spaced accordingly. Lastly, down aerial will always meteor smash aerial opponents thanks to its consistent hitbox, although it can also be used as to punish opponents from out of shield when it is SHFF'd.
Palutena's grounded moveset also has some interesting options. This is most notable with her grab game: Palutena's standing grab is the fourth longest ranged in the game despite not being a tether grab, whereas her pivot grab also has impressive range. Her pummel's average speed and high damage output make it one of the best pummels in the game. Like Luigi, Palutena's down throw is the most essential aspect of her offense: its high base knockback, very low knockback scaling, and diagonal launching angle collectively grant it impressive combo potential into her neutral, up, forward, and back aerials, although latter requires the usage of a reverse aerial rush. By extension, its up aerial combo boasts KO potential on almost the entirety of the cast at high percentages, while its back aerial combo also has decent KO potential.
Outside of this, down throw can even combo into down aerial and up smash if the player correctly predicts the foe’s action. Forward and back throws are useful for launching the opponent off-stage to set up an edge-guard, although back throw also has KO potential at very high percentages. Up throw has the least amount of utility, although it can be used to pressure the opponent with aerial attacks at low percentages.
Neutral attack is a very reliable damage racking option and has excellent jab cancel potential, thanks to its very quick interruptibility. Like Little Mac, Palutena's tilt attacks boast anti-rebounding priority, while up and down tilts also possess distinct strengths. Up tilt has the lowest amount of start-up lag out of her tilts; a very long duration; lowers her hurtbox even more than her crouch does; is a useful anti-air attack thanks to its deceptive vertical range; and is a situational KOing option thanks to its very strong final hit. In comparison, down tilt's very low ending lag makes it a good spacing option at long range, while its fairly long duration allows it to punish sidesteps rather easily. Dash attack is fast thanks to it hitting on frame 6 and, like her back aerial, it grants partial invincibility. Lastly, forward and especially up smashes possess excellent ranges and high power, the latter of which is among the strongest when sweetspotted.
Despite these advantages, Palutena's weaknesses are very noticeable. Her most glaring flaw is her awful frame data in relation to her power and weight class, which is overall the laggiest in the entire game. When coupled with below-average damage output on most of her attacks, Palutena's offense has major issues that are distinct from her fellow middleweights. This is most apparent with her grounded moveset, which is unfitting for a character with great grounded mobility. Aside from down tilt, Palutena's other grounded moves have disproportionately high ending lag. Neutral infinite's finisher has 21 frames of ending lag; dash attack, forward tilt and up tilt have more than 25 frames of ending lag; her smash attacks have more than 40 frames of ending lag; and her special moveset is fairly sluggish in regard to overall lag. These traits result in Palutena's missed attacks being very susceptible to punishment, even if the opponent is a fair distance away from her, and results in her having an almost nonexistent grounded approach by extension.
In addition to considerable ending lag, Palutena's grounded KOing options are risky in other ways: her smash attacks have considerable start-up lag, whereas up tilt and clean dash attack are situational at best. As such, accuracy is crucial when using Palutena's grounded moves, and can often make a player instead rely solely on her safest grounded moves to set-up KO opportunities via edge-guarding or her down throw-initiated KO combos.
Palutena's abysmal frame data also extends beyond her moveset. Despite her item throws being fast, most of them have very high ending lag, which limits most follow-ups she might have if she is able to steal an item from an opponent. Palutena's safe edge grab is offset by all of her other options being very unsafe: her edge attack is slow and short-ranged; her edge roll grants minimal intangibility frames; and her normal get-up and edge jump are the slowest in the game. As a result, Palutena's edge recovery is problematic weakness unique to her, since her aerial attacks are unsafe on hit should she drop from an edge and then jump while attacking. The only remotely safe option she has is using Warp and aiming for the middle of the stage, although its lack of invulnerability can render her prone to being punished afterward. Despite her larger number of edge options compared to other characters, these flaws make Palutena quite easy to predict when she attempts to recover.
Although Palutena's air game is potent, it nevertheless has a few flaws. Down aerial, in particular, is her worst aerial: it lasts for only 1 frame, is short-ranged, and has very high ending/landing lag. Forward aerial also has a very short duration and high ending lag, whereas up aerial has minimal horizontal range, fairly high landing lag, and can only be interrupted before it can auto-cancel. By extension, down throw's KO set-ups can potentially fail if she is affected by rage and/or the opponent uses proper directional influence.
Palutena's default special moves are also infamously unimpressive because of their limited utility, poor synergy with her regular moves, and their aforementioned sluggishness. Warp is considered to be Palutena's best default special move: it is a quick and rather safe recovery move that improves her neutral game, allows for swift re-positioning, and can easily be edge-canceled. However, it lacks hitboxes and does not grant invincibility or intangibility, which can leave her open to attacks before and just after she uses it. Autoreticle can deter or force an approach; be used for mindgames when B-reversed; and is reliable for locking. However, its projectiles move only toward the fixed reticle and have a slow start-up, with the first projectile coming out on frame 29.
Reflect Barrier has an unblockable hitbox, a weak push effect, a long duration, and can be reused immediately after breaking. However, it is still the weakest reflector of its kind, neither covers her entirely or accompanies her in midair, and has noticeable start-up lag for a reflector. Lastly, Counter has a high damage multiplier, but is the least effective counterattack in the game because of its overall low knockback, overall high lag, very short counter window, and dubious distinction of being one of the very few counterattacks to have a sourspot.
Her custom moves’ utility are rivaled only by the Mii Fighters' in regard to versatility, and they benefit her tremendously in comparison to the majority of her default special moves. Super Speed has immense utility: it allows Palutena to move faster than even an uncharged Spin Charge, it can either be jump-canceled into any aerial move and an up smash, or perform a ramming attack, the latter of which can also lead into the aforementioned attacks, but only as long as it is not telegraphed or interrupted with a disjointed hitbox. The move can also be used for huge horizontal recovery if jump-cancelled. As a trade-off, Super Speed has a cooldown mechanic like Monado Arts, with its cooldown duration lasting approximately 3 seconds.
Lightweight amplifies her movement speed and jump height to the point that she dashes faster than Sonic and jumps higher than Falco. This drastically improves Palutena's mobility and by extension her recovery, yet also makes her off-stage presence and already good combo game become among the best in the game; the latter of which is particularly notable, as it includes a guaranteed combo into her up or down aerials that both KO reliably after 80%. As a trade-off, it lasts for approximately 12.5 seconds, doubles the damage (but not knockback) she receives, and halves her default speed for approximately 5 seconds upon expiring while her damage vulnerability and jump height return to their original values. Regardless of their weaknesses, Super Speed and Lightweight are unarguably Palutena's most effective custom moves, as they improve her KO potential and grant her various mix-ups, set-ups, mindgames, combos and edge-guards that her default moveset otherwise does not possess.
Palutena's other custom moves also have noticeable advantages, but some of them are held back by their easily exploitable weaknesses. Explosive Flame is a pinpoint explosion that is just as slow as Autoreticle, although its limited range makes it even more difficult to land than Autoreticle, as well as being easily punishable if the opponent is in the middle of her and the explosion. Heavenly Light has very minimal use in singles play because of its inability to KO or even flinch. However, these traits also make it invaluable in Team Attack-based doubles play as a method to supplement Ness, Lucas, Mr. Game & Watch and Mii Gunner's absorption-based moves, as well as capable of potentially stealing KOs, similarly to Fox's Blaster. Angelic Missile is a good recovery move and a potent edge-guarding option thanks to its respectable damage output and high base knockback, but it is easy to intercept because of its noticeable start-up lag, low knockback scaling and linear path.
Jump Glide covers an extreme amount of horizontal distance; grants Palutena a safe approaches with her aerial moveset; and can help her extend combos out of Super Speed or Lightweight. However, it has the same fatal flaw as Wings of Icarus: if for any reason Palutena flinches during the move, she cannot use Jump Glide again if she does not land on solid ground, which may lead to an inevitable KO. Rocket Jump has a meteor smash hitbox below Palutena in midair, as well as a strong hitbox that notably improves her out of shield game. However, it is inferior to both Warp and Jump Glide in every other way. Lastly, Celestial Firework grants intangibility during start-up; has impressive knockback; and can easily hit aerial opponents. Although it can potentially hit grounded opponents, this is difficult to do unless they are at point-blank range or enduring heavy lag.
Overall, Palutena is a frail, yet defensive character who has a surprisingly high learning curve in spite of her default moveset being rudimentary. Her optimal playstyle is similar to Ike's: her grab game and punishment options are potent, yet she must rely on spacing and shielding to circumvent her moveset's sluggishness and lack of reliable approach options. Although Palutena's default moveset ultimately renders her as a "high-risk, medium-reward" character, she can be fairly threatening when mastered. As such, Palutena is most rewarding for players with good fundamentals, as a single opening can allow her to quickly rack up damage with her most reliable moves, use her mobility and spacing options to evade and maintain a strong defense, or even KO early with her down throw-initiated KO combos.
Due to her flaws and learning curve, Palutena initially received a poor reception within the Western scene. However, thanks to buffs from game updates, the expansion of her metagame, and notable tournament results from the likes of TLTC, Iceninja and Prince Ramen, the competitive community's reception toward Palutena has improved over time, even in spite of her continually sparse representation.
Update history[edit]
Palutena has received a mix of buffs and nerfs in game updates. The changes to game mechanics have worsened her defensive game, though she was also overall buffed directly, as most of her moves were changed, each in a different way, with the majority of them noticeably improving her previously mediocre offensive game.
Update 1.0.4 made up and down tilts faster, to the point that the latter is now one of her safest grounded attacks. However, it also fixed a useful glitch on Counter that effectively removed its mindgame potential, and shortened her pivot grab's range. Update 1.0.6 removed another beneficial glitch on Super Speed, where the momentum would be maintained after jump-canceled attacks. Update 1.0.8 further improved up tilt by increasing its damage output and improving its hitbox placements. Update 1.1.0 brought a mix of buffs and nerfs: it increased down tilt and neutral aerial's hitbox sizes, increased forward aerial's damage output, and decreased her grabs' ending lag, yet effectively significantly hindered forward tilt's damage racking potential by removing its re-hit rate.
However, update 1.1.1 brought an indirect, yet immense nerf: the changes to shield mechanics worsened Palutena's already poor out of shield potential even further, as they neutralized the crux of her defense and make it more difficult for her to shield and punish her opponent. While these changes also make spacing Palutena's aerial moves more of an option for her, it is also important to note that the disproportionate amount of ending lag compared to her damage output results in her remaining one of the easiest characters to punish out of shield. The same update also buffed Explosive Flame's damage output and hitbox sizes, but largely counterbalanced these buffs by making its last hit blockable. Another glitch was also removed, in which she could instantly renew Lightweight on platforms.
Lastly, update 1.1.5 brought some other useful buffs by increasing the damage outputs of her neutral attack, neutral aerial and forward aerial, which improved her damage racking potential and combo game. Ultimately, Palutena's abundant buffs are arguably counterbalanced by the few nerfs she received. As a result, her position relative to the cast is debatable, mostly because of other characters also receiving very useful buffs from game updates, such as Samus, Charizard, Lucina, and Mewtwo.
 Forward, back and up item tosses' ending lag decreased: frame 30 → 28 (grounded)/24 (aerial).
 Up tilt's ending lag decreased: frame 75 → 68.
 Down tilt's ending lag decreased: frame 45 → 42.
 Up smash's hitboxes last longer: frame 18-22 → 18-26
 Pivot grab's range was slightly decreased (Z2 offset: 19.4 → 17.4).
 Fixed a glitch where using Counter at certain parts of a walk or run animation would propel Palutena forward a short distance.
 Up aerial's visual effects improved.
 Due to concerns raised by CERO, Palutena's skirt and underwear were lengthened and slightly darkened in the Japanese version.[3]
 Fixed a glitch where Super Speed's momentum could be maintained after jump-canceled attacks.
 Up tilt's loop hits deal 0.2% more damage: 1% → 1.2%.
 Up tilt's hitbox placements adjusted: bone 1000 → 0. This re-positions its hitboxes around Palutena instead of her staff, which make its hits connect together better.
 Forward tilt's hitbox sizes increased: 3.8u/2.5u → 4.1u/2.8u; its first hit's angle altered: 361° → 48° and knockback scaling decreased: 100 → 65; and its second hit's angle altered: 48° → 361° and knockback scaling increased: 65 → 100. Altogether, these changes make its hits connect together better at low percentages, and improve its spacing potential.
 Forward tilt's re-hit rate removed: 10 → 0, significantly hindering its damage racking potential.
 Down tilt's hitbox sizes increased: 2.4u/1.9u → 2.7u/2.1u.
 Down tilt's ending lag decreased.
 Neutral aerial's hitbox sizes increased: 3u → 3.4u.
 Forward aerial deals 1% more damage: 7% → 8%.
 All grabs' ending lag decreased: frame 34 → 32 (standing), frame 42 → 40 (dash/pivot).
 Explosive Flame deals 0.2% more damage: 0.6% (loop)/4% (last) → 0.8%
 Explosive Flame's hitbox sizes increased: 3.7u (loop)/4.8u (last) → 14u/15.5u.
 Explosive Flame's last hit is no longer unblockable.
 Fixed a glitch where Palutena could infinitely renew Lightweight on platforms.
 Neutral infinite finisher deals more damage: 3% → 3.5%.
 Neutral aerial deals more damage (1.5% → 1.7% (loop), 4% → 5% (last)).
 Forward aerial deals more damage: 8% → 9% with its knockback compensated.
Moveset[edit]
For a gallery of Palutena's hitboxes, see here.
| Name | Damage | Description | ||
|---|---|---|---|---|
| Neutral attack | Radiance (輝き) Glimmer (煌めき) Glimmer Finish (煌めきフィニッシュ) |
3% | Thrusts her staff forward to emit a blast of light from its orb that hits multiple times, followed by an upward swipe. It is Palutena's best ground attack and arguably one of the best neutral attacks in the game, thanks to its spacing, damage racking and jab canceling potential. Jab cancel follow-ups include itself and standing/dash grabs at low to high percentages, and neutral aerial, back aerial, and smash attacks at very high percentages. Its neutral infinite's finisher is useful for spacing, thanks to its extremely high knockback scaling. Due to it hitting on frame 8, however, it is tied with Wario's neutral attack for the fourth slowest in the game. Its neutral infinite also has high ending lag. | |
| 0.8% (loop), 3.5% (last) | ||||
| Forward tilt | Circle of Protection (守りの環) | 6% (staff's head), 4% (staff's tail) | Telekinetically twirls her staff in front of herself. Hitting with the staff's tail can make it hit twice altogether, while its long duration and good range can allow it to punish sidesteps and backward rolls. It has anti-rebounding priority, which means that it will not suffer ending lag if it collides with an attack that does not have transcendent priority. Due to it hitting on frame 17, however, it is her slowest tilt attack. When coupled with its high ending lag and long duration, it is very punishable. | |
| Up tilt | Circle of Heaven (天の環) | 1.2% (hits 1-6), 2.5% (hit 7 staff's head), 1.5% (hit 7 staff's tail) | Kneels and telekinetically twirls her staff overhead. Unlike forward and down tilt, it has KO potential, thanks to its last hit's head hitbox having extremely high knockback scaling. Its last hit's head hitbox KOs middleweights at 154%/143% (3DS/Wii U) from anywhere on Final Destination. Despite having a relatively low hitbox, it has deceptively decent vertical range, lowers Palutena's hurtbox even more than her crouch does, and has anti-rebounding priority. Due to it hitting on frame 10, it has the lowest start-up out of her tilt attacks. However, when this is coupled with its long duration, it is nevertheless punishable. In addition, its minimal horizontal range makes it unable to hit small, grounded characters like Kirby. | |
| Down tilt | Circle of Earth (地の環) | 8.5% (grounded opponents, staff's head/tail on aerial opponents), 5% (staff's handle on aerial opponents) | Kneels and telekinetically twirls her staff along the ground in front of herself. In addition to its anti-rebounding priority, it has the shortest duration and lowest ending lag out of her tilt attacks. It can be used for edge-guarding and spacing, or to punish sidesteps. However, its noticeable start-up lag makes it more situational than her neutral attack in regard to spacing. | |
| Dash attack | Palutena Shield (パルテナシールド) | 9% (clean), 5% (late) | Rams into the opponent with her shield. Due to it hitting on frame 6, it is one of the fastest dash attacks in the game. It also has deceptive range, thanks to it slightly boosting Palutena. Thanks to its clean hitbox's high knockback scaling, it can function as a situational KOing option; it KOs middleweights at 157%/145% (3DS/Wii U) while near the edge of Final Destination. Its clean hitbox also grants partial invincibility to Palutena's body on frames 4-15. However, its high ending lag makes it very punishable. | |
| Forward smash | Goddess' Wings (女神の翼) | 16% (near), 13% (far), — (tip) | Conjures ethereal wings and flaps them forward. It has impressive horizontal range, while its respectable damage output and high knockback scaling make it very strong. Its sweetspot covers the majority of the wings, whereas its sourspot is on their tips. Its sweetspot KOs middleweights at 84%/74% (3DS/Wii U) while near the edge of Final Destination. Conversely, its sourspot latter KOs them at 108%/97% (3DS/Wii U) while near the edge of Final Destination. It also has a windbox near the tips of the wings that can push away opponents and potentially gimp recoveries. Due to it hitting on frame 18 and having 47 frames of ending lag, however, it is very punishable and thus best suited as a punishment option. Occasionally, Palutena utters "Goddess Wings!" while using the move. | |
| Up smash | Pillar of Light (光の柱) | 16% (base), 12% (middle), 9% (top) | Conjures a cyan beam of light that erupts from the ground. It has the highest vertical range of any up smash in the game, and the second highest vertical range of all up smashes in the series, surpassed only by Snake's. It has three hitboxes: one at the base of the beam, one at the middle, and one at the top. Its high vertical range and base hitbox's great KO potential make it very useful for edge-guarding. Its base hitbox KOs middleweights at 102%/94% (3DS/Wii U) from anywhere on Final Destination. Although its middle hitbox deals slightly less damage, it also KOs reliably; it KOs aerial middleweights at 117%/106% (3DS/Wii U) from anywhere on Final Destination. Due to it hitting on frame 18, and having both 42 frames of ending lag and very minimal horizontal range, it is best suited as a punishment option. In addition, its top hitbox KOs noticeably later because of its average damage output. | |
| Down smash | Goddess' Wings (女神の翼) | 15% (near), 13% (far), — (tip) | Conjures ethereal wings and flaps them downward on both sides. Its clean hitbox has the highest knockback scaling out of her smash attacks. When coupled with its respectable damage output, it KOs middleweights at 110%/102% (3DS/Wii U) while near the edge of Final Destination. Although its late hitbox deals slightly less damage, it is also reliable thanks to being a semi-spike that is strong enough to KO middleweights at 115%/104% (3DS/Wii U) while near the edge of Final Destination. Like forward smash, it has a windbox near the tips of the wings. However, it hits on frame 17 and has 52 frames of ending lag; the latter of which is the highest amount of ending lag of all down smashes in the game, and the second highest ending lag of all smash attacks in the game. As a result, it is best used as a punishment option. Occasionally, Palutena utters "Goddess Wings!" while using the move. | |
| Neutral aerial | Omnidirectional Circle (四方の環, Four-Directions' Circle) | 1.7% (loop), 5% (last) | Telekinetically spins her staff around herself. Its loop hits have the auto-link angle, which makes it reliably trap opponents. When coupled with its long duration, it is a great pressuring and juggling option against opponents in the air or on platforms. Its last hit's extremely high knockback scaling also allows it to function as a decent edge-guarding option, and combo into grounded or other aerial attacks at low percentages. | |
| Forward aerial | Palutena Kick (パルテナキック) | 9% | A flying kick. Its long range and low landing lag make it one of her most reliable spacing options. When coupled with its ability to be auto-canceled when SHFF'd, it also boasts good combo potential at low to medium percentages; follow-ups include itself, neutral attack, standing/dash grab, and dash attack. However, it has a very short duration and high ending lag. | |
| Back aerial | Shield Bash (シールドバッシュ) | 12% (shield), 9% (arm) | Rotates her body to slam her shield into the opponent. Due to it hitting on frame 8, it is tied with up aerial as her second fastest aerial. It also has the second lowest amount of landing lag out of her aerials, and can be auto-canceled from a short hop. When these traits are coupled with its shield hitbox's respectable damage and high knockback scaling, it is one of Palutena's most viable KOing options. Its shield hitbox KOs middleweights at 135%/123% (3DS/Wii U) while near the edge of Final Destination. Like dash attack's clean hitbox, it grants partial invincibility around her body, but does so for its entire duration instead of for several frames. However, it has very high ending lag and a very small sourspot on her arm that deals less damage. Due to having its hitboxes positioned only on her shielded arm, it can also potentially miss an opponent that is too close to her. | |
| Up aerial | Halo/Nimbus (後光) | 1% (hits 1-4), 5% (hit 5) | Twirls while emitting her halo. Due to it hitting on frame 8, it is tied with back aerial as her second fastest aerial. Like neutral aerial, it has a long duration, hits multiple times and its last hit has extremely high knockback scaling. These traits allow it to reliably pressure aerial opponents above Palutena, and make it one of her most viable KOing options. Its last hit KOs middleweights at 104%/95% (3DS/Wii U) while near the upper blast line of Final Destination. However, it has a noticeable amount of ending lag. Due to having more interruptible frames than auto-canceling frames, it also cannot be auto-canceled at all, even a few frames after its animation ends. Despite this, its auto-cancel issue can be mitigated by using another attack with less ending lag, such as forward aerial, before Palutena lands on solid ground. | |
| Down aerial | Purging/Exile Kick (追放キック) | 9% | A downward roundhouse kick. Unlike other meteor smashes, it will always meteor smash aerial opponents, thanks to its consistent hitbox. Conversely, it will obliquely launch grounded opponents, which allows it to be used as a punishment option from out of shield when SHFF'd. Due to it hitting on frame 10 and having the highest ending lag of any aerial attack in the game, it is her slowest aerial and thus very punishable. In addition, it only lasts for only 1 frame, has very minimal horizontal range, and cannot auto-cancel unless used from a jump. As a result of its flaws, it is unarguably Palutena's least effective aerial attack. | |
| Grab | Grab (つかみ) | — | Telekinetically clinches the opponent. Palutena's overall grab range is above-average: her standing grab is the fourth longest ranged non-tether grab in the game, while her pivot grab also has impressive range. However, her dash grab has a slight amount of ending lag. | |
| Pummel | Grab Petit Shock (つかみプチショック) | 3.1% | A small blast of light. Moderately slow, but tied with Sheik's for the sixth most damaging pummel in the game. | |
| Forward throw | Zero-Contact Throw (触れない投げ, No Touching Throw) | 9% | Slightly curls herself and then telekinetically pushes the opponent forward. It is Palutena's second most damaging throw, but only has utility as an edge-guard set-up. | |
| Back throw | Zero-Contact Reverse Throw (触れない逆投げ, No Touching Inverted Throw) | 10% | Telekinetically lifts the opponent and then performs an inverted version of the Arabesque, a ballet position, to fling the opponent backward. It is Palutena's most damaging throw, and her only throw that KOs at reasonable percentages. It is also useful for setting up an edge-guard. It KOs middleweights at 156%/146% (3DS/Wii U) while near the edge of Final Destination. | |
| Up throw | Launch (打ち上げ) | 8% | Telekinetically heaves the opponent upward. Despite having high base knockback, its average damage output and below-average knockback scaling make it unreliable at KOing without the use of a highly elevated platform, such as Battlefield's top platform. As a result, it is better suited for setting up aerial pressure. | |
| Down throw | Knock Down (叩き落とし, Thrashing Dropper) | 5% | Telekinetically slams the opponent onto the ground. It is Palutena's most useful throw, thanks to its high base knockback, very low knockback growth, and diagonal launching angle. Depending on the opponent's DI, it can combo into any of her aerials, most notably up aerial. At high percentages, its up aerial combo is a reliable KO combo against almost the entirety of the cast, similarly to Zelda's own respective combo. Its back aerial combo also has decent KO potential, but must be used with a reverse aerial rush. In comparison, its down aerial combo requires both a successful read of the opponent's air dodge, and the opponent failing to DI properly. It can also combo into up smash, although it has the same requirements as the down aerial combo. However, down throw's combos are susceptible to DI, and it loses its effectiveness while Palutena has high rage. | |
| Forward roll Back roll Spot dodge Air dodge |
— | — | ||
| Techs | — | — | ||
| Floor attack (front) Floor getups (front) |
7% | Swings her staff behind herself and then in front of herself before getting up. | ||
| Floor attack (back) Floor getups (back) |
7% | Swings her staff behind herself and then in front of herself before getting up. | ||
| Floor attack (trip) Floor getups (trip) |
5% | Swings her staff in front of herself and then behind herself before getting up. | ||
| Edge attack Edge getups |
7% | Performs a legsweep while climbing up. | ||
| Neutral special | Default | Autoreticle | 2.9% (per hit, 3 hits) | Illuminates her staff's orb to aim a reticle over an opponent within a large frontal cone radius, and then fires three energy blasts at that location. It will only fire the blasts if no surfaces block her target (including platforms), and if the opponent is within range and not intangible. It can be used as a way for stopping direct approaches and locking, as well as forcing an approach. However, it has high ending lag, regardless of whether or not it targets anything. Because the shots aren’t very fast and only go in one direction, they can be dodged with relative ease. |
| Custom 1 | Explosive Flame | 0.8% (loop, 6 hits), 4.2% (last) | Creates a Smart Bomb-like explosion approximately three character lengths away. It is a decent spacing and zoning tool like Autoreticle. Unlike Autoreticle, it actually has KO potential, thanks to its loop hits reliably trapping the opponent, and its last hit having impressive knockback in spite of its low damage output. Its last hit KOs middleweights at 170% from anywhere on Final Destination in Super Smash Bros. for Nintendo 3DS. However, its noticeable start-up lag and set distance make it fairly predictable like Autoreticle. | |
| Custom 2 | Heavenly Light | 1% (per hit, 36 hits) | Emits a large, rectangular field of supernal light above herself. Its duration can be extended as long as the special button is held. It deals damage within its area, and has windboxes at its edges that push away opponents. However, it cannot KO outright because of its lack of knockback. As a result, it can be used to steal a KO from a character who launched another. When coupled with its ability to be absorbed, it can also function as a very useful way to supplement a teammate if they have a move to absorb it. Still, relatively high end lag makes Palutena even more vulnerable using this move. | |
| Side special | Default | Reflect Barrier | 5%, 1.17× (reflected projectiles) | Raises her shield to emit a rectangular barrier. The barrier reflects projectiles and weakly pushes opponents away, dealing damage to anyone within grabbing range. Palutena's shield also has an unblockable hitbox when it is being raised. If the barrier blocks or reflects an attack that deals at least 50%, it will break. However, unlike other reflectors, it can be used immediately after breaking. The barrier stays out for almost an entire second (58 frames). |
| Custom 1 | Angelic Missile | 13% | Shoots herself forward to perform a corkscrew battering ram, similarly to Skull Bash. Due to it covering almost half of Battlefield and not rendering her helpless, it is a very useful horizontal recovery option, though it has a moderate amount of end lag in mid-air. In addition, its respectable damage output and high base knockback allow it to KO middleweights at 108% while near the edge of Final Destination in the 3DS version. However, it can be avoided somewhat easily because of its noticeable start-up lag, and can even be interrupted by very weak attacks because of its low knockback scaling. Unlike Skull Bash and Green Missile, it also propels Palutena at a set distance because of its inability to be charged. | |
| Custom 2 | Super Speed | 0%-7% | Glides along the ground very quickly while emitting her halo in order to ram into the opponent. It covers the entirety of Battlefield when used on the ground, and propels her diagonally downward when used in the air. Damage varies based on acceleration and timing; starting the move next to someone will knock them aside dealing no damage. In addition to damaging opponents on contact, it can be canceled with her jump, grab, dash attack, sidestep, or pressing the special button again. It has a cooldown period that lasts for slightly more than 3 seconds (184 frames), and a small ring of light will appear around Palutena's torso to indicate when it can be used again. It is considered her best side special move, thanks to its sheer speed and ability to retain its momentum after canceling collectively granting Palutena a plethora of options for mix-ups, recovery, pressure and mobility. | |
| Up special | Default | Warp | — | Disappears and then reappears in a chosen direction. It quickly covers both a respectable amount of height and a decent horizontal distance while rendering Palutena invisible. It can also be edge-canceled, which grants it defensive and re-positioning potentials. However, it renders Palutena helpless after she reappears unless it is edge-canceled. Functions similar to Mewtwo’s Teleport. |
| Custom 1 | Jump Glide | — | Jumps a fair distance and then glides afterward, similarly to Peach Parasol, before entering a helpless state at the end of the glide. It can be canceled into any aerial move, which makes it great at maintaining vertical follow-ups, and covers more horizontal distance than Warp. However, it cannot be edge-canceled, and canceling it into her aerials will render her helpless, similarly to Winged Pikmin. In addition, if Palutena flinches during the move, she cannot do anything until she lands on the ground aside from moving, similarly to Wings of Icarus. The move jumps much lower on the ground. | |
| Custom 2 | Rocket Jump | 12% (grounded), 10% (aerial) | Detonates an explosion at her feet to propel herself upward. Its grounded explosion is strong enough to KO middleweights at 108% while near the edge of Final Destination in the 3DS version. Its aerial explosion deals slightly less damage and KOs grounded opponents noticeably later, but powerfully meteor smashes aerial opponents directly below Palutena. However, the explosion has fairly minimal horizontal range. It also covers less height than Warp or Jump Glide, and little horizontal distance. | |
| Down special | Default | Counter | 1.3× (minimum 10%) | Parries with her shield and then counterattacks any incoming attacks by thrusting her staff forward. Its damage multiplier is tied with Vision and Slip Counter's for the second highest in the game. It is also one of the few counterattacks that consists of a sweetspot and a sourspot: the former is located at the staff's head, whereas the latter is located at the staff's handle. Despite its appearance, it has impressive horizontal range, as it can counterattack large/disjointed hitboxes like Shulk's forward smash. However, it is unarguably the worst counterattack in the game for a number of reasons. Due to it coming out on frame 10, it is tied with Toad for the highest amount of start-up lag out of every counterattack in the game, and is further burdened with the highest ending lag of any counterattack in the game. It is also the second weakest counterattack in the game in regard to knockback, and has both a very short counter window and poor vertical range. |
| Custom 1 | Lightweight | — | Nearly doubles her walking speed, dashing speed and jump height, but slows her falling speed, lowers her gravity, and increases the damage received (although knockback remains unchanged) for slightly more than 12.5 seconds (755 frames). Upon concluding, her jump height and gravity return to normal, while her grounded movement becomes much slower for nearly 5 seconds (299 frames). It is considered Palutena's best down special move, thanks to it significantly improving her off-stage presence, and granting both an immense increase in follow-up options and access to down throw-initiated KO set-ups that are guaranteed on the entire cast. | |
| Custom 2 | Celestial Firework | 3.2% (toss), 1.2% (explosion, 4 hits) | Shoots an explosive firework almost directly above herself. Its explosion is strong enough to KO middleweights at 145% from anywhere on Final Destination in the 3DS version. In addition to its power and good vertical range, it grants invincibility before the firework is launched. However, it is has a fairly long duration and extremely minimal horizontal range, to the point that it will only hit grounded opponents if they are at point-blank range. | |
| Final Smash | Black Hole Laser | — (Black Hole), 2.4% (Mega Laser hits 1-12), 12% (Mega Laser hit 13) | Illuminates her staff's orb and twirls around repeatedly before firing a Black Hole from her staff's orb, after which she quickly retreats off-stage in order to fire a Mega Laser into the Black Hole. The Black Hole does not deal damage, but pulls the opponent into itself and places them in a tumbling state. Conversely, the Mega Laser hits multiple times before concluding with a final blast that launches the opponent and dissipates the Black Hole. It is strong enough to KOs middleweights at 35% while near the edge of Final Destination in the 3DS version. | |
Stats[edit]
| Stats | Weight | Dash speed | Walk speed | Traction | Air friction | Air speed | Air acceleration | Gravity | Falling speed | Jumpsquat | Jump height | Double jump height | Empty landing Lag |
|---|---|---|---|---|---|---|---|---|---|---|---|---|---|
| Value | 91 | 1.5 – Initial dash 1.888 – Run |
1.21 | 0.068 | 0.01 | 0.91 | 0.01 – Base 0.1 – Additional |
0.105 | 1.4 – Base 2.24 – Fast-fall |
5 | 35.900002 - Base 17.303881 - Short hop |
35.900002 | 4 |
Announcer call[edit]
English/Japanese/Chinese
On-screen appearance[edit]
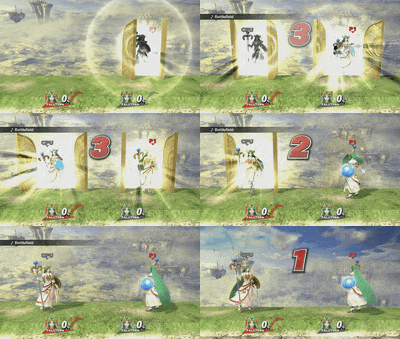
- Walks out of a golden door that is decorated with her halo's design and emits a bright, shining light.
|
|---|
Taunts[edit]
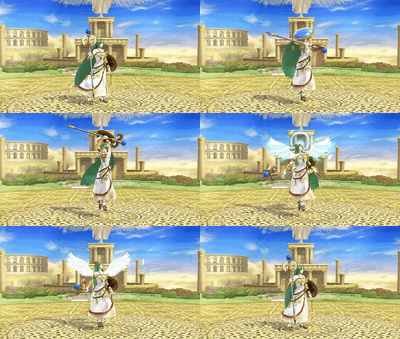
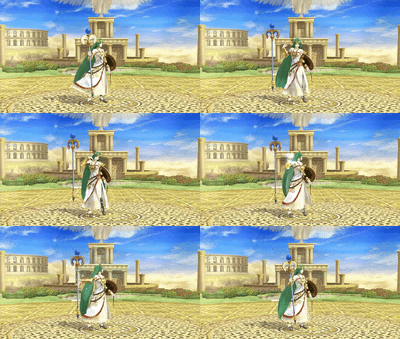
- Up taunt: Raises her arms overhead and then brings them down while producing ethereal wings, emitting her halo, and saying "You shall be purified!" (浄化してあげましょう, You will be purified.)
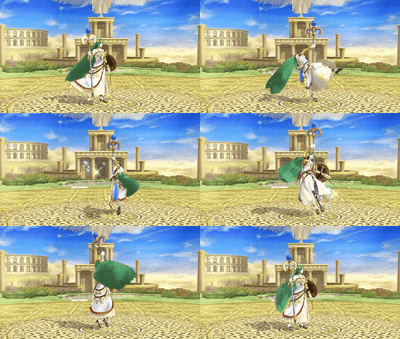
- Side taunt: Laughs while using her staff to perform a twirling, inverted version of the Arabesque.
- Down taunt: Lets go of her staff and telekinetically holds it next to herself, then brushes her hair aside while emitting her halo and saying "Ready when you are." (いつでもどうぞ?, Feel free whenever.) before grabbing her staff.
| Up taunt | Side taunt | Down taunt |
|---|---|---|
|
|
|
Idle poses[edit]
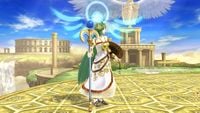
- Taps the ground with the tail of her staff and shield in front of herself, during which she briefly emits her halo.
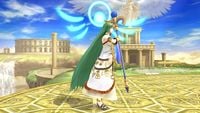
- Looks away while crossing her staff and shield in front of herself, during which she briefly emits her halo.
 |
|
|---|
Crowd cheer[edit]
Victory poses[edit]
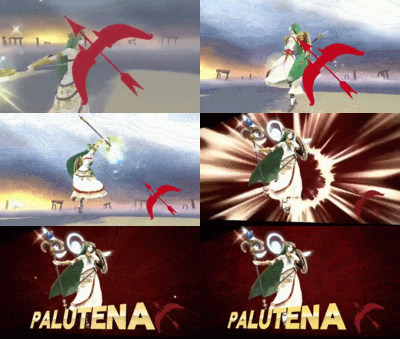
- Laughs while using her staff to briefly perform the Backwards Showgirl, a pole dancing move, before assuming a seated stance while floating. In the Japanese version, she says "本気出してもいいんですよ?" which translates to "It's alright to fight seriously."
- Twirls while floating, then flourishes her staff and emits her halo while saying "No one can hide from the light."
- If Pit is present in the match, there is a chance she will instead say "Oh, so sorry about that, Pit."
- Telekinetically twirls her staff and then points it in front of herself while saying "Too bad for you."
- If Dark Pit is present in the match, there is a chance she will instead say "Poor little Pittoo."
 |
 |
|
|---|
In competitive play[edit]
Official Custom Moveset Project[edit]
| Character | Custom sets available | ||||
|---|---|---|---|---|---|
| 2322 | 2312 | 1322 | 1312 | 2122 | |
| 1122 | 2332 | 1332 | 2313 | 2323 | |
Most historically significant players[edit]
See also: Category:Palutena players (SSB4)
El Pitikla - Co-mained Palutena alongside Fox. He is best known for winning Tech Republic 2, using Palutena to defeat several players in top 8, including Greward twice in grand finals; although he also used Fox in several sets, this nevertheless marks the largest tournament won by a Palutena player. Additionally, he made top 8 at some of the most notable Spanish/European regionals, placing 5th at Tech Republic and 7th at BEAST 7.
Iceninja - One of the best North American Palutena players in the game's early years, placing highly at several of Canada's largest events during this time, including 5th at both Canada Cup 2015 and Enthusiast Gaming Live Expo and 7th at Get On My Level 2015. Although overshadowed by other Palutena players since, she remains the best Palutena player in Canada, notably placing 25th at Get On My Level 2017.
MM - The best Palutena player in Australia, known for placing highly at many of Australia's earliest events, including 2nd at DI Another Day, 7th at Southern Cross Championship 2K15, and 9th at Battle Arena Melbourne 8, the latter being the largest Australian Smash 4 tournament to date. He eventually began playing other characters, but continued to play Palutena from time to time.
Prince Ramen - The first noteworthy non-customs Palutena player in competitive play, best known for his win over ZeRo at CEO 2016, where he also placed 33rd. He saw several other noteworthy results in his region, including placing 7th at Tampa Never Sleeps 6 and CEO 2016 Prologue, but rarely attended events outside of Florida and stopped competing at the end of 2016.
TLTC - The best Palutena player of all-time, known for frequently performing well at Southern California events. His best performances were placing 17th at both 2GGT: Abadango Saga and 2GGC: Greninja Saga, upsetting Ranai at the latter event, both of which marked the best major performances for a Palutena player. In addition, he also has a win over Kirihara, defeating him to place 33rd at EVO 2016.
Tier placement and history[edit]
In the early metagame, Palutena was notable for her smash attacks' impressive range and her distinction as the only character in the game with both a reflector and a counterattack in their default moveset. However, opinions on her eventually dropped dramatically after her weaknesses began to emerge when custom moves were not accounted for, largely because of her sluggish frame data, flawed special moves, and her lack of offensive options outside of her grab game. As such, she was seen as one of the worst characters in competitive play when custom special moves were disabled. On the other hand, many players were more positive towards Palutena when custom special moves were discussed, believing the character was high tier at worst with them. However, the universal ban of custom movesets after EVO 2015 reversed all positive opinions on Palutena, and the lack of buffs, plus the changes to shield mechanics in subsequent updates, cemented her status as a non-viable character. As such, she was ranked 50th on the first tier list as a bottom tier character.
Palutena's perception and representation began improving at the start of 2016, which not only saw her receive buffs in update 1.1.5, but also saw strong in-region results from players such as Prince Ramen and TLTC. In addition, as the non-custom metagame continued to develop, players also noticed how most of Palutena's matchups against the top- and high-tier characters were not as unfavorable as considered before. This positive development continued throughout the rest of 2016, which saw Prince Ramen score a major upset over ZeRo and TLTC place well at many 2GGT events. Thanks to her buffs and improved results, players no longer considered Palutena as one of the worst characters in the game, and as such, she rose to 40th on the second tier list, being reassessed as a low-tier.
Prince Ramen eventually retired from competitive play, leaving TLTC as the sole Palutena player who was consistently successful at majors. With Palutena's overall results remaining sparse, she began to drop in subsequent tier lists, ranking 42nd on the third one and 44th on the fourth and current one; however, tier restructuring reassessed Palutena as a mid-tier character in the fourth tier list. This reassessment remained up for debate, as many players argued that Palutena should have remained a low-tier character due to her noticeable weaknesses and stagnant playerbase. Nevertheless, opinions on Palutena remained better than they were in the early metagame.
In Solo Modes[edit]
All-Star Mode[edit]
In All-Star Mode, Palutena is fought in Stage 3 in the 3DS version or Stage 5 in the Wii U version alongside Yoshi, Captain Falcon, Dr. Mario, Marth, Pit, Mega Man, and Ryu.
 Event Matches[edit]
Solo Events[edit]
- New Challengers 2: Palutena is one of the seven opponents fought in this event alongside Greninja, Robin, Shulk, Dark Pit, Mega Man, and Pac-Man.
- The Demon King and the Goddess: As Ganondorf, the player must initially defeat Link and Zelda. After the two are defeated or some time has passed, a giant Palutena appears must be defeated her as well.
- The Destroyer Cometh: Palutena must defeat a giant Ganondorf and two other Ganondorfs before they destroy all of Skyworld's terrain.
Co-op Events[edit]
- The Ultimate Battle: Two players select a character and must defeat the entire roster.
- Unlikely Allies: Palutena and Ganondorf must defeat sixteen Mr. Game & Watches.
Congratulations screens[edit]
3DS[edit]
Wii U[edit]
Trophies[edit]
Palutena's default trophy is obtained by clearing Classic Mode as Palutena. Her alternate trophy is obtained by clearing All-Star Mode as Palutena in the 3DS version or purchasing it in the Trophy Shop for 1000G in the Wii U version (the latter can only appear after clearing Classic or All-Star as Palutena). The Black Hole Laser trophy is obtained only in the Wii U version by clearing All-Star Mode as Palutena.
- Palutena
In Kid Icarus: Uprising, the goddess of light uses telepathy to communicate and grants miracles to support Pit on his adventure. In Smash Bros., she has special moves like Warp and Heavenly Light at her disposal. She's very adaptable—you can customize her into a long- or close-range fighter!
: Kid Icarus (08/1987)
: Kid Icarus: Uprising (03/2012)
Said to be able to perform miracles, this goddess supports Pit in battle, using telepathy to communicate with him. She's no slouch on her own, either. She has a huge variety of moves you can customise and use to your advantage. Short or long range, the sky's the limit! Or maybe not. After all, she can teleport.
: Kid Icarus (02/1987)
: Kid Icarus: Uprising (03/2012)
- Palutena (Alt.)
 Palutena's Reflect Barrier side special deflects any attacks and projectiles that come at her from the front. Unlike other reflective moves, you can leave this barrier in place and it will keep reflecting. If you really want to ruin someone's day, you can push them over an edge using this move.
 Palutena's Reflect Barrier side special deflects any attacks and projectiles that come at her from the front. Unlike others' reflective moves, she can move a bit while this barrier is active. If you really want to ruin someone's day, you can push him or her over an edge using this move.
: Kid Icarus (08/1987)
: Kid Icarus: Uprising (03/2012)
Palutena's Reflect Barrier special deflects any attacks and projectiles that come at her from the front. Unlike other fighters' reflective moves, you can deploy this barrier and then leave it to its own devices. You can also push opponents with it, so use it on someone who's teetering on the edge of the stage to push them off.
: Kid Icarus (02/1987)
: Kid Icarus: Uprising (03/2012)
- Black Hole Laser
Palutena's Final Smash. After doing a divine twirl, she creates a black hole in front of her, drawing in her opponents. When she's got 'em where she wants 'em, she follows up with a wide laser beam that reaches from one edge of the screen to the other. It even changes direction slightly, just in case someone managed to avoid the black hole.
Palutena's Final Smash. After doing a divine twirl, she creates a black hole in front of her, drawing in her opponents. When she's got 'em where she wants 'em, the next step is a wide laser beam that reaches from one edge of the screen to the other. It even changes direction slightly, for that extra chance of taking out her foes.
Alternate costumes[edit]

| |||||||

|

|

|

|

|

|

|

|
Reveal trailer[edit]
Gallery[edit]
Palutena's amiibo.
Palutena, as she appears in Super Smash Bros. for Wii U.
Using Explosive Flame.
Alongside Phosphora.
On Mario Galaxy.
Alongside Marth.
On Battlefield.
Alongside Mario on Arena Ferox.
Palutena, as she appears in Super Smash Bros. for Nintendo 3DS.
Using Black Hole Laser, her Final Smash.
Palutena taking part in the Home-Run Contest in Super Smash Bros. for Nintendo 3DS.
Using Heavenly Light.
Trivia[edit]
- Palutena's artwork highly resembles her Kid Icarus: Uprising artwork.
- Palutena's special moves have a few distinct traits associated with them:
- Her special moves, custom special moves and Final Smash are based on some of the Powers she can grant to Pit and fighters in Kid Icarus: Uprising.
- She occasionally calls out the names of all but one of her special moves upon using them. The only exception is Reflect Barrier, with which she simply says "Reflect!" instead of its full name.
- Incidentally, she also does this when using her forward and down smash attacks. In their cases, Palutena will occasionally say "Goddess Wings" (ゴッド ウイング, "God Wing").
- She is the only character in the game, whose default moveset has both a reflector and a counterattack as well as the first to do so in the Super Smash Bros. series.
- She and the Mii Fighters are the only characters whose custom special moves are immediately available instead of being unlockable.
- They are also the only characters whose custom moves are completely different from one another, rather than being the same moves with different properties.
- Kirby has unused sound files that consist of him vocalizing all three of her neutral special moves. This suggests that either it was not until late in development that it was decided which would be Palutena's default neutral special move, or that Kirby was originally able to copy any one of her neutral special moves.
- Palutena is one of the few characters who can occasionally say something upon being KO'd instead of typically grunting or yelling in pain. In her case, she says "Oh no!"
- Palutena is the first character to be part of a Final Smash in a previous installment of Super Smash Bros., and a playable character in a subsequent installment, the second would be Chrom.
- Unlike most characters, Palutena twirls upon hard landing, instead of simply landing on her feet.
- Palutena is the first character since Link in Super Smash Bros. to wield a shield at all times that does not protect her while idle.
- This trait is also applicable to Mii Gunner and Mii Swordfighter, but only while they are wearing the Proto Man, Hunter, Rathalos and Gil costumes. Unlike the Miis wearing those costumes, however, Palutena's shield is not entirely aesthetic, thanks to it granting her partial invincibility during her dash attack and back aerial.
- Palutena's defeated/No Contest animation depicts her wearing a brown sleeve on her left arm, a feature that is normally not present in her in-game model, instead of her left vambrace.
- Super Smash Bros. for Nintendo 3DS marks the first ever game that Palutena is playable.
- Oddly, Palutena's internal files of voice clips for her smash attack uses the same three-number codes (e.g. "003" in case of "Goddess wings!" voice clip) used for special moves, Final Smashes, and on-screen appearances of veteran characters as well as Rosalina & Luma's Launch Star, instead of using the "attack" descriptor that smash attacks usually share with neutral attack, tilt attacks, dash attack, aerial attacks, and floor attacks.
- Palutena's idle animation while holding a small item has a visual bug where her shield appears to be detached from her arm.
- This visual bug was also present in Super Smash Bros. Ultimate until it was patched out in version 7.0.0
References[edit]
| Fighters in Super Smash Bros. 4 | |
|---|---|
| Veterans | Bowser · Captain Falcon · Charizard · Diddy Kong · Donkey Kong · Dr. Mario · Falco · Fox · Ganondorf · Ike · Jigglypuff · King Dedede · Kirby · Link · Lucario · Lucas · Luigi · Mario · Marth · Meta Knight · Mewtwo · Mr. Game & Watch · Ness · Olimar · Peach · Pikachu · Pit · R.O.B. · Roy · Samus · Sheik · Sonic · Toon Link · Wario · Yoshi · Zelda · Zero Suit Samus |
| Newcomers | Bayonetta · Bowser Jr. · Cloud · Corrin · Dark Pit · Duck Hunt · Greninja · Little Mac · Lucina · Mega Man · Mii Fighter (Mii Brawler · Mii Gunner · Mii Swordfighter) · Pac-Man · Palutena · Robin · Rosalina & Luma · Ryu · Shulk · Villager · Wii Fit Trainer |
|
| |
|---|---|
| Fighters | Pit (SSBB · SSB4 · SSBU) · Palutena (SSB4 · SSBU) · Dark Pit (SSB4 · SSBU) |
| Assist Trophies | Magnus · Phosphora |
| Stages | Skyworld · Reset Bomb Forest · Palutena's Temple |
| Items | Back Shield · Daybreak · Killer Eye · Ore Club · X Bomb · Staff |
| Enemies | Boom Stomper · Bumpety Bomb · Clubberskull · Daphne · Flage · Lethinium · Lurchthorn · Mahva · Megonta · Mimicutie · Monoeye · Nutski · Orne · Reaper & Reapette · Skuttler · Souflee · Zuree |
| Other | Centurion · Viridi |
| Trophies, Stickers and Spirits | Trophies (SSBB · SSB4) · Stickers · Spirits |
| Music | Brawl · SSB4 · Ultimate |
| Masterpiece | Kid Icarus |


