mNo edit summary |
(Make it look more like how it appears in-game) |
||
| (3 intermediate revisions by the same user not shown) | |||
| Line 1: | Line 1: | ||
{{ArticleIcons|ssbm=yes}} | {{ArticleIcons|ssbm=yes}} | ||
The following is a list of all 293 [[Trophy|trophies]] that appear in ''[[Super Smash Bros. Melee]]''. Players are able to sort trophies through the normal order, game order, or alphabetically. The [[Mario & Yoshi]] and [[Samus Unmasked]] trophies were only distributed through certain events in Japan and cannot be obtained without use of a hacking device, while the [[List of SSBM trophies (Others)#Tamagon|Tamagon]] trophy can only be obtained in Japanese releases despite all three having English trophy descriptions. As such, the player only needs to obtain the other 290 trophies for the game to [[Milestone|acknowledge]] them for collecting all of the trophies (and Tamagon in Japanese releases). | The following is a list of all 293 [[Trophy|trophies]] that appear in ''[[Super Smash Bros. Melee]]''. Players are able to sort trophies through the normal order, game order, or alphabetically. The [[Mario & Yoshi]] and [[Samus Unmasked]] trophies were only distributed through certain events in Japan and cannot be obtained without use of a hacking device, while the [[List of SSBM trophies (Others)#Tamagon|Tamagon]] trophy can only be obtained in Japanese releases despite all three having English trophy descriptions. As such, the player only needs to obtain the other 290 trophies for the game to [[Milestone|acknowledge]] them for collecting all of the trophies (and Tamagon in Japanese releases). | ||
{| class="wikitable sortable" style="text-align:center" | {| class="wikitable sortable" style="text-align:center" | ||
|- | |- | ||
! | !Normal Order # | ||
! | !Game Order # | ||
! | !Name | ||
! | !Image | ||
|- | |- | ||
|1 | |1 | ||
| Line 16: | Line 13: | ||
|{{SSBM|Mario}} | |{{SSBM|Mario}} | ||
|{{anchor|Mario}}[[File:Mario Trophy Melee.png|100px]] | |{{anchor|Mario}}[[File:Mario Trophy Melee.png|100px]] | ||
|- | |- | ||
|2 | |2 | ||
|221 | |221 | ||
|Mario | |Mario <span style="color:red; border: 1px solid red; border-radius: 5px">SMASH</span> | ||
|{{anchor|Mario Smash}}[[File:Mario Trophy (Smash).png|100px]] | |{{anchor|Mario Smash}}[[File:Mario Trophy (Smash).png|100px]] | ||
|- | |- | ||
|3 | |3 | ||
|222 | |222 | ||
|Mario | |Mario <span style="color:blue; border: 1px solid blue; border-radius: 5px">SMASH</span> | ||
|{{anchor|Mario Smash 2}}[[File:Mario Trophy (Smash 2).png|100px]] | |{{anchor|Mario Smash 2}}[[File:Mario Trophy (Smash 2).png|100px]] | ||
|- | |- | ||
|4 | |4 | ||
| Line 34: | Line 28: | ||
|{{SSBM|Donkey Kong}} | |{{SSBM|Donkey Kong}} | ||
|{{anchor|Donkey Kong}}[[File:Donkey Kong Trophy Melee.png|100px]] | |{{anchor|Donkey Kong}}[[File:Donkey Kong Trophy Melee.png|100px]] | ||
|- | |- | ||
|5 | |5 | ||
|225 | |225 | ||
|Donkey Kong | |Donkey Kong <span style="color:red; border: 1px solid red; border-radius: 5px">SMASH</span> | ||
|{{anchor|Donkey Kong Smash}}[[File:Donkey Kong Trophy (Smash).png|100px]] | |{{anchor|Donkey Kong Smash}}[[File:Donkey Kong Trophy (Smash).png|100px]] | ||
|- | |- | ||
|6 | |6 | ||
|226 | |226 | ||
|Donkey Kong | |Donkey Kong <span style="color:blue; border: 1px solid blue; border-radius: 5px">SMASH</span> | ||
|{{anchor|Donkey Kong Smash 2}}[[File:Donkey Kong Trophy (Smash 2).png|100px]] | |{{anchor|Donkey Kong Smash 2}}[[File:Donkey Kong Trophy (Smash 2).png|100px]] | ||
|- | |- | ||
|7 | |7 | ||
| Line 52: | Line 43: | ||
|{{SSBM|Link}} | |{{SSBM|Link}} | ||
|{{anchor|Link}}[[File:Link Trophy Melee.png|100px]] | |{{anchor|Link}}[[File:Link Trophy Melee.png|100px]] | ||
|- | |- | ||
|8 | |8 | ||
|227 | |227 | ||
|Link | |Link <span style="color:red; border: 1px solid red; border-radius: 5px">SMASH</span> | ||
|{{anchor|Link Smash}}[[File:Link Trophy (Smash).png|100px]] | |{{anchor|Link Smash}}[[File:Link Trophy (Smash).png|100px]] | ||
|- | |- | ||
|9 | |9 | ||
|228 | |228 | ||
|Link | |Link <span style="color:blue; border: 1px solid blue; border-radius: 5px">SMASH</span> | ||
|{{anchor|Link Smash 2}}[[File:Link Trophy 2 (Smash).png|100px]] | |{{anchor|Link Smash 2}}[[File:Link Trophy 2 (Smash).png|100px]] | ||
|- | |- | ||
|10 | |10 | ||
|93 | |93 | ||
| | |{{SSBM|Samus Aran}} | ||
|{{anchor|Samus Aran}}[[File:Samus Trophy Melee.png|100px]] | |{{anchor|Samus Aran}}[[File:Samus Trophy Melee.png|100px]] | ||
|- | |- | ||
|11 | |11 | ||
|233 | |233 | ||
|Samus Aran | |Samus Aran <span style="color:red; border: 1px solid red; border-radius: 5px">SMASH</span> | ||
|{{anchor|Samus Aran Smash}}[[File:Samus Trophy (Smash).png|100px]] | |{{anchor|Samus Aran Smash}}[[File:Samus Trophy (Smash).png|100px]] | ||
|- | |- | ||
|12 | |12 | ||
|234 | |234 | ||
|Samus Aran | |Samus Aran <span style="color:blue; border: 1px solid blue; border-radius: 5px">SMASH</span> | ||
|{{anchor|Samus Aran Smash 2}}[[File:Samus Trophy (Smash 2).png|100px]] | |{{anchor|Samus Aran Smash 2}}[[File:Samus Trophy (Smash 2).png|100px]] | ||
|- | |- | ||
|13 | |13 | ||
| Line 88: | Line 73: | ||
|{{SSBM|Yoshi}} | |{{SSBM|Yoshi}} | ||
|{{anchor|Yoshi}}[[File:Yoshi Trophy Melee.png|100px]] | |{{anchor|Yoshi}}[[File:Yoshi Trophy Melee.png|100px]] | ||
|- | |- | ||
|14 | |14 | ||
|223 | |223 | ||
|Yoshi | |Yoshi <span style="color:red; border: 1px solid red; border-radius: 5px">SMASH</span> | ||
|{{anchor|Yoshi Smash}}[[File:Yoshi Trophy (Smash).png|100px]] | |{{anchor|Yoshi Smash}}[[File:Yoshi Trophy (Smash).png|100px]] | ||
|- | |- | ||
|15 | |15 | ||
|224 | |224 | ||
|Yoshi | |Yoshi <span style="color:blue; border: 1px solid blue; border-radius: 5px">SMASH</span> | ||
|{{anchor|Yoshi Smash 2}}[[File:Yoshi Trophy (Smash 2).png|100px]] | |{{anchor|Yoshi Smash 2}}[[File:Yoshi Trophy (Smash 2).png|100px]] | ||
|- | |- | ||
|16 | |16 | ||
| Line 107: | Line 88: | ||
|{{SSBM|Kirby}} | |{{SSBM|Kirby}} | ||
|{{anchor|Kirby}}[[File:Kirby Trophy Melee.png|100px]] | |{{anchor|Kirby}}[[File:Kirby Trophy Melee.png|100px]] | ||
|- | |- | ||
|17 | |17 | ||
|235 | |235 | ||
|Kirby | |Kirby <span style="color:red; border: 1px solid red; border-radius: 5px">SMASH</span> | ||
|{{anchor|Kirby Smash}}[[File:Kirby Trophy (Smash).png|100px]] | |{{anchor|Kirby Smash}}[[File:Kirby Trophy (Smash).png|100px]] | ||
|- | |- | ||
|18 | |18 | ||
|236 | |236 | ||
|Kirby | |Kirby <span style="color:blue; border: 1px solid blue; border-radius: 5px">SMASH</span> | ||
|{{anchor|Kirby Smash 2}}[[File:Kirby Trophy (Smash 2).png|100px]] | |{{anchor|Kirby Smash 2}}[[File:Kirby Trophy (Smash 2).png|100px]] | ||
|- | |- | ||
|19 | |19 | ||
|83 | |83 | ||
| | |{{SSBM|Fox McCloud}} | ||
|{{anchor|Fox McCloud}}[[File:Fox Trophy Melee.png|100px]] | |{{anchor|Fox McCloud}}[[File:Fox Trophy Melee.png|100px]] | ||
|- | |- | ||
|20 | |20 | ||
|231 | |231 | ||
|Fox McCloud | |Fox McCloud <span style="color:red; border: 1px solid red; border-radius: 5px">SMASH</span> | ||
|{{anchor|Fox McCloud Smash}}[[File:Fox Trophy (Smash).png|100px]] | |{{anchor|Fox McCloud Smash}}[[File:Fox Trophy (Smash).png|100px]] | ||
|- | |- | ||
|21 | |21 | ||
|232 | |232 | ||
|Fox McCloud | |Fox McCloud <span style="color:blue; border: 1px solid blue; border-radius: 5px">SMASH</span> | ||
|{{anchor|Fox McCloud Smash 2}}[[File:Fox Trophy (Smash 2).png|100px]] | |{{anchor|Fox McCloud Smash 2}}[[File:Fox Trophy (Smash 2).png|100px]] | ||
|- | |- | ||
|22 | |22 | ||
| Line 144: | Line 118: | ||
|{{SSBM|Pikachu}} | |{{SSBM|Pikachu}} | ||
|{{anchor|Pikachu}}[[File:Pikachu Trophy Melee.png|100px]] | |{{anchor|Pikachu}}[[File:Pikachu Trophy Melee.png|100px]] | ||
|- | |- | ||
|23 | |23 | ||
|239 | |239 | ||
|Pikachu | |Pikachu <span style="color:red; border: 1px solid red; border-radius: 5px">SMASH</span> | ||
|{{anchor|Pikachu Smash}}[[File:Pikachu Trophy (Smash).png|100px]] | |{{anchor|Pikachu Smash}}[[File:Pikachu Trophy (Smash).png|100px]] | ||
|- | |- | ||
|24 | |24 | ||
|240 | |240 | ||
|Pikachu | |Pikachu <span style="color:blue; border: 1px solid blue; border-radius: 5px">SMASH</span> | ||
|{{anchor|Pikachu Smash 2}}[[File:Pikachu Trophy (Smash 2).png|100px]] | |{{anchor|Pikachu Smash 2}}[[File:Pikachu Trophy (Smash 2).png|100px]] | ||
|- | |- | ||
|25 | |25 | ||
| Line 162: | Line 133: | ||
|{{SSBM|Ness}} | |{{SSBM|Ness}} | ||
|{{anchor|Ness}}[[File:Ness Trophy Melee.png|100px]] | |{{anchor|Ness}}[[File:Ness Trophy Melee.png|100px]] | ||
|- | |- | ||
|26 | |26 | ||
|237 | |237 | ||
|Ness | |Ness <span style="color:red; border: 1px solid red; border-radius: 5px">SMASH</span> | ||
|{{anchor|Ness Smash}}[[File:Ness Trophy (Smash).png|100px]] | |{{anchor|Ness Smash}}[[File:Ness Trophy (Smash).png|100px]] | ||
|- | |- | ||
|27 | |27 | ||
|238 | |238 | ||
|Ness | |Ness <span style="color:blue; border: 1px solid blue; border-radius: 5px">SMASH</span> | ||
|{{anchor|Ness Smash 2}}[[File:Ness Trophy (Smash) 2.png|100px]] | |{{anchor|Ness Smash 2}}[[File:Ness Trophy (Smash) 2.png|100px]] | ||
|- | |- | ||
|28 | |28 | ||
| Line 180: | Line 148: | ||
|[[Captain Falcon (SSBM)|Capt. Falcon]] | |[[Captain Falcon (SSBM)|Capt. Falcon]] | ||
|{{anchor|Captain Falcon}}[[File:Captain Falcon Trophy Melee.png|100px]] | |{{anchor|Captain Falcon}}[[File:Captain Falcon Trophy Melee.png|100px]] | ||
|- | |- | ||
|29 | |29 | ||
|229 | |229 | ||
|Capt. Falcon | |Capt. Falcon <span style="color:red; border: 1px solid red; border-radius: 5px">SMASH</span> | ||
|{{anchor|Capt. Falcon Smash}}[[File:Captain Falcon Trophy (Smash).png|100px]] | |{{anchor|Capt. Falcon Smash}}[[File:Captain Falcon Trophy (Smash).png|100px]] | ||
|- | |- | ||
|30 | |30 | ||
|230 | |230 | ||
|Capt. Falcon | |Capt. Falcon <span style="color:blue; border: 1px solid blue; border-radius: 5px">SMASH</span> | ||
|{{anchor|Capt. Falcon Smash 2}}[[File:Captain Falcon Trophy (Smash 2).png|100px]] | |{{anchor|Capt. Falcon Smash 2}}[[File:Captain Falcon Trophy (Smash 2).png|100px]] | ||
|- | |- | ||
|31 | |31 | ||
| Line 198: | Line 163: | ||
|{{SSBM|Bowser}} | |{{SSBM|Bowser}} | ||
|{{anchor|Bowser}}[[File:Bowser Trophy Melee.png|100px]] | |{{anchor|Bowser}}[[File:Bowser Trophy Melee.png|100px]] | ||
|- | |- | ||
|32 | |32 | ||
|245 | |245 | ||
|Bowser | |Bowser <span style="color:red; border: 1px solid red; border-radius: 5px">SMASH</span> | ||
|{{anchor|Bowser Smash}}[[File:Bowser Trophy (Smash).png|100px]] | |{{anchor|Bowser Smash}}[[File:Bowser Trophy (Smash).png|100px]] | ||
|- | |- | ||
|33 | |33 | ||
|246 | |246 | ||
|Bowser | |Bowser <span style="color:blue; border: 1px solid blue; border-radius: 5px">SMASH</span> | ||
|{{anchor|Bowser Smash 2}}[[File:Bowser Trophy (Smash 2).png|100px]] | |{{anchor|Bowser Smash 2}}[[File:Bowser Trophy (Smash 2).png|100px]] | ||
|- | |- | ||
|34 | |34 | ||
| Line 216: | Line 178: | ||
|{{SSBM|Peach}} | |{{SSBM|Peach}} | ||
|{{anchor|Peach}}[[File:Peach Trophy Melee.png|100px]] | |{{anchor|Peach}}[[File:Peach Trophy Melee.png|100px]] | ||
|- | |- | ||
|35 | |35 | ||
|247 | |247 | ||
|Peach | |Peach <span style="color:red; border: 1px solid red; border-radius: 5px">SMASH</span> | ||
|{{anchor|Peach Smash}}[[File:Peach Trophy (Smash).png|100px]] | |{{anchor|Peach Smash}}[[File:Peach Trophy (Smash).png|100px]] | ||
|- | |- | ||
|36 | |36 | ||
|248 | |248 | ||
|Peach | |Peach <span style="color:blue; border: 1px solid blue; border-radius: 5px">SMASH</span> | ||
|{{anchor|Peach Smash 2}}[[File:Peach Trophy (Smash 2).png|100px]] | |{{anchor|Peach Smash 2}}[[File:Peach Trophy (Smash 2).png|100px]] | ||
|- | |- | ||
|37 | |37 | ||
| Line 234: | Line 193: | ||
|{{SSBM|Ice Climbers}} | |{{SSBM|Ice Climbers}} | ||
|{{anchor|Ice Climbers}}[[File:Ice Climber Trophy Melee.png|100px]] | |{{anchor|Ice Climbers}}[[File:Ice Climber Trophy Melee.png|100px]] | ||
|- | |- | ||
|38 | |38 | ||
|257 | |257 | ||
|Ice Climbers | |Ice Climbers <span style="color:red; border: 1px solid red; border-radius: 5px">SMASH</span> | ||
|{{anchor|Ice Climbers Smash}}[[File:Ice Climber Trophy (Smash).png|100px]] | |{{anchor|Ice Climbers Smash}}[[File:Ice Climber Trophy (Smash).png|100px]] | ||
|- | |- | ||
|39 | |39 | ||
|258 | |258 | ||
|Ice Climbers | |Ice Climbers <span style="color:blue; border: 1px solid blue; border-radius: 5px">SMASH</span> | ||
|{{anchor|Ice Climbers Smash 2}}[[File:Ice Climber Trophy (Smash 2).png|100px]] | |{{anchor|Ice Climbers Smash 2}}[[File:Ice Climber Trophy (Smash 2).png|100px]] | ||
|- | |- | ||
|40 | |40 | ||
| Line 252: | Line 208: | ||
|{{SSBM|Zelda}} | |{{SSBM|Zelda}} | ||
|{{anchor|Zelda}}[[File:Princess Zelda Trophy Melee.png|100px]] | |{{anchor|Zelda}}[[File:Princess Zelda Trophy Melee.png|100px]] | ||
|- | |- | ||
|41 | |41 | ||
|249 | |249 | ||
|Zelda | |Zelda <span style="color:red; border: 1px solid red; border-radius: 5px">SMASH</span> | ||
|{{anchor|Zelda Smash}}[[File:Princess Zelda Trophy (Smash).png|100px]] | |{{anchor|Zelda Smash}}[[File:Princess Zelda Trophy (Smash).png|100px]] | ||
|- | |- | ||
|42 | |42 | ||
|250 | |250 | ||
|Zelda | |Zelda <span style="color:blue; border: 1px solid blue; border-radius: 5px">SMASH</span> | ||
|{{anchor|Zelda Smash 2}}[[File:Princess Zelda Trophy 2 (Smash).png|100px]] | |{{anchor|Zelda Smash 2}}[[File:Princess Zelda Trophy 2 (Smash).png|100px]] | ||
|- | |- | ||
|43 | |43 | ||
| Line 270: | Line 223: | ||
|{{SSBM|Sheik}} | |{{SSBM|Sheik}} | ||
|{{anchor|Sheik}}[[File:Sheik Trophy Melee.png|100px]] | |{{anchor|Sheik}}[[File:Sheik Trophy Melee.png|100px]] | ||
|- | |- | ||
|44 | |44 | ||
|251 | |251 | ||
|Sheik | |Sheik <span style="color:red; border: 1px solid red; border-radius: 5px">SMASH</span> | ||
|{{anchor|Sheik Smash}}[[File:Sheik Trophy (Smash).png|100px]] | |{{anchor|Sheik Smash}}[[File:Sheik Trophy (Smash).png|100px]] | ||
|- | |- | ||
|45 | |45 | ||
|252 | |252 | ||
|Sheik | |Sheik <span style="color:blue; border: 1px solid blue; border-radius: 5px">SMASH</span> | ||
|{{anchor|Sheik Smash 2}}[[File:Sheik Trophy 2 (Smash).png|100px]] | |{{anchor|Sheik Smash 2}}[[File:Sheik Trophy 2 (Smash).png|100px]] | ||
|- | |- | ||
|46 | |46 | ||
| Line 288: | Line 238: | ||
|{{SSBM|Luigi}} | |{{SSBM|Luigi}} | ||
|{{anchor|Luigi}}[[File:Luigi Trophy Melee.png|100px]] | |{{anchor|Luigi}}[[File:Luigi Trophy Melee.png|100px]] | ||
|- | |- | ||
|47 | |47 | ||
|243 | |243 | ||
|Luigi | |Luigi <span style="color:red; border: 1px solid red; border-radius: 5px">SMASH</span> | ||
|{{anchor|Luigi Smash}}[[File:Luigi Trophy (Smash).png|100px]] | |{{anchor|Luigi Smash}}[[File:Luigi Trophy (Smash).png|100px]] | ||
|- | |- | ||
|48 | |48 | ||
|244 | |244 | ||
|Luigi | |Luigi <span style="color:blue; border: 1px solid blue; border-radius: 5px">SMASH</span> | ||
|{{anchor|Luigi Smash 2}}[[File:Luigi Trophy (Smash 2).png|100px]] | |{{anchor|Luigi Smash 2}}[[File:Luigi Trophy (Smash 2).png|100px]] | ||
|- | |- | ||
|49 | |49 | ||
| Line 306: | Line 253: | ||
|{{SSBM|Jigglypuff}} | |{{SSBM|Jigglypuff}} | ||
|{{anchor|Jigglypuff}}[[File:Jigglypuff Trophy Melee.png|100px]] | |{{anchor|Jigglypuff}}[[File:Jigglypuff Trophy Melee.png|100px]] | ||
|- | |- | ||
|50 | |50 | ||
|241 | |241 | ||
|Jigglypuff | |Jigglypuff <span style="color:red; border: 1px solid red; border-radius: 5px">SMASH</span> | ||
|{{anchor|Jigglypuff Smash}}[[File:Jigglypuff Trophy (Smash).png|100px]] | |{{anchor|Jigglypuff Smash}}[[File:Jigglypuff Trophy (Smash).png|100px]] | ||
|- | |- | ||
|51 | |51 | ||
|242 | |242 | ||
|Jigglypuff | |Jigglypuff <span style="color:blue; border: 1px solid blue; border-radius: 5px">SMASH</span> | ||
|{{anchor|Jigglypuff Smash 2}}[[File:Jigglypuff Trophy (Smash 2).png|100px]] | |{{anchor|Jigglypuff Smash 2}}[[File:Jigglypuff Trophy (Smash 2).png|100px]] | ||
|- | |- | ||
|52 | |52 | ||
| Line 324: | Line 268: | ||
|{{SSBM|Mewtwo}} | |{{SSBM|Mewtwo}} | ||
|{{anchor|Mewtwo}}[[File:Mewtwo Trophy Melee.png|100px]] | |{{anchor|Mewtwo}}[[File:Mewtwo Trophy Melee.png|100px]] | ||
|- | |- | ||
|53 | |53 | ||
|255 | |255 | ||
|Mewtwo | |Mewtwo <span style="color:red; border: 1px solid red; border-radius: 5px">SMASH</span> | ||
|{{anchor|Mewtwo Smash}}[[File:Mewtwo Trophy (Smash).png|100px]] | |{{anchor|Mewtwo Smash}}[[File:Mewtwo Trophy (Smash).png|100px]] | ||
|- | |- | ||
|54 | |54 | ||
|256 | |256 | ||
|Mewtwo | |Mewtwo <span style="color:blue; border: 1px solid blue; border-radius: 5px">SMASH</span> | ||
|{{anchor|Mewtwo Smash 2}}[[File:Mewtwo Trophy (Smash 2).png|100px]] | |{{anchor|Mewtwo Smash 2}}[[File:Mewtwo Trophy (Smash 2).png|100px]] | ||
|- | |- | ||
|55 | |55 | ||
| Line 342: | Line 283: | ||
|{{SSBM|Marth}} | |{{SSBM|Marth}} | ||
|{{anchor|Marth}}[[File:Marth Trophy Melee.png|100px]] | |{{anchor|Marth}}[[File:Marth Trophy Melee.png|100px]] | ||
|- | |- | ||
|56 | |56 | ||
|253 | |253 | ||
|Marth | |Marth <span style="color:red; border: 1px solid red; border-radius: 5px">SMASH</span> | ||
|{{anchor|Marth Smash}}[[File:Marth Trophy (Smash).png|100px]] | |{{anchor|Marth Smash}}[[File:Marth Trophy (Smash).png|100px]] | ||
|- | |- | ||
|57 | |57 | ||
|254 | |254 | ||
|Marth | |Marth <span style="color:blue; border: 1px solid blue; border-radius: 5px">SMASH</span> | ||
|{{anchor|Marth Smash 2}}[[File:Marth Trophy (Smash 2).png|100px]] | |{{anchor|Marth Smash 2}}[[File:Marth Trophy (Smash 2).png|100px]] | ||
|- | |- | ||
|58 | |58 | ||
| Line 360: | Line 298: | ||
|{{SSBM|Mr. Game & Watch}} | |{{SSBM|Mr. Game & Watch}} | ||
|{{anchor|Mr. Game & Watch}}[[File:Mr. Game and Watch Trophy.png|100px]] | |{{anchor|Mr. Game & Watch}}[[File:Mr. Game and Watch Trophy.png|100px]] | ||
|- | |- | ||
|59 | |59 | ||
|259 | |259 | ||
|Mr. Game & Watch | |Mr. Game & Watch <span style="color:red; border: 1px solid red; border-radius: 5px">SMASH</span> | ||
|{{anchor|Mr. Game & Watch Smash}}[[File:Mr. Game and Watch Trophy (Smash).png|100px]] | |{{anchor|Mr. Game & Watch Smash}}[[File:Mr. Game and Watch Trophy (Smash).png|100px]] | ||
|- | |- | ||
|60 | |60 | ||
|260 | |260 | ||
|Mr. Game & Watch | |Mr. Game & Watch <span style="color:blue; border: 1px solid blue; border-radius: 5px">SMASH</span> | ||
|{{anchor|Mr. Game & Watch Smash 2}}[[File:Mr. Game and Watch Trophy (Smash) 2.png|100px]] | |{{anchor|Mr. Game & Watch Smash 2}}[[File:Mr. Game and Watch Trophy (Smash) 2.png|100px]] | ||
|- | |- | ||
|61 | |61 | ||
| Line 379: | Line 313: | ||
|{{SSBM|Dr. Mario}} | |{{SSBM|Dr. Mario}} | ||
|{{anchor|Dr. Mario}}[[File:Dr. Mario Trophy Melee.png|100px]] | |{{anchor|Dr. Mario}}[[File:Dr. Mario Trophy Melee.png|100px]] | ||
|- | |- | ||
|62 | |62 | ||
|261 | |261 | ||
|Dr. Mario | |Dr. Mario <span style="color:red; border: 1px solid red; border-radius: 5px">SMASH</span> | ||
|{{anchor|Dr. Mario Smash}}[[File:Dr. Mario Trophy (Smash).png|100px]] | |{{anchor|Dr. Mario Smash}}[[File:Dr. Mario Trophy (Smash).png|100px]] | ||
|- | |- | ||
|63 | |63 | ||
|262 | |262 | ||
|Dr. Mario | |Dr. Mario <span style="color:blue; border: 1px solid blue; border-radius: 5px">SMASH</span> | ||
|{{anchor|Dr. Mario Smash 2}}[[File:Dr. Mario Trophy (Smash 2).png|100px]] | |{{anchor|Dr. Mario Smash 2}}[[File:Dr. Mario Trophy (Smash 2).png|100px]] | ||
|- | |- | ||
|64 | |64 | ||
| Line 397: | Line 328: | ||
|{{SSBM|Ganondorf}} | |{{SSBM|Ganondorf}} | ||
|{{anchor|Ganondorf}}[[File:Ganondorf Trophy Melee.png|100px]] | |{{anchor|Ganondorf}}[[File:Ganondorf Trophy Melee.png|100px]] | ||
|- | |- | ||
|65 | |65 | ||
|271 | |271 | ||
|Ganondorf | |Ganondorf <span style="color:red; border: 1px solid red; border-radius: 5px">SMASH</span> | ||
|{{anchor|Ganondorf Smash}}[[File:Ganondorf Trophy (Smash).png|100px]] | |{{anchor|Ganondorf Smash}}[[File:Ganondorf Trophy (Smash).png|100px]] | ||
|- | |- | ||
|66 | |66 | ||
|272 | |272 | ||
|Ganondorf | |Ganondorf <span style="color:blue; border: 1px solid blue; border-radius: 5px">SMASH</span> | ||
|{{anchor|Ganondorf Smash 2}}[[File:Ganondorf Trophy 2 (Smash).png|100px]] | |{{anchor|Ganondorf Smash 2}}[[File:Ganondorf Trophy 2 (Smash).png|100px]] | ||
|- | |- | ||
|67 | |67 | ||
|84 | |84 | ||
| | |{{SSBM|Falco Lombardi}} | ||
|{{anchor|Falco Lombardi}}[[File:Falco Trophy Melee.png|100px]] | |{{anchor|Falco Lombardi}}[[File:Falco Trophy Melee.png|100px]] | ||
|- | |- | ||
|68 | |68 | ||
|265 | |265 | ||
|Falco Lombardi | |Falco Lombardi <span style="color:red; border: 1px solid red; border-radius: 5px">SMASH</span> | ||
|{{anchor|Falco Lombardi Smash}}[[File:Falco Trophy (Smash).png|100px]] | |{{anchor|Falco Lombardi Smash}}[[File:Falco Trophy (Smash).png|100px]] | ||
|- | |- | ||
|69 | |69 | ||
|266 | |266 | ||
|Falco Lombardi | |Falco Lombardi <span style="color:blue; border: 1px solid blue; border-radius: 5px">SMASH</span> | ||
|{{anchor|Falco Lombardi Smash 2}}[[File:Falco Trophy (Smash 2).png|100px]] | |{{anchor|Falco Lombardi Smash 2}}[[File:Falco Trophy (Smash 2).png|100px]] | ||
|- | |- | ||
|70 | |70 | ||
| Line 434: | Line 358: | ||
|{{SSBM|Young Link}} | |{{SSBM|Young Link}} | ||
|{{anchor|Young Link}}[[File:Young Link Trophy.png|100px]] | |{{anchor|Young Link}}[[File:Young Link Trophy.png|100px]] | ||
|- | |- | ||
|71 | |71 | ||
|263 | |263 | ||
|Young Link | |Young Link <span style="color:red; border: 1px solid red; border-radius: 5px">SMASH</span> | ||
|{{anchor|Young Link Smash}}[[File:Young Link Trophy (Smash).png|100px]] | |{{anchor|Young Link Smash}}[[File:Young Link Trophy (Smash).png|100px]] | ||
|- | |- | ||
|72 | |72 | ||
|264 | |264 | ||
|Young Link | |Young Link <span style="color:blue; border: 1px solid blue; border-radius: 5px">SMASH</span> | ||
|{{anchor|Young Link Smash 2}}[[File:Young Link Trophy 2 (Smash).png|100px]] | |{{anchor|Young Link Smash 2}}[[File:Young Link Trophy 2 (Smash).png|100px]] | ||
|- | |- | ||
|73 | |73 | ||
| Line 452: | Line 373: | ||
|{{SSBM|Pichu}} | |{{SSBM|Pichu}} | ||
|{{anchor|Pichu}}[[File:Pichu Trophy Melee.png|100px]] | |{{anchor|Pichu}}[[File:Pichu Trophy Melee.png|100px]] | ||
|- | |- | ||
|74 | |74 | ||
|267 | |267 | ||
|Pichu | |Pichu <span style="color:red; border: 1px solid red; border-radius: 5px">SMASH</span> | ||
|{{anchor|Pichu Smash}}[[File:Pichu Trophy (Smash).png|100px]] | |{{anchor|Pichu Smash}}[[File:Pichu Trophy (Smash).png|100px]] | ||
|- | |- | ||
|75 | |75 | ||
|268 | |268 | ||
|Pichu | |Pichu <span style="color:blue; border: 1px solid blue; border-radius: 5px">SMASH</span> | ||
|{{anchor|Pichu Smash 2}}[[File:Pichu Trophy (Smash 2).png|100px]] | |{{anchor|Pichu Smash 2}}[[File:Pichu Trophy (Smash 2).png|100px]] | ||
|- | |- | ||
|76 | |76 | ||
| Line 470: | Line 388: | ||
|{{SSBM|Roy}} | |{{SSBM|Roy}} | ||
|{{anchor|Roy}}[[File:Roy Trophy Melee.png|100px]] | |{{anchor|Roy}}[[File:Roy Trophy Melee.png|100px]] | ||
|- | |- | ||
|77 | |77 | ||
|269 | |269 | ||
|Roy | |Roy <span style="color:red; border: 1px solid red; border-radius: 5px">SMASH</span> | ||
|{{anchor|Roy Smash}}[[File:Roy Trophy (Smash).png|100px]] | |{{anchor|Roy Smash}}[[File:Roy Trophy (Smash).png|100px]] | ||
|- | |- | ||
|78 | |78 | ||
|270 | |270 | ||
|Roy | |Roy <span style="color:blue; border: 1px solid blue; border-radius: 5px">SMASH</span> | ||
|{{anchor|Roy Smash 2}}[[File:Roy Trophy (Smash 2).png|100px]] | |{{anchor|Roy Smash 2}}[[File:Roy Trophy (Smash 2).png|100px]] | ||
|- | |- | ||
|79 | |79 | ||
| Line 489: | Line 403: | ||
|[[Male Wire Frame]] | |[[Male Wire Frame]] | ||
|{{anchor|Male Wire Frame}}[[File:Male Wire Frame Trophy.png|100px]] | |{{anchor|Male Wire Frame}}[[File:Male Wire Frame Trophy.png|100px]] | ||
|- | |- | ||
|80 | |80 | ||
| Line 495: | Line 408: | ||
|[[Female Wire Frame]] | |[[Female Wire Frame]] | ||
|{{anchor|Female Wire Frame}}[[File:Female Wire Frame Trophy.png|100px]] | |{{anchor|Female Wire Frame}}[[File:Female Wire Frame Trophy.png|100px]] | ||
|- | |- | ||
|81 | |81 | ||
| Line 501: | Line 413: | ||
|[[Fighting Wire Frame]]s | |[[Fighting Wire Frame]]s | ||
|{{anchor|Fighting Wire Frames}}[[File:Fighting Wire Frames Trophy.png|100px]] | |{{anchor|Fighting Wire Frames}}[[File:Fighting Wire Frames Trophy.png|100px]] | ||
|- | |- | ||
|82 | |82 | ||
|291 | |291 | ||
| | |{{SSBM|Giga Bowser}} | ||
|{{anchor|Giga Bowser}}[[File:Giga Bowser Melee Trophy.png|100px]] | |{{anchor|Giga Bowser}}[[File:Giga Bowser Melee Trophy.png|100px]] | ||
|- | |- | ||
|83 | |83 | ||
| Line 513: | Line 423: | ||
|{{SSBM|Master Hand}} | |{{SSBM|Master Hand}} | ||
|{{anchor|Master Hand}}[[File:Master Hand Melee Trophy.png|100px]] | |{{anchor|Master Hand}}[[File:Master Hand Melee Trophy.png|100px]] | ||
|- | |- | ||
|84 | |84 | ||
| Line 519: | Line 428: | ||
|{{SSBM|Crazy Hand}} | |{{SSBM|Crazy Hand}} | ||
|{{anchor|Crazy Hand}}[[File:Crazy Hand Melee Trophy.png|100px]] | |{{anchor|Crazy Hand}}[[File:Crazy Hand Melee Trophy.png|100px]] | ||
|- | |- | ||
|85 | |85 | ||
| Line 525: | Line 433: | ||
|[[Food]] | |[[Food]] | ||
|{{anchor|Food}}[[File:Food Melee Trophy.png|100px]] | |{{anchor|Food}}[[File:Food Melee Trophy.png|100px]] | ||
|- | |- | ||
|86 | |86 | ||
| Line 531: | Line 438: | ||
|[[Maxim Tomato]] | |[[Maxim Tomato]] | ||
|{{anchor|Maxim Tomato}}[[File:Maxim Tomato Trophy Melee.png|100px]] | |{{anchor|Maxim Tomato}}[[File:Maxim Tomato Trophy Melee.png|100px]] | ||
|- | |- | ||
|87 | |87 | ||
| Line 537: | Line 443: | ||
|[[Heart Container]] | |[[Heart Container]] | ||
|{{anchor|Heart Container}}[[File:Heart Container Trophy Melee.png|100px]] | |{{anchor|Heart Container}}[[File:Heart Container Trophy Melee.png|100px]] | ||
|- | |- | ||
|88 | |88 | ||
| Line 543: | Line 448: | ||
|[[Warp Star]] | |[[Warp Star]] | ||
|{{anchor|Warp Star}}[[File:Warp Star Trophy Melee.png|100px]] | |{{anchor|Warp Star}}[[File:Warp Star Trophy Melee.png|100px]] | ||
|- | |- | ||
|89 | |89 | ||
| Line 549: | Line 453: | ||
|[[Ray Gun]] | |[[Ray Gun]] | ||
|{{anchor|Ray Gun}}[[File:Ray Gun Melee Trophy.png|100px]] | |{{anchor|Ray Gun}}[[File:Ray Gun Melee Trophy.png|100px]] | ||
|- | |- | ||
|90 | |90 | ||
| Line 555: | Line 458: | ||
|[[Super Scope]] | |[[Super Scope]] | ||
|{{anchor|Super Scope}}[[File:Super Scope Trophy Melee.png|100px]] | |{{anchor|Super Scope}}[[File:Super Scope Trophy Melee.png|100px]] | ||
|- | |- | ||
|91 | |91 | ||
| Line 561: | Line 463: | ||
|[[Fire Flower]] | |[[Fire Flower]] | ||
|{{anchor|Fire Flower}}[[File:Fire Flower Trophy Melee.png|100px]] | |{{anchor|Fire Flower}}[[File:Fire Flower Trophy Melee.png|100px]] | ||
|- | |- | ||
|92 | |92 | ||
| Line 567: | Line 468: | ||
|[[Lip's Stick]] | |[[Lip's Stick]] | ||
|{{anchor|Lip's Stick}}[[File:Lip's Stick Trophy Melee.png|100px]] | |{{anchor|Lip's Stick}}[[File:Lip's Stick Trophy Melee.png|100px]] | ||
|- | |- | ||
|93 | |93 | ||
| Line 573: | Line 473: | ||
|[[Star Rod]] | |[[Star Rod]] | ||
|{{anchor|Star Rod}}[[File:Star Rod Trophy Melee.png|100px]] | |{{anchor|Star Rod}}[[File:Star Rod Trophy Melee.png|100px]] | ||
|- | |- | ||
|94 | |94 | ||
| Line 579: | Line 478: | ||
|[[Beam Sword]] | |[[Beam Sword]] | ||
|{{anchor|Beam Sword}}[[File:Beam Sword Melee Trophy.png|100px]] | |{{anchor|Beam Sword}}[[File:Beam Sword Melee Trophy.png|100px]] | ||
|- | |- | ||
|95 | |95 | ||
| Line 585: | Line 483: | ||
|[[Home-Run Bat]] | |[[Home-Run Bat]] | ||
|{{anchor|Home-Run Bat}}[[File:Home Run Bat Melee Trophy.png|100px]] | |{{anchor|Home-Run Bat}}[[File:Home Run Bat Melee Trophy.png|100px]] | ||
|- | |- | ||
|96 | |96 | ||
| Line 591: | Line 488: | ||
|[[Fan]] | |[[Fan]] | ||
|{{anchor|Fan}}[[File:Fan Melee Trophy.png|100px]] | |{{anchor|Fan}}[[File:Fan Melee Trophy.png|100px]] | ||
|- | |- | ||
|97 | |97 | ||
| Line 597: | Line 493: | ||
|{{b|Hammer|item}} | |{{b|Hammer|item}} | ||
|{{anchor|Hammer}}[[File:Hammer Trophy Melee.png|100px]] | |{{anchor|Hammer}}[[File:Hammer Trophy Melee.png|100px]] | ||
|- | |- | ||
|98 | |98 | ||
| Line 603: | Line 498: | ||
|[[Green Shell]] | |[[Green Shell]] | ||
|{{anchor|Green Shell}}[[File:Green Shell Trophy Melee.png|100px]] | |{{anchor|Green Shell}}[[File:Green Shell Trophy Melee.png|100px]] | ||
|- | |- | ||
|99 | |99 | ||
| Line 609: | Line 503: | ||
|[[Red Shell]] | |[[Red Shell]] | ||
|{{anchor|Red Shell}}[[File:Red Shell Trophy Melee.png|100px]] | |{{anchor|Red Shell}}[[File:Red Shell Trophy Melee.png|100px]] | ||
|- | |- | ||
|100 | |100 | ||
| Line 615: | Line 508: | ||
|[[Flipper]] | |[[Flipper]] | ||
|{{anchor|Flipper}}[[File:Flipper Trophy Melee.png|100px]] | |{{anchor|Flipper}}[[File:Flipper Trophy Melee.png|100px]] | ||
|- | |- | ||
|101 | |101 | ||
| Line 621: | Line 513: | ||
|[[Freezie]] | |[[Freezie]] | ||
|{{anchor|Freezie}}[[File:Freezie Trophy Melee.png|100px]] | |{{anchor|Freezie}}[[File:Freezie Trophy Melee.png|100px]] | ||
|- | |- | ||
|102 | |102 | ||
| Line 627: | Line 518: | ||
|[[Mr. Saturn]] | |[[Mr. Saturn]] | ||
|{{anchor|Mr. Saturn}}[[File:Mr. Saturn Trophy Melee.png|100px]] | |{{anchor|Mr. Saturn}}[[File:Mr. Saturn Trophy Melee.png|100px]] | ||
|- | |- | ||
|103 | |103 | ||
| Line 633: | Line 523: | ||
|[[Bob-omb]] | |[[Bob-omb]] | ||
|{{anchor|Bob-omb}}[[File:Bob-omb Trophy Melee.png|100px]] | |{{anchor|Bob-omb}}[[File:Bob-omb Trophy Melee.png|100px]] | ||
|- | |- | ||
|104 | |104 | ||
|194 | |194 | ||
|{{Flag|Japan}}/{{Flag|Europe}} | |Proximity Mine {{Flag|Japan}}/{{Flag|Europe}}<br>[[Motion-Sensor Bomb]] {{Flag|North America}} | ||
|{{anchor|Proximity Mine}}{{anchor|Motion-Sensor Bomb}}[[File:Proximity Mine Trophy Melee.png|100px]]<br>[[File:Motion-Sensor Bomb Trophy Melee.png|100px]] | |{{anchor|Proximity Mine}}{{anchor|Motion-Sensor Bomb}}[[File:Proximity Mine Trophy Melee.png|100px]]<br>[[File:Motion-Sensor Bomb Trophy Melee.png|100px]] | ||
|- | |- | ||
|105 | |105 | ||
| Line 646: | Line 533: | ||
|[[Super Mushroom]] | |[[Super Mushroom]] | ||
|{{anchor|Super Mushroom}}[[File:Super Mushroom Trophy Melee.png|100px]] | |{{anchor|Super Mushroom}}[[File:Super Mushroom Trophy Melee.png|100px]] | ||
|- | |- | ||
|106 | |106 | ||
| Line 652: | Line 538: | ||
|[[Poison Mushroom]] | |[[Poison Mushroom]] | ||
|{{anchor|Poison Mushroom}}[[File:Poison Mushroom Trophy Melee.png|100px]] | |{{anchor|Poison Mushroom}}[[File:Poison Mushroom Trophy Melee.png|100px]] | ||
|- | |- | ||
|107 | |107 | ||
| Line 658: | Line 543: | ||
|[[Super Star|Starman]] | |[[Super Star|Starman]] | ||
|{{anchor|Starman}}[[File:Starman Trophy Melee.png|100px]] | |{{anchor|Starman}}[[File:Starman Trophy Melee.png|100px]] | ||
|- | |- | ||
|108 | |108 | ||
| Line 664: | Line 548: | ||
|[[Parasol]] | |[[Parasol]] | ||
|{{anchor|Parasol}}[[File:Parasol Trophy Melee.png|100px]] | |{{anchor|Parasol}}[[File:Parasol Trophy Melee.png|100px]] | ||
|- | |- | ||
|109 | |109 | ||
| Line 670: | Line 553: | ||
|{{b|Screw Attack|item}} | |{{b|Screw Attack|item}} | ||
|{{anchor|Screw Attack}}[[File:Screw Attack Trophy Melee.png|100px]] | |{{anchor|Screw Attack}}[[File:Screw Attack Trophy Melee.png|100px]] | ||
|- | |- | ||
|110 | |110 | ||
| Line 676: | Line 558: | ||
|[[Metal Box]] | |[[Metal Box]] | ||
|{{anchor|Metal Box}}[[File:Metal Box Trophy Melee.png|100px]] | |{{anchor|Metal Box}}[[File:Metal Box Trophy Melee.png|100px]] | ||
|- | |- | ||
|111 | |111 | ||
| Line 682: | Line 563: | ||
|[[Bunny Hood]] | |[[Bunny Hood]] | ||
|{{anchor|Bunny Hood}}[[File:Bunny Hood Trophy Melee.png|100px]] | |{{anchor|Bunny Hood}}[[File:Bunny Hood Trophy Melee.png|100px]] | ||
|- | |- | ||
|112 | |112 | ||
| Line 688: | Line 568: | ||
|[[Cloaking Device]] | |[[Cloaking Device]] | ||
|{{anchor|Cloaking Device}}[[File:Cloaking Device Trophy Melee.png|100px]] | |{{anchor|Cloaking Device}}[[File:Cloaking Device Trophy Melee.png|100px]] | ||
|- | |- | ||
|113 | |113 | ||
| Line 695: | Line 573: | ||
|[[Barrel Cannon]] | |[[Barrel Cannon]] | ||
|{{anchor|Barrel Cannon}}[[File:Barrel Cannon Trophy Melee.png|100px]] | |{{anchor|Barrel Cannon}}[[File:Barrel Cannon Trophy Melee.png|100px]] | ||
|- | |- | ||
|114 | |114 | ||
| Line 701: | Line 578: | ||
|[[Party Ball]] | |[[Party Ball]] | ||
|{{anchor|Party Ball}}[[File:Party Ball Melee Trophy.png|100px]] | |{{anchor|Party Ball}}[[File:Party Ball Melee Trophy.png|100px]] | ||
|- | |- | ||
|115 | |115 | ||
| Line 707: | Line 583: | ||
|[[Crate]] | |[[Crate]] | ||
|{{anchor|Crate}}[[File:Crate Melee Trophy.png|100px]] | |{{anchor|Crate}}[[File:Crate Melee Trophy.png|100px]] | ||
|- | |- | ||
|116 | |116 | ||
| Line 713: | Line 588: | ||
|[[Barrel]] | |[[Barrel]] | ||
|{{anchor|Barrel}}[[File:Barrel Melee Trophy.png|100px]] | |{{anchor|Barrel}}[[File:Barrel Melee Trophy.png|100px]] | ||
|- | |- | ||
|117 | |117 | ||
| Line 719: | Line 593: | ||
|[[Capsule]] | |[[Capsule]] | ||
|{{anchor|Capsule}}[[File:Capsule Melee Trophy.png|100px]] | |{{anchor|Capsule}}[[File:Capsule Melee Trophy.png|100px]] | ||
|- | |- | ||
|118 | |118 | ||
| Line 725: | Line 598: | ||
|[[Egg]] | |[[Egg]] | ||
|{{anchor|Egg}}[[File:Egg Melee Trophy.png|100px]] | |{{anchor|Egg}}[[File:Egg Melee Trophy.png|100px]] | ||
|- | |- | ||
|119 | |119 | ||
| Line 731: | Line 603: | ||
|[[Smash Coin]]s | |[[Smash Coin]]s | ||
|{{anchor|Smash Coins}}[[File:Smash Coins Melee Trophy.png|100px]] | |{{anchor|Smash Coins}}[[File:Smash Coins Melee Trophy.png|100px]] | ||
|- | |- | ||
|120 | |120 | ||
| Line 737: | Line 608: | ||
|[[Poké Ball]] | |[[Poké Ball]] | ||
|{{anchor|Poke Ball}}[[File:Poké Ball Trophy Melee.png|100px]] | |{{anchor|Poke Ball}}[[File:Poké Ball Trophy Melee.png|100px]] | ||
|- | |- | ||
|121 | |121 | ||
| Line 743: | Line 613: | ||
|[[Venusaur]] | |[[Venusaur]] | ||
|{{anchor|Venusaur}}[[File:Venusaur Trophy Melee.png|100px]] | |{{anchor|Venusaur}}[[File:Venusaur Trophy Melee.png|100px]] | ||
|- | |- | ||
|122 | |122 | ||
| Line 749: | Line 618: | ||
|[[Charizard]] | |[[Charizard]] | ||
|{{anchor|Charizard}}[[File:Charizard Trophy Melee.png|100px]] | |{{anchor|Charizard}}[[File:Charizard Trophy Melee.png|100px]] | ||
|- | |- | ||
|123 | |123 | ||
| Line 755: | Line 623: | ||
|[[Squirtle]] | |[[Squirtle]] | ||
|{{anchor|Squirtle}}[[File:Squirtle Trophy Melee.png|100px]] | |{{anchor|Squirtle}}[[File:Squirtle Trophy Melee.png|100px]] | ||
|- | |- | ||
|124 | |124 | ||
| Line 761: | Line 628: | ||
|[[Blastoise]] | |[[Blastoise]] | ||
|{{anchor|Blastoise}}[[File:Blastoise Trophy Melee.png|100px]] | |{{anchor|Blastoise}}[[File:Blastoise Trophy Melee.png|100px]] | ||
|- | |- | ||
|125 | |125 | ||
| Line 767: | Line 633: | ||
|[[Clefairy]] | |[[Clefairy]] | ||
|{{anchor|Clefairy}}[[File:Clefairy Trophy Melee.png|100px]] | |{{anchor|Clefairy}}[[File:Clefairy Trophy Melee.png|100px]] | ||
|- | |- | ||
|126 | |126 | ||
| Line 773: | Line 638: | ||
|[[Electrode]] | |[[Electrode]] | ||
|{{anchor|Electrode}}[[File:Electrode Trophy Melee.png|100px]] | |{{anchor|Electrode}}[[File:Electrode Trophy Melee.png|100px]] | ||
|- | |- | ||
|127 | |127 | ||
| Line 779: | Line 643: | ||
|[[Weezing]] | |[[Weezing]] | ||
|{{anchor|Weezing}}[[File:Weezing Trophy Melee.png|100px]] | |{{anchor|Weezing}}[[File:Weezing Trophy Melee.png|100px]] | ||
|- | |- | ||
|128 | |128 | ||
| Line 785: | Line 648: | ||
|[[Chansey]] | |[[Chansey]] | ||
|{{anchor|Chansey}}[[File:Chansey Trophy Melee.png|100px]] | |{{anchor|Chansey}}[[File:Chansey Trophy Melee.png|100px]] | ||
|- | |- | ||
|129 | |129 | ||
| Line 791: | Line 653: | ||
|[[Goldeen]] | |[[Goldeen]] | ||
|{{anchor|Goldeen}}[[File:Goldeen Trophy Melee.png|100px]] | |{{anchor|Goldeen}}[[File:Goldeen Trophy Melee.png|100px]] | ||
|- | |- | ||
|130 | |130 | ||
| Line 797: | Line 658: | ||
|[[Staryu]] | |[[Staryu]] | ||
|{{anchor|Staryu}}[[File:Staryu Trophy Melee.png|100px]] | |{{anchor|Staryu}}[[File:Staryu Trophy Melee.png|100px]] | ||
|- | |- | ||
|131 | |131 | ||
| Line 803: | Line 663: | ||
|[[Snorlax]] | |[[Snorlax]] | ||
|{{anchor|Snolax}}[[File:Snorlax Trophy Melee.png|100px]] | |{{anchor|Snolax}}[[File:Snorlax Trophy Melee.png|100px]] | ||
|- | |- | ||
|132 | |132 | ||
| Line 809: | Line 668: | ||
|[[Articuno]] | |[[Articuno]] | ||
|{{anchor|Articuno}}[[File:Articuno Trophy Melee.png|100px]] | |{{anchor|Articuno}}[[File:Articuno Trophy Melee.png|100px]] | ||
|- | |- | ||
|133 | |133 | ||
| Line 815: | Line 673: | ||
|[[Zapdos]] | |[[Zapdos]] | ||
|{{anchor|Zapdos}}[[File:Zapdos Trophy Melee.png|100px]] | |{{anchor|Zapdos}}[[File:Zapdos Trophy Melee.png|100px]] | ||
|- | |- | ||
|134 | |134 | ||
| Line 821: | Line 678: | ||
|[[Moltres]] | |[[Moltres]] | ||
|{{anchor|Moltres}}[[File:Moltres Trophy Melee.png|100px]] | |{{anchor|Moltres}}[[File:Moltres Trophy Melee.png|100px]] | ||
|- | |- | ||
|135 | |135 | ||
| Line 827: | Line 683: | ||
|[[Mew]] | |[[Mew]] | ||
|{{anchor|Mew}}[[File:Mew Trophy Melee.png|100px]] | |{{anchor|Mew}}[[File:Mew Trophy Melee.png|100px]] | ||
|- | |- | ||
|136 | |136 | ||
| Line 833: | Line 688: | ||
|[[Chikorita]] | |[[Chikorita]] | ||
|{{anchor|Chikorita}}[[File:Chikorita Trophy Melee.png|100px]] | |{{anchor|Chikorita}}[[File:Chikorita Trophy Melee.png|100px]] | ||
|- | |- | ||
|137 | |137 | ||
| Line 839: | Line 693: | ||
|[[Cyndaquil]] | |[[Cyndaquil]] | ||
|{{anchor|Cyndaquil}}[[File:Cyndaquil Trophy Melee.png|100px]] | |{{anchor|Cyndaquil}}[[File:Cyndaquil Trophy Melee.png|100px]] | ||
|- | |- | ||
|138 | |138 | ||
| Line 845: | Line 698: | ||
|[[Togepi]] | |[[Togepi]] | ||
|{{anchor|Togepi}}[[File:Togepi Trophy Melee.png|100px]] | |{{anchor|Togepi}}[[File:Togepi Trophy Melee.png|100px]] | ||
|- | |- | ||
|139 | |139 | ||
| Line 851: | Line 703: | ||
|[[Bellossom]] | |[[Bellossom]] | ||
|{{anchor|Bellossom}}[[File:Bellossom Trophy Melee.png|100px]] | |{{anchor|Bellossom}}[[File:Bellossom Trophy Melee.png|100px]] | ||
|- | |- | ||
|140 | |140 | ||
| Line 857: | Line 708: | ||
|[[Marill]] | |[[Marill]] | ||
|{{anchor|Marill}}[[File:Marill Trophy Melee.png|100px]] | |{{anchor|Marill}}[[File:Marill Trophy Melee.png|100px]] | ||
|- | |- | ||
|141 | |141 | ||
|162 | |162 | ||
|{{ | |{{pkmn|Sudowoodo}} | ||
|{{anchor|Sudowoodo}}[[File:Sudowoodo Trophy Melee.png|100px]] | |{{anchor|Sudowoodo}}[[File:Sudowoodo Trophy Melee.png|100px]] | ||
|- | |- | ||
|142 | |142 | ||
| Line 869: | Line 718: | ||
|[[Unown]] | |[[Unown]] | ||
|{{anchor|Unown}}[[File:Unown Trophy Melee.png|100px]] | |{{anchor|Unown}}[[File:Unown Trophy Melee.png|100px]] | ||
|- | |- | ||
|143 | |143 | ||
| Line 875: | Line 723: | ||
|[[Wobbuffet]] | |[[Wobbuffet]] | ||
|{{anchor|Wobbuffet}}[[File:Wobbuffet Trophy Melee.png|100px]] | |{{anchor|Wobbuffet}}[[File:Wobbuffet Trophy Melee.png|100px]] | ||
|- | |- | ||
|144 | |144 | ||
| Line 881: | Line 728: | ||
|[[Scizor]] | |[[Scizor]] | ||
|{{anchor|Scizor}}[[File:Scizor Trophy Melee.png|100px]] | |{{anchor|Scizor}}[[File:Scizor Trophy Melee.png|100px]] | ||
|- | |- | ||
|145 | |145 | ||
| Line 887: | Line 733: | ||
|[[Porygon2]] | |[[Porygon2]] | ||
|{{anchor|Porygon2}}[[File:Porygon2 Trophy Melee.png|100px]] | |{{anchor|Porygon2}}[[File:Porygon2 Trophy Melee.png|100px]] | ||
|- | |- | ||
|146 | |146 | ||
| Line 893: | Line 738: | ||
|[[Raikou]] | |[[Raikou]] | ||
|{{anchor|Raikou}}[[File:Raikou Trophy Melee.png|100px]] | |{{anchor|Raikou}}[[File:Raikou Trophy Melee.png|100px]] | ||
|- | |- | ||
|147 | |147 | ||
| Line 899: | Line 743: | ||
|[[Entei]] | |[[Entei]] | ||
|{{anchor|Entei}}[[File:Entei Trophy Melee.png|100px]] | |{{anchor|Entei}}[[File:Entei Trophy Melee.png|100px]] | ||
|- | |- | ||
|148 | |148 | ||
| Line 905: | Line 748: | ||
|[[Suicune]] | |[[Suicune]] | ||
|{{anchor|Suicune}}[[File:Suicune Trophy Melee.png|100px]] | |{{anchor|Suicune}}[[File:Suicune Trophy Melee.png|100px]] | ||
|- | |- | ||
|149 | |149 | ||
| Line 911: | Line 753: | ||
|[[Lugia]] | |[[Lugia]] | ||
|{{anchor|Lugia}}[[File:Lugia Trophy Melee.png|100px]] | |{{anchor|Lugia}}[[File:Lugia Trophy Melee.png|100px]] | ||
|- | |- | ||
|150 | |150 | ||
| Line 917: | Line 758: | ||
|[[Ho-oh]] | |[[Ho-oh]] | ||
|{{anchor|Ho-oh}}[[File:Ho-oh Trophy Melee.png|100px]] | |{{anchor|Ho-oh}}[[File:Ho-oh Trophy Melee.png|100px]] | ||
|- | |- | ||
|151 | |151 | ||
| Line 923: | Line 763: | ||
|[[Celebi]] | |[[Celebi]] | ||
|{{anchor|Celebi}}[[File:Celebi Trophy Melee.png|100px]] | |{{anchor|Celebi}}[[File:Celebi Trophy Melee.png|100px]] | ||
|- | |- | ||
|152 | |152 | ||
| Line 929: | Line 768: | ||
|[[Toad]] | |[[Toad]] | ||
|{{anchor|Toad}}[[File:Toad Trophy Melee.png|100px]] | |{{anchor|Toad}}[[File:Toad Trophy Melee.png|100px]] | ||
|- | |- | ||
|153 | |153 | ||
| Line 935: | Line 773: | ||
|{{iw|mariowiki|Coin}} | |{{iw|mariowiki|Coin}} | ||
|{{anchor|Coin}}[[File:Coin Trophy Melee.png|100px]] | |{{anchor|Coin}}[[File:Coin Trophy Melee.png|100px]] | ||
|- | |- | ||
|154 | |154 | ||
| Line 941: | Line 778: | ||
|[[Vegetable]] | |[[Vegetable]] | ||
|{{anchor|Vegetable}}[[File:Vegetable Trophy Melee.png|100px]] | |{{anchor|Vegetable}}[[File:Vegetable Trophy Melee.png|100px]] | ||
|- | |- | ||
|155 | |155 | ||
| Line 947: | Line 783: | ||
|[[Megavitamin]]s | |[[Megavitamin]]s | ||
|{{anchor|Megavitamins}}[[File:Megavitamins Trophy Melee.png|100px]] | |{{anchor|Megavitamins}}[[File:Megavitamins Trophy Melee.png|100px]] | ||
|- | |- | ||
|156 | |156 | ||
| Line 953: | Line 788: | ||
|[[zeldawiki:Milk|Lon Lon Milk]] | |[[zeldawiki:Milk|Lon Lon Milk]] | ||
|{{anchor|Lon Lon Milk}}[[File:Lon Lon Milk Trophy.png|100px]] | |{{anchor|Lon Lon Milk}}[[File:Lon Lon Milk Trophy.png|100px]] | ||
|- | |- | ||
|157 | |157 | ||
| Line 959: | Line 793: | ||
|Kirby Hat 1 | |Kirby Hat 1 | ||
|{{anchor|Kirby Hat 1}}[[File:Kirby Hat 1 Trophy.png|100px]][[File:KirbyHat1-Back.png|100px]] | |{{anchor|Kirby Hat 1}}[[File:Kirby Hat 1 Trophy.png|100px]][[File:KirbyHat1-Back.png|100px]] | ||
|- | |- | ||
|158 | |158 | ||
| Line 965: | Line 798: | ||
|Kirby Hat 2 | |Kirby Hat 2 | ||
|{{anchor|Kirby Hat 2}}[[File:Kirby Hat 2 Trophy.png|100px]][[File:KirbyHat2-Back.png|100px]] | |{{anchor|Kirby Hat 2}}[[File:Kirby Hat 2 Trophy.png|100px]][[File:KirbyHat2-Back.png|100px]] | ||
|- | |- | ||
|159 | |159 | ||
| Line 971: | Line 803: | ||
|Kirby Hat 3 | |Kirby Hat 3 | ||
|{{anchor|Kirby Hat 3}}[[File:Kirby Hat 3 Trophy.png|100px]][[File:KirbyHat3-Back.png|100px]] | |{{anchor|Kirby Hat 3}}[[File:Kirby Hat 3 Trophy.png|100px]][[File:KirbyHat3-Back.png|100px]] | ||
|- | |- | ||
|160 | |160 | ||
| Line 977: | Line 808: | ||
|Kirby Hat 4 | |Kirby Hat 4 | ||
|{{anchor|Kirby Hat 4}}[[File:Kirby Hat 4 Trophy.png|100px]][[File:KirbyHat4-Back.png|100px]] | |{{anchor|Kirby Hat 4}}[[File:Kirby Hat 4 Trophy.png|100px]][[File:KirbyHat4-Back.png|100px]] | ||
|- | |- | ||
|161 | |161 | ||
| Line 983: | Line 813: | ||
|Kirby Hat 5 | |Kirby Hat 5 | ||
|{{anchor|Kirby Hat 5}}[[File:Kirby Hat 5 Trophy.png|100px]][[File:KirbyHat5-Back.png|100px]] | |{{anchor|Kirby Hat 5}}[[File:Kirby Hat 5 Trophy.png|100px]][[File:KirbyHat5-Back.png|100px]] | ||
|- | |- | ||
|162 | |162 | ||
| Line 989: | Line 818: | ||
|[[Princess Peach's Castle]] | |[[Princess Peach's Castle]] | ||
|{{anchor|Princess Peach's Castle}}[[File:Peach's Castle Trophy Melee.png|100px]] | |{{anchor|Princess Peach's Castle}}[[File:Peach's Castle Trophy Melee.png|100px]] | ||
|- | |- | ||
|163 | |163 | ||
| Line 995: | Line 823: | ||
|[[Banzai Bill]] | |[[Banzai Bill]] | ||
|{{anchor|Banzai Bill}}[[File:Banzai Bill Trophy Melee.png|100px]] | |{{anchor|Banzai Bill}}[[File:Banzai Bill Trophy Melee.png|100px]] | ||
|- | |- | ||
|164 | |164 | ||
| Line 1,001: | Line 828: | ||
|[[Lakitu]] | |[[Lakitu]] | ||
|{{anchor|Lakitu}}[[File:Lakitu Trophy Melee.png|100px]] | |{{anchor|Lakitu}}[[File:Lakitu Trophy Melee.png|100px]] | ||
|- | |- | ||
|165 | |165 | ||
| Line 1,007: | Line 833: | ||
|[[Pidgit]] | |[[Pidgit]] | ||
|{{anchor|Pidgit}}[[File:Pidgit Trophy Melee.png|100px]] | |{{anchor|Pidgit}}[[File:Pidgit Trophy Melee.png|100px]] | ||
|- | |- | ||
|166 | |166 | ||
| Line 1,013: | Line 838: | ||
|[[Birdo]] | |[[Birdo]] | ||
|{{anchor|Birdo}}[[File:Birdo Trophy Melee.png|100px]] | |{{anchor|Birdo}}[[File:Birdo Trophy Melee.png|100px]] | ||
|- | |- | ||
|167 | |167 | ||
| Line 1,019: | Line 843: | ||
|[[Klaptrap|Klap Trap]] | |[[Klaptrap|Klap Trap]] | ||
|{{anchor|Klap Trap}}[[File:Klap Trap Trophy Melee.png|100px]] | |{{anchor|Klap Trap}}[[File:Klap Trap Trophy Melee.png|100px]] | ||
|- | |- | ||
|168 | |168 | ||
| Line 1,025: | Line 848: | ||
|[[Shy Guy]]s | |[[Shy Guy]]s | ||
|{{anchor|Shy Guys}}[[File:Shy Guys Trophy Melee.png|100px]] | |{{anchor|Shy Guys}}[[File:Shy Guys Trophy Melee.png|100px]] | ||
|- | |- | ||
|169 | |169 | ||
| Line 1,031: | Line 853: | ||
|{{iw|mariowiki|Pak E. Derm}} | |{{iw|mariowiki|Pak E. Derm}} | ||
|{{anchor|Pak E. Derm}}[[File:Pak E. Derm Trophy Melee.png|100px]] | |{{anchor|Pak E. Derm}}[[File:Pak E. Derm Trophy Melee.png|100px]] | ||
|- | |- | ||
|170 | |170 | ||
| Line 1,037: | Line 858: | ||
|[[Tingle]] | |[[Tingle]] | ||
|{{anchor|Tingle}}[[File:Tingle Trophy Melee.png|100px]] | |{{anchor|Tingle}}[[File:Tingle Trophy Melee.png|100px]] | ||
|- | |- | ||
|171 | |171 | ||
| Line 1,043: | Line 863: | ||
|[[Moon]] | |[[Moon]] | ||
|{{anchor|Moon}}[[File:Moon Trophy.png|100px]] | |{{anchor|Moon}}[[File:Moon Trophy.png|100px]] | ||
|- | |- | ||
|172 | |172 | ||
| Line 1,049: | Line 868: | ||
|{{iw|zeldawiki|Turtle}} | |{{iw|zeldawiki|Turtle}} | ||
|{{anchor|Turtle}}[[File:Turtle Trophy.png|100px]] | |{{anchor|Turtle}}[[File:Turtle Trophy.png|100px]] | ||
|- | |- | ||
|173 | |173 | ||
| Line 1,055: | Line 873: | ||
|{{iw|zeldawiki|Four Giants}} | |{{iw|zeldawiki|Four Giants}} | ||
|{{anchor|Four Giants}}[[File:Four Giants Trophy.png|100px]] | |{{anchor|Four Giants}}[[File:Four Giants Trophy.png|100px]] | ||
|- | |- | ||
|174 | |174 | ||
| Line 1,061: | Line 878: | ||
|[[Master Sword]] | |[[Master Sword]] | ||
|{{anchor|Master Sword}}[[File:Master Sword Trophy.png|100px]] | |{{anchor|Master Sword}}[[File:Master Sword Trophy.png|100px]] | ||
|- | |- | ||
|175 | |175 | ||
| Line 1,068: | Line 883: | ||
|[[Falcon Flyer]] | |[[Falcon Flyer]] | ||
|{{anchor|Falcon Flyer}}[[File:Falcon Flyer Trophy Melee.png|100px]] | |{{anchor|Falcon Flyer}}[[File:Falcon Flyer Trophy Melee.png|100px]] | ||
|- | |- | ||
|176 | |176 | ||
| Line 1,074: | Line 888: | ||
|[[F-Zero Racers]] | |[[F-Zero Racers]] | ||
|{{anchor|F-Zero Racers}}[[File:F-Zero Racers Trophy Melee.png|100px]] | |{{anchor|F-Zero Racers}}[[File:F-Zero Racers Trophy Melee.png|100px]] | ||
|- | |- | ||
|177 | |177 | ||
| Line 1,080: | Line 893: | ||
|{{SSBM|Mute City}} | |{{SSBM|Mute City}} | ||
|{{anchor|Mute City}}[[File:Mute City Trophy Melee.png|100px]] | |{{anchor|Mute City}}[[File:Mute City Trophy Melee.png|100px]] | ||
|- | |- | ||
|178 | |178 | ||
| Line 1,086: | Line 898: | ||
|[[Arwing]] | |[[Arwing]] | ||
|{{anchor|Arwing}}[[File:Arwing Trophy Melee.png|100px]] | |{{anchor|Arwing}}[[File:Arwing Trophy Melee.png|100px]] | ||
|- | |- | ||
|179 | |179 | ||
| Line 1,093: | Line 903: | ||
|[[Great Fox]] | |[[Great Fox]] | ||
|{{anchor|Great Fox}}[[File:Great Fox Trophy Melee.png|100px]] | |{{anchor|Great Fox}}[[File:Great Fox Trophy Melee.png|100px]] | ||
|- | |- | ||
|180 | |180 | ||
| Line 1,100: | Line 908: | ||
|[[Peppy Hare]] | |[[Peppy Hare]] | ||
|{{anchor|Peppy Hare}}[[File:Peppy Trophy Melee.png|100px]] | |{{anchor|Peppy Hare}}[[File:Peppy Trophy Melee.png|100px]] | ||
|- | |- | ||
|181 | |181 | ||
| Line 1,107: | Line 913: | ||
|[[Slippy Toad]] | |[[Slippy Toad]] | ||
|{{anchor|Slippy Toad}}[[File:Slippy Trophy Melee.png|100px]] | |{{anchor|Slippy Toad}}[[File:Slippy Trophy Melee.png|100px]] | ||
|- | |- | ||
|182 | |182 | ||
| Line 1,114: | Line 918: | ||
|[[Kraid]] | |[[Kraid]] | ||
|{{anchor|Kraid}}[[File:Kraid Trophy.png|100px]] | |{{anchor|Kraid}}[[File:Kraid Trophy.png|100px]] | ||
|- | |- | ||
|183 | |183 | ||
| Line 1,120: | Line 923: | ||
|{{iw|metroidwiki|Chozo Statue}} | |{{iw|metroidwiki|Chozo Statue}} | ||
|{{anchor|Chozo Statue}}[[File:Chozo Statue Trophy.png|100px]] | |{{anchor|Chozo Statue}}[[File:Chozo Statue Trophy.png|100px]] | ||
|- | |- | ||
|184 | |184 | ||
| Line 1,126: | Line 928: | ||
|[[Whispy Woods]] | |[[Whispy Woods]] | ||
|{{anchor|Whispy Woods}}[[File:Whispy Woods Trophy Melee.png|100px]] | |{{anchor|Whispy Woods}}[[File:Whispy Woods Trophy Melee.png|100px]] | ||
|- | |- | ||
|185 | |185 | ||
| Line 1,132: | Line 933: | ||
|[[Fountain of Dreams]] | |[[Fountain of Dreams]] | ||
|{{anchor|Fountain of Dreams}}[[File:Fountain of Dreams Trophy Melee.png|100px]] | |{{anchor|Fountain of Dreams}}[[File:Fountain of Dreams Trophy Melee.png|100px]] | ||
|- | |- | ||
|186 | |186 | ||
| Line 1,138: | Line 938: | ||
|UFO | |UFO | ||
|{{anchor|UFO}}[[File:UFO Trophy.png|100px]] | |{{anchor|UFO}}[[File:UFO Trophy.png|100px]] | ||
|- | |- | ||
|187 | |187 | ||
| Line 1,144: | Line 943: | ||
|[[Pokémon Stadium]] | |[[Pokémon Stadium]] | ||
|{{anchor|Pokemon Stadium}}[[File:Pokémon Stadium Trophy Melee.png|100px]] | |{{anchor|Pokemon Stadium}}[[File:Pokémon Stadium Trophy Melee.png|100px]] | ||
|- | |- | ||
|188 | |188 | ||
| Line 1,150: | Line 948: | ||
|[[Flat Zone|Game & Watch]] | |[[Flat Zone|Game & Watch]] | ||
|{{anchor|Game & Watch}}[[File:Game and Watch Trophy Melee.png|100px]] | |{{anchor|Game & Watch}}[[File:Game and Watch Trophy Melee.png|100px]] | ||
|- | |- | ||
|189 | |189 | ||
| Line 1,156: | Line 953: | ||
|[[Target]] | |[[Target]] | ||
|{{anchor|Target}}[[File:Target Melee Trophy.png|100px]] | |{{anchor|Target}}[[File:Target Melee Trophy.png|100px]] | ||
|- | |- | ||
|190 | |190 | ||
| Line 1,162: | Line 958: | ||
|[[Sandbag]] | |[[Sandbag]] | ||
|{{anchor|Sandbag}}[[File:Sandbag Melee Trophy.png|100px]] | |{{anchor|Sandbag}}[[File:Sandbag Melee Trophy.png|100px]] | ||
|- | |- | ||
|191 | |191 | ||
| Line 1,168: | Line 963: | ||
|{{SSBM|Battlefield}} | |{{SSBM|Battlefield}} | ||
|{{anchor|Battlefield}}[[File:Battlefield Melee Trophy.png|100px]] | |{{anchor|Battlefield}}[[File:Battlefield Melee Trophy.png|100px]] | ||
|- | |- | ||
|192 | |192 | ||
| Line 1,174: | Line 968: | ||
|{{SSBM|Final Destination}} | |{{SSBM|Final Destination}} | ||
|{{anchor|Final Destination}}[[File:Final Destination Melee Trophy.png|100px]] | |{{anchor|Final Destination}}[[File:Final Destination Melee Trophy.png|100px]] | ||
|- | |- | ||
|193 | |193 | ||
| Line 1,180: | Line 973: | ||
|[[Goomba]] | |[[Goomba]] | ||
|{{anchor|Goomba}}[[File:Goomba Trophy Melee.png|100px]] | |{{anchor|Goomba}}[[File:Goomba Trophy Melee.png|100px]] | ||
|- | |- | ||
|194 | |194 | ||
| Line 1,186: | Line 978: | ||
|[[Koopa Troopa]] | |[[Koopa Troopa]] | ||
|{{anchor|Koopa Troopa}}[[File:Koopa Troopa Trophy Melee.png|100px]] | |{{anchor|Koopa Troopa}}[[File:Koopa Troopa Trophy Melee.png|100px]] | ||
|- | |- | ||
|195 | |195 | ||
| Line 1,192: | Line 983: | ||
|[[Koopa Paratroopa]] | |[[Koopa Paratroopa]] | ||
|{{anchor|Koopa Paratroopa}}[[File:Koopa Paratroopa Trophy Melee.png|100px]] | |{{anchor|Koopa Paratroopa}}[[File:Koopa Paratroopa Trophy Melee.png|100px]] | ||
|- | |- | ||
|196 | |196 | ||
| Line 1,198: | Line 988: | ||
|[[ReDead]] | |[[ReDead]] | ||
|{{anchor|ReDead}}[[File:ReDead Trophy.png|100px]] | |{{anchor|ReDead}}[[File:ReDead Trophy.png|100px]] | ||
|- | |- | ||
|197 | |197 | ||
| Line 1,204: | Line 993: | ||
|[[Octorok]] | |[[Octorok]] | ||
|{{anchor|Octorok}}[[File:Octorok Trophy.png|100px]] | |{{anchor|Octorok}}[[File:Octorok Trophy.png|100px]] | ||
|- | |- | ||
|198 | |198 | ||
| Line 1,210: | Line 998: | ||
|[[Like Like]] | |[[Like Like]] | ||
|{{anchor|Like Like}}[[File:Like Like Trophy.png|100px]] | |{{anchor|Like Like}}[[File:Like Like Trophy.png|100px]] | ||
|- | |- | ||
|199 | |199 | ||
| Line 1,216: | Line 1,003: | ||
|[[Topi]] | |[[Topi]] | ||
|{{anchor|Topi}}[[File:Topi Trophy Melee.png|100px]][[File:Topi Trophy Melee (JP).png|100px]] | |{{anchor|Topi}}[[File:Topi Trophy Melee.png|100px]][[File:Topi Trophy Melee (JP).png|100px]] | ||
|- | |- | ||
|200 | |200 | ||
| Line 1,222: | Line 1,008: | ||
|[[Polar Bear]] | |[[Polar Bear]] | ||
|{{anchor|Polar Bear}}[[File:Polar Bear Trophy Melee.png|100px]] | |{{anchor|Polar Bear}}[[File:Polar Bear Trophy Melee.png|100px]] | ||
|- | |- | ||
|201 | |201 | ||
| Line 1,228: | Line 1,013: | ||
|{{iw|mariowiki|Raccoon Mario}} | |{{iw|mariowiki|Raccoon Mario}} | ||
|{{anchor|Raccoon Mario}}[[File:Raccoon Mario Trophy Melee.png|100px]] | |{{anchor|Raccoon Mario}}[[File:Raccoon Mario Trophy Melee.png|100px]] | ||
|- | |- | ||
|202 | |202 | ||
| Line 1,234: | Line 1,018: | ||
|Mario & Yoshi | |Mario & Yoshi | ||
|{{anchor|Mario and Yoshi}}[[File:Mario and Yoshi Trophy Melee.png|100px]] | |{{anchor|Mario and Yoshi}}[[File:Mario and Yoshi Trophy Melee.png|100px]] | ||
|- | |- | ||
|203 | |203 | ||
| Line 1,240: | Line 1,023: | ||
|[[Metal Mario]] | |[[Metal Mario]] | ||
|{{anchor|Metal Mario}}[[File:Metal Mario Trophy Melee.png|100px]] | |{{anchor|Metal Mario}}[[File:Metal Mario Trophy Melee.png|100px]] | ||
|- | |- | ||
|204 | |204 | ||
| Line 1,246: | Line 1,028: | ||
|[[mariowiki:Mario#Paper Mario series|Paper Mario]] | |[[mariowiki:Mario#Paper Mario series|Paper Mario]] | ||
|{{anchor|Paper Mario}}[[File:Paper Mario Trophy Melee.png|100px]] | |{{anchor|Paper Mario}}[[File:Paper Mario Trophy Melee.png|100px]] | ||
|- | |- | ||
|205 | |205 | ||
| Line 1,252: | Line 1,033: | ||
|[[Wario]] | |[[Wario]] | ||
|{{anchor|Wario}}[[File:Wario Trophy Melee.png|100px]] | |{{anchor|Wario}}[[File:Wario Trophy Melee.png|100px]] | ||
|- | |- | ||
|206 | |206 | ||
| Line 1,258: | Line 1,038: | ||
|{{iw|mariowiki|Plum}} | |{{iw|mariowiki|Plum}} | ||
|{{anchor|Plum}}[[File:Plum Trophy Melee.png|100px]] | |{{anchor|Plum}}[[File:Plum Trophy Melee.png|100px]] | ||
|- | |- | ||
|207 | |207 | ||
| Line 1,264: | Line 1,043: | ||
|[[Daisy]] | |[[Daisy]] | ||
|{{anchor|Daisy}}[[File:Daisy Trophy Melee.png|100px]] | |{{anchor|Daisy}}[[File:Daisy Trophy Melee.png|100px]] | ||
|- | |- | ||
|208 | |208 | ||
| Line 1,270: | Line 1,048: | ||
|[[Waluigi]] | |[[Waluigi]] | ||
|{{anchor|Waluigi}}[[File:Waluigi Trophy Melee.png|100px]] | |{{anchor|Waluigi}}[[File:Waluigi Trophy Melee.png|100px]] | ||
|- | |- | ||
|209 | |209 | ||
| Line 1,276: | Line 1,053: | ||
|[[Thwomp]] | |[[Thwomp]] | ||
|{{anchor|Thwomp}}[[File:Thwomp Trophy Melee.png|100px]] | |{{anchor|Thwomp}}[[File:Thwomp Trophy Melee.png|100px]] | ||
|- | |- | ||
|210 | |210 | ||
| Line 1,282: | Line 1,058: | ||
|[[Boo]] | |[[Boo]] | ||
|{{anchor|Boo}}[[File:Boo Trophy Melee.png|100px]] | |{{anchor|Boo}}[[File:Boo Trophy Melee.png|100px]] | ||
|- | |- | ||
|211 | |211 | ||
| Line 1,288: | Line 1,063: | ||
|[[Koopa Clown Car]] | |[[Koopa Clown Car]] | ||
|{{anchor|Koopa Clown Car}}[[File:Koopa Clown Car Trophy Melee.png|100px]] | |{{anchor|Koopa Clown Car}}[[File:Koopa Clown Car Trophy Melee.png|100px]] | ||
|- | |- | ||
|212 | |212 | ||
| Line 1,294: | Line 1,068: | ||
|{{iw|mariowiki|Virus}}es | |{{iw|mariowiki|Virus}}es | ||
|{{anchor|Viruses}}[[File:Viruses Trophy Melee.png|100px]] | |{{anchor|Viruses}}[[File:Viruses Trophy Melee.png|100px]] | ||
|- | |- | ||
|213 | |213 | ||
| Line 1,300: | Line 1,073: | ||
|{{iw|mariowiki|Bucket}} | |{{iw|mariowiki|Bucket}} | ||
|{{anchor|Bucket}}[[File:Bucket Trophy Melee.png|100px]] | |{{anchor|Bucket}}[[File:Bucket Trophy Melee.png|100px]] | ||
|- | |- | ||
|214 | |214 | ||
| Line 1,306: | Line 1,078: | ||
|[[mariowiki:Kart|Racing Kart]] | |[[mariowiki:Kart|Racing Kart]] | ||
|{{anchor|Racing Kart}}[[File:Racing Kart Trophy Melee.png|100px]] | |{{anchor|Racing Kart}}[[File:Racing Kart Trophy Melee.png|100px]] | ||
|- | |- | ||
|215 | |215 | ||
| Line 1,312: | Line 1,083: | ||
|{{iw|mariowiki|Baby Mario}} | |{{iw|mariowiki|Baby Mario}} | ||
|{{anchor|Baby Mario}}[[File:Baby Mario Trophy Melee.png|100px]] | |{{anchor|Baby Mario}}[[File:Baby Mario Trophy Melee.png|100px]] | ||
|- | |- | ||
|216 | |216 | ||
| Line 1,318: | Line 1,088: | ||
|{{iw|mariowiki|Baby Bowser}} | |{{iw|mariowiki|Baby Bowser}} | ||
|{{anchor|Baby Bowser}}[[File:Baby Bowser Trophy Melee.png|100px]] | |{{anchor|Baby Bowser}}[[File:Baby Bowser Trophy Melee.png|100px]] | ||
|- | |- | ||
|217 | |217 | ||
| Line 1,324: | Line 1,093: | ||
|{{iw|mariowiki|Raphael Raven}} | |{{iw|mariowiki|Raphael Raven}} | ||
|{{anchor|Raphael Raven}}[[File:Raphael Raven Trophy Melee.png|100px]] | |{{anchor|Raphael Raven}}[[File:Raphael Raven Trophy Melee.png|100px]] | ||
|- | |- | ||
|218 | |218 | ||
| Line 1,330: | Line 1,098: | ||
|[[Dixie Kong]] | |[[Dixie Kong]] | ||
|{{anchor|Dixie Kong}}[[File:Dixie Kong Trophy Melee.png|100px]] | |{{anchor|Dixie Kong}}[[File:Dixie Kong Trophy Melee.png|100px]] | ||
|- | |- | ||
|219 | |219 | ||
| Line 1,336: | Line 1,103: | ||
|[[King K. Rool]] | |[[King K. Rool]] | ||
|{{anchor|King K. Rool}}[[File:King K. Rool Trophy Melee.png|100px]] | |{{anchor|King K. Rool}}[[File:King K. Rool Trophy Melee.png|100px]] | ||
|- | |- | ||
|220 | |220 | ||
| Line 1,342: | Line 1,108: | ||
|{{iw|zeldawiki|Goron}} | |{{iw|zeldawiki|Goron}} | ||
|{{anchor|Goron}}[[File:Goron Trophy Melee.png|100px]] | |{{anchor|Goron}}[[File:Goron Trophy Melee.png|100px]] | ||
|- | |- | ||
|221 | |221 | ||
| Line 1,348: | Line 1,113: | ||
|{{iw|zeldawiki|Marin}} | |{{iw|zeldawiki|Marin}} | ||
|{{anchor|Marin}}[[File:Marin Trophy.png|100px]] | |{{anchor|Marin}}[[File:Marin Trophy.png|100px]] | ||
|- | |- | ||
|222 | |222 | ||
| Line 1,354: | Line 1,118: | ||
|[[Majora's Mask]] | |[[Majora's Mask]] | ||
|{{anchor|Majora's Mask}}[[File:Majora's Mask Trophy.png|100px]] | |{{anchor|Majora's Mask}}[[File:Majora's Mask Trophy.png|100px]] | ||
|- | |- | ||
|223 | |223 | ||
| Line 1,360: | Line 1,123: | ||
|{{iw|zeldawiki|Ocarina of Time|Item}} | |{{iw|zeldawiki|Ocarina of Time|Item}} | ||
|{{anchor|Ocarina of Time}}[[File:Ocarina of Time Trophy.png|100px]] | |{{anchor|Ocarina of Time}}[[File:Ocarina of Time Trophy.png|100px]] | ||
|- | |- | ||
|224 | |224 | ||
| Line 1,366: | Line 1,128: | ||
|[[Samurai Goroh]] | |[[Samurai Goroh]] | ||
|{{anchor|Samurai Goroh}} {{Anchor|Fire Stingray}} [[File:Samurai Goroh Trophy Melee.png|100px]] | |{{anchor|Samurai Goroh}} {{Anchor|Fire Stingray}} [[File:Samurai Goroh Trophy Melee.png|100px]] | ||
|- | |- | ||
|225 | |225 | ||
| Line 1,372: | Line 1,133: | ||
|{{iw|fzerowiki|Dr. Stewart}} | |{{iw|fzerowiki|Dr. Stewart}} | ||
|{{anchor|Dr. Stewart}} {{Anchor|Golden Fox}} [[File:Dr. Stewart Trophy Melee.png|100px]] | |{{anchor|Dr. Stewart}} {{Anchor|Golden Fox}} [[File:Dr. Stewart Trophy Melee.png|100px]] | ||
|- | |- | ||
|226 | |226 | ||
| Line 1,378: | Line 1,138: | ||
|{{iw|fzerowiki|Jody Summer}} | |{{iw|fzerowiki|Jody Summer}} | ||
|{{anchor|Jody Summer}} {{Anchor|White Cat}}[[File:Jody Summer Trophy Melee.png|100px]] | |{{anchor|Jody Summer}} {{Anchor|White Cat}}[[File:Jody Summer Trophy Melee.png|100px]] | ||
|- | |- | ||
|227 | |227 | ||
| Line 1,384: | Line 1,143: | ||
|[[Landmaster|Landmaster Tank]] | |[[Landmaster|Landmaster Tank]] | ||
|{{anchor|Landmaster Tank}}[[File:Landmaster Trophy Melee.png|100px]] | |{{anchor|Landmaster Tank}}[[File:Landmaster Trophy Melee.png|100px]] | ||
|- | |- | ||
|228 | |228 | ||
| Line 1,391: | Line 1,148: | ||
|[[Wolfen]] | |[[Wolfen]] | ||
|{{anchor|Wolfen}}[[File:Wolfen Trophy Melee.png|100px]] | |{{anchor|Wolfen}}[[File:Wolfen Trophy Melee.png|100px]] | ||
|- | |- | ||
|229 | |229 | ||
| | |92 | ||
|[[Andross]] | |[[Andross]] | ||
|{{anchor|Andross}}[[File:Andross (SNES) Trophy Melee.png|100px]] | |{{anchor|Andross}}[[File:Andross (SNES) Trophy Melee.png|100px]] | ||
|- | |- | ||
|230 | |230 | ||
| | |91 | ||
|Andross | |Andross | ||
|{{anchor|Andross 2}}[[File:Andross (N64) Trophy Melee.png|100px]] | |{{anchor|Andross 2}}[[File:Andross (N64) Trophy Melee.png|100px]] | ||
|- | |- | ||
|231 | |231 | ||
| Line 1,412: | Line 1,163: | ||
|Samus Unmasked | |Samus Unmasked | ||
|{{anchor|Samus Unmasked}}[[File:Samus Unmasked Trophy.png|100px]] | |{{anchor|Samus Unmasked}}[[File:Samus Unmasked Trophy.png|100px]] | ||
|- | |- | ||
|232 | |232 | ||
| Line 1,418: | Line 1,168: | ||
|[[Gunship|Samus's Starship]] | |[[Gunship|Samus's Starship]] | ||
|{{anchor|Samus's Starship}}[[File:Samus' Ship Trophy Melee.png|100px]] | |{{anchor|Samus's Starship}}[[File:Samus' Ship Trophy Melee.png|100px]] | ||
|- | |- | ||
|233 | |233 | ||
| Line 1,424: | Line 1,173: | ||
|{{b|Metroid|creature}} | |{{b|Metroid|creature}} | ||
|{{anchor|Metroid}}[[File:Metroid Trophy Melee.png|100px]] | |{{anchor|Metroid}}[[File:Metroid Trophy Melee.png|100px]] | ||
|- | |- | ||
|234 | |234 | ||
| Line 1,430: | Line 1,178: | ||
|[[Ridley]] | |[[Ridley]] | ||
|{{anchor|Ridley}}[[File:Ridley Trophy Melee.png|100px]] | |{{anchor|Ridley}}[[File:Ridley Trophy Melee.png|100px]] | ||
|- | |- | ||
|235 | |235 | ||
| Line 1,436: | Line 1,183: | ||
|{{iw|wikirby|Fire Kirby}} | |{{iw|wikirby|Fire Kirby}} | ||
|{{anchor|Fire Kirby}}[[File:Fire Kirby Trophy Melee.png|100px]] | |{{anchor|Fire Kirby}}[[File:Fire Kirby Trophy Melee.png|100px]] | ||
|- | |- | ||
|236 | |236 | ||
| Line 1,442: | Line 1,188: | ||
|[[wikirby:Fighter|Fighter Kirby]] | |[[wikirby:Fighter|Fighter Kirby]] | ||
|{{anchor|Fighter Kirby}}[[File:Fighter Kirby Trophy Melee.png|100px]] | |{{anchor|Fighter Kirby}}[[File:Fighter Kirby Trophy Melee.png|100px]] | ||
|- | |- | ||
|237 | |237 | ||
| Line 1,449: | Line 1,193: | ||
|[[wikirby:Ball|Ball Kirby]] | |[[wikirby:Ball|Ball Kirby]] | ||
|{{anchor|Ball Kirby}}[[File:Ball Kirby Trophy Melee.png|100px]] | |{{anchor|Ball Kirby}}[[File:Ball Kirby Trophy Melee.png|100px]] | ||
|- | |- | ||
|238 | |238 | ||
| Line 1,455: | Line 1,198: | ||
|[[Waddle Dee]] | |[[Waddle Dee]] | ||
|{{anchor|Waddle Dee}}[[File:Waddle Dee Trophy Melee.png|100px]] | |{{anchor|Waddle Dee}}[[File:Waddle Dee Trophy Melee.png|100px]] | ||
|- | |- | ||
|239 | |239 | ||
| Line 1,461: | Line 1,203: | ||
|[[King Dedede]] | |[[King Dedede]] | ||
|{{anchor|King Dedede}}[[File:King Dedede Trophy Melee.png|100px]] | |{{anchor|King Dedede}}[[File:King Dedede Trophy Melee.png|100px]] | ||
|- | |- | ||
|240 | |240 | ||
| Line 1,467: | Line 1,208: | ||
|{{iw|wikirby|Rick}} | |{{iw|wikirby|Rick}} | ||
|{{anchor|Rick}}[[File:Rick Trophy Melee.png|100px]] | |{{anchor|Rick}}[[File:Rick Trophy Melee.png|100px]] | ||
|- | |- | ||
|241 | |241 | ||
| Line 1,473: | Line 1,213: | ||
|{{iw|wikirby|Gooey}} | |{{iw|wikirby|Gooey}} | ||
|{{anchor|Gooey}}[[File:Gooey Trophy Melee.png|100px]] | |{{anchor|Gooey}}[[File:Gooey Trophy Melee.png|100px]] | ||
|- | |- | ||
|242 | |242 | ||
| Line 1,479: | Line 1,218: | ||
|[[Meta Knight|Meta-Knight]] | |[[Meta Knight|Meta-Knight]] | ||
|{{anchor|Meta-Knight}}[[File:Meta Knight Trophy Melee.png|100px]] | |{{anchor|Meta-Knight}}[[File:Meta Knight Trophy Melee.png|100px]] | ||
|- | |- | ||
|243 | |243 | ||
| Line 1,486: | Line 1,223: | ||
|[[Paula]] | |[[Paula]] | ||
|{{anchor|Paula}}[[File:Paula Trophy.png|100px]] | |{{anchor|Paula}}[[File:Paula Trophy.png|100px]] | ||
|- | |- | ||
|244 | |244 | ||
| Line 1,492: | Line 1,228: | ||
|[[Jeff]] | |[[Jeff]] | ||
|{{anchor|Jeff}}[[File:Jeff Trophy Melee.png|100px]] | |{{anchor|Jeff}}[[File:Jeff Trophy Melee.png|100px]] | ||
|- | |- | ||
|245 | |245 | ||
| Line 1,498: | Line 1,233: | ||
|[[Poo]] | |[[Poo]] | ||
|{{anchor|Poo}}[[File:Poo Trophy Melee.png|100px]] | |{{anchor|Poo}}[[File:Poo Trophy Melee.png|100px]] | ||
|- | |- | ||
|246 | |246 | ||
| Line 1,504: | Line 1,238: | ||
|{{b|Starman|EarthBound}} | |{{b|Starman|EarthBound}} | ||
|{{anchor|Starman}}[[File:Starman Trophy (Mother).png|100px]] | |{{anchor|Starman}}[[File:Starman Trophy (Mother).png|100px]] | ||
|- | |- | ||
|247 | |247 | ||
| Line 1,510: | Line 1,243: | ||
|{{pkmn|Bulbasaur}} | |{{pkmn|Bulbasaur}} | ||
|{{anchor|Bulbasaur}}[[File:Bulbasaur Trophy Melee.png|100px]] | |{{anchor|Bulbasaur}}[[File:Bulbasaur Trophy Melee.png|100px]] | ||
|- | |- | ||
|248 | |248 | ||
| Line 1,516: | Line 1,248: | ||
|{{pkmn|Poliwhirl}} | |{{pkmn|Poliwhirl}} | ||
|{{anchor|Poliwhirl}}[[File:Poliwhirl Trophy Melee.png|100px]] | |{{anchor|Poliwhirl}}[[File:Poliwhirl Trophy Melee.png|100px]] | ||
|- | |- | ||
|249 | |249 | ||
| Line 1,522: | Line 1,253: | ||
|[[Ditto]] | |[[Ditto]] | ||
|{{anchor|Ditto}}[[File:Ditto Trophy Melee.png|100px]] | |{{anchor|Ditto}}[[File:Ditto Trophy Melee.png|100px]] | ||
|- | |- | ||
|250 | |250 | ||
| Line 1,528: | Line 1,258: | ||
|[[Eevee]] | |[[Eevee]] | ||
|{{anchor|Eevee}}[[File:Eevee Trophy Melee.png|100px]] | |{{anchor|Eevee}}[[File:Eevee Trophy Melee.png|100px]] | ||
|- | |- | ||
|251 | |251 | ||
| Line 1,534: | Line 1,263: | ||
|{{pkmn|Totodile}} | |{{pkmn|Totodile}} | ||
|{{anchor|Totodile}}[[File:Totodile Trophy Melee.png|100px]] | |{{anchor|Totodile}}[[File:Totodile Trophy Melee.png|100px]] | ||
|- | |- | ||
|252 | |252 | ||
| Line 1,540: | Line 1,268: | ||
|{{pkmn|Crobat}} | |{{pkmn|Crobat}} | ||
|{{anchor|Crobat}}[[File:Crobat Trophy Melee.png|100px]] | |{{anchor|Crobat}}[[File:Crobat Trophy Melee.png|100px]] | ||
|- | |- | ||
|253 | |253 | ||
| Line 1,546: | Line 1,273: | ||
|{{pkmn|Cleffa}} | |{{pkmn|Cleffa}} | ||
|{{anchor|Cleffa}}[[File:Cleffa Trophy Melee.png|100px]] | |{{anchor|Cleffa}}[[File:Cleffa Trophy Melee.png|100px]] | ||
|- | |- | ||
|254 | |254 | ||
| Line 1,552: | Line 1,278: | ||
|{{pkmn|Igglybuff}} | |{{pkmn|Igglybuff}} | ||
|{{anchor|Igglybuff}}[[File:Igglybuff Trophy Melee.png|100px]] | |{{anchor|Igglybuff}}[[File:Igglybuff Trophy Melee.png|100px]] | ||
|- | |- | ||
|255 | |255 | ||
| Line 1,558: | Line 1,283: | ||
|{{pkmn|Steelix}} | |{{pkmn|Steelix}} | ||
|{{anchor|Steelix}}[[File:Steelix Trophy Melee.png|100px]] | |{{anchor|Steelix}}[[File:Steelix Trophy Melee.png|100px]] | ||
|- | |- | ||
|256 | |256 | ||
| Line 1,564: | Line 1,288: | ||
|{{pkmn|Heracross}} | |{{pkmn|Heracross}} | ||
|{{anchor|Heracross}}[[File:Heracross Trophy Melee.png|100px]] | |{{anchor|Heracross}}[[File:Heracross Trophy Melee.png|100px]] | ||
|- | |- | ||
|257 | |257 | ||
| Line 1,570: | Line 1,293: | ||
|[[Meowth]] | |[[Meowth]] | ||
|{{anchor|Meowth}}[[File:Meowth Trophy Melee.png|100px]] | |{{anchor|Meowth}}[[File:Meowth Trophy Melee.png|100px]] | ||
|- | |- | ||
|258 | |258 | ||
| Line 1,576: | Line 1,298: | ||
|{{iw|bulbapedia|Professor Oak}} | |{{iw|bulbapedia|Professor Oak}} | ||
|{{anchor|Professor Oak}}[[File:Professor Oak Trophy Melee.png|100px]] | |{{anchor|Professor Oak}}[[File:Professor Oak Trophy Melee.png|100px]] | ||
|- | |- | ||
|259 | |259 | ||
| Line 1,582: | Line 1,303: | ||
|{{iw|bulbapedia|Misty}} | |{{iw|bulbapedia|Misty}} | ||
|{{anchor|Misty}}[[File:Misty Trophy Melee.png|100px]] | |{{anchor|Misty}}[[File:Misty Trophy Melee.png|100px]] | ||
|- | |- | ||
|260 | |260 | ||
| Line 1,588: | Line 1,308: | ||
|{{iw|bulbapedia|ZERO-ONE}} | |{{iw|bulbapedia|ZERO-ONE}} | ||
|{{anchor|ZERO-ONE}}[[File:ZERO-ONE Trophy Melee.png|100px]] | |{{anchor|ZERO-ONE}}[[File:ZERO-ONE Trophy Melee.png|100px]] | ||
|- | |- | ||
|261 | |261 | ||
| Line 1,594: | Line 1,313: | ||
|Maruo Maruhige | |Maruo Maruhige | ||
|{{anchor|Maruo Maruhige}}[[File:Maruo Maruhige Trophy Melee.png|100px]] | |{{anchor|Maruo Maruhige}}[[File:Maruo Maruhige Trophy Melee.png|100px]] | ||
|- | |- | ||
|262 | |262 | ||
| Line 1,600: | Line 1,318: | ||
|Ryota Hayami | |Ryota Hayami | ||
|{{anchor|Ryota Hayami}}[[File:Ryota Hayami Trophy Melee.png|100px]] | |{{anchor|Ryota Hayami}}[[File:Ryota Hayami Trophy Melee.png|100px]] | ||
|- | |- | ||
|263 | |263 | ||
| Line 1,606: | Line 1,323: | ||
|Kensuke Kimachi | |Kensuke Kimachi | ||
|{{anchor|Kensuke Kimachi}}[[File:Kensuke Kimachi Trophy Melee.png|100px]] | |{{anchor|Kensuke Kimachi}}[[File:Kensuke Kimachi Trophy Melee.png|100px]] | ||
|- | |- | ||
|264 | |264 | ||
| Line 1,612: | Line 1,328: | ||
|Love Giant | |Love Giant | ||
|{{anchor|Love Giant}}[[File:Love Giant Trophy Melee.png|100px]] | |{{anchor|Love Giant}}[[File:Love Giant Trophy Melee.png|100px]] | ||
|- | |- | ||
|265 | |265 | ||
| Line 1,618: | Line 1,333: | ||
|Hate Giant | |Hate Giant | ||
|{{anchor|Hate Giant}}[[File:Hate Giant Trophy Melee.png|100px]] | |{{anchor|Hate Giant}}[[File:Hate Giant Trophy Melee.png|100px]] | ||
|- | |- | ||
|266 | |266 | ||
| Line 1,624: | Line 1,338: | ||
|Ray Mk Ⅱ | |Ray Mk Ⅱ | ||
|{{anchor|Ray Mk II}}[[File:Ray Mk II Trophy Melee.png|100px]] | |{{anchor|Ray Mk II}}[[File:Ray Mk II Trophy Melee.png|100px]] | ||
|- | |- | ||
|267 | |267 | ||
| Line 1,630: | Line 1,343: | ||
|Bayonette | |Bayonette | ||
|{{anchor|Bayonette}}[[File:Bayonette Trophy Melee.png|100px]] | |{{anchor|Bayonette}}[[File:Bayonette Trophy Melee.png|100px]] | ||
|- | |- | ||
|268 | |268 | ||
| Line 1,636: | Line 1,348: | ||
|Annie | |Annie | ||
|{{anchor|Annie}}[[File:Annie Trophy Melee.png|100px]] | |{{anchor|Annie}}[[File:Annie Trophy Melee.png|100px]] | ||
|- | |- | ||
|269 | |269 | ||
| Line 1,642: | Line 1,353: | ||
|[[Tom Nook]] | |[[Tom Nook]] | ||
|{{anchor|Tom Nook}}[[File:Tom Nook Trophy Melee.png|100px]] | |{{anchor|Tom Nook}}[[File:Tom Nook Trophy Melee.png|100px]] | ||
|- | |- | ||
|270 | |270 | ||
| Line 1,648: | Line 1,358: | ||
|[[K.K. Slider|Totakeke]] | |[[K.K. Slider|Totakeke]] | ||
|{{anchor|Totakeke}}[[File:Totakeke Trophy Melee.png|100px]] | |{{anchor|Totakeke}}[[File:Totakeke Trophy Melee.png|100px]] | ||
|- | |- | ||
|271 | |271 | ||
| Line 1,654: | Line 1,363: | ||
|[[Mr. Resetti]] | |[[Mr. Resetti]] | ||
|{{anchor|Mr. Resetti}}[[File:Mr. Resetti Trophy Melee.png|100px]] | |{{anchor|Mr. Resetti}}[[File:Mr. Resetti Trophy Melee.png|100px]] | ||
|- | |- | ||
|272 | |272 | ||
| Line 1,660: | Line 1,368: | ||
|[[Helirin|Heririn]] | |[[Helirin|Heririn]] | ||
|{{anchor|Heririn}}[[File:Heririn Trophy Melee.png|100px]] | |{{anchor|Heririn}}[[File:Heririn Trophy Melee.png|100px]] | ||
|- | |- | ||
|273 | |273 | ||
| Line 1,666: | Line 1,373: | ||
|Alpha | |Alpha | ||
|{{anchor|Alpha}}[[File:Alpha Trophy Melee.png|100px]] | |{{anchor|Alpha}}[[File:Alpha Trophy Melee.png|100px]] | ||
|- | |- | ||
|274 | |274 | ||
| Line 1,672: | Line 1,378: | ||
|[[mariowiki:Poltergust 3000|Vacuum Luigi]] | |[[mariowiki:Poltergust 3000|Vacuum Luigi]] | ||
|{{anchor|Vacuum Luigi}}[[File:Vacuum Luigi Trophy Melee.png|100px]] | |{{anchor|Vacuum Luigi}}[[File:Vacuum Luigi Trophy Melee.png|100px]] | ||
|- | |- | ||
|275 | |275 | ||
| Line 1,678: | Line 1,383: | ||
|{{b|Pikmin|species}} | |{{b|Pikmin|species}} | ||
|{{anchor|Pikmin}}[[File:Pikmin Trophy Melee.png|100px]] | |{{anchor|Pikmin}}[[File:Pikmin Trophy Melee.png|100px]] | ||
|- | |- | ||
|276 | |276 | ||
| Line 1,684: | Line 1,388: | ||
|[[Captain Olimar]] | |[[Captain Olimar]] | ||
|{{anchor|Captain Olimar}}[[File:Olimar Trophy Melee.png|100px]] | |{{anchor|Captain Olimar}}[[File:Olimar Trophy Melee.png|100px]] | ||
|- | |- | ||
|277 | |277 | ||
| Line 1,690: | Line 1,393: | ||
|[[Excitebike]] | |[[Excitebike]] | ||
|{{anchor|Excitebike}}[[File:Excite Bike Trophy Melee.png|100px]] | |{{anchor|Excitebike}}[[File:Excite Bike Trophy Melee.png|100px]] | ||
|- | |- | ||
|278 | |278 | ||
| Line 1,696: | Line 1,398: | ||
|Tamagon | |Tamagon | ||
|{{anchor|Tamagon}}[[File:Tamagon Trophy Melee.png|100px]] | |{{anchor|Tamagon}}[[File:Tamagon Trophy Melee.png|100px]] | ||
|- | |- | ||
|279 | |279 | ||
| Line 1,702: | Line 1,403: | ||
|{{iw|mariowiki|Donkey Kong Junior}} | |{{iw|mariowiki|Donkey Kong Junior}} | ||
|{{anchor|Donkey Kong Jr.}}[[File:Donkey Kong Jr. Trophy.png|100px]] | |{{anchor|Donkey Kong Jr.}}[[File:Donkey Kong Jr. Trophy.png|100px]] | ||
|- | |- | ||
|280 | |280 | ||
| Line 1,708: | Line 1,408: | ||
|[[Duck Hunt|Ducks]] | |[[Duck Hunt|Ducks]] | ||
|{{anchor|Ducks}}[[File:Ducks Trophy Melee.png|100px]] | |{{anchor|Ducks}}[[File:Ducks Trophy Melee.png|100px]] | ||
|- | |- | ||
|281 | |281 | ||
| Line 1,714: | Line 1,413: | ||
|Bubbles | |Bubbles | ||
|{{anchor|Bubbles}}[[File:Bubbles Trophy Melee.png|100px]] | |{{anchor|Bubbles}}[[File:Bubbles Trophy Melee.png|100px]] | ||
|- | |- | ||
|282 | |282 | ||
| Line 1,720: | Line 1,418: | ||
|{{iw|mariowiki|Eggplant Man}} | |{{iw|mariowiki|Eggplant Man}} | ||
|{{anchor|Eggplant Man}}[[File:Eggplant Man Trophy Melee.png|100px]] | |{{anchor|Eggplant Man}}[[File:Eggplant Man Trophy Melee.png|100px]] | ||
|- | |- | ||
|283 | |283 | ||
| Line 1,726: | Line 1,423: | ||
|Mach Rider | |Mach Rider | ||
|{{anchor|Mach Rider}}[[File:Mach Rider Trophy Melee.png|100px]] | |{{anchor|Mach Rider}}[[File:Mach Rider Trophy Melee.png|100px]] | ||
|- | |- | ||
|284 | |284 | ||
| Line 1,732: | Line 1,428: | ||
|Balloon Fighter | |Balloon Fighter | ||
|{{anchor|Balloon Fighter}}[[File:Balloon Fighter Trophy Melee.png|100px]] | |{{anchor|Balloon Fighter}}[[File:Balloon Fighter Trophy Melee.png|100px]] | ||
|- | |- | ||
|285 | |285 | ||
| Line 1,738: | Line 1,433: | ||
|{{iw|mariowiki|Stanley}} | |{{iw|mariowiki|Stanley}} | ||
|{{anchor|Stanley}}[[File:Stanley Trophy Melee.png|100px]] | |{{anchor|Stanley}}[[File:Stanley Trophy Melee.png|100px]] | ||
|- | |- | ||
|286 | |286 | ||
| Line 1,744: | Line 1,438: | ||
|[[Pit]] | |[[Pit]] | ||
|{{anchor|Pit}}[[File:Pit Trophy Melee.png|100px]] | |{{anchor|Pit}}[[File:Pit Trophy Melee.png|100px]] | ||
|- | |- | ||
|287 | |287 | ||
| Line 1,750: | Line 1,443: | ||
|[[Dr. Wright]] | |[[Dr. Wright]] | ||
|{{anchor|Dr. Wright}}[[File:Dr. Wright Trophy Melee.png|100px]] | |{{anchor|Dr. Wright}}[[File:Dr. Wright Trophy Melee.png|100px]] | ||
|- | |- | ||
|288 | |288 | ||
| Line 1,756: | Line 1,448: | ||
|Donbe & Hikari | |Donbe & Hikari | ||
|{{anchor|Donbe & Hikari}}[[File:Donbe & Hikari Trophy Melee.png|100px]] | |{{anchor|Donbe & Hikari}}[[File:Donbe & Hikari Trophy Melee.png|100px]] | ||
|- | |- | ||
|289 | |289 | ||
| Line 1,762: | Line 1,453: | ||
|Ayumi Tachibana | |Ayumi Tachibana | ||
|{{anchor|Ayumi Tachibana}}[[File:Ayumi Tachibana Trophy Melee.png|100px]] | |{{anchor|Ayumi Tachibana}}[[File:Ayumi Tachibana Trophy Melee.png|100px]] | ||
|- | |- | ||
|290 | |290 | ||
| Line 1,768: | Line 1,458: | ||
|{{iw|mariowiki|Monster|monster truck}} | |{{iw|mariowiki|Monster|monster truck}} | ||
|{{anchor|Monster}}[[File:Monster Trophy Melee.png|100px]] | |{{anchor|Monster}}[[File:Monster Trophy Melee.png|100px]] | ||
|- | |- | ||
|291 | |291 | ||
| Line 1,774: | Line 1,463: | ||
|[[Sheriff]] | |[[Sheriff]] | ||
|{{anchor|Sheriff}}[[File:Sheriff Trophy Melee.png|100px]] | |{{anchor|Sheriff}}[[File:Sheriff Trophy Melee.png|100px]] | ||
|- | |- | ||
|292 | |292 | ||
| Line 1,780: | Line 1,468: | ||
|Diskun | |Diskun | ||
|{{anchor|Diskun}}[[File:Diskun Trophy Melee.png|100px]] | |{{anchor|Diskun}}[[File:Diskun Trophy Melee.png|100px]] | ||
|- | |- | ||
|293 | |293 | ||
| Line 1,786: | Line 1,473: | ||
|[[GCN]] | |[[GCN]] | ||
|{{anchor|Nintendo GameCube}}[[File:Gamecube Trophy Melee.png|100px]] | |{{anchor|Nintendo GameCube}}[[File:Gamecube Trophy Melee.png|100px]] | ||
|} | |} | ||
Latest revision as of 15:09, December 3, 2024
The following is a list of all 293 trophies that appear in Super Smash Bros. Melee. Players are able to sort trophies through the normal order, game order, or alphabetically. The Mario & Yoshi and Samus Unmasked trophies were only distributed through certain events in Japan and cannot be obtained without use of a hacking device, while the Tamagon trophy can only be obtained in Japanese releases despite all three having English trophy descriptions. As such, the player only needs to obtain the other 290 trophies for the game to acknowledge them for collecting all of the trophies (and Tamagon in Japanese releases).
| Normal Order # | Game Order # | Name | Image |
|---|---|---|---|
| 1 | 1 | Mario | 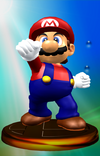
|
| 2 | 221 | Mario SMASH | 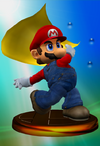
|
| 3 | 222 | Mario SMASH | 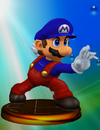
|
| 4 | 48 | Donkey Kong | 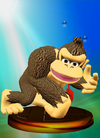
|
| 5 | 225 | Donkey Kong SMASH | 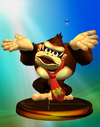
|
| 6 | 226 | Donkey Kong SMASH | 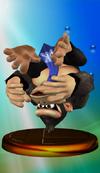
|
| 7 | 56 | Link | 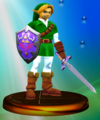
|
| 8 | 227 | Link SMASH | 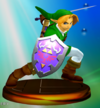
|
| 9 | 228 | Link SMASH | 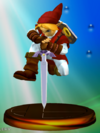
|
| 10 | 93 | Samus Aran | 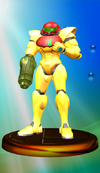
|
| 11 | 233 | Samus Aran SMASH | 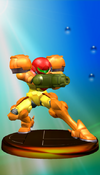
|
| 12 | 234 | Samus Aran SMASH | 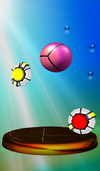
|
| 13 | 42 | Yoshi | 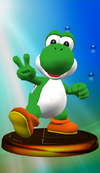
|
| 14 | 223 | Yoshi SMASH | 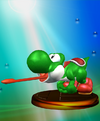
|
| 15 | 224 | Yoshi SMASH | 
|
| 16 | 101 | Kirby | 
|
| 17 | 235 | Kirby SMASH | 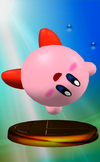
|
| 18 | 236 | Kirby SMASH | 
|
| 19 | 83 | Fox McCloud | 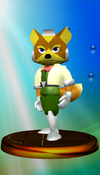
|
| 20 | 231 | Fox McCloud SMASH | 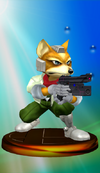
|
| 21 | 232 | Fox McCloud SMASH | 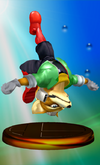
|
| 22 | 135 | Pikachu | 
|
| 23 | 239 | Pikachu SMASH | 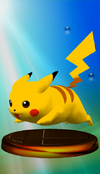
|
| 24 | 240 | Pikachu SMASH | 
|
| 25 | 121 | Ness | 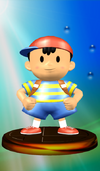
|
| 26 | 237 | Ness SMASH | 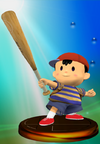
|
| 27 | 238 | Ness SMASH | 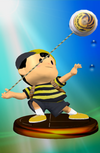
|
| 28 | 76 | Capt. Falcon | 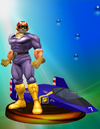
|
| 29 | 229 | Capt. Falcon SMASH | 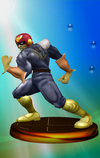
|
| 30 | 230 | Capt. Falcon SMASH | 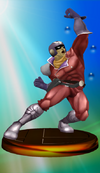
|
| 31 | 10 | Bowser | 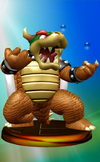
|
| 32 | 245 | Bowser SMASH | 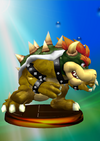
|
| 33 | 246 | Bowser SMASH | 
|
| 34 | 7 | Peach | 
|
| 35 | 247 | Peach SMASH | 
|
| 36 | 248 | Peach SMASH | 
|
| 37 | 181 | Ice Climbers | 
|
| 38 | 257 | Ice Climbers SMASH | 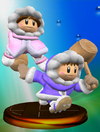
|
| 39 | 258 | Ice Climbers SMASH | 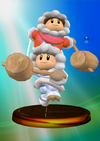
|
| 40 | 58 | Zelda | 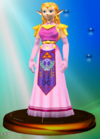
|
| 41 | 249 | Zelda SMASH | 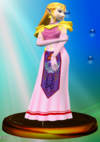
|
| 42 | 250 | Zelda SMASH | 
|
| 43 | 59 | Sheik | 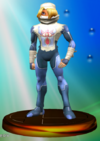
|
| 44 | 251 | Sheik SMASH | 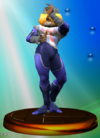
|
| 45 | 252 | Sheik SMASH | 
|
| 46 | 8 | Luigi | 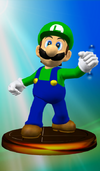
|
| 47 | 243 | Luigi SMASH | 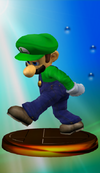
|
| 48 | 244 | Luigi SMASH | 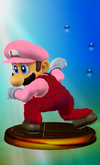
|
| 49 | 137 | Jigglypuff | 
|
| 50 | 241 | Jigglypuff SMASH | 
|
| 51 | 242 | Jigglypuff SMASH | 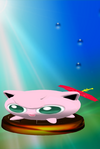
|
| 52 | 150 | Mewtwo | 
|
| 53 | 255 | Mewtwo SMASH | 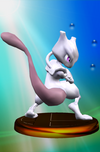
|
| 54 | 256 | Mewtwo SMASH | 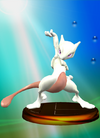
|
| 55 | 128 | Marth | 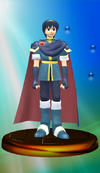
|
| 56 | 253 | Marth SMASH | 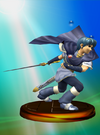
|
| 57 | 254 | Marth SMASH | 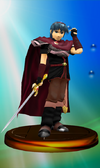
|
| 58 | 217 | Mr. Game & Watch | 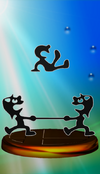
|
| 59 | 259 | Mr. Game & Watch SMASH | 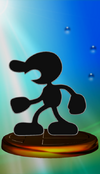
|
| 60 | 260 | Mr. Game & Watch SMASH | 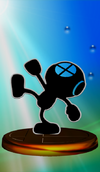
|
| 61 | 2 | Dr. Mario | 
|
| 62 | 261 | Dr. Mario SMASH | 
|
| 63 | 262 | Dr. Mario SMASH | 
|
| 64 | 63 | Ganondorf | 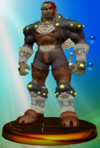
|
| 65 | 271 | Ganondorf SMASH | 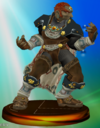
|
| 66 | 272 | Ganondorf SMASH | 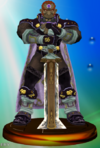
|
| 67 | 84 | Falco Lombardi | 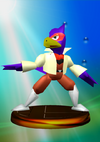
|
| 68 | 265 | Falco Lombardi SMASH | 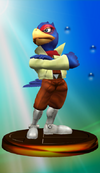
|
| 69 | 266 | Falco Lombardi SMASH | 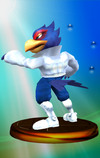
|
| 70 | 57 | Young Link | 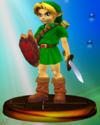
|
| 71 | 263 | Young Link SMASH | 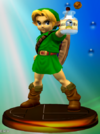
|
| 72 | 264 | Young Link SMASH | 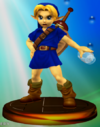
|
| 73 | 156 | Pichu | 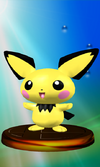
|
| 74 | 267 | Pichu SMASH | 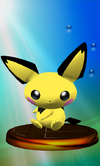
|
| 75 | 268 | Pichu SMASH | 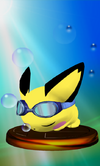
|
| 76 | 129 | Roy | 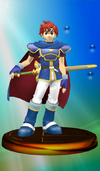
|
| 77 | 269 | Roy SMASH | 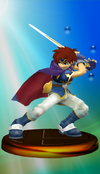
|
| 78 | 270 | Roy SMASH | 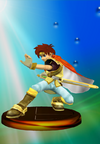
|
| 79 | 288 | Male Wire Frame | 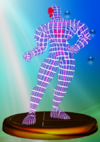
|
| 80 | 289 | Female Wire Frame | 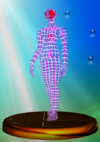
|
| 81 | 290 | Fighting Wire Frames | 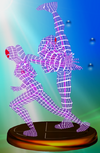
|
| 82 | 291 | Giga Bowser | 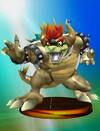
|
| 83 | 292 | Master Hand | 
|
| 84 | 293 | Crazy Hand | 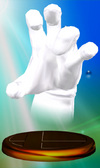
|
| 85 | 279 | Food | 
|
| 86 | 116 | Maxim Tomato | 
|
| 87 | 67 | Heart Container | 
|
| 88 | 118 | Warp Star | 
|
| 89 | 283 | Ray Gun | 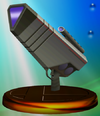
|
| 90 | 219 | Super Scope | 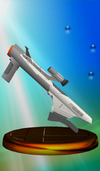
|
| 91 | 30 | Fire Flower | 
|
| 92 | 211 | Lip's Stick | 
|
| 93 | 117 | Star Rod | 
|
| 94 | 274 | Beam Sword | 
|
| 95 | 281 | Home-Run Bat | 
|
| 96 | 280 | Fan | 
|
| 97 | 55 | Hammer | 
|
| 98 | 36 | Green Shell | 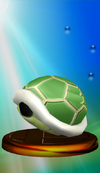
|
| 99 | 37 | Red Shell | 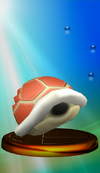
|
| 100 | 206 | Flipper | 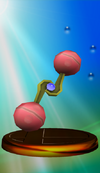
|
| 101 | 35 | Freezie | 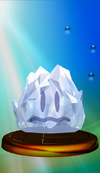
|
| 102 | 125 | Mr. Saturn | 
|
| 103 | 16 | Bob-omb | 
|
| 104 | 194 | Proximity Mine Motion-Sensor Bomb |
|
| 105 | 28 | Super Mushroom | 
|
| 106 | 29 | Poison Mushroom | 
|
| 107 | 33 | Starman | 
|
| 108 | 119 | Parasol | 
|
| 109 | 100 | Screw Attack | 
|
| 110 | 32 | Metal Box | 
|
| 111 | 70 | Bunny Hood | 
|
| 112 | 195 | Cloaking Device | 
|
| 113 | 54 | Barrel Cannon | 
|
| 114 | 282 | Party Ball | 
|
| 115 | 275 | Crate | 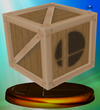
|
| 116 | 273 | Barrel | 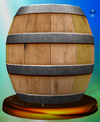
|
| 117 | 276 | Capsule | 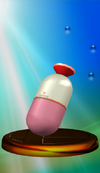
|
| 118 | 278 | Egg | 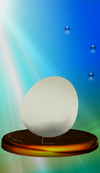
|
| 119 | 277 | Smash Coins | 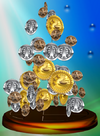
|
| 120 | 178 | Poké Ball | 
|
| 121 | 131 | Venusaur | 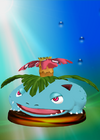
|
| 122 | 132 | Charizard | 
|
| 123 | 133 | Squirtle | 
|
| 124 | 134 | Blastoise | 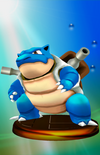
|
| 125 | 136 | Clefairy | 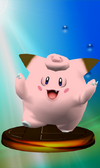
|
| 126 | 139 | Electrode | 
|
| 127 | 140 | Weezing | 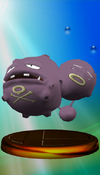
|
| 128 | 141 | Chansey | 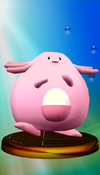
|
| 129 | 142 | Goldeen | 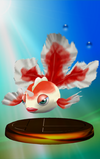
|
| 130 | 143 | Staryu | 
|
| 131 | 146 | Snorlax | 
|
| 132 | 147 | Articuno | 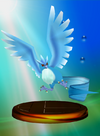
|
| 133 | 148 | Zapdos | 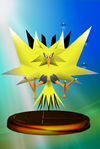
|
| 134 | 149 | Moltres | 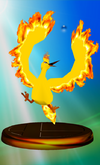
|
| 135 | 151 | Mew | 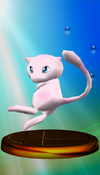
|
| 136 | 152 | Chikorita | 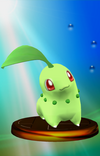
|
| 137 | 153 | Cyndaquil | 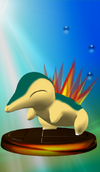
|
| 138 | 159 | Togepi | 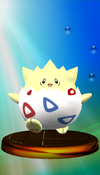
|
| 139 | 160 | Bellossom | 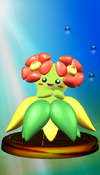
|
| 140 | 161 | Marill | 
|
| 141 | 162 | Sudowoodo | 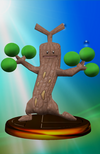
|
| 142 | 163 | Unown | 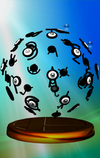
|
| 143 | 164 | Wobbuffet | 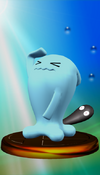
|
| 144 | 166 | Scizor | 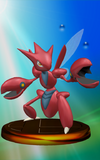
|
| 145 | 168 | Porygon2 | 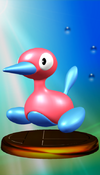
|
| 146 | 169 | Raikou | 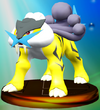
|
| 147 | 170 | Entei | 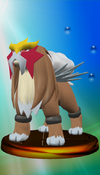
|
| 148 | 171 | Suicune | 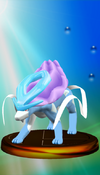
|
| 149 | 172 | Lugia | 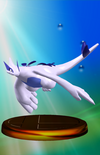
|
| 150 | 173 | Ho-oh | 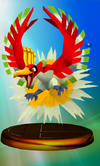
|
| 151 | 174 | Celebi | 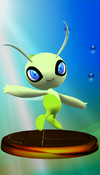
|
| 152 | 11 | Toad | 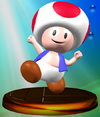
|
| 153 | 31 | Coin | 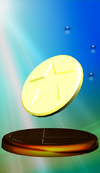
|
| 154 | 38 | Vegetable | 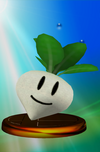
|
| 155 | 40 | Megavitamins | 
|
| 156 | 69 | Lon Lon Milk | 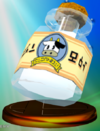
|
| 157 | 105 | Kirby Hat 1 | 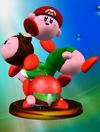 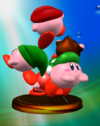
|
| 158 | 106 | Kirby Hat 2 | 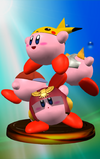 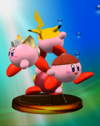
|
| 159 | 107 | Kirby Hat 3 | 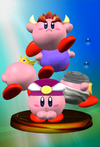 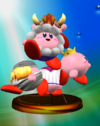
|
| 160 | 108 | Kirby Hat 4 | 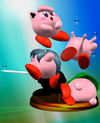 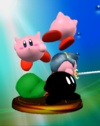
|
| 161 | 109 | Kirby Hat 5 | 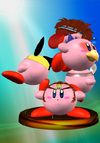 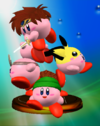
|
| 162 | 41 | Princess Peach's Castle | 
|
| 163 | 19 | Banzai Bill | 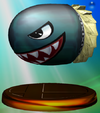
|
| 164 | 18 | Lakitu | 
|
| 165 | 27 | Pidgit | 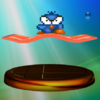
|
| 166 | 26 | Birdo | 
|
| 167 | 53 | Klap Trap | 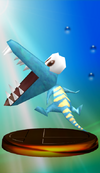
|
| 168 | 45 | Shy Guys | 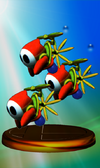
|
| 169 | 47 | Pak E. Derm | 
|
| 170 | 62 | Tingle | 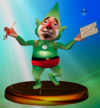
|
| 171 | 74 | Moon | 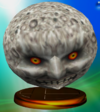
|
| 172 | 73 | Turtle | 
|
| 173 | 75 | Four Giants | 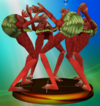
|
| 174 | 68 | Master Sword | 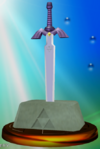
|
| 175 | 77 | Falcon Flyer | 
|
| 176 | 78 | F-Zero Racers | 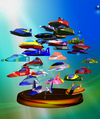
|
| 177 | 82 | Mute City | 
|
| 178 | 87 | Arwing | 
|
| 179 | 88 | Great Fox | 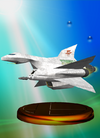
|
| 180 | 85 | Peppy Hare | 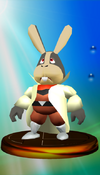
|
| 181 | 86 | Slippy Toad | 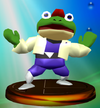
|
| 182 | 96 | Kraid | 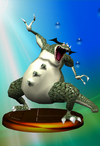
|
| 183 | 99 | Chozo Statue | 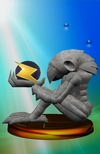
|
| 184 | 115 | Whispy Woods | 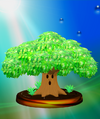
|
| 185 | 120 | Fountain of Dreams | 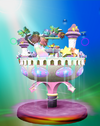
|
| 186 | 127 | UFO | 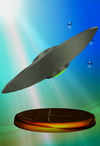
|
| 187 | 180 | Pokémon Stadium | 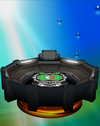
|
| 188 | 218 | Game & Watch | 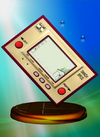
|
| 189 | 285 | Target | 
|
| 190 | 284 | Sandbag | 
|
| 191 | 286 | Battlefield | 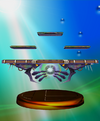
|
| 192 | 287 | Final Destination | 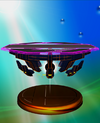
|
| 193 | 20 | Goomba | 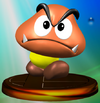
|
| 194 | 21 | Koopa Troopa | 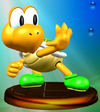
|
| 195 | 22 | Koopa Paratroopa | 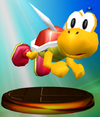
|
| 196 | 64 | ReDead | 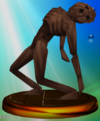
|
| 197 | 66 | Octorok | 
|
| 198 | 65 | Like Like | 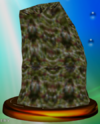
|
| 199 | 182 | Topi | 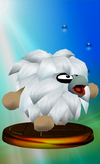 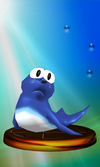
|
| 200 | 183 | Polar Bear | 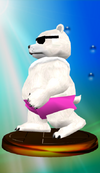
|
| 201 | 4 | Raccoon Mario | 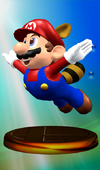
|
| 202 | 3 | Mario & Yoshi | 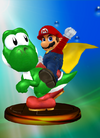
|
| 203 | 5 | Metal Mario | 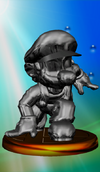
|
| 204 | 6 | Paper Mario | 
|
| 205 | 12 | Wario | 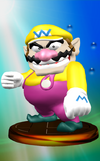
|
| 206 | 14 | Plum | 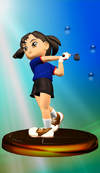
|
| 207 | 13 | Daisy | 
|
| 208 | 15 | Waluigi | 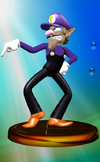
|
| 209 | 17 | Thwomp | 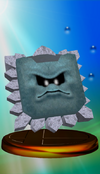
|
| 210 | 23 | Boo | 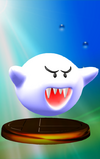
|
| 211 | 24 | Koopa Clown Car | 
|
| 212 | 25 | Viruses | 
|
| 213 | 34 | Bucket | 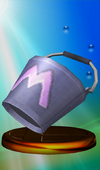
|
| 214 | 39 | Racing Kart | 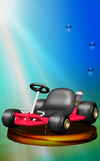
|
| 215 | 44 | Baby Mario | 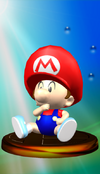
|
| 216 | 43 | Baby Bowser | 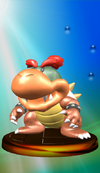
|
| 217 | 46 | Raphael Raven | 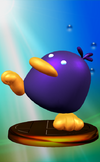
|
| 218 | 51 | Dixie Kong | 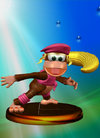
|
| 219 | 52 | King K. Rool | 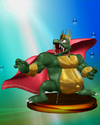
|
| 220 | 60 | Goron | 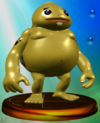
|
| 221 | 61 | Marin | 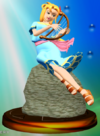
|
| 222 | 72 | Majora's Mask | 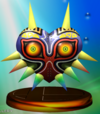
|
| 223 | 71 | Ocarina of Time | 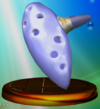
|
| 224 | 79 | Samurai Goroh | 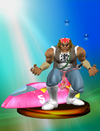
|
| 225 | 80 | Dr. Stewart | 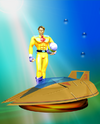
|
| 226 | 81 | Jody Summer | 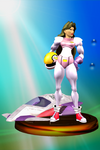
|
| 227 | 89 | Landmaster Tank | 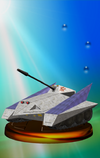
|
| 228 | 90 | Wolfen | 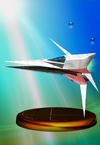
|
| 229 | 92 | Andross | 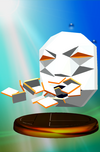
|
| 230 | 91 | Andross | 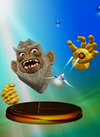
|
| 231 | 94 | Samus Unmasked | 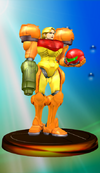
|
| 232 | 95 | Samus's Starship | 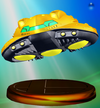
|
| 233 | 97 | Metroid | 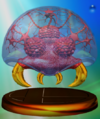
|
| 234 | 98 | Ridley | 
|
| 235 | 104 | Fire Kirby | 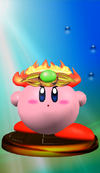
|
| 236 | 103 | Fighter Kirby | 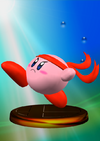
|
| 237 | 102 | Ball Kirby | 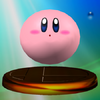
|
| 238 | 111 | Waddle Dee | 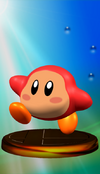
|
| 239 | 110 | King Dedede | 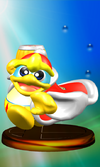
|
| 240 | 113 | Rick | 
|
| 241 | 112 | Gooey | 
|
| 242 | 114 | Meta-Knight | 
|
| 243 | 122 | Paula | 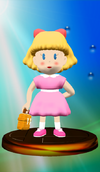
|
| 244 | 123 | Jeff | 
|
| 245 | 124 | Poo | 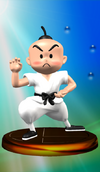
|
| 246 | 126 | Starman | 
|
| 247 | 130 | Bulbasaur | 
|
| 248 | 138 | Poliwhirl | 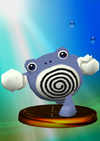
|
| 249 | 144 | Ditto | 
|
| 250 | 145 | Eevee | 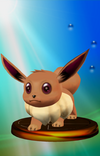
|
| 251 | 154 | Totodile | 
|
| 252 | 155 | Crobat | 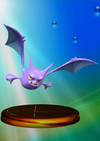
|
| 253 | 157 | Cleffa | 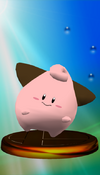
|
| 254 | 158 | Igglybuff | 
|
| 255 | 165 | Steelix | 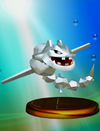
|
| 256 | 167 | Heracross | 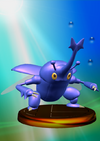
|
| 257 | 175 | Meowth | 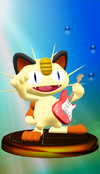
|
| 258 | 176 | Professor Oak | 
|
| 259 | 177 | Misty | 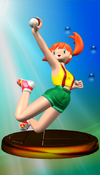
|
| 260 | 179 | ZERO-ONE | 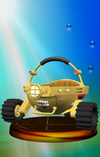
|
| 261 | 200 | Maruo Maruhige | 
|
| 262 | 184 | Ryota Hayami | 
|
| 263 | 185 | Kensuke Kimachi | 
|
| 264 | 186 | Love Giant | 
|
| 265 | 187 | Hate Giant | 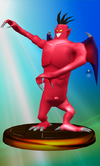
|
| 266 | 188 | Ray Mk Ⅱ | 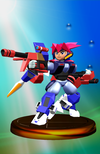
|
| 267 | 189 | Bayonette | 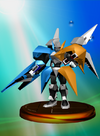
|
| 268 | 190 | Annie | 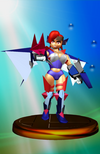
|
| 269 | 192 | Tom Nook | 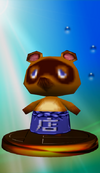
|
| 270 | 193 | Totakeke | 
|
| 271 | 191 | Mr. Resetti | 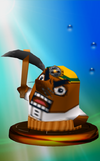
|
| 272 | 196 | Heririn | 
|
| 273 | 199 | Alpha | 
|
| 274 | 9 | Vacuum Luigi | 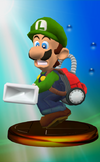
|
| 275 | 198 | Pikmin | 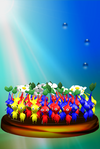
|
| 276 | 197 | Captain Olimar | 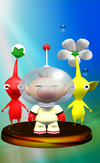
|
| 277 | 209 | Excitebike | 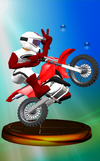
|
| 278 | 210 | Tamagon | 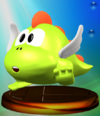
|
| 279 | 49 | Donkey Kong Junior | 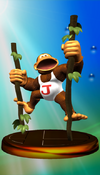
|
| 280 | 202 | Ducks | 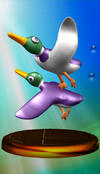
|
| 281 | 201 | Bubbles | 
|
| 282 | 204 | Eggplant Man | 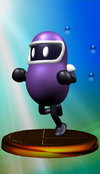
|
| 283 | 203 | Mach Rider | 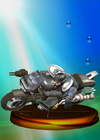
|
| 284 | 205 | Balloon Fighter | 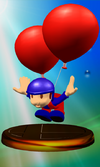
|
| 285 | 50 | Stanley | 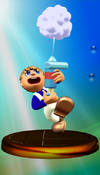
|
| 286 | 207 | Pit | 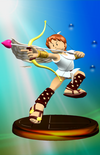
|
| 287 | 208 | Dr. Wright | 
|
| 288 | 214 | Donbe & Hikari | 
|
| 289 | 213 | Ayumi Tachibana | 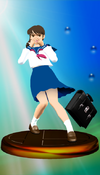
|
| 290 | 212 | Monster | 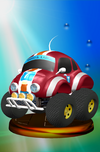
|
| 291 | 215 | Sheriff | 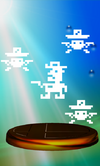
|
| 292 | 216 | Diskun | 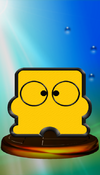
|
| 293 | 220 | GCN | 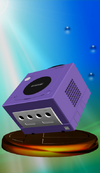
|