Bowser (SSBU)/Down special: Difference between revisions
m (→Grounded: Added hitstun table.) |
|||
| (5 intermediate revisions by 3 users not shown) | |||
| Line 1: | Line 1: | ||
{{ArticleIcons|ssbu=y}} | {{ArticleIcons|ssbu=y}} | ||
{{disambig2|the hitbox visualization in ''Super Smash Bros. Ultimate''|the move itself|Bowser Bomb}} | |||
{{competitive expertise}} | {{competitive expertise}} | ||
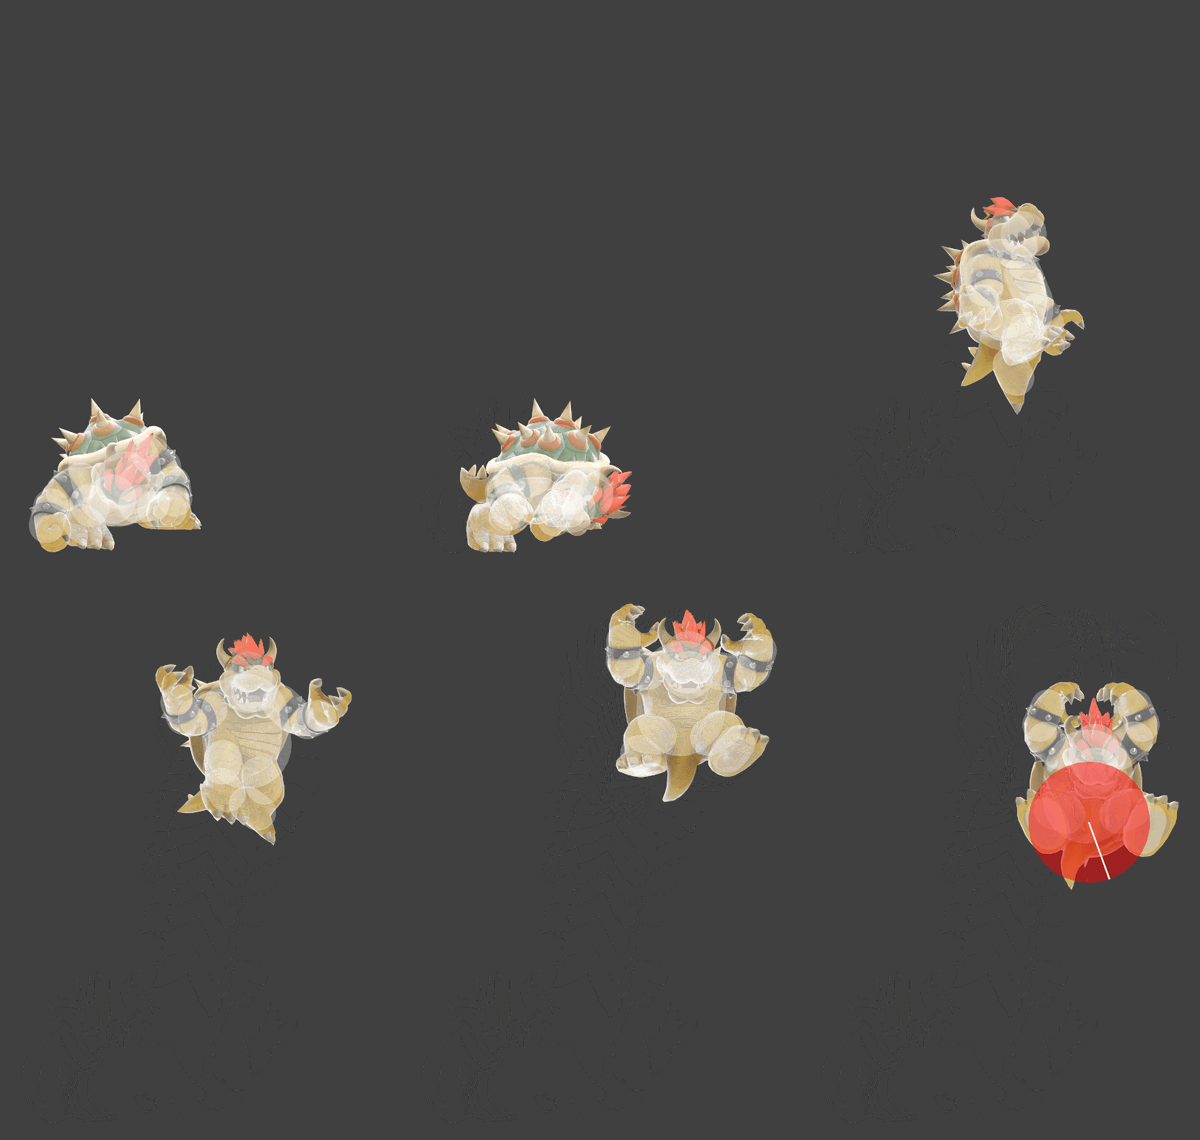
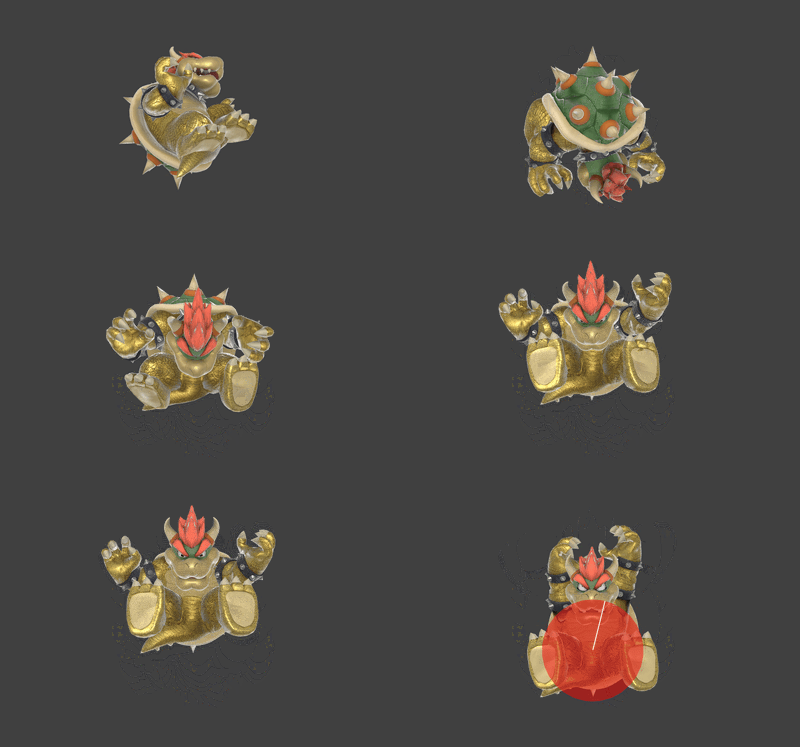
[[File:BowserBowserBombGroundedSSBU.gif|thumb|400px|Hitbox visualization showing Bowser's grounded down special, Bowser Bomb]] | [[File:BowserBowserBombGroundedSSBU.gif|thumb|400px|Hitbox visualization showing Bowser's grounded down special, Bowser Bomb]] | ||
| Line 5: | Line 7: | ||
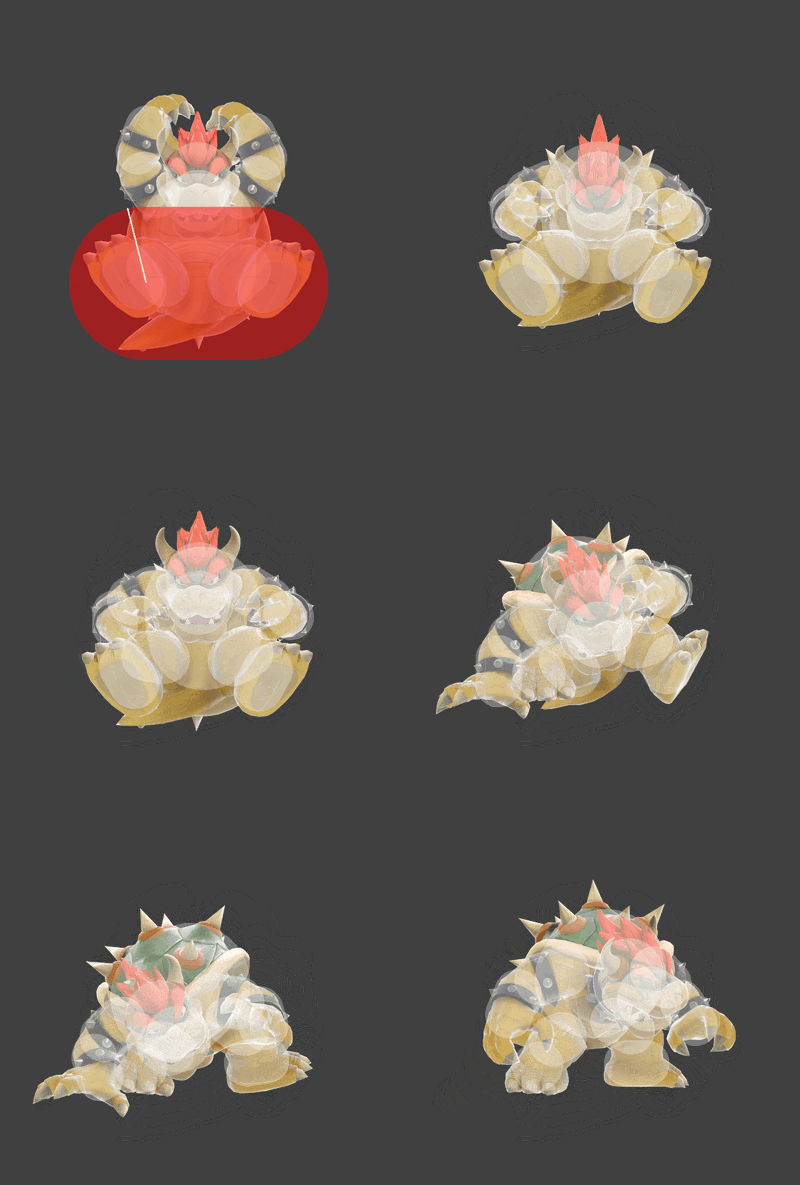
[[File:BowserBowserBombLandingSSBU.gif|thumb|400px|Hitbox visualization showing Bowser's down special landing, Bowser Bomb]] | [[File:BowserBowserBombLandingSSBU.gif|thumb|400px|Hitbox visualization showing Bowser's down special landing, Bowser Bomb]] | ||
==Overview== | ==Overview== | ||
Bowser headbutts opponents with his horns before preforming his ground pound attack from ''Super Mario Bros. 3''. The first notable quality of Bowser Bomb is its tremendous [[shield]] damage, breaking even full shields if both ground hits connect. This can be effective at any precent, as Bowser can KO at 0% on a shield break thanks to his tipper [[Bowser (SSBU)/Neutral special|Flame Breath]] and strong [[Bowser (SSBU)/Forward smash|Forward Smash]]. Additionally, the move can be used to snap to ledge, regardless if Bowser is facing the ledge while making the move difficult to challenge due to its strong hitbox. | |||
However, despite these great traits, Bowser Bomb has sluggish startup in the air, making it difficult to set up shield breaks with due to the aerial version being reactable and susceptible to [[Perfect shield|Perfect shielding]]. Additionally, using the move to KO is generally not a good idea, as Bowser has no shortage of powerful KO options such as [[Bowser (SSBU)/Back aerial|Back aerial]] and [[Bowser (SSBU)/Forward tilt|Forward tilt]]. Additionally, the scooping hitbox only lasts for a single frame, meaning that the scoop hitbox can be whiffed easily, with the move being very unsafe due to its sizable ending lag. While the move does have a [[Meteor smash]] hitbox when Bowser starts falling, it is outclassed in setting up edgeguards and [[Sacrificial KO|kamikazes]] due to [[Bowser (SSBU)/Down aerial|Down aerial]] being faster and having a longer meteor window. | |||
As a result, Bowser Bomb is seldom used in competitive play due to it's sluggish startup in the air making it hard to shieldbreak with. The main use for the move is as a ledge grab option, which is a rather shallow niche. | |||
==Hitboxes== | ==Hitboxes== | ||
===Grounded=== | ===Grounded=== | ||
{{UltimateHitboxTableHeader}} | {{UltimateHitboxTableHeader}} | ||
! Hitstun | ! Hitstun | ||
{{HitboxTableTitle|Start| | {{HitboxTableTitle|Start|42}} | ||
{{UltimateHitboxTableRow | {{UltimateHitboxTableRow | ||
|id=0 | |id=0 | ||
| Line 17: | Line 25: | ||
|ks=100 | |ks=100 | ||
|fkv=60 | |fkv=60 | ||
|setweight=t | |||
|r=4.0 | |r=4.0 | ||
|bn=top | |bn=top | ||
|ypos=1.0 to 9.0 | |ypos=1.0 to 9.0 | ||
|zpos=17.0 | |zpos=17.0 | ||
|sdi=0.5 | |sdi=0.5 | ||
|type=Body | |type=Body | ||
|sfx=Kick | |sfx=Kick | ||
|slvl=M | |slvl=M | ||
| Line 39: | Line 45: | ||
|ks=100 | |ks=100 | ||
|fkv=60 | |fkv=60 | ||
|setweight=t | |||
|r=2.0 | |r=2.0 | ||
|bn=top | |bn=top | ||
|ypos=0.5 to 9.5 | |ypos=0.5 to 9.5 | ||
|zpos=22.5 | |zpos=22.5 | ||
|sdi=0.5 | |sdi=0.5 | ||
|type=Body | |type=Body | ||
|sfx=Kick | |sfx=Kick | ||
|slvl=M | |slvl=M | ||
| Line 61: | Line 65: | ||
|ks=100 | |ks=100 | ||
|fkv=60 | |fkv=60 | ||
|setweight=t | |||
|r=4.0 | |r=4.0 | ||
|bn=top | |bn=top | ||
|ypos=2.5 to 7.5 | |ypos=2.5 to 7.5 | ||
|zpos=13.0 | |zpos=13.0 | ||
|sdi=0.5 | |sdi=0.5 | ||
|type=Body | |type=Body | ||
|sfx=Kick | |sfx=Kick | ||
|slvl=M | |slvl=M | ||
| Line 76: | Line 78: | ||
}} | }} | ||
|'''+8''' frames | |'''+8''' frames | ||
{{HitboxTableTitle|Fall| | {{HitboxTableTitle|Fall|42}} | ||
{{UltimateHitboxTableRow | {{UltimateHitboxTableRow | ||
|id=0 | |id=0 | ||
|damage=20.0% | |damage=20.0% | ||
|angle=290 | |angle=290 | ||
|af=3 | |||
|bk=13 | |bk=13 | ||
|ks=65 | |ks=65 | ||
|fkv=0 | |fkv=0 | ||
|setweight=t | |||
|r=8.3 | |r=8.3 | ||
|bn=top | |bn=top | ||
|ypos=5.2 | |ypos=5.2 | ||
|sd=5 | |sd=5 | ||
|sdi=0.5 | |sdi=0.5 | ||
|type=Body | |type=Body | ||
|sfx=Kick | |sfx=Kick | ||
|slvl=L | |slvl=L | ||
| Line 102: | Line 102: | ||
===Aerial=== | ===Aerial=== | ||
{{UltimateHitboxTableHeader}} | {{UltimateHitboxTableHeader}} | ||
{{HitboxTableTitle|Clean| | {{HitboxTableTitle|Clean|42}} | ||
{{UltimateHitboxTableRow | {{UltimateHitboxTableRow | ||
|id=0 | |id=0 | ||
| Line 115: | Line 115: | ||
|ypos=5.2 | |ypos=5.2 | ||
|zpos=0.0 | |zpos=0.0 | ||
|sd=5 | |sd=5 | ||
|type=Body | |type=Body | ||
|sfx=Kick | |sfx=Kick | ||
|slvl=L | |slvl=L | ||
}} | }} | ||
{{HitboxTableTitle|Late| | {{HitboxTableTitle|Late|42}} | ||
{{UltimateHitboxTableRow | {{UltimateHitboxTableRow | ||
|id=0 | |id=0 | ||
|damage=20.0% | |damage=20.0% | ||
|angle=76 | |angle=76 | ||
|af=3 | |||
|bk=45 | |bk=45 | ||
|ks=75 | |ks=75 | ||
| Line 132: | Line 131: | ||
|r=8.3 | |r=8.3 | ||
|bn=top | |bn=top | ||
|ypos=5.2 | |ypos=5.2 | ||
|sd=5 | |sd=5 | ||
|type=Body | |type=Body | ||
|sfx=Kick | |sfx=Kick | ||
|slvl=L | |slvl=L | ||
| Line 151: | Line 146: | ||
|bk=60 | |bk=60 | ||
|ks=72 | |ks=72 | ||
|fkv= | |fkv=0 | ||
|r=8.0 | |r=8.0 | ||
|bn=top | |bn=top | ||
|ypos=1.5 | |ypos=1.5 | ||
|zpos=-5.5 to 5.5 | |zpos=-5.5 to 5.5 | ||
|sd=5 | |sd=5 | ||
|type=Body | |type=Body | ||
|sfx=Kick | |sfx=Kick | ||
|slvl=M | |slvl=M | ||
| Line 166: | Line 158: | ||
}} | }} | ||
|} | |} | ||
==Timing== | ==Timing== | ||
The falling portion lasts indefinitely until Bowser lands. Bowser can grab ledges as soon as he starts to fall. | |||
===Grounded=== | |||
{|class="wikitable" | |||
!Jump | |||
|11 | |||
|- | |||
!Fall, clean hit | |||
|37-39 | |||
|- | |||
!Fall, late hit | |||
|40- | |||
|} | |||
{{FrameStripStart}} | |||
{{FrameStrip|t=Lag|c=10}}{{FrameStrip|t=Hitbox|c=1}}{{FrameStrip|t=Lag|c=25}}{{FrameStrip|t=Hitbox|c=3|e=HitboxChangeS}}{{FrameStrip|t=Hitbox|c=2|s=HitboxChangeE|e=HitboxLoopS}}{{FrameStrip|t=Hitbox|c=1|s=HitboxLoopE}} | |||
{{FrameStripEnd}} | |||
===Aerial=== | |||
{|class="wikitable" | |||
!Clean hit | |||
|31-32 | |||
|- | |||
!Late hit | |||
|33- | |||
|} | |||
{{FrameStripStart}} | |||
{{FrameStrip|t=Lag|c=30}}{{FrameStrip|t=Hitbox|c=2|e=HitboxChangeS}}{{FrameStrip|t=Hitbox|c=2|s=HitboxChangeE|e=HitboxLoopS}}{{FrameStrip|t=Hitbox|c=1|s=HitboxLoopE}} | |||
{{FrameStripEnd}} | |||
===Landing=== | |||
{|class="wikitable" | |||
!Hitbox | |||
|1-2 | |||
|- | |||
!Interruptible | |||
|55 | |||
|- | |||
!Animation length | |||
|64 | |||
|} | |||
{{FrameStripStart}} | |||
{{FrameStrip|t=Hitbox|c=2}}{{FrameStrip|t=Lag|c=52}}{{FrameStrip|t=Interruptible|c=10}} | |||
{{FrameStripEnd}} | |||
{{FrameIconLegend|lag=y|hitbox=y|hitboxchange=y|loop=y|interruptible=y}} | |||
==Parameters== | |||
{|class="wikitable" | |||
!Horizontal speed multiplier on aerial startup | |||
|0.8 | |||
|- | |||
!Vertical speed multiplier on aerial startup | |||
|0.5 | |||
|- | |||
!Air friction before fall portion | |||
|0.02 | |||
|- | |||
!Gravity before fall portion | |||
|0.03 | |||
|- | |||
!Falling speed before fall portion | |||
|0.4 | |||
|- | |||
!Fall portion vertical speed | |||
| -9 | |||
|} | |||
{{MvSubNavBowser|g=SSBU}} | {{MvSubNavBowser|g=SSBU}} | ||
[[Category:Bowser (SSBU)]] | [[Category:Bowser (SSBU)]] | ||
[[Category:Special moves (SSBU)]] | [[Category:Special moves (SSBU)]] | ||
[[Category:Down special moves (SSBU)]] | [[Category:Down special moves (SSBU)]] | ||
Latest revision as of 17:32, September 20, 2024
Overview[edit]
Bowser headbutts opponents with his horns before preforming his ground pound attack from Super Mario Bros. 3. The first notable quality of Bowser Bomb is its tremendous shield damage, breaking even full shields if both ground hits connect. This can be effective at any precent, as Bowser can KO at 0% on a shield break thanks to his tipper Flame Breath and strong Forward Smash. Additionally, the move can be used to snap to ledge, regardless if Bowser is facing the ledge while making the move difficult to challenge due to its strong hitbox.
However, despite these great traits, Bowser Bomb has sluggish startup in the air, making it difficult to set up shield breaks with due to the aerial version being reactable and susceptible to Perfect shielding. Additionally, using the move to KO is generally not a good idea, as Bowser has no shortage of powerful KO options such as Back aerial and Forward tilt. Additionally, the scooping hitbox only lasts for a single frame, meaning that the scoop hitbox can be whiffed easily, with the move being very unsafe due to its sizable ending lag. While the move does have a Meteor smash hitbox when Bowser starts falling, it is outclassed in setting up edgeguards and kamikazes due to Down aerial being faster and having a longer meteor window.
As a result, Bowser Bomb is seldom used in competitive play due to it's sluggish startup in the air making it hard to shieldbreak with. The main use for the move is as a ledge grab option, which is a rather shallow niche.
Hitboxes[edit]
Grounded[edit]
Aerial[edit]
Landing[edit]
Timing[edit]
The falling portion lasts indefinitely until Bowser lands. Bowser can grab ledges as soon as he starts to fall.
Grounded[edit]
| Jump | 11 |
|---|---|
| Fall, clean hit | 37-39 |
| Fall, late hit | 40- |
Aerial[edit]
| Clean hit | 31-32 |
|---|---|
| Late hit | 33- |
Landing[edit]
| Hitbox | 1-2 |
|---|---|
| Interruptible | 55 |
| Animation length | 64 |
Lag time |
Hitbox |
Hitbox change |
Loop point |
Interruptible |
Parameters[edit]
| Horizontal speed multiplier on aerial startup | 0.8 |
|---|---|
| Vertical speed multiplier on aerial startup | 0.5 |
| Air friction before fall portion | 0.02 |
| Gravity before fall portion | 0.03 |
| Falling speed before fall portion | 0.4 |
| Fall portion vertical speed | -9 |
|


