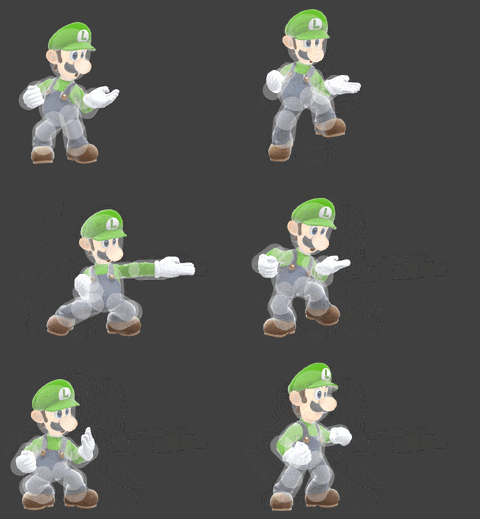
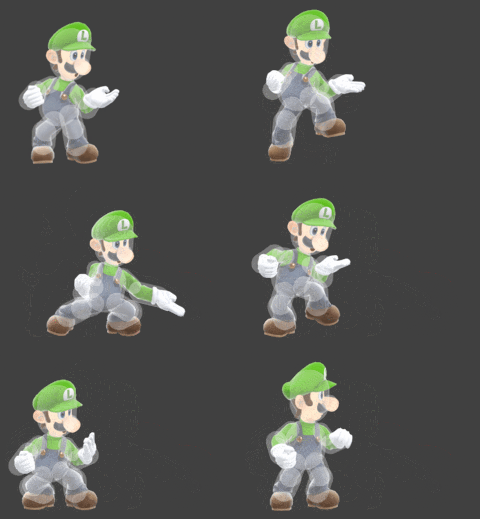
Luigi (SSBU)/Forward smash: Difference between revisions
mNo edit summary |
|||
| (9 intermediate revisions by 4 users not shown) | |||
| Line 4: | Line 4: | ||
|- | |- | ||
!↗ | !↗ | ||
|[[File:LuigiFSmashUpSSBU.gif| | |[[File:LuigiFSmashUpSSBU.gif|240px]] | ||
|- | |- | ||
!→ | !→ | ||
|[[File:LuigiFSmashSSBU.gif| | |[[File:LuigiFSmashSSBU.gif|240px]] | ||
|- | |- | ||
!↘ | !↘ | ||
|[[File:LuigiFSmashDownSSBU.gif| | |[[File:LuigiFSmashDownSSBU.gif|240px]] | ||
|- | |- | ||
|} | |} | ||
| Line 16: | Line 16: | ||
==Overview== | ==Overview== | ||
Luigi steps forward and delivers a knifehand jab. It is fast for its strength at frame 12 with moderate ending lag, and possesses a very slight disjoint at the fingers as well as no kind of sourspot, making it a reliable KO option. It can be angled, which alters the move's knockback and angle stats. The slight disjoint can be utilized with the up angle as an anti-air against low-ranged aerials, strengthened by its higher kill power due to higher knockback and launch angle, capable of killing at ~85% on midweights from the top. The un-angled variation can be used with its longer horizontal reach as a strong punish, and the down angle can be used to hit certain ledgehangs, and sends at the lowest angle, thus killing earliest at the ledge at ~100% on midweights. The move also possesses five extra points of shield damage, making it a useful move to break a damaged shield. | Luigi steps forward and delivers a knifehand jab. It is fast for its strength at frame 12 with moderate ending lag, and possesses a very slight disjoint at the fingers as well as no kind of sourspot, making it a reliable KO option. It can be angled, which alters the move's knockback and angle stats. The slight disjoint can be utilized with the up angle as an anti-air against low-ranged aerials, strengthened by its higher kill power due to higher knockback and launch angle, capable of killing at ~85% on midweights from the top. The un-angled variation can be used with its longer horizontal reach as a strong punish, and the down angle can be used to hit certain ledgehangs, and sends at the lowest angle, thus killing earliest at the ledge at ~100% on midweights. The move also possesses five extra points of shield damage, making it a useful move to break a damaged shield. | ||
==Hitboxes== | ==Hitboxes== | ||
{{UltimateHitboxTableHeader}} | {{UltimateHitboxTableHeader}} | ||
{{HitboxTableTitle|Angled up| | {{HitboxTableTitle|Angled up|50}} | ||
{{UltimateHitboxTableRow | {{UltimateHitboxTableRow | ||
|id=0 | |id=0 | ||
|damage=15.0 | |damage={{ChargedSmashDmgSSBU|15.0}} | ||
|sd=5 | |sd=5.0 | ||
|angle=52 | |angle=52 | ||
|bk=20 | |bk=20 | ||
| Line 36: | Line 35: | ||
|type=Hand | |type=Hand | ||
|effect=Stab | |effect=Stab | ||
|sfx= | |sfx=Luigi Forward Smash | ||
|slvl=L | |slvl=L | ||
}} | }} | ||
{{UltimateHitboxTableRow | {{UltimateHitboxTableRow | ||
|id=1 | |id=1 | ||
|damage=15.0 | |damage={{ChargedSmashDmgSSBU|15.0}} | ||
|sd=5 | |sd=5.0 | ||
|angle=52 | |angle=52 | ||
|bk=20 | |bk=20 | ||
| Line 55: | Line 54: | ||
|type=Hand | |type=Hand | ||
|effect=Stab | |effect=Stab | ||
|sfx= | |sfx=Luigi Forward Smash | ||
|slvl=L | |slvl=L | ||
}} | }} | ||
{{HitboxTableTitle|Not angled| | {{HitboxTableTitle|Not angled|50}} | ||
{{UltimateHitboxTableRow | {{UltimateHitboxTableRow | ||
|id=0 | |id=0 | ||
|damage=15.0 | |damage={{ChargedSmashDmgSSBU|15.0}} | ||
|sd=5 | |sd=5.0 | ||
|angle=42 | |angle=42 | ||
|bk=20 | |bk=20 | ||
| Line 75: | Line 74: | ||
|type=Hand | |type=Hand | ||
|effect=Stab | |effect=Stab | ||
|sfx= | |sfx=Luigi Forward Smash | ||
|slvl=L | |slvl=L | ||
}} | }} | ||
{{UltimateHitboxTableRow | {{UltimateHitboxTableRow | ||
|id=1 | |id=1 | ||
|damage=15.0 | |damage={{ChargedSmashDmgSSBU|15.0}} | ||
|sd=5 | |sd=5.0 | ||
|angle=42 | |angle=42 | ||
|bk=20 | |bk=20 | ||
| Line 94: | Line 93: | ||
|type=Hand | |type=Hand | ||
|effect=Stab | |effect=Stab | ||
|sfx= | |sfx=Luigi Forward Smash | ||
|slvl=L | |slvl=L | ||
}} | }} | ||
{{HitboxTableTitle|Angled down| | {{HitboxTableTitle|Angled down|50}} | ||
{{UltimateHitboxTableRow | {{UltimateHitboxTableRow | ||
|id=0 | |id=0 | ||
|damage=15.0 | |damage={{ChargedSmashDmgSSBU|15.0}} | ||
|sd=5 | |sd=5.0 | ||
|angle=37 | |angle=37 | ||
|bk=20 | |bk=20 | ||
| Line 114: | Line 113: | ||
|type=Hand | |type=Hand | ||
|effect=Stab | |effect=Stab | ||
|sfx= | |sfx=Luigi Forward Smash | ||
|slvl=L | |slvl=L | ||
}} | }} | ||
{{UltimateHitboxTableRow | {{UltimateHitboxTableRow | ||
|id=1 | |id=1 | ||
|damage=15.0 | |damage={{ChargedSmashDmgSSBU|15.0}} | ||
|sd=5 | |sd=5.0 | ||
|angle=37 | |angle=37 | ||
|bk=20 | |bk=20 | ||
| Line 133: | Line 132: | ||
|type=Hand | |type=Hand | ||
|effect=Stab | |effect=Stab | ||
|sfx= | |sfx=Luigi Forward Smash | ||
|slvl=L | |slvl=L | ||
}} | }} | ||
|} | |} | ||
==Timing== | ==Timing== | ||
{|class="wikitable" | {|class="wikitable" | ||
| Line 146: | Line 146: | ||
|- | |- | ||
!Interruptible | !Interruptible | ||
| | |42 | ||
|- | |- | ||
!Animation length | !Animation length | ||
Latest revision as of 22:14, July 31, 2023
| Luigi forward smash hitbox visualizations | ||||
|---|---|---|---|---|
| ↗ | 
| |||
| → | 
| |||
| ↘ | 
| |||
Overview[edit]
Luigi steps forward and delivers a knifehand jab. It is fast for its strength at frame 12 with moderate ending lag, and possesses a very slight disjoint at the fingers as well as no kind of sourspot, making it a reliable KO option. It can be angled, which alters the move's knockback and angle stats. The slight disjoint can be utilized with the up angle as an anti-air against low-ranged aerials, strengthened by its higher kill power due to higher knockback and launch angle, capable of killing at ~85% on midweights from the top. The un-angled variation can be used with its longer horizontal reach as a strong punish, and the down angle can be used to hit certain ledgehangs, and sends at the lowest angle, thus killing earliest at the ledge at ~100% on midweights. The move also possesses five extra points of shield damage, making it a useful move to break a damaged shield.
Hitboxes[edit]
Timing[edit]
| Charges between | 4-5 |
|---|---|
| Hitboxes | 12-13 |
| Interruptible | 42 |
| Animation length | 41 |
Lag time |
Charge interval |
Hitbox |
Interruptible |
|