R.O.B. (SSBB): Difference between revisions
Doomdorm64 (talk | contribs) |
|||
| (56 intermediate revisions by 34 users not shown) | |||
| Line 1: | Line 1: | ||
{{ArticleIcons|brawl=y}} | {{ArticleIcons|brawl=y}} | ||
:''This article is about R.O.B.'s playable appearance in Super Smash Bros. Brawl. For his non-playable appearance in [[Adventure Mode: The Subspace Emissary]], see [[Ancient Minister]]. For other R.O.B.s as enemies in Adventure Mode, see [[R.O.B. Squad]].'' | |||
{{for|other uses|R.O.B.}} | |||
{{Infobox Character | {{Infobox Character | ||
|name = R.O.B. | |name = R.O.B. | ||
| Line 13: | Line 14: | ||
'''R.O.B.''' ({{ja|ロボット|Robotto}}, ''Robot'') is a [[newcomer]] in ''[[Super Smash Bros. Brawl]]''. His full name is '''Robotic Operating Buddy''' and he is based on the R.O.B./Robot [[nwiki:NES|NES]]/[[nwiki:Famicom|Famicom]] peripheral. He was unveiled in a mass [[leak]] prior to the Japanese release of ''Brawl''. R.O.B. was confirmed on the ''DOJO!!'' March 6, 2008. | '''R.O.B.''' ({{ja|ロボット|Robotto}}, ''Robot'') is a [[newcomer]] in ''[[Super Smash Bros. Brawl]]''. His full name is '''Robotic Operating Buddy''' and he is based on the R.O.B./Robot [[nwiki:NES|NES]]/[[nwiki:Famicom|Famicom]] peripheral. He was unveiled in a mass [[leak]] prior to the Japanese release of ''Brawl''. R.O.B. was confirmed on the ''DOJO!!'' March 6, 2008. | ||
R.O.B. | R.O.B. has a set of realistic robot sounds, similar to how Donkey Kong, Diddy Kong and Bowser use realistic vocal effects. | ||
R.O.B. ranks 18th on the [[tier list]] at the bottom of the high-mid tier. R.O.B. possesses a strong [[camp]]ing game with two very effective projectiles; one is a fast [[transcendent]] [[projectile]] that can travel across entire stages while going through any hurtbox it connects with, and a powerful item-based projectile that produces a lingering [[hitbox]] when it lands, while being able to be picked up and [[glide toss]]ed with. He also has one of the best [[recoveries]] in ''Brawl'', that gains incredible distance while giving R.O.B. nearly free reign to act out of. R.O.B. additionally possesses great [[tilt]]s and effective [[aerial]]s, with them having great [[reach]] or large hitboxes. However, R.O.B. has significant problems [[KO]]ing opponents, at least without racking up well in excess of 150+% damage; his finishers aren't powerful (with most having low knockback scaling, making it especially difficult for R.O.B. to KO heavier characters), while having slow start-up, poor hitbox placement, or both, that makes them difficult to land. Additionally, R.O.B. has a large hurtbox, which when combined with his heavy [[weight]] and slow aerial mobility, leaves him vulnerable to [[juggling]]. R.O.B.'s hurtbox also accentuates his problems dealing with projectile camping from characters like {{SSBB|Falco}}, especially since he lacks a reliable [[reflection|reflector]]. The hurtbox combines with his below-average mobility to create difficulty in initiating [[approach]]es when he lacks a [[Gyro]] to glide toss. Another problem R.O.B. has is his poor [[momentum cancelling]] options, giving him among the worst endurance for a character of his weight class. Overall, R.O.B. has average [[matchup]]s, where he holds an advantage over nearly every character below borderline tier, but loses the majority of matchups with several {{b|counter|matchup}}s against characters above (including a notoriously poor matchup against {{SSBB|Meta Knight}}). R.O.B. has achieved above average [[tournament]] results regardless, especially in Meta Knight-banned tournaments. | |||
==How to unlock== | ==How to unlock== | ||
Complete one of the following: | Complete one of the following: | ||
*Play 160 [[VS. match]]es. | *Play 160 [[VS. match]]es. | ||
*Collect 250 different [[trophies]]. | *Collect 250 different [[trophies]]. | ||
*Have R.O.B. join the player's party in | *Have R.O.B. join the player's party in [[The Subspace Emissary]] ([[The Subspace Bomb Factory (Part II)]]). | ||
With the exception of the third method, R.O.B. must then be defeated on [[Mario Bros.]] | With the exception of the third method, R.O.B. must then be defeated on [[Mario Bros.]] whether or not that stage has been unlocked beforehand. | ||
==Attributes== | ==Attributes== | ||
R.O.B. plays the role of a long-range attacker very well, with projectiles and means to keep opponents at bay. His base up close is a blind spot, making it important to keep foes away. Many of his attacks balance moderate power and range with short lag-time. His moves with actual KO potential, though, have considerable start up lag or keep him airborne longer than desired. R.O.B. is also prone to [[Stale move negation]] on his KO moves (notably his down smash which, due to its low knockback scaling, can have trouble KO'ing heavier characters even at around 200%) rendering him unable to KO at times (however, his up throw can KO reliably at above 160%). He can easily set up an edgeguard using a forward or back throw, but his most powerful aerials are difficult to land. Despite his moves boasting only moderate knockback, R.O.B. can generally keep knocking his opponent away with superior range and combine any of his moves together fairly easily. The resulting damage adds up rather quickly with an experienced player. R.O.B. is decently heavy and floaty (making R.O.B, {{SSBB|Samus}} and {{SSBB|Yoshi}} the only floaty heavyweights), but he is also a large target. He has two projectiles, both with decent knockback and unique properties, which usually mess up the opponent's approach. The major flaw with these projectiles is that they are not spammable (as they must be charged/recharged). His aerial game is also good, with his forward aerial being fast and having moderate knockback, his neutral and back aerial being powerful but difficult to land, and his down air acting as a [[Meteor Smash]] (although it has a very slow start-up). His back aerial can also aid his exceptional recovery, both his back and down aerials push R.O.B. up slightly when using [[Robo Burner]]. With the addition of [[Robo Burner]], he is quite interesting to experiment with on certain combination of attacks and techniques such as a [[Wall of Pain]]. In fact, a technique sometimes called "burner flashing," which is initiated by first using Robo Burner and then repeatedly pressing B, has been proven to be the farthest vertical traveling recovery move in one go. R.O.B.'s recovery does have its problems. He can't air dodge out of Robo Burner, making his recovery predictable for some characters and he can be juggled because he is floaty in both jumping and recovery, notably by {{SSBB|Meta Knight}} and {{SSBB|Fox}}. His slow [[falling speed|fast falling]] also makes his momentum canceling poor, getting KOed vertically at relatively low percentages, especially for his weight class. R.O.B.'s side special reflects projectiles, but characters with more spammable projectiles can easily overwhelm R.O.B. from afar, and it isn't useful as an attack. Overall, with a very flexible ranged game, R.O.B. can be a dangerous foe for many characters in the game. | R.O.B. plays the role of a long-range attacker very well, with projectiles and means to keep opponents at bay. His base up close is a blind spot, making it important to keep foes away. Many of his attacks balance moderate power and range with short lag-time. His moves with actual KO potential, though, have considerable start up lag or keep him airborne longer than desired. R.O.B. is also prone to [[Stale move negation]] on his KO moves (notably his down smash which, due to its low knockback scaling, can have trouble KO'ing heavier characters even at around 200%) rendering him unable to KO at times (however, his up throw can KO reliably at above 160%). He can easily set up an edgeguard using a forward or back throw, but his most powerful aerials are difficult to land. Despite his moves boasting only moderate knockback, R.O.B. can generally keep knocking his opponent away with superior range and combine any of his moves together fairly easily. The resulting damage adds up rather quickly with an experienced player. R.O.B. is decently heavy and floaty (making R.O.B., {{SSBB|Samus}}, and {{SSBB|Yoshi}} the only floaty heavyweights), but he is also a large target. He has two projectiles, both with decent knockback and unique properties, which usually mess up the opponent's approach. The major flaw with these projectiles is that they are not spammable (as they must be charged/recharged). His aerial game is also good, with his forward aerial being fast and having moderate knockback, his neutral and back aerial being powerful but difficult to land, and his down air acting as a [[Meteor Smash]] (although it has a very slow start-up). His back aerial can also aid his exceptional recovery, both his back and down aerials push R.O.B. up slightly when using [[Robo Burner]]. With the addition of [[Robo Burner]], he is quite interesting to experiment with on certain combination of attacks and techniques such as a [[Wall of Pain]]. In fact, a technique sometimes called "burner flashing," which is initiated by first using Robo Burner and then repeatedly pressing B, has been proven to be the farthest vertical traveling recovery move in one go. R.O.B.'s recovery does have its problems. He can't air dodge out of Robo Burner, making his recovery predictable for some characters and he can be juggled because he is floaty in both jumping and recovery, notably by {{SSBB|Meta Knight}} and {{SSBB|Fox}}. His slow [[falling speed|fast falling]] also makes his momentum canceling poor, getting KOed vertically at relatively low percentages, especially for his weight class. R.O.B.'s side special reflects projectiles, but characters with more spammable projectiles can easily overwhelm R.O.B. from afar, and it isn't useful as an attack. Overall, with a very flexible ranged game, R.O.B. can be a dangerous foe for many characters in the game. | ||
==Moveset== | ==Moveset== | ||
''For a gallery of R.O.B.'s hitboxes, see [[R.O.B. (SSBB)/Hitboxes|here]].'' | |||
{{MovesetTable | {{MovesetTable | ||
|game=SSBB | |game=SSBB | ||
|neutralcount=2 | |neutralcount=2 | ||
|neutralname= | |neutralname=11 / 12 | ||
|neutral1dmg=3% | |neutral1dmg=3% | ||
|neutral2dmg=3% | |neutral2dmg=3% | ||
|neutraldesc=R.O.B. does a quick swing with each arm. | |neutraldesc=R.O.B. does a quick swing with each arm. | ||
|ftiltname= | |ftiltname=S2 | ||
|ftiltdmg=8% (arm tip), 6% (arm), 5% (body) | |ftiltdmg=8% (arm tip), 6% (arm), 5% (body) | ||
|ftiltdesc=Leans forward and punches with an impressive range. Can be aimed up or down. | |ftiltdesc=Leans forward and punches with an impressive range. Can be aimed up or down. | ||
|utiltname= | |utiltname=Hi2 | ||
|utiltdmg=3% (early), 5% (arms tip), 6% (arms base) | |utiltdmg=3% (early), 5% (arms tip), 6% (arms base) | ||
|utiltdesc=R.O.B. throws both arms upwards. Can hit twice, with the first hit having [[set knockback]] and second hit launching opponents upwards. | |utiltdesc=R.O.B. throws both arms upwards. Can hit twice, with the first hit having [[set knockback]] and second hit launching opponents upwards. | ||
|dtiltname= | |dtiltname=Lw2 | ||
|dtiltdmg=5% (arms), 4% (arms tip) | |dtiltdmg=5% (arms), 4% (arms tip) | ||
|dtiltdesc=Quickly pushes his arms forward along the ground. Quick, produces opportunity for multiple hits. Can cause tripping. | |dtiltdesc=Quickly pushes his arms forward along the ground. Quick, produces opportunity for multiple hits. Can cause tripping. | ||
|dashname= | |dashname=DashA | ||
|dashdmg=6% (arms), 5% (arms tip) | |dashdmg=6% (arms), 5% (arms tip) | ||
|dashdesc=R.O.B. thrusts both his arms forward. | |dashdesc=R.O.B. thrusts both his arms forward. | ||
|fsmashname=S3 | |fsmashname=S3 | ||
|fsmashdmg={{ChargedSmashDmgSSBB|14}} (base), {{ChargedSmashDmgSSBB|13}} (mid), {{ChargedSmashDmgSSBB|12}} (tip) | |fsmashdmg={{ChargedSmashDmgSSBB|14}} (base), {{ChargedSmashDmgSSBB|13}} (mid), {{ChargedSmashDmgSSBB|12}} (tip) | ||
|fsmashdesc=Shoots a short beam from his eyes. Can be directed up and down like a shorter [[Robo Beam]]. May be considered a projectile, due to the fact that it can't break a [[Metal Box]]. Does average knockback | |fsmashdesc=Shoots a short beam from his eyes. Can be directed up and down like a shorter [[Robo Beam]]. May be considered a projectile, due to the fact that it can't break a [[Metal Box]]. Does average knockback. | ||
|usmashname= | |usmashname=Hi3 | ||
|usmashdmg={{ChargedSmashDmgSSBB|12}} (base), {{ChargedSmashDmgSSBB|13}} (mid), {{ChargedSmashDmgSSBB|14}} (tip) | |usmashdmg={{ChargedSmashDmgSSBB|12}} (base), {{ChargedSmashDmgSSBB|13}} (mid), {{ChargedSmashDmgSSBB|14}} (tip) | ||
|usmashdesc=R.O.B. plants his hands on the ground and does a handstand, shooting boosters out of his base upwards. Very high knockback (R.O.B.'s strongest move in terms of knockback) but is slow and predictable. High vertical range but has no horizontal range, making the move difficult to use, especially on stages without platforms. When sweetspotted and fully charged, it KOs at 70%. | |usmashdesc=R.O.B. plants his hands on the ground and does a handstand, shooting boosters out of his base upwards. Very high knockback (R.O.B.'s strongest move in terms of knockback) but is slow and predictable. High vertical range but has no horizontal range, making the move difficult to use, especially on stages without platforms. When sweetspotted and fully charged, it KOs at 70%. | ||
|dsmashname= | |dsmashname=Lw3 | ||
|dsmashdmg={{ChargedSmashDmgSSBB|2}} (hits 1-4), {{ChargedSmashDmgSSBB|5}} (hit 5) | |dsmashdmg={{ChargedSmashDmgSSBB|2}} (hits 1-4), {{ChargedSmashDmgSSBB|5}} (hit 5) | ||
|dsmashdesc= Lowers torso on his spine and extends arms, spinning them. Low damage and knockback, but decent range and multiple hits. It is the fastest down smash, tied with Zelda's. | |dsmashdesc= Lowers torso on his spine and extends arms, spinning them. Low damage and knockback, but decent range and multiple hits. It is the fastest down smash, tied with Zelda's. | ||
|nairname= | |nairname=AirN | ||
|nairdmg=10% | |nairdmg=10% | ||
|nairdesc=Pauses for a second, then fires his boosters as he spins vertically. | |nairdesc=Pauses for a second, then fires his boosters as he spins vertically. | ||
|fairname= | |fairname=AirF | ||
|fairdmg=10% (clean), 6% (late) | |fairdmg=10% (clean), 6% (late) | ||
|fairdesc=Extends his arms forward. Has low lag, and is good for starting up aerial combos and [[edgeguard]]ing. At low percentages, it can set up for a neutral or down aerials on heavyweights. | |fairdesc=Extends his arms forward. Has low lag, and is good for starting up aerial combos and [[edgeguard]]ing. At low percentages, it can set up for a neutral or down aerials on heavyweights. | ||
|bairname= | |bairname=AirB | ||
|bairdmg=11% | |bairdmg=11% | ||
|bairdesc=Aims his base behind him and fires his boosters. Pushes R.O.B. forward a little bit, although while he keeps the knockback after getting hit, it does nothing to increase or reduce momentum. The hitbox affects targets both in front of and behind R.O.B. each with decent knockback. This can be used for recovery in between Robo Burners, creating virtually the longest horizontal recovery move in the game along with [[Pound]] and [[Glide]]. | |bairdesc=Aims his base behind him and fires his boosters. Pushes R.O.B. forward a little bit, although while he keeps the knockback after getting hit, it does nothing to increase or reduce momentum. The hitbox affects targets both in front of and behind R.O.B. each with decent knockback. This can be used for recovery in between Robo Burners, creating virtually the longest horizontal recovery move in the game along with [[Pound]] and [[Glide]]. | ||
|uairname= | |uairname=AirHi | ||
|uairdmg=4-5% (hits 1-4), 3% (hit 5) | |uairdmg=4-5% (hits 1-4), 3% (hit 5) | ||
|uairdesc=Raises arms repeatedly above his head, hitting multiple times with good damage if used right. About 20% damage if all hits connect. | |uairdesc=Raises arms repeatedly above his head, hitting multiple times with good damage if used right. About 20% damage if all hits connect. | ||
|dairname= | |dairname=AirLw | ||
|dairdmg=12% (base), 13% (booster base), 11% (booster mid), 6% (booster tip) | |dairdmg=12% (base), 13% (booster base), 11% (booster mid), 6% (booster tip) | ||
|dairdesc=R.O.B. fires a blast downwards. Boosts R.O.B. up a little bit, shooting his boosters down where he was. It's powerful, yet slow and can [[meteor smash]]. Keeps him stationary in the air shortly, although he can fast fall with it as long as he's in knockback after getting hit. When [[Poison Mushroom|tiny]], R.O.B. can use this move instead of Robo Burner to recover. Provides him an unlimited [[recovery]] move, because it pushes him upward and can be used infinitely to fly up the upper [[blast line]] infinitely without getting Star KO'd, making it also the only unlimited non-[[bomb recovery]] and the only infinite recovery (when tiny) of every ''Smash Bros.'' installment. Can also perform every [[Hyrule Jump]] (only when tiny). It should be noted that the uppermost hitboxes have weaker vertical knockback. | |dairdesc=R.O.B. fires a blast downwards. Boosts R.O.B. up a little bit, shooting his boosters down where he was. It's powerful, yet slow and can [[meteor smash]]. Keeps him stationary in the air shortly, although he can fast fall with it as long as he's in knockback after getting hit. When [[Poison Mushroom|tiny]], R.O.B. can use this move instead of Robo Burner to recover. Provides him an unlimited [[recovery]] move, because it pushes him upward and can be used infinitely to fly up the upper [[blast line]] infinitely without getting Star KO'd, making it also the only unlimited non-[[bomb recovery]] and the only infinite recovery (when tiny) of every ''Smash Bros.'' installment. Can also perform every [[Hyrule Jump]] (only when tiny). It should be noted that the uppermost hitboxes have weaker vertical knockback. | ||
|grabname= | |grabname=Grab ({{ja|つかみ|Tsukami}}) | ||
|grabdesc= | |grabdesc= | ||
|pummelname= | |pummelname=CatchA | ||
|pummeldmg=2% | |pummeldmg=2% | ||
|pummeldesc=Squeezes opponent with his hands. Very fast and no ending lag. | |pummeldesc=Squeezes opponent with his hands. Very fast and no ending lag. | ||
|fthrowname= | |fthrowname=ThrowF | ||
|fthrowdmg=10% | |fthrowdmg=10% | ||
|fthrowdesc=Tosses opponent forward. Very fast. | |fthrowdesc=Tosses opponent forward. Very fast. | ||
|bthrowname= | |bthrowname=ThrowB | ||
|bthrowdmg=10% | |bthrowdmg=10% | ||
|bthrowdesc=Quickly swings his opponent backward. Can KO around 165%, if used very close to the ledge. | |bthrowdesc=Quickly swings his opponent backward. Can KO around 165%, if used very close to the ledge. | ||
|uthrowname= | |uthrowname=ThrowHi | ||
|uthrowdmg=10% | |uthrowdmg=10% | ||
|uthrowdesc=Grabs opponent, flies them into the air a short distance, turns them upside down, then crashes them into the ground (Similar to {{SSBB|Olimar}}, {{SSBB|Kirby}} or {{SSBB|Meta Knight}}'s up throw). This is R.O.B.'s strongest throw along with his back throw, knockback wise. Can KO around 165%. | |uthrowdesc=Grabs opponent, flies them into the air a short distance, turns them upside down, then crashes them into the ground (Similar to {{SSBB|Olimar}}, {{SSBB|Kirby}} or {{SSBB|Meta Knight}}'s up throw). This is R.O.B.'s strongest throw along with his back throw, knockback wise. Can KO around 165%. | ||
|dthrowname= | |dthrowname=ThrowLw | ||
|dthrowdmg=10% | |dthrowdmg=10% | ||
|dthrowdesc=Drills opponent into the ground in front of him. Can be followed up by up aerial. | |dthrowdesc=Drills opponent into the ground in front of him. Can be followed up by up aerial. | ||
| Line 118: | Line 122: | ||
|fsdesc=Begins firing a spiral-shaped beam from his eyes. The Diffusion Beam is unique in that it operates like the [[Superspicy Curry]], as his entire moveset, excluding the Robo Beam, is usable during this Final Smash, in addition to items. Foes caught in the beam will take damage, but the beam itself has no knockback. However, there is also a powerful laser that appears instead of the spiral-shaped beam at points, which has strong knockback, and will usually KOs opponents hit by it. As the move's hitbox is directly related to the space in front of R.O.B.'s eyes, the beam can be directed at foes through the use of unorthodox methods, such as taunts. R.O.B. himself also gains [[invincibility]] while the Diffusion Beam is active. | |fsdesc=Begins firing a spiral-shaped beam from his eyes. The Diffusion Beam is unique in that it operates like the [[Superspicy Curry]], as his entire moveset, excluding the Robo Beam, is usable during this Final Smash, in addition to items. Foes caught in the beam will take damage, but the beam itself has no knockback. However, there is also a powerful laser that appears instead of the spiral-shaped beam at points, which has strong knockback, and will usually KOs opponents hit by it. As the move's hitbox is directly related to the space in front of R.O.B.'s eyes, the beam can be directed at foes through the use of unorthodox methods, such as taunts. R.O.B. himself also gains [[invincibility]] while the Diffusion Beam is active. | ||
}} | }} | ||
===Stats=== | |||
{{technical data|Needs short hop and double jump heights}} | |||
{{Attributes | |||
|cast = 39 | |||
|weight = 106 | |||
|rweight = 10 | |||
|dash = 1.3 | |||
|rdash = 29-35 | |||
|run = 1.5 | |||
|rrun = 17-20 | |||
|walk = 1.1 | |||
|rwalk = 17-19 | |||
|trac = 0.06 | |||
|rtrac = 11-16 | |||
|airfric = 0.004 | |||
|rairfric = 36-37 | |||
|air = 0.89 | |||
|rair = 27-28 | |||
|baseaccel = 0.04 | |||
|rbaseaccel = 3-5 | |||
|addaccel = 0.006 | |||
|raddaccel = 39 | |||
|gravity = 0.065 | |||
|rgravity = 32-33 | |||
|fall = 1.2 | |||
|rfall = 32-35 | |||
|ff = 1.68 | |||
|rff = 33-35 | |||
|jumpsquat = 5 | |||
|rjumpsquat = 11-26 | |||
|jumpheight = 37.82543269 | |||
|rjumpheight = 6 | |||
|shorthop = ? | |||
|rshorthop = ? | |||
|djump = ? | |||
|rdjump = ? | |||
|ellag = 3 | |||
|rellag = 1-29 | |||
}} | |||
===[[Announcer]] call=== | |||
{{audio|Needs announcer calls from other languages.}} | |||
<gallery> | |||
R.O.B. English Announcer SSBB.wav|English | |||
</gallery> | |||
===[[Wii Remote selection sound]]=== | |||
{{SelectSound|char=R.O.B.|desc=Makes a pair of whirring noises.}} | |||
===[[On-screen appearance]]=== | ===[[On-screen appearance]]=== | ||
| Line 135: | Line 188: | ||
{{Idle | {{Idle | ||
|desc-1=Looks toward his right side, and then looks towards his left side. | |desc-1=Looks toward his right side, and then looks towards his left side. | ||
|desc-2=Slowly tilts his head downwards and then lifts it back up. | |desc-2=Slowly tilts his head downwards and then lifts it back up, as if falling asleep. | ||
|image-1=R.O.B. Idle Pose 1 Brawl.png | |image-1=R.O.B. Idle Pose 1 Brawl.png | ||
|image-2=R.O.B. Idle Pose 2 Brawl.png}} | |image-2=R.O.B. Idle Pose 2 Brawl.png}} | ||
===[[Crowd cheer]]=== | ===[[Crowd cheer]]=== | ||
{{ | {| class="wikitable" | ||
| | |- | ||
| | !{{{name|}}} | ||
| | !Cheer (English) | ||
| | !Cheer (Japanese) | ||
| | !Cheer (German) | ||
| | !Cheer (Korean) | ||
| | |- | ||
! scope="row"|Cheer | |||
= | |[[File:R.O.B. Cheer English SSBB.ogg|center]]||[[File:R.O.B. Cheer Japanese SSBB.ogg|center]]||[[File:R.O.B. Cheer German SSBB.ogg|center]]||rowspan="4"|[[File:R.O.B. Cheer Korean SSBB.ogg|center]] | ||
|- | |||
! scope="row"|Description | |||
|R - O - B - R.O.B.! || Ro - bot! || R - O - B! ROB! | |||
|- | |||
!{{{name|}}} | |||
!Cheer (French) | |||
!Cheer (Italian) | |||
!Cheer (Spanish) | |||
|- | |||
! scope="row"|Cheer | |||
|[[File:R.O.B. Cheer French SSBB.ogg|center]]||[[File:R.O.B. Cheer Italian SSBB.ogg|center]]||[[File:R.O.B. Cheer Spanish SSBB.ogg|center]] | |||
|- | |||
! scope="row"|Description | |||
|R - O - B ! Rooooob ! || Roooob! || ROB! *claps 3 times* || R - O - B! | |||
|} | |||
===[[Victory pose]]s=== | ===[[Victory pose]]s=== | ||
| Line 156: | Line 223: | ||
|victory-theme=ROBTheme.ogg | |victory-theme=ROBTheme.ogg | ||
|victory-desc=A cover of the track that would play when starting up Memory mode in ''{{s|wikipedia|Stack-Up}}'', the first game that the [[R.O.B.]] accessory was compatible with. | |victory-desc=A cover of the track that would play when starting up Memory mode in ''{{s|wikipedia|Stack-Up}}'', the first game that the [[R.O.B.]] accessory was compatible with. | ||
|desc- | |desc-up=Spins around up a slight inch in the air, then lands, then puts his arms down and brings them back up again while turning his head. | ||
|desc-left=Spins his arms and moves them in a strongman pose while turning his head. | |||
|desc- | |desc-right=Shoots sparks from his eyes, then flexes his upper body, like his side [[taunt]]. | ||
|char=ROB}} | |char=ROB}} | ||
==In [[competitive play]]== | ==In [[competitive play]]== | ||
===Notable players=== | ===Notable players=== | ||
:''See also: [[:Category:R.O.B. | {{cleanup|[[SmashWiki:Cleanup of the Notable Players sections|To fit these guidelines]]}} | ||
:''See also: [[:Category:R.O.B. players (SSBB)]] | |||
*{{Sm|8BitMan|USA}} - Best R.O.B. main from Florida | *{{Sm|8BitMan|USA}} - Best R.O.B. main from Florida | ||
*{{Sm| | *{{Sm|Chia|USA}} - Best Tri-State R.O.B. | ||
*{{Sm|HolyNightmare|Canada}} - Best R.O.B. in Canada | *{{Sm|HolyNightmare|Canada}} - Best R.O.B. in Canada | ||
*{{Sm|Luminous|Japan}} - Placed | *{{Sm|HugS|USA}} | ||
*{{Sm|Luminous|Japan|p=Brawl}} - Placed 7th at Umebura 1 | |||
*{{Sm|OCEAN|Japan}} - Best R.O.B. in the world | *{{Sm|OCEAN|Japan}} - Best R.O.B. in the world | ||
*{{Sm|Rena|Japan}} - Notably beat Mikeneko, Otori, and 9B | *{{Sm|Rena|Japan}} - Notably beat Mikeneko, Otori, and 9B | ||
| Line 181: | Line 246: | ||
===Tier placement and history=== | ===Tier placement and history=== | ||
R.O.B. was initially a top tier character, being ranked 6th in the first tier list (September 2008). He was considered a difficult matchup for many players, who weren't experienced enough at the time to get around his weaknesses, and he was very dominant, with his attacks known for being fast and having great hitboxes. However, as time progressed, R.O.B.'s weaknesses became more prominent, with players learning to get around the blind spots of his attacks, as well as the increasing dominance of {{SSBB|Meta Knight}}, the character which countered R.O.B. the most. R.O.B. continued to drop down the tier list, with the biggest drop being him falling five places from the third tier list to the fourth. He currently ranks 18th place in upper-mid tier, in the eighth tier list, as of April 2013. | R.O.B. was initially a top tier character, being ranked 6th in the first tier list (September 2008). He was considered a difficult matchup for many players, who weren't experienced enough at the time to get around his weaknesses, and he was very dominant, with his attacks known for being fast and having great hitboxes. However, as time progressed, R.O.B.'s weaknesses became more prominent, with players learning to get around the blind spots of his attacks, as well as the increasing dominance of {{SSBB|Meta Knight}}, the character which countered R.O.B. the most. R.O.B. continued to drop down the tier list, with the biggest drop being him falling five places from the third tier list to the fourth. He currently ranks 18th place in upper-mid tier, in the eighth tier list, as of April 2013. | ||
==In Solo Modes== | |||
==={{SSBB|Classic Mode}}=== | |||
In Classic Mode, R.O.B. can appear as an opponent in Stage 9 if he has been unlocked on [[Mario Bros.]] (or [[Delfino Plaza]] if Mario Bros. has not been unlocked) R.O.B. can also appear as an opponent in Stage 11, but only if he hasn't appeared in Stage 9. | |||
===[[All-Star Mode]]=== | |||
In All-Star Mode, R.O.B. is fought in Stage 5 on [[Mario Bros.]] (or [[Delfino Plaza]] if Mario Bros. has not been unlocked) | |||
===[[Event Match]]es=== | |||
====Solo Events==== | |||
*'''[[Event 24: Come On! Blue Falcon!]]''': {{SSBB|Captain Falcon}} must use his [[Final Smash]], [[Blue Falcon]], to defeat two R.O.B.s on [[Port Town Aero Dive]] before one full lap is complete. | |||
*'''[[Event 27: Three-Beast Carnage]]''': A tiny R.O.B. must defeat a giant {{SSBB|Bowser}}, a giant {{SSBB|Donkey Kong}}, and a giant {{SSBB|Charizard}} on [[New Pork City]]. | |||
*'''[[Event 39: All-Star Battle x2]]''': R.O.B. is one of the eight opponents fought in this event along with {{SSBB|King Dedede}}, {{SSBB|Ike}}, {{SSBB|Lucario}}, {{SSBB|Toon Link}}, {{SSBB|Snake}}, {{SSBB|Sonic}}, and {{SSBB|Wolf}}. | |||
====Co-Op Events==== | |||
*'''[[Co-Op Event 10: The R.O.B.'s of Tomorrow]]''': Lucario and the {{SSBB|Ice Climbers}} must defeat five R.O.B.s of varying sizes on [[Summit]]. | |||
*'''[[Co-Op Event 18: The New Weapon of Shadow Moses]]''': Snake and R.O.B. must defeat two other R.O.B.s on [[Shadow Moses Island]]. | |||
*'''[[Co-Op Event 21: The True All-Star Battle]]''': Both players select a character and take on the entire roster on {{SSBB|Battlefield}}. | |||
===[[Congratulations_screen#Super_Smash_Bros._Brawl|Congratulations Screens]]=== | |||
<center> | |||
<gallery> | |||
R.O.B. Congratulations Screen Classic Mode Brawl.png|Classic Mode | |||
R.O.B. Congratulations Screen All-Star Brawl.png|All-Star Mode | |||
</gallery> | |||
</center> | |||
==Role in [[The Subspace Emissary]]== | ==Role in [[The Subspace Emissary]]== | ||
[[File:ROB Subspace Emissary.jpg|thumb|300px|R.O.B. in ''[[SSE]]'']] | [[File:ROB Subspace Emissary.jpg|thumb|300px|R.O.B. in ''[[SSE]]''.]] | ||
The race of R.O.B.s appear under four roles in ''Super Smash Bros. Brawl''. During | The race of R.O.B.s appear under four roles in ''Super Smash Bros. Brawl''. During ''The Subspace Emissary'', they are a faction of the [[Subspace Army]] and are used to activate the [[Subspace Bomb]]s, as well as guard the [[Ancient Minister]] and come in three different variations; [[R.O.B. Sentry|R.O.B. Sentries]], [[R.O.B. Launcher]]s and [[R.O.B. Blaster]]s. The bodyguards for the Ancient Minister are called "The [[R.O.B. Squad]]". When a pair of R.O.B.s are used to activate a Subspace Bomb, they are destroyed in its detonation. | ||
In | In The Subspace Emissary, it is revealed that the Ancient Minister is actually R.O.B. and the whole reason he was tearing apart the [[World of Trophies]] was because [[Tabuu]] had taken the lives of many of his fellow R.O.B.s, which upset him. Tabuu then threatened to extinguish the rest of them if he would not aid him in his plot. It is also revealed that R.O.B. was once the ruler of the world and lived on the floating [[Isle of the Ancients]] with its kind in peace. {{SSBB|Samus}}, {{SSBB|Pikachu}}, {{SSBB|Olimar}}, {{SSBB|Captain Falcon}}, {{SSBB|Donkey Kong}} and {{SSBB|Diddy Kong}} were able to get on this same island. However, [[Subspace Bomb Factory (Part II)|when they arrive]], the Ancient Minister refuses to battle with them. | ||
A hologram of {{SSBB|Ganondorf}} appears and commands the R.O.B. minions to detonate all the Subspace Bombs in the building, only to have the Ancient Minister tell him off. Ganondorf then orders the R.O.B.s to attack | A hologram of {{SSBB|Ganondorf}} appears and commands the R.O.B. minions to detonate all the Subspace Bombs in the building, only to have the Ancient Minister tell him off. Ganondorf then orders the R.O.B.s to attack him for his disobedience. They burn the Minister's robes away to discover that their target is a R.O.B. himself. At that point, R.O.B. decided to stop destroying his home dimension and joined the heroes. After he and his friends defeat some of the Subspace Army's forces sent in by Ganondorf, he mourned at the fact that the Subspace Bombs are about to detonate and annihilate the rest of his kind. Realizing that they cannot pull the R.O.B.s away from the bombs, Captain Falcon calls in the [[Falcon Flyer]], DK grabs the melancholic R.O.B. and the fighters depart, despite interference from [[Meta Ridley]]. | ||
Captain Falcon drives the Falcon Flyer straight into | Captain Falcon drives the Falcon Flyer straight [[Entrance to Subspace|into Subspace]] along with everyone else. Unfortunately, Tabuu uses his Off Waves to reduce them all to their [[trophy]] forms; R.O.B. among them. {{SSBB|King Dedede}}, {{SSBB|Ness}}, {{SSBB|Luigi}}, and {{SSBB|Kirby}}, who were revived by the [[Dedede Brooch]], find them and bring them back to life. With all heroes reunited, they endure [[the Great Maze]] and fight Tabuu. | ||
R.O.B. is one of the few characters who has two names displayed [[List of cutscenes in The Subspace Emissary|throughout the story]]. The [[Midair Stadium|first time]] is as the Ancient Minister and the second time as R.O.B. {{SSBB|Zelda}} and {{SSBB|Samus}} also have different names displayed, labelled at different times as "{{SSBB|Sheik}}" and "{{SSBB|Zero Suit Samus}}", respectively. | R.O.B. is one of the few characters who has two names displayed [[List of cutscenes in The Subspace Emissary|throughout the story]]. The [[Midair Stadium|first time]] is as the Ancient Minister and the second time as R.O.B.. {{SSBB|Zelda}} and {{SSBB|Samus}} also have different names displayed, labelled at different times as "{{SSBB|Sheik}}" and "{{SSBB|Zero Suit Samus}}", respectively. | ||
===Playable appearances=== | ===Playable appearances=== | ||
R.O.B appeared several times in the Subspace Emissary as the [[Ancient Minister]] until he was finally | R.O.B. appeared several times in the Subspace Emissary as the [[Ancient Minister]] until he was finally reformed. He appeared in [[Midair Stadium]], [[The Plain]], [[The Battlefield Fortress]] (where he was seen being attacked by {{SSBB|Ike}} to prevent him from dropping a Subspace Bomb), [[The Cave]], [[The Wilds (Part II)]] and finally in [[The Subspace Bomb Factory (Part I)]]. | ||
*[[The Subspace Bomb Factory (Part II)]] | *[[The Subspace Bomb Factory (Part II)]] | ||
| Line 201: | Line 292: | ||
*[[The Great Maze]] (if rescued in [[Subspace (Part II)]]) | *[[The Great Maze]] (if rescued in [[Subspace (Part II)]]) | ||
== | ===Exclusive [[sticker]]s=== | ||
These stickers can only be used by R.O.B. or a select few including him. | |||
* | *Ashley Viewing DTS: [Specials: Direct] Attack +17 | ||
* | *Candy: [Specials: Direct] Attack +4 | ||
* | *Donbe: [Slash] Resistance +26 | ||
*Duck: Launch Resistance +20 | |||
*F-Type: [Throwing] Power +22 | |||
*R.O.B.: [Specials: Indirect] Attack +15 | |||
*Robot: [Energy] Attack +32 | |||
*Robot & Blocks: [Specials: Indirect] Attack +27 | |||
*Wild Gunman: [Specials: Indirect] Attack +5 | |||
*Yakuman Player: [Electric] Resistance +28 | |||
== | ==[[Trophies]]== | ||
R.O.B.'s main and [[Final Smash]] trophies can be obtained by clearing {{SSBB|Classic Mode}} and [[All-Star]] mode respectively with R.O.B. | |||
== | {{Trophy/Fighter | ||
R.O.B. | |name=R.O.B. | ||
|image=R.O.B. - Brawl Trophy.png | |||
|mode=Classic | |||
|desc-ntsc=R.O.B. sporting his Famicom colors. R.O.B. debuted in Japan as Robot in 1985 as an add-on for the Famicom. He could be combined with a "gyro set", etc. for two types of play. The player controlled Professor Hector, the TV emitted light, and R.O.B. responded to the light by moving. At the time, it was epoch-making game play. Recently, R.O.B. appeared in Mario Kart DS. | |||
|desc-pal=R.O.B. sporting his Famicom colors. R.O.B. debuted in Japan as Robot in 1985 as an add-on for the Famicom. He could be combined with a "gyro set", etc. for two types of play. The player controlled Professor Hector, the TV emitted light, and R.O.B. responded to the light by moving. At the time, it was epoch-making game play. Recently, R.O.B. appeared in Mario Kart DS. | |||
|gamelist={{Trophy games|console1=NES|game1=Nintendo Entertainment System|console2=none|game2=Robotic Operating Buddy}} | |||
|game=Brawl | |||
}} | |||
{{clrl}} | |||
{{Trophy/Fighter | |||
|name=Diffusion Beam | |||
|image=Diffusion Beam - Brawl Trophy.png | |||
|desc-ntsc=R.O.B.'s Final Smash. He emits a beam from his eyes that spreads across the spectrum and undulates in great variety as it travels. What makes this technique different is R.O.B.'s ability to move while using it. This allows him to use it in combination with his other moves to increase his Final Smash's effectiveness. | |||
|desc-pal=R.O.B.'s Final Smash. He emits a beam from his eyes that spreads across the spectrum and undulates with great variety as it travels. What makes this technique different is R.O.B.'s ability to move while using it. This allows him to use it in combination with his other moves to increase his Final Smash's effectiveness. | |||
|gamelist={{Trophy games|console1=Wii|game1=Super Smash Bros. Brawl}} | |||
|game=Brawl | |||
}} | |||
{{Trophy games|console1=Wii|game1=Super Smash Bros. Brawl}} | {{clrl}} | ||
==[[Alternate costume (SSBB)#R.O.B.|Alternate costumes]]== | ==[[Alternate costume (SSBB)#R.O.B.|Alternate costumes]]== | ||
| Line 244: | Line 341: | ||
|{{Head|R.O.B.|g=SSBB|s=25px|cl=Green}} | |{{Head|R.O.B.|g=SSBB|s=25px|cl=Green}} | ||
|} | |} | ||
==Gallery== | |||
<gallery> | |||
SSBBDojoR.O.B.1.jpg|[[Taunt]]ing on [[Luigi's Mansion]]. | |||
SSBBDojoR.O.B.2.jpg|With {{SSBB|Zelda}} on [[Delfino Plaza]]. | |||
SSBBDojoR.O.B.3.jpg|Getting [[footstool]]ed by {{SSBB|Pikachu}} on [[Spear Pillar]]. | |||
SSBBDojoR.O.B.4.jpg|Using his [[back aerial]] on [[Frigate Orpheon]]. | |||
</gallery> | |||
==Trivia== | ==Trivia== | ||
| Line 253: | Line 358: | ||
*R.O.B. is the only character to spin horizontally when using a {{b|Screw Attack|item}}. Despite this, the graphical effect continues to spin vertically. | *R.O.B. is the only character to spin horizontally when using a {{b|Screw Attack|item}}. Despite this, the graphical effect continues to spin vertically. | ||
*On the base of R.O.B. it reads "FAMILY COMPUTER ROBOT". However, when using the gray palette swap, it reads "R.O.B. Robotic Operating Buddy", a reference to the English-language version of R.O.B. | *On the base of R.O.B. it reads "FAMILY COMPUTER ROBOT". However, when using the gray palette swap, it reads "R.O.B. Robotic Operating Buddy", a reference to the English-language version of R.O.B. | ||
*''Brawl'' is the only game where R.O.B. | *''Brawl'' is the only game since his debut where R.O.B. uses the same default color in all regions, regardless of the language, and is also the only game where the Famicom colors are the default in the international versions. | ||
*When spawning items on [[training mode]] with R.O.B., the items will spawn much farther than with other characters. This makes it specially difficult to spawn multiple [[Smart Bomb]]s continuously in order to rack up the combo meter. | *When spawning items on [[training mode]] with R.O.B., the items will spawn much farther than with other characters. This makes it specially difficult to spawn multiple [[Smart Bomb]]s continuously in order to rack up the combo meter. | ||
*With a total of 22 years and five months (at the time of ''Brawl's'' release), R.O.B. held the record for the longest time gap between their debut as a playable character in ''Smash'' and their last appearance in their home series, beating the record of the {{SSBM|Ice Climbers}} until {{SSB4|Duck Hunt}} in turn took the record in {{for3ds}}. | |||
==External links== | ==External links== | ||
Latest revision as of 08:08, December 16, 2024
- This article is about R.O.B.'s playable appearance in Super Smash Bros. Brawl. For his non-playable appearance in Adventure Mode: The Subspace Emissary, see Ancient Minister. For other R.O.B.s as enemies in Adventure Mode, see R.O.B. Squad.
| R.O.B. in Super Smash Bros. Brawl | |
|---|---|
| |
| Universe | R.O.B. |
| Other playable appearances | in SSB4 in Ultimate |
| Availability | Unlockable |
| Final Smash | Diffusion Beam |
| Tier | C- (18) |
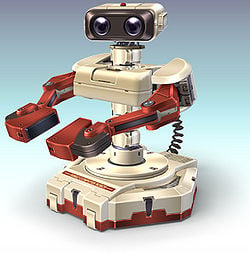
R.O.B. (ロボット, Robot) is a newcomer in Super Smash Bros. Brawl. His full name is Robotic Operating Buddy and he is based on the R.O.B./Robot NES/Famicom peripheral. He was unveiled in a mass leak prior to the Japanese release of Brawl. R.O.B. was confirmed on the DOJO!! March 6, 2008.
R.O.B. has a set of realistic robot sounds, similar to how Donkey Kong, Diddy Kong and Bowser use realistic vocal effects.
R.O.B. ranks 18th on the tier list at the bottom of the high-mid tier. R.O.B. possesses a strong camping game with two very effective projectiles; one is a fast transcendent projectile that can travel across entire stages while going through any hurtbox it connects with, and a powerful item-based projectile that produces a lingering hitbox when it lands, while being able to be picked up and glide tossed with. He also has one of the best recoveries in Brawl, that gains incredible distance while giving R.O.B. nearly free reign to act out of. R.O.B. additionally possesses great tilts and effective aerials, with them having great reach or large hitboxes. However, R.O.B. has significant problems KOing opponents, at least without racking up well in excess of 150+% damage; his finishers aren't powerful (with most having low knockback scaling, making it especially difficult for R.O.B. to KO heavier characters), while having slow start-up, poor hitbox placement, or both, that makes them difficult to land. Additionally, R.O.B. has a large hurtbox, which when combined with his heavy weight and slow aerial mobility, leaves him vulnerable to juggling. R.O.B.'s hurtbox also accentuates his problems dealing with projectile camping from characters like Falco, especially since he lacks a reliable reflector. The hurtbox combines with his below-average mobility to create difficulty in initiating approaches when he lacks a Gyro to glide toss. Another problem R.O.B. has is his poor momentum cancelling options, giving him among the worst endurance for a character of his weight class. Overall, R.O.B. has average matchups, where he holds an advantage over nearly every character below borderline tier, but loses the majority of matchups with several counters against characters above (including a notoriously poor matchup against Meta Knight). R.O.B. has achieved above average tournament results regardless, especially in Meta Knight-banned tournaments.
How to unlock[edit]
Complete one of the following:
- Play 160 VS. matches.
- Collect 250 different trophies.
- Have R.O.B. join the player's party in The Subspace Emissary (The Subspace Bomb Factory (Part II)).
With the exception of the third method, R.O.B. must then be defeated on Mario Bros. whether or not that stage has been unlocked beforehand.
Attributes[edit]
R.O.B. plays the role of a long-range attacker very well, with projectiles and means to keep opponents at bay. His base up close is a blind spot, making it important to keep foes away. Many of his attacks balance moderate power and range with short lag-time. His moves with actual KO potential, though, have considerable start up lag or keep him airborne longer than desired. R.O.B. is also prone to Stale move negation on his KO moves (notably his down smash which, due to its low knockback scaling, can have trouble KO'ing heavier characters even at around 200%) rendering him unable to KO at times (however, his up throw can KO reliably at above 160%). He can easily set up an edgeguard using a forward or back throw, but his most powerful aerials are difficult to land. Despite his moves boasting only moderate knockback, R.O.B. can generally keep knocking his opponent away with superior range and combine any of his moves together fairly easily. The resulting damage adds up rather quickly with an experienced player. R.O.B. is decently heavy and floaty (making R.O.B., Samus, and Yoshi the only floaty heavyweights), but he is also a large target. He has two projectiles, both with decent knockback and unique properties, which usually mess up the opponent's approach. The major flaw with these projectiles is that they are not spammable (as they must be charged/recharged). His aerial game is also good, with his forward aerial being fast and having moderate knockback, his neutral and back aerial being powerful but difficult to land, and his down air acting as a Meteor Smash (although it has a very slow start-up). His back aerial can also aid his exceptional recovery, both his back and down aerials push R.O.B. up slightly when using Robo Burner. With the addition of Robo Burner, he is quite interesting to experiment with on certain combination of attacks and techniques such as a Wall of Pain. In fact, a technique sometimes called "burner flashing," which is initiated by first using Robo Burner and then repeatedly pressing B, has been proven to be the farthest vertical traveling recovery move in one go. R.O.B.'s recovery does have its problems. He can't air dodge out of Robo Burner, making his recovery predictable for some characters and he can be juggled because he is floaty in both jumping and recovery, notably by Meta Knight and Fox. His slow fast falling also makes his momentum canceling poor, getting KOed vertically at relatively low percentages, especially for his weight class. R.O.B.'s side special reflects projectiles, but characters with more spammable projectiles can easily overwhelm R.O.B. from afar, and it isn't useful as an attack. Overall, with a very flexible ranged game, R.O.B. can be a dangerous foe for many characters in the game.
Moveset[edit]
For a gallery of R.O.B.'s hitboxes, see here.
| Name | Damage | Description | ||
|---|---|---|---|---|
| Neutral attack | 11 / 12 | 3% | R.O.B. does a quick swing with each arm. | |
| 3% | ||||
| Forward tilt | S2 | 8% (arm tip), 6% (arm), 5% (body) | Leans forward and punches with an impressive range. Can be aimed up or down. | |
| Up tilt | Hi2 | 3% (early), 5% (arms tip), 6% (arms base) | R.O.B. throws both arms upwards. Can hit twice, with the first hit having set knockback and second hit launching opponents upwards. | |
| Down tilt | Lw2 | 5% (arms), 4% (arms tip) | Quickly pushes his arms forward along the ground. Quick, produces opportunity for multiple hits. Can cause tripping. | |
| Dash attack | DashA | 6% (arms), 5% (arms tip) | R.O.B. thrusts both his arms forward. | |
| Forward smash | S3 | 14% (base), 13% (mid), 12% (tip) | Shoots a short beam from his eyes. Can be directed up and down like a shorter Robo Beam. May be considered a projectile, due to the fact that it can't break a Metal Box. Does average knockback. | |
| Up smash | Hi3 | 12% (base), 13% (mid), 14% (tip) | R.O.B. plants his hands on the ground and does a handstand, shooting boosters out of his base upwards. Very high knockback (R.O.B.'s strongest move in terms of knockback) but is slow and predictable. High vertical range but has no horizontal range, making the move difficult to use, especially on stages without platforms. When sweetspotted and fully charged, it KOs at 70%. | |
| Down smash | Lw3 | 2% (hits 1-4), 5% (hit 5) | Lowers torso on his spine and extends arms, spinning them. Low damage and knockback, but decent range and multiple hits. It is the fastest down smash, tied with Zelda's. | |
| Neutral aerial | AirN | 10% | Pauses for a second, then fires his boosters as he spins vertically. | |
| Forward aerial | AirF | 10% (clean), 6% (late) | Extends his arms forward. Has low lag, and is good for starting up aerial combos and edgeguarding. At low percentages, it can set up for a neutral or down aerials on heavyweights. | |
| Back aerial | AirB | 11% | Aims his base behind him and fires his boosters. Pushes R.O.B. forward a little bit, although while he keeps the knockback after getting hit, it does nothing to increase or reduce momentum. The hitbox affects targets both in front of and behind R.O.B. each with decent knockback. This can be used for recovery in between Robo Burners, creating virtually the longest horizontal recovery move in the game along with Pound and Glide. | |
| Up aerial | AirHi | 4-5% (hits 1-4), 3% (hit 5) | Raises arms repeatedly above his head, hitting multiple times with good damage if used right. About 20% damage if all hits connect. | |
| Down aerial | AirLw | 12% (base), 13% (booster base), 11% (booster mid), 6% (booster tip) | R.O.B. fires a blast downwards. Boosts R.O.B. up a little bit, shooting his boosters down where he was. It's powerful, yet slow and can meteor smash. Keeps him stationary in the air shortly, although he can fast fall with it as long as he's in knockback after getting hit. When tiny, R.O.B. can use this move instead of Robo Burner to recover. Provides him an unlimited recovery move, because it pushes him upward and can be used infinitely to fly up the upper blast line infinitely without getting Star KO'd, making it also the only unlimited non-bomb recovery and the only infinite recovery (when tiny) of every Smash Bros. installment. Can also perform every Hyrule Jump (only when tiny). It should be noted that the uppermost hitboxes have weaker vertical knockback. | |
| Grab | Grab (つかみ) | — | ||
| Pummel | CatchA | 2% | Squeezes opponent with his hands. Very fast and no ending lag. | |
| Forward throw | ThrowF | 10% | Tosses opponent forward. Very fast. | |
| Back throw | ThrowB | 10% | Quickly swings his opponent backward. Can KO around 165%, if used very close to the ledge. | |
| Up throw | ThrowHi | 10% | Grabs opponent, flies them into the air a short distance, turns them upside down, then crashes them into the ground (Similar to Olimar, Kirby or Meta Knight's up throw). This is R.O.B.'s strongest throw along with his back throw, knockback wise. Can KO around 165%. | |
| Down throw | ThrowLw | 10% | Drills opponent into the ground in front of him. Can be followed up by up aerial. | |
| Forward roll Back roll Spot dodge Air dodge |
— | — | ||
| Techs | — | — | ||
| Floor attack (front) Floor getups (front) |
6% | Gets up and spins with his right arms extended, hitting both sides of himself. | ||
| Floor attack (back) Floor getups (back) |
6% | Quickly gets up and hammers both arms extended in each direction. | ||
| Floor attack (trip) Floor getups (trip) |
5% | R.O.B. lowers his torso, withdraws his left arm and extends his right arm to sweep the floor around. Around 5%. | ||
| Edge attack (fast) Edge getups (fast) |
7% | R.O.B. leaps onto the edge and swings both arms over-head. | ||
| Edge attack (slow) Edge getups (slow) |
10% | Slowly climbs onto the stage and lunges his left arm forward. | ||
| Neutral special | Robo Beam | 5% (uncharged), 7% (charged), 9% (Super Robo Beam) | Fires a long-range laser from his eyes that will pierce through opponents. The laser can be directed, and if the laser makes contact with a floor, ceiling, or wall, it will bounce off at an angle. Attempting to use the Robo Beam again immediately after using it will result instead in R.O.B. using a weak attack that only affects the area directly in front of him. After not using the Robo Beam for a minimum of 20 seconds, the attack will be powered up and become a Super Robo Beam. This Super Robo Beam has enhanced power and knockback when compared to the regular Robo Beam, and is visually wider. | |
| Side special | Arm Rotor | 1-2% (loop), 3-4% (last hit) | Spins his arms like a rotor. The move has a light push and also lifts him into the air by a small amount, and can also be directed up and down, causing the rotor's hitbox to move along with it. The move hits multiple times and finishes off with a weak attack that has decent knockback. It also works as a reflector that sends any projectile back towards the user at x1.5 the power. However, as the hitbox of the attack changes depending on the position of the rotor, in addition to the start-up lag of the move, the usefulness of this move as a reflector varies. | |
| Up special | Robo Burner | 0% | Activates burners on his base to fly into the air. During Robo Burner, R.O.B. will ascend vertically so long as the special move or up directional buttons are pressed. While in this state, R.O.B. can also attack to cancel out of the move. The Robo Burner is an extremely powerful vertical recovery, being one of the best vertical recoveries in Brawl, and a good horizontal recovery as well. The Robo Burner lasts a fairly long time, and when deactivated, it will not send R.O.B. into a helpless state like most recovery moves. However, when out of fuel, R.O.B. must return to solid ground in order to recharge the burner, or the move cannot be used again. It takes roughly 1.5 seconds to recharge. | |
| Down special | Gyro | 7-18% (shoot), 2-5% (idle), 8% (thrown), 9% (smash & dash thrown), 3-7% (dropped) | Produces a Gyro that he begins to spin. The Gyro can be fired off by using the move again while charging or when fully charged. The Gyro can be picked up after hitting foes or landing on the ground, and can continue to damage foes in this state, as it will deal slight damage to foes who contact it while the Gyro is spinning. When a Gyro on the ground stops spinning, it will disappear. As an item, foes can pick it back up to throw back at R.O.B., or he can pick it up to throw again himself, but the Gyro cannot be charged again if picked up. The Gyro can be glide tossed, and is generally considered one of the more powerful glide tosses in Brawl, due to its high range and knockback. | |
| Final Smash | Diffusion Beam | 2% (close range) 4% (long range) 15% (hard hit laser) | Begins firing a spiral-shaped beam from his eyes. The Diffusion Beam is unique in that it operates like the Superspicy Curry, as his entire moveset, excluding the Robo Beam, is usable during this Final Smash, in addition to items. Foes caught in the beam will take damage, but the beam itself has no knockback. However, there is also a powerful laser that appears instead of the spiral-shaped beam at points, which has strong knockback, and will usually KOs opponents hit by it. As the move's hitbox is directly related to the space in front of R.O.B.'s eyes, the beam can be directed at foes through the use of unorthodox methods, such as taunts. R.O.B. himself also gains invincibility while the Diffusion Beam is active. | |
Stats[edit]
| Stats | Weight | Dash speed | Walk speed | Traction | Air friction | Air speed | Air acceleration | Gravity | Falling speed | Jumpsquat | Jump height | Double jump height | Empty landing Lag |
|---|---|---|---|---|---|---|---|---|---|---|---|---|---|
| Value | 106 | 1.3 – Initial dash 1.5 – Run |
1.1 | 0.06 | 0.004 | 0.89 | 0.04 – Base 0.006 – Additional |
0.065 | 1.2 – Base 1.68 – Fast-fall |
5 | 37.82543269 - Base ? - Short hop |
? | 3 |
Announcer call[edit]
English
Wii Remote selection sound[edit]
- Makes a pair of whirring noises.
On-screen appearance[edit]
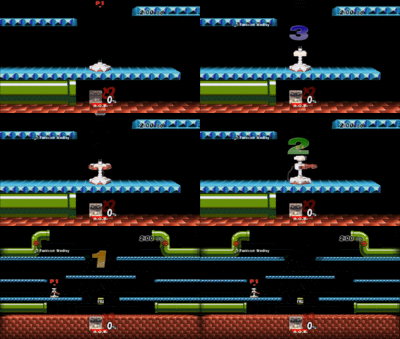
- Assembles piece by piece as his parts drop from the sky.
|
|---|
Taunts[edit]
- Up taunt: Faces the camera and spins his arms and head in a circle.
- Side taunt: Faces the camera and moves his head around, firing a small laser from his eyes.
- Down taunt: Faces the camera, moves his arms down and then moves them back up again, spinning them whilst he does so.
| Up taunt | Side taunt | Down taunt |
|---|---|---|
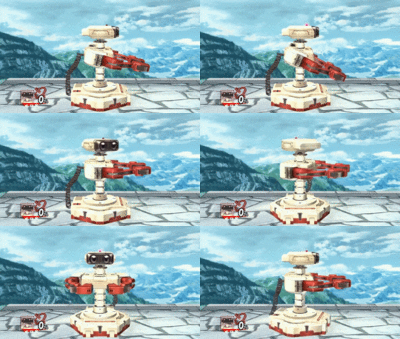
|
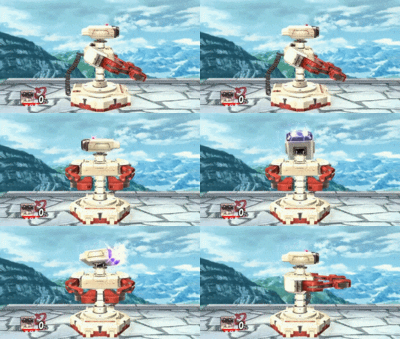
|
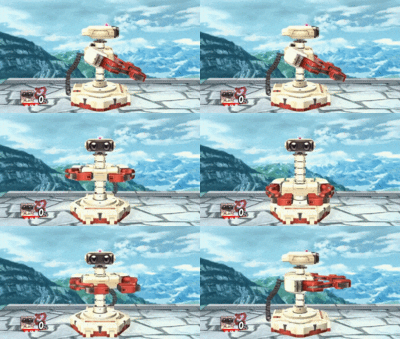
|
Idle poses[edit]
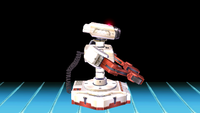
- Looks toward his right side, and then looks towards his left side.
- Slowly tilts his head downwards and then lifts it back up, as if falling asleep.
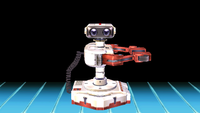 |
|
|---|
Crowd cheer[edit]
| Cheer (English) | Cheer (Japanese) | Cheer (German) | Cheer (Korean) | |
|---|---|---|---|---|
| Cheer | ||||
| Description | R - O - B - R.O.B.! | Ro - bot! | R - O - B! ROB! | |
| Cheer (French) | Cheer (Italian) | Cheer (Spanish) | ||
| Cheer | ||||
| Description | R - O - B ! Rooooob ! | Roooob! | ROB! *claps 3 times* | R - O - B! |
Victory poses[edit]
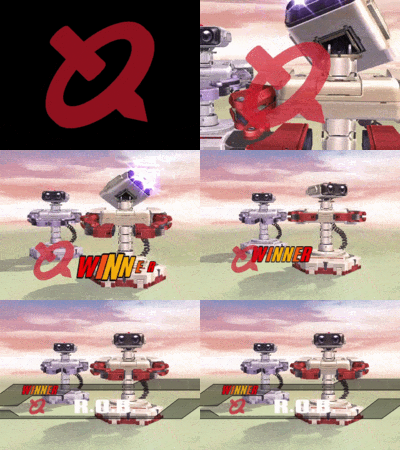
- Up: Spins around up a slight inch in the air, then lands, then puts his arms down and brings them back up again while turning his head.
- Left: Spins his arms and moves them in a strongman pose while turning his head.
- Right: Shoots sparks from his eyes, then flexes his upper body, like his side taunt.
| Up | Left | Right |
|---|---|---|

|

|
|
In competitive play[edit]
Notable players[edit]
- See also: Category:R.O.B. players (SSBB)
8BitMan - Best R.O.B. main from Florida
Chia - Best Tri-State R.O.B.
HolyNightmare - Best R.O.B. in Canada
HugS
Luminous - Placed 7th at Umebura 1
OCEAN - Best R.O.B. in the world
Rena - Notably beat Mikeneko, Otori, and 9B
Renasu - Notably beat Mikeneko, Luminous, and Lagnel
Route - Notably beat Edge, Earth, and Choco
Stingers - Best R.O.B. in Carolina
t0mmy - Best Northwestern R.O.B.
Tier placement and history[edit]
R.O.B. was initially a top tier character, being ranked 6th in the first tier list (September 2008). He was considered a difficult matchup for many players, who weren't experienced enough at the time to get around his weaknesses, and he was very dominant, with his attacks known for being fast and having great hitboxes. However, as time progressed, R.O.B.'s weaknesses became more prominent, with players learning to get around the blind spots of his attacks, as well as the increasing dominance of Meta Knight, the character which countered R.O.B. the most. R.O.B. continued to drop down the tier list, with the biggest drop being him falling five places from the third tier list to the fourth. He currently ranks 18th place in upper-mid tier, in the eighth tier list, as of April 2013.
In Solo Modes[edit]
Classic Mode[edit]
In Classic Mode, R.O.B. can appear as an opponent in Stage 9 if he has been unlocked on Mario Bros. (or Delfino Plaza if Mario Bros. has not been unlocked) R.O.B. can also appear as an opponent in Stage 11, but only if he hasn't appeared in Stage 9.
All-Star Mode[edit]
In All-Star Mode, R.O.B. is fought in Stage 5 on Mario Bros. (or Delfino Plaza if Mario Bros. has not been unlocked)
Event Matches[edit]
Solo Events[edit]
- Event 24: Come On! Blue Falcon!: Captain Falcon must use his Final Smash, Blue Falcon, to defeat two R.O.B.s on Port Town Aero Dive before one full lap is complete.
- Event 27: Three-Beast Carnage: A tiny R.O.B. must defeat a giant Bowser, a giant Donkey Kong, and a giant Charizard on New Pork City.
- Event 39: All-Star Battle x2: R.O.B. is one of the eight opponents fought in this event along with King Dedede, Ike, Lucario, Toon Link, Snake, Sonic, and Wolf.
Co-Op Events[edit]
- Co-Op Event 10: The R.O.B.'s of Tomorrow: Lucario and the Ice Climbers must defeat five R.O.B.s of varying sizes on Summit.
- Co-Op Event 18: The New Weapon of Shadow Moses: Snake and R.O.B. must defeat two other R.O.B.s on Shadow Moses Island.
- Co-Op Event 21: The True All-Star Battle: Both players select a character and take on the entire roster on Battlefield.
Congratulations Screens[edit]
Role in The Subspace Emissary[edit]
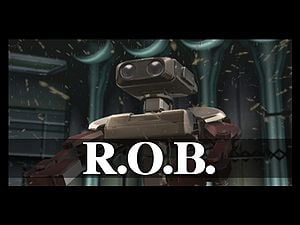
The race of R.O.B.s appear under four roles in Super Smash Bros. Brawl. During The Subspace Emissary, they are a faction of the Subspace Army and are used to activate the Subspace Bombs, as well as guard the Ancient Minister and come in three different variations; R.O.B. Sentries, R.O.B. Launchers and R.O.B. Blasters. The bodyguards for the Ancient Minister are called "The R.O.B. Squad". When a pair of R.O.B.s are used to activate a Subspace Bomb, they are destroyed in its detonation.
In The Subspace Emissary, it is revealed that the Ancient Minister is actually R.O.B. and the whole reason he was tearing apart the World of Trophies was because Tabuu had taken the lives of many of his fellow R.O.B.s, which upset him. Tabuu then threatened to extinguish the rest of them if he would not aid him in his plot. It is also revealed that R.O.B. was once the ruler of the world and lived on the floating Isle of the Ancients with its kind in peace. Samus, Pikachu, Olimar, Captain Falcon, Donkey Kong and Diddy Kong were able to get on this same island. However, when they arrive, the Ancient Minister refuses to battle with them.
A hologram of Ganondorf appears and commands the R.O.B. minions to detonate all the Subspace Bombs in the building, only to have the Ancient Minister tell him off. Ganondorf then orders the R.O.B.s to attack him for his disobedience. They burn the Minister's robes away to discover that their target is a R.O.B. himself. At that point, R.O.B. decided to stop destroying his home dimension and joined the heroes. After he and his friends defeat some of the Subspace Army's forces sent in by Ganondorf, he mourned at the fact that the Subspace Bombs are about to detonate and annihilate the rest of his kind. Realizing that they cannot pull the R.O.B.s away from the bombs, Captain Falcon calls in the Falcon Flyer, DK grabs the melancholic R.O.B. and the fighters depart, despite interference from Meta Ridley.
Captain Falcon drives the Falcon Flyer straight into Subspace along with everyone else. Unfortunately, Tabuu uses his Off Waves to reduce them all to their trophy forms; R.O.B. among them. King Dedede, Ness, Luigi, and Kirby, who were revived by the Dedede Brooch, find them and bring them back to life. With all heroes reunited, they endure the Great Maze and fight Tabuu.
R.O.B. is one of the few characters who has two names displayed throughout the story. The first time is as the Ancient Minister and the second time as R.O.B.. Zelda and Samus also have different names displayed, labelled at different times as "Sheik" and "Zero Suit Samus", respectively.
Playable appearances[edit]
R.O.B. appeared several times in the Subspace Emissary as the Ancient Minister until he was finally reformed. He appeared in Midair Stadium, The Plain, The Battlefield Fortress (where he was seen being attacked by Ike to prevent him from dropping a Subspace Bomb), The Cave, The Wilds (Part II) and finally in The Subspace Bomb Factory (Part I).
- The Subspace Bomb Factory (Part II)
- Entrance to Subspace
- The Great Maze (if rescued in Subspace (Part II))
Exclusive stickers[edit]
These stickers can only be used by R.O.B. or a select few including him.
- Ashley Viewing DTS: [Specials: Direct] Attack +17
- Candy: [Specials: Direct] Attack +4
- Donbe: [Slash] Resistance +26
- Duck: Launch Resistance +20
- F-Type: [Throwing] Power +22
- R.O.B.: [Specials: Indirect] Attack +15
- Robot: [Energy] Attack +32
- Robot & Blocks: [Specials: Indirect] Attack +27
- Wild Gunman: [Specials: Indirect] Attack +5
- Yakuman Player: [Electric] Resistance +28
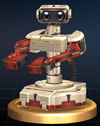
Trophies[edit]
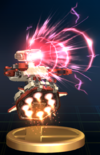
R.O.B.'s main and Final Smash trophies can be obtained by clearing Classic Mode and All-Star mode respectively with R.O.B.
- R.O.B.
R.O.B. sporting his Famicom colors. R.O.B. debuted in Japan as Robot in 1985 as an add-on for the Famicom. He could be combined with a "gyro set", etc. for two types of play. The player controlled Professor Hector, the TV emitted light, and R.O.B. responded to the light by moving. At the time, it was epoch-making game play. Recently, R.O.B. appeared in Mario Kart DS.
R.O.B. sporting his Famicom colors. R.O.B. debuted in Japan as Robot in 1985 as an add-on for the Famicom. He could be combined with a "gyro set", etc. for two types of play. The player controlled Professor Hector, the TV emitted light, and R.O.B. responded to the light by moving. At the time, it was epoch-making game play. Recently, R.O.B. appeared in Mario Kart DS.
: Nintendo Entertainment System
- Robotic Operating Buddy
- Diffusion Beam
R.O.B.'s Final Smash. He emits a beam from his eyes that spreads across the spectrum and undulates in great variety as it travels. What makes this technique different is R.O.B.'s ability to move while using it. This allows him to use it in combination with his other moves to increase his Final Smash's effectiveness.
R.O.B.'s Final Smash. He emits a beam from his eyes that spreads across the spectrum and undulates with great variety as it travels. What makes this technique different is R.O.B.'s ability to move while using it. This allows him to use it in combination with his other moves to increase his Final Smash's effectiveness.
: Super Smash Bros. Brawl
Alternate costumes[edit]

| |||||
Gallery[edit]
With Zelda on Delfino Plaza.
Getting footstooled by Pikachu on Spear Pillar.
Using his back aerial on Frigate Orpheon.
Trivia[edit]
- The entirety of R.O.B.'s "voice" is composed of NES-style noises, although this is difficult to discern during a fight. R.O.B., Mr. Game & Watch, Olimar, and Samus are the only characters that do not have voices.
- R.O.B. is the only character in Super Smash Bros. Brawl without a stage representing his universe. Instead, Mario Bros. is used as his home stage. Delfino Plaza is used if Mario Bros. has not been unlocked yet.
- R.O.B. is the only character in Brawl who can hold 4 consecutive charges at the same time; a smash attack, a fully charged Gyro, Robo Beam and the automatic replenishing of his fuel capacity for Robo Burner.
- While some characters cannot be put in helpless naturally, their helpless state can be seen via hacking. R.O.B. is the exception, as the game freezes if he is put in helpless state, meaning he was not programmed to have one.
- R.O.B. is the only character to spin horizontally when using a Screw Attack. Despite this, the graphical effect continues to spin vertically.
- On the base of R.O.B. it reads "FAMILY COMPUTER ROBOT". However, when using the gray palette swap, it reads "R.O.B. Robotic Operating Buddy", a reference to the English-language version of R.O.B.
- Brawl is the only game since his debut where R.O.B. uses the same default color in all regions, regardless of the language, and is also the only game where the Famicom colors are the default in the international versions.
- When spawning items on training mode with R.O.B., the items will spawn much farther than with other characters. This makes it specially difficult to spawn multiple Smart Bombs continuously in order to rack up the combo meter.
- With a total of 22 years and five months (at the time of Brawl's release), R.O.B. held the record for the longest time gap between their debut as a playable character in Smash and their last appearance in their home series, beating the record of the Ice Climbers until Duck Hunt in turn took the record in Super Smash Bros. for Nintendo 3DS.
External links[edit]
| Fighters in Super Smash Bros. Brawl | |
|---|---|
| Veterans | Bowser · Captain Falcon · Donkey Kong · Falco · Fox · Ganondorf · Ice Climbers · Jigglypuff · Kirby · Link · Luigi · Mario · Marth · Mr. Game & Watch · Ness · Peach · Pikachu · Samus · Yoshi · Zelda / Sheik |
| Newcomers | Diddy Kong · Ike · King Dedede · Lucario · Lucas · Meta Knight · Olimar · Pit · Pokémon Trainer (Charizard · Ivysaur · Squirtle) · R.O.B. · Snake · Sonic · Toon Link · Wario · Wolf · (Zero Suit Samus) |
|
| |
|---|---|
| Fighter | R.O.B. (SSBB · SSB4 · SSBU) |
| Enemies | R.O.B. Squad (R.O.B. Blaster · R.O.B. Launcher · R.O.B. Sentry) |
| Other | Ancient Minister · Isle of the Ancients |
| Trophies, Stickers, and Spirits | Trophies (SSBB · SSB4) · Spirits |
| Music | Gyromite |


