Dr. Mario (SSB4)/Down aerial: Difference between revisions
mNo edit summary |
SuperSqank (talk | contribs) m (→Update history) |
||
| (2 intermediate revisions by the same user not shown) | |||
| Line 7: | Line 7: | ||
==Update history== | ==Update history== | ||
{{GameIcon|ssb4-3ds}} [[1.0.4]] | '''{{GameIcon|ssb4-3ds}} [[1.0.4]]/{{GameIcon|ssb4-wiiu}} 1.0.0''' | ||
*{{buff|The loop hits deal more damage ({{rollover|1.4%|1.568% with the 1.12x damage multiplier)|y}} → {{rollover|1.7%|1.904% with the 1.12x damage multiplier)|y}}).}} | |||
*{{buff| | *{{buff|Landing lag (24 frames → 21).}} | ||
*{{buff| | *{{nerf|The loop hits have a longer rehit rate 3 → 4. This gives the move two less hits, reducing its overall damage ({{rollover|11.4%|12.768% with the 1.12x damage multiplier|y}} → {{rollover|9.8%|10.976% with the 1.12x damage multiplier)|y}}).}} | ||
*{{nerf| | |||
==Hitboxes== | ==Hitboxes== | ||
===Attack=== | |||
{{SSB4HitboxTableHeader|special=y}} | |||
{{SSB4HitboxTableHeader}} | {{HitboxTableTitle|Loop hits|42}} | ||
{{HitboxTableTitle| | {{SSB4SpecialHitboxTableRow | ||
{{ | |||
|id=0 | |id=0 | ||
|part=0 | |part=0 | ||
|damage=1. | |rehit=4 | ||
|damage=1.7% | |||
|angle=366 | |angle=366 | ||
|bk=30 | |bk=30 | ||
| Line 39: | Line 38: | ||
|slvl=S | |slvl=S | ||
}} | }} | ||
{{ | {{SSB4SpecialHitboxTableRow | ||
|id=1 | |id=1 | ||
|part=0 | |part=0 | ||
|damage=1. | |rehit=4 | ||
|damage=1.7% | |||
|angle=366 | |angle=366 | ||
|bk=30 | |bk=30 | ||
| Line 59: | Line 59: | ||
|slvl=S | |slvl=S | ||
}} | }} | ||
{{ | {{SSB4SpecialHitboxTableRow | ||
|id=2 | |id=2 | ||
|part=0 | |part=0 | ||
|damage=1. | |rehit=4 | ||
|damage=1.7% | |||
|angle=95 | |angle=95 | ||
|bk=30 | |bk=30 | ||
| Line 79: | Line 80: | ||
|slvl=S | |slvl=S | ||
}} | }} | ||
{{ | {{SSB4SpecialHitboxTableRow | ||
|id=3 | |id=3 | ||
|part=0 | |part=0 | ||
|damage=1. | |rehit=4 | ||
|damage=1.7% | |||
|angle=95 | |angle=95 | ||
|bk=30 | |bk=30 | ||
| Line 100: | Line 102: | ||
}} | }} | ||
{{HitboxTableTitle|Final hit|42}} | {{HitboxTableTitle|Final hit|42}} | ||
{{ | {{SSB4SpecialHitboxTableRow | ||
|id=0 | |id=0 | ||
|part=1 | |part=1 | ||
|damage=3 | |damage=3% | ||
|angle=45 | |angle=45 | ||
|bk=50 | |bk=50 | ||
| Line 119: | Line 121: | ||
|slvl=M | |slvl=M | ||
}} | }} | ||
{{ | {{SSB4SpecialHitboxTableRow | ||
|id=1 | |id=1 | ||
|part=1 | |part=1 | ||
|damage=3 | |damage=3% | ||
|angle=45 | |angle=45 | ||
|bk=50 | |bk=50 | ||
| Line 138: | Line 140: | ||
|slvl=M | |slvl=M | ||
}} | }} | ||
{{HitboxTableTitle|Landing| | {{HitboxTableRowNote|The damage values are untouched before being affected by Dr. Mario's 1.12x damage multiplier.|42}} | ||
|} | |||
===Landing=== | |||
{{SSB4HitboxTableHeader|stretch=y}} | |||
{{HitboxTableTitle|Landing|27}} | |||
{{SSB4HitboxTableRow | {{SSB4HitboxTableRow | ||
|id=0 | |id=0 | ||
|part=0 | |part=0 | ||
|damage=2 | |damage=2% | ||
|angle=361 | |angle=361 | ||
|bk=50 | |bk=50 | ||
| Line 152: | Line 159: | ||
|ypos=3.2 | |ypos=3.2 | ||
|zpos=4.0 | |zpos=4.0 | ||
|ystretch=3.2 | |||
|zstretch=-3.5 | |||
|type=Foot | |type=Foot | ||
|sdi=1.0 | |sdi=1.0 | ||
| Line 159: | Line 168: | ||
|slvl=M | |slvl=M | ||
}} | }} | ||
{{HitboxTableRowNote|The damage values are untouched before being affected by Dr. Mario's 1.12x damage multiplier.|27}} | |||
|} | |||
==Timing== | |||
===Attack=== | |||
{|class="wikitable" | |||
!Initial autocancel | |||
|1-5 | |||
|- | |||
!Hits 1-4 | |||
|11-26 | |||
|- | |||
!Hit 5 | |||
|27 | |||
|- | |||
!Ending autocancel | |||
|45- | |||
|- | |||
!Interruptible | |||
|52 | |||
|- | |||
!Animation length | |||
|52 | |||
|} | |||
{{FrameStripStart}} | |||
{{FrameStrip|t=Lag|c=10}}{{FrameStrip|t=Hitbox|c=16|e=HitboxChangeS}}{{FrameStrip|t=Hitbox|c=1|s=HitboxChangeE}}{{FrameStrip|t=Lag|c=24}}{{FrameStrip|t=Interruptible|c=1}} | |||
|- | |||
{{FrameStrip|t=Autocancel|c=5}}{{FrameStrip|t=Blank|c=39}}{{FrameStrip|t=Autocancel|c=8}} | |||
{{FrameStripEnd}} | |||
===Landing lag=== | |||
{|class="wikitable" | |||
!Animation length | |||
|21 | |||
|} | |} | ||
{{FrameStripStart}} | |||
{{FrameStrip|t=Lag|c=21}} | |||
{{FrameStripEnd}} | |||
{{FrameIconLegend|lag=y|hitbox=y|hitboxchange=y|interruptible=y|autocancel=y}} | |||
{{MvSubNavDrMario|g=SSB4}} | {{MvSubNavDrMario|g=SSB4}} | ||
[[Category:Dr. Mario (SSB4)]] | [[Category:Dr. Mario (SSB4)]] | ||
[[Category:Down aerials (SSB4)]] | [[Category:Down aerials (SSB4)]] | ||
Latest revision as of 09:26, October 26, 2021
Overview[edit]
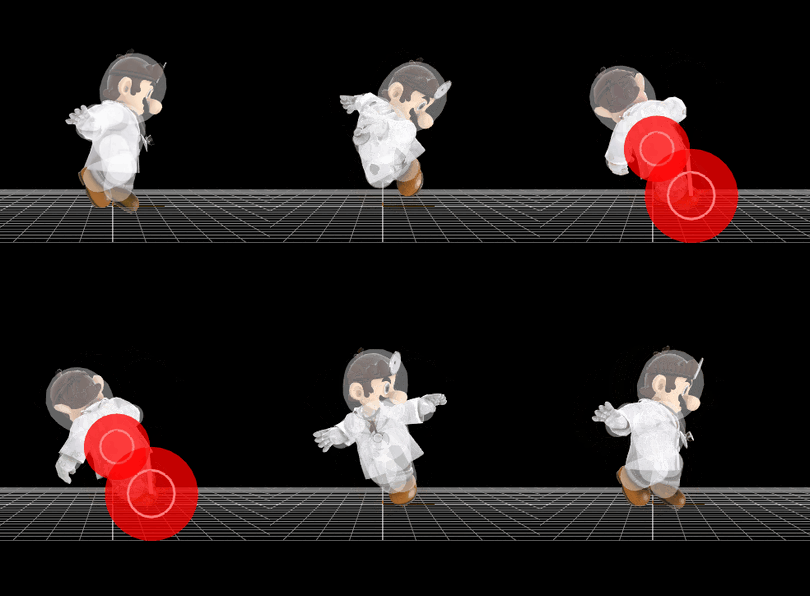
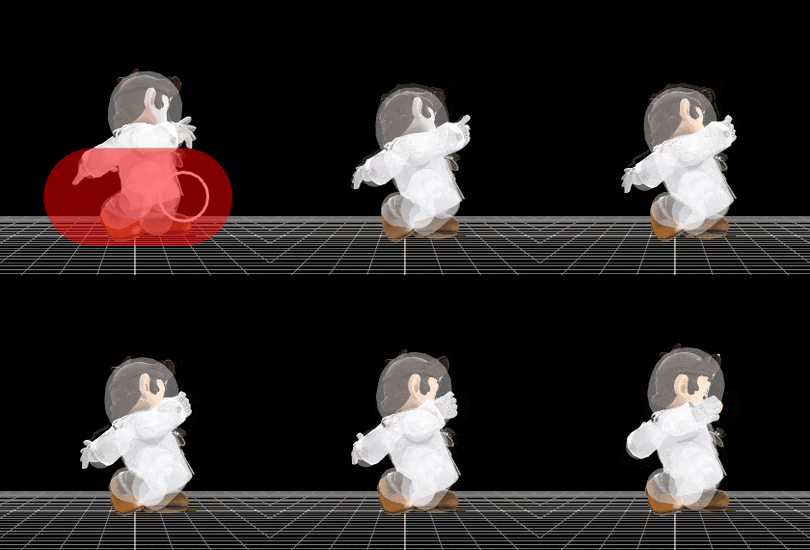
Dr. Mario's down aerial is a drill kick with good horizontal knockback on the last hit. This move has a decent damage output, and like most drills, its hits connect more reliably than some other multi-hitting attacks, making it a proficient damage-racker. Its low angle also makes it good at gimping opponents recovering low. However, it has little horizontal range, not much use in combos due to its unfavorable launch angle, and it has no KO power whatsoever because of its low knockback scaling. A strange attribute is tied to the landing hitbox, where it is only able to hit grounded opponents. This makes it quite inconsistent at landing near the ground, and quite punishable due to the landing lag of the move. The landing hitbox itself is a bit more powerful than the final hit of down aerial.
Update history[edit]
![]() 1.0.4/
1.0.4/![]() 1.0.0
1.0.0
 The loop hits deal more damage (1.4% → 1.7%).
 Landing lag (24 frames → 21).
 The loop hits have a longer rehit rate 3 → 4. This gives the move two less hits, reducing its overall damage (11.4% → 9.8%).
Hitboxes[edit]
Attack[edit]
Landing[edit]
Timing[edit]
Attack[edit]
| Initial autocancel | 1-5 |
|---|---|
| Hits 1-4 | 11-26 |
| Hit 5 | 27 |
| Ending autocancel | 45- |
| Interruptible | 52 |
| Animation length | 52 |
Landing lag[edit]
| Animation length | 21 |
|---|
Lag time |
Hitbox |
Hitbox change |
Autocancel |
Interruptible |
|

