Meta Knight (SSBB)/Up tilt: Difference between revisions
From SmashWiki, the Super Smash Bros. wiki
Jump to navigationJump to search
TheWatcher (talk | contribs) (→Overview: Added really small information and a hyperlink.) Tag: Mobile edit |
No edit summary |
||
| (4 intermediate revisions by 3 users not shown) | |||
| Line 1: | Line 1: | ||
{{ArticleIcons|ssbb=y}} | {{ArticleIcons|ssbb=y}} | ||
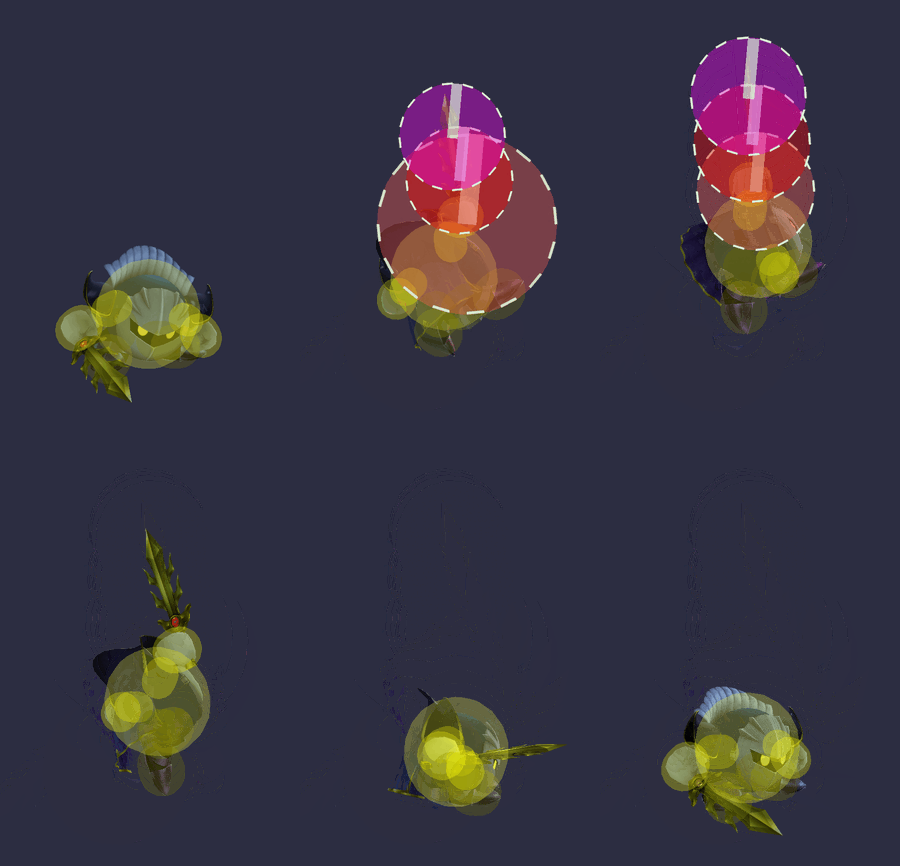
[[File:MetaKnightUTiltSSBB.gif|thumb|300px|Hitbox visualization showing Meta Knight's up tilt.]] | |||
==Overview== | |||
Meta Knight stabs upward. The move has a [[sweetspot]] at the tip of the sword (similarly to {{SSBB|Marth}}'s tipper sweetspots). When sweetspotted, the move has high vertical [[knockback]], and can reliably [[KO]] under 150%, although its [[KO]] power is reduced by a sizable amount if the move is not sweetspotted. The move is usually used to [[punish]] and cover options from opponents above Meta Knight, especially those on [[soft platform]]s above Meta Knight on stages such as {{SSBB|Battlefield}} and [[Halberd]]. | |||
== | ==Hitboxes== | ||
{{BrawlHitboxTableHeader}} | |||
{{HitboxTableTitle|Early hit|42}} | |||
{{BrawlHitboxTableRow | |||
|id=2 | |||
|damage=7.0% | |||
|angle=85 | |||
|bk=40 | |||
|ks=120 | |||
|fkv=0 | |||
|r=420000 | |||
|bn=40 | |||
|xpos=0.0 | |||
|ypos=-60000 | |||
|zpos=0.0 | |||
|rawflags=00100010100000110000011001000010 | |||
}} | |||
{{HitboxTableTitle|Clean hit|42}} | |||
{{BrawlHitboxTableRow | |||
|id=0 | |||
|damage=7.0% | |||
|angle=85 | |||
|bk=35 | |||
|ks=145 | |||
|fkv=0 | |||
|r=330000 | |||
|bn=40 | |||
|xpos=0.0 | |||
|ypos=540000 | |||
|zpos=0.0 | |||
|rawflags=00100010100000110000011001000010 | |||
}} | |||
{{BrawlHitboxTableRow | |||
|id=1 | |||
|damage=8.0% | |||
|angle=85 | |||
|bk=35 | |||
|ks=130 | |||
|fkv=0 | |||
|r=360000 | |||
|bn=40 | |||
|xpos=0.0 | |||
|ypos=240000 | |||
|zpos=0.0 | |||
|rawflags=00100010100000110000011001000010 | |||
}} | |||
{{BrawlHitboxTableRow | |||
|id=2 | |||
|damage=6.0% | |||
|angle=85 | |||
|bk=40 | |||
|ks=120 | |||
|fkv=0 | |||
|r=600000 | |||
|bn=40 | |||
|xpos=0.0 | |||
|ypos=-60000 | |||
|zpos=0.0 | |||
|rawflags=00100010100000110000011001000010 | |||
}} | |||
{{HitboxTableTitle|Late hit|42}} | |||
{{BrawlHitboxTableRow | |||
|id=0 | |||
|damage=7.0% | |||
|angle=85 | |||
|bk=35 | |||
|ks=145 | |||
|fkv=0 | |||
|r=330000 | |||
|bn=40 | |||
|xpos=0.0 | |||
|ypos=540000 | |||
|zpos=0.0 | |||
|rawflags=00100010100000110000011001000010 | |||
}} | |||
{{BrawlHitboxTableRow | |||
|id=1 | |||
|damage=8.0% | |||
|angle=85 | |||
|bk=35 | |||
|ks=130 | |||
|fkv=0 | |||
|r=360000 | |||
|bn=40 | |||
|xpos=0.0 | |||
|ypos=240000 | |||
|zpos=0.0 | |||
|rawflags=00100010100000110000011001000010 | |||
}} | |||
{{BrawlHitboxTableRow | |||
|id=2 | |||
|damage=6.0% | |||
|angle=85 | |||
|bk=40 | |||
|ks=120 | |||
|fkv=0 | |||
|r=360000 | |||
|bn=40 | |||
|xpos=0.0 | |||
|ypos=-60000 | |||
|zpos=0.0 | |||
|rawflags=00100010100000110000011001000010 | |||
}} | |||
|} | |||
==Timing== | |||
{|class="wikitable" | |||
!Early hit | |||
|7 | |||
|- | |||
!Clean hit | |||
|8-12 | |||
|- | |||
!Late hit | |||
|13-18 | |||
|- | |||
!Animation length | |||
|35 | |||
|} | |||
{{ | {{FrameStripStart}} | ||
{{FrameStrip|t=Lag|c=6}}{{FrameStrip|t=Hitbox|c=1|e=HitboxChangeS}}{{FrameStrip|t=Hitbox|c=5|s=HitboxChangeE|e=HitboxChangeS}}{{FrameStrip|t=Hitbox|c=6|s=HitboxChangeE}}{{FrameStrip|t=Lag|c=17}} | |||
{{FrameStripEnd}} | |||
{{FrameIconLegend|lag=y|hitbox=y|hitboxchange=y}} | |||
{{MvSubNavMetaKnight|g=SSBB}} | {{MvSubNavMetaKnight|g=SSBB}} | ||
[[Category:Meta Knight (SSBB)]] | [[Category:Meta Knight (SSBB)]] | ||
[[Category:Up tilts (SSBB)]] | [[Category:Up tilts (SSBB)]] | ||
Latest revision as of 20:21, May 19, 2024
Overview[edit]
Meta Knight stabs upward. The move has a sweetspot at the tip of the sword (similarly to Marth's tipper sweetspots). When sweetspotted, the move has high vertical knockback, and can reliably KO under 150%, although its KO power is reduced by a sizable amount if the move is not sweetspotted. The move is usually used to punish and cover options from opponents above Meta Knight, especially those on soft platforms above Meta Knight on stages such as Battlefield and Halberd.
Hitboxes[edit]
Timing[edit]
| Early hit | 7 |
|---|---|
| Clean hit | 8-12 |
| Late hit | 13-18 |
| Animation length | 35 |
Lag time |
Hitbox |
Hitbox change |
|
