Ganondorf (SSB4)/Forward throw: Difference between revisions
From SmashWiki, the Super Smash Bros. wiki
Jump to navigationJump to search
UltraNessDX (talk | contribs) (added owerview) |
SuperSqank (talk | contribs) |
||
| (6 intermediate revisions by 2 users not shown) | |||
| Line 1: | Line 1: | ||
{{ArticleIcons|ssb4=y}} | {{ArticleIcons|ssb4=y}} | ||
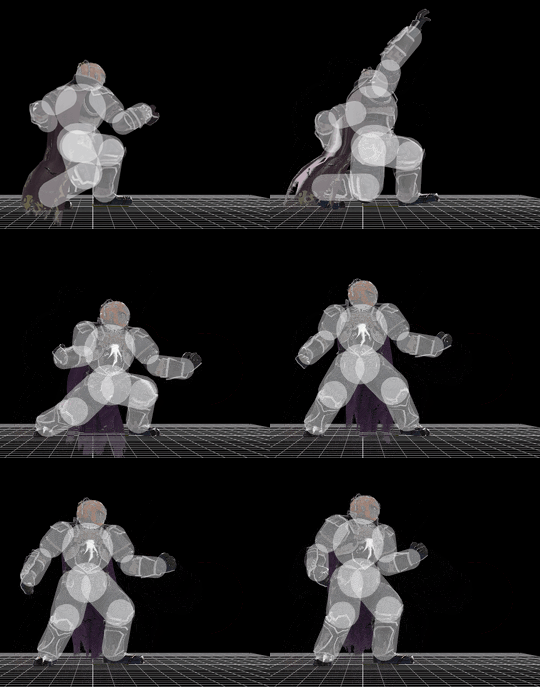
[[File:GanondorfThrowForward.gif|thumb|270px|Hitbox visualization showing Ganondorf's forward throw.]] | [[File:GanondorfThrowForward.gif|thumb|270px|Hitbox visualization showing Ganondorf's forward throw.]] | ||
==Overview== | ==Overview== | ||
{{competitive expertise}} | |||
Ganondorf punches the opponent forward dealing very high damage and sometimes is a good edgeguard setup. It has low KO power, struggling to KO under 200% from the middle of the stage. | |||
==Update history== | |||
{{GameIcon|ssb4}} [[1.0.6]] | |||
== | *{{buff|[[Hitlag]] decreased.}} | ||
==Throw and Hitbox Data== | |||
===Hitboxes=== | |||
{{SSB4HitboxTableHeader}} | {{SSB4HitboxTableHeader}} | ||
{{SSB4HitboxTableRow | {{SSB4HitboxTableRow | ||
| Line 86: | Line 79: | ||
|} | |} | ||
===Throw=== | |||
{{SSB4ThrowTableHeader}} | |||
{{SSB4ThrowTableRow | |||
|id=0 | |||
|damage=8% | |||
|af=3 | |||
|angle=43 | |||
|bk=60 | |||
|ks=65 | |||
|fkv=0 | |||
|bn=0 | |||
|noff=true | |||
|trip=0 | |||
|type=Throwing | |||
|effect=Normal | |||
|slvl=S | |||
|sfx=None | |||
}} | |||
{{SSB4ThrowTableRow | |||
|id=1 | |||
|damage=3% | |||
|af=3 | |||
|angle=361 | |||
|bk=60 | |||
|ks=100 | |||
|fkv=0 | |||
|bn=0 | |||
|noff=true | |||
|trip=0 | |||
|type=Throwing | |||
|effect=Normal | |||
|slvl=S | |||
|sfx=None | |||
}} | |||
|} | |||
==Timing== | |||
{|class="wikitable" | |||
!Invincibility | |||
|1-18 | |||
|- | |||
!Hitbox | |||
|11-12 | |||
|- | |||
!Throw Release | |||
|13 | |||
|- | |||
!Animation length | |||
|39 | |||
|- | |||
!Interruptible | |||
|40 | |||
|} | |||
{{FrameStripStart}} | |||
{{FrameStrip|t=Lag|c=10}}{{FrameStrip|t=Hitbox|c=2|e=HitboxThrowS}}{{FrameStrip|t=Lag|c=27|s=LagThrowE}} | |||
|- | |||
{{FrameStrip|t=Invincible|c=18}}{{FrameStrip|t=Vulnerable|c=21}} | |||
{{FrameStripEnd}} | |||
{{FrameIconLegend|lag=y|hitbox=y|throw=y|vulnerable=y|invincible=y}} | |||
{{MvSubNavGanondorf|g=SSB4}} | {{MvSubNavGanondorf|g=SSB4}} | ||
[[Category:Ganondorf (SSB4)]] | [[Category:Ganondorf (SSB4)]] | ||
[[Category:Forward throws (SSB4)]] | [[Category:Forward throws (SSB4)]] | ||
Latest revision as of 07:24, May 12, 2021
Overview[edit]
Ganondorf punches the opponent forward dealing very high damage and sometimes is a good edgeguard setup. It has low KO power, struggling to KO under 200% from the middle of the stage.
Update history[edit]
 Hitlag decreased.
Throw and Hitbox Data[edit]
Hitboxes[edit]
Throw[edit]
| ID | Damage | Angle | BK | KS | FKV | Bone | FFx | Type | Effect | Sound | |
|---|---|---|---|---|---|---|---|---|---|---|---|
| 0 | 8% | Forwards | 60 | 65 | 0 | 0 | None | ||||
| 1 | 3% | Forwards | 60 | 100 | 0 | 0 | None | ||||
Timing[edit]
| Invincibility | 1-18 |
|---|---|
| Hitbox | 11-12 |
| Throw Release | 13 |
| Animation length | 39 |
| Interruptible | 40 |
Lag time |
Hitbox |
Vulnerable |
Invincible |
Throw point |
|

