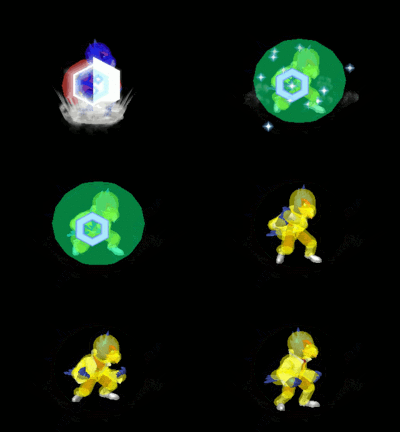
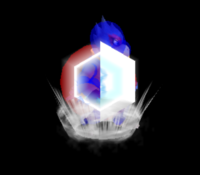
Falco (SSBM)/Down special: Difference between revisions
(→Timing: Stuff about turning around and jump-canceling) |
Mariogeek2 (talk | contribs) m (→Timing: Added "Continuable" legend.) |
||
| (21 intermediate revisions by 14 users not shown) | |||
| Line 1: | Line 1: | ||
{{ArticleIcons|ssbm=y}} | {{ArticleIcons|ssbm=y}} | ||
{{disambig2|the hitbox visualization in ''[[Super Smash Bros. Melee]]''|the move itself|Reflector (Falco)}} | |||
==Overview== | ==Overview== | ||
[[File:Falco Down Special Hitbox Melee.gif|thumb|The hitbox of Falco's shine.]] | [[File:Falco Down Special Hitbox Melee.gif|thumb|The hitbox of Falco's shine.]] | ||
[[File:Falco Shine Frame 1 Melee.png|thumb|Falco's hitbox and intangibility can be seen on frame 1.]] | |||
Widely considered Falco's principal move, Falco's '''[[Reflector (Falco)|Reflector]]''' (informally known as a shine) is the crux of his entire [[metagame]] and is among his greatest strengths as a character. The potency of the shine is attributed to two attributes: 1) the initial hit of shine comes out without any delay (on [[frame]] 1), and 2) it can be [[jump cancel]]ed as fast as frame 4, letting Falco act out of shine as fast as ¹⁄₃₀ of a second. This allows Falco to hit an opponent and then leave the shine extremely early either by jumping out right away or [[wavedash]]ing out of it (called [[waveshining]]). Falco's shine sends opponents upward with a slight diagonal tilt, [[tumbling]] all characters at 0% (thanks to the move's incredibly high [[Knockback#Basic physics|base knockback]], the highest in the game), even when [[crouch cancel]]ling, and setting up aerial follow ups perfectly, most notably his {{mvsub|Falco|SSBM|down aerial}}, which directly combos back into the shine. This potentially endless cycle of shines and down airs is known as [[pillaring]] and is the central engine of all of Falco's combos. The basic form of pillaring can be expanded on by including {{mvsub|Falco|SSBM|up tilt}}s, {{mvsub|Falco|SSBM|neutral aerial}}s and {{mvsub|Falco|SSBM|back aerial}}s in between shines and down aerials for devastating effect, and is usually finished with a down aerial off-stage or a {{mvsub|Falco|SSBM|forward smash}} on-stage, which can lead to [[edgeguard]]s or KO the opponent outright. | |||
The uses of shine are not just limited to [[combo]]ing however. With its [[startup]] | The uses of shine are not just limited to [[combo]]ing, however. With its instant [[startup]] and intangibility on frame 1, the shine can be used as a wake-up option when being [[tech-chase]]d, and can even beat grab. The shine can also be done [[out of shield]], allowing Falco to change the tide of the match to his favor. The fact that the shine can be jump canceled allows Falco to continue chaining multiple shines into each other (either by [[pseudo-jump-cancel]]ing new shines, a technique known as [[multi shine|multi shining]], or waveshining back and forth) should the first shine be shielded, giving Falco enormous shield-pressure capabilities, though it should be noted it's not as strong as Fox's, due to Falco's slower [[jumpsquat]], as well as the fact that he gets less follow-ups off of shine-grab, making that option less threatening. | ||
Falco's shine can reflect projectiles with a 1.5x damage multiplier. Despite this, many competitive players will not opt to use shine for this purpose and instead attempt to [[powershield]] projectiles, as powershielding projectiles is faster, less punishable, and easier to follow up on; powershield frames become active on frame 1 of the shield (reflection takes place on frame 4 as detailed below), and furthermore, upon reflecting something with the shine, Falco will experience hitlag than he cannot jump out of (and consequently cannot waveshine out of), negating any sort of follow up ability off reflection and potentially allowing opponents to punish Falco for shining projectiles. However, it still sees use as a reflector in the air, where Falco cannot shield, especially against powerful KO moves like Samus's fully-charged [[Samus (SSBM)/Neutral special|charge shot]] or Peach's Stitch Face. | |||
The move's flaws, though few, do exist. In order for it to hit the opponent, Falco must be in range before activating it, thanks to a single active frame. If used to reflect projectiles, it will shatter if it bounces back the same projectile too many times due to an upper limit to how much base damage the reflected projectile should have before making contact with the Reflector. When this happens, Falco will go through the stun animation and be completely vulnerable to attack. If it's used against opponents who have been knocked down and are lying prone, and the move is sufficiently [[stale]]d, there's a chance the opponent will be launched upwards, becoming actionable ⅕ of a second later while still suffering knockback, making them seemingly "float" in the air, the entire phenomenon of which is referred to as ''spooky stun''. | |||
==Hitboxes== | ==Hitboxes== | ||
| Line 18: | Line 22: | ||
|ks=50 | |ks=50 | ||
|fkv=0 | |fkv=0 | ||
|r= | |r=1536 | ||
|bn=3 | |bn=3 | ||
|rebound=n | |rebound=n | ||
| Line 48: | Line 52: | ||
|39 | |39 | ||
|} | |} | ||
{{FrameStripStart}} | {{FrameStripStart}} | ||
!Hitboxes {{FrameStrip|t=Hitbox|c=1}}{{FrameStrip|t=Lag|c=2}}{{FrameStrip|t=Reflect|c=18}}{{FrameStrip|t=Lag|c=18}} | |||
|- | |- | ||
{{FrameStrip|t= | !Body {{FrameStrip|t=Intangible|c=1}}{{FrameStrip|t=Vulnerable|c=38}} | ||
|- | |- | ||
{{FrameStrip|t= | !Jump-cancel {{FrameStrip|t=Blank|c=3}}{{FrameStrip|t=Continuable|c=18}}{{FrameStrip|t=Blank|c=18}} | ||
{{FrameStripEnd}} | |||
===In general=== | ===In general=== | ||
{|class="wikitable" | {|class="wikitable" | ||
| Line 75: | Line 82: | ||
|[release+19] | |[release+19] | ||
|} | |} | ||
{{FrameStripStart}} | {{FrameStripStart}} | ||
!Hitboxes {{FrameStrip|t=Hitbox|c=1}}{{FrameStrip|t=Lag|c=2|e=LagLoopS}}{{FrameStrip|t=Reflect|c=28|s=ReflectLoopE|e=ReflectLoopS}}{{FrameStrip|t=Lag|c=18|s=LagLoopE}} | |||
|- | |- | ||
{{FrameStrip|t= | !Body {{FrameStrip|t=Intangible|c=1}}{{FrameStrip|t=Vulnerable|c=2|e=VulnerableLoopS}}{{FrameStrip|t=Vulnerable|c=28|s=VulnerableLoopE|e=VulnerableLoopS}}{{FrameStrip|t=Vulnerable|c=18|s=VulnerableLoopE}} | ||
|- | |- | ||
{{FrameStrip|t= | !Jump-cancel {{FrameStrip|t=Blank|c=3|e=BlankLoopS}}{{FrameStrip|t=Continuable|c=28|s=ContinuableLoopE|e=ContinuableLoopS}}{{FrameStrip|t=Blank|c=18|s=BlankLoopE}} | ||
{{FrameStripEnd}} | |||
{{FrameIconLegend|lag=y|hitbox=y|vulnerable=y|loop=y|reflect=y|intangible=y}} | {{FrameIconLegend|lag=y|hitbox=y|vulnerable=y|loop=y|reflect=y|intangible=y|continuable=y}} | ||
Turning around disables jump-canceling for 3 frames. These frames will always reflect, regardless of release time. If the reflect window was increased that way, the ending lag will also increase by the same amount. | Turning around disables jump-canceling for 3 frames. These frames will always reflect, regardless of release time. If the reflect window was increased that way, the ending lag will also increase by the same amount. | ||
| Line 105: | Line 114: | ||
==Similar moves== | ==Similar moves== | ||
*[[Fox (SSBM)/Down special]] | *[[Fox (SSBM)/Down special|Fox's shine]] | ||
{{MvSubNavFalco|g=SSBM}} | {{MvSubNavFalco|g=SSBM}} | ||
Latest revision as of 15:33, November 19, 2024
Overview[edit]
Widely considered Falco's principal move, Falco's Reflector (informally known as a shine) is the crux of his entire metagame and is among his greatest strengths as a character. The potency of the shine is attributed to two attributes: 1) the initial hit of shine comes out without any delay (on frame 1), and 2) it can be jump canceled as fast as frame 4, letting Falco act out of shine as fast as ¹⁄₃₀ of a second. This allows Falco to hit an opponent and then leave the shine extremely early either by jumping out right away or wavedashing out of it (called waveshining). Falco's shine sends opponents upward with a slight diagonal tilt, tumbling all characters at 0% (thanks to the move's incredibly high base knockback, the highest in the game), even when crouch cancelling, and setting up aerial follow ups perfectly, most notably his down aerial, which directly combos back into the shine. This potentially endless cycle of shines and down airs is known as pillaring and is the central engine of all of Falco's combos. The basic form of pillaring can be expanded on by including up tilts, neutral aerials and back aerials in between shines and down aerials for devastating effect, and is usually finished with a down aerial off-stage or a forward smash on-stage, which can lead to edgeguards or KO the opponent outright.
The uses of shine are not just limited to comboing, however. With its instant startup and intangibility on frame 1, the shine can be used as a wake-up option when being tech-chased, and can even beat grab. The shine can also be done out of shield, allowing Falco to change the tide of the match to his favor. The fact that the shine can be jump canceled allows Falco to continue chaining multiple shines into each other (either by pseudo-jump-canceling new shines, a technique known as multi shining, or waveshining back and forth) should the first shine be shielded, giving Falco enormous shield-pressure capabilities, though it should be noted it's not as strong as Fox's, due to Falco's slower jumpsquat, as well as the fact that he gets less follow-ups off of shine-grab, making that option less threatening.
Falco's shine can reflect projectiles with a 1.5x damage multiplier. Despite this, many competitive players will not opt to use shine for this purpose and instead attempt to powershield projectiles, as powershielding projectiles is faster, less punishable, and easier to follow up on; powershield frames become active on frame 1 of the shield (reflection takes place on frame 4 as detailed below), and furthermore, upon reflecting something with the shine, Falco will experience hitlag than he cannot jump out of (and consequently cannot waveshine out of), negating any sort of follow up ability off reflection and potentially allowing opponents to punish Falco for shining projectiles. However, it still sees use as a reflector in the air, where Falco cannot shield, especially against powerful KO moves like Samus's fully-charged charge shot or Peach's Stitch Face.
The move's flaws, though few, do exist. In order for it to hit the opponent, Falco must be in range before activating it, thanks to a single active frame. If used to reflect projectiles, it will shatter if it bounces back the same projectile too many times due to an upper limit to how much base damage the reflected projectile should have before making contact with the Reflector. When this happens, Falco will go through the stun animation and be completely vulnerable to attack. If it's used against opponents who have been knocked down and are lying prone, and the move is sufficiently staled, there's a chance the opponent will be launched upwards, becoming actionable ⅕ of a second later while still suffering knockback, making them seemingly "float" in the air, the entire phenomenon of which is referred to as spooky stun.
Hitboxes[edit]
| ID | Part | Damage | SD | Angle | BK | KS | FKV | Radius | Bone | Offset | Clang | Rebound | Effect | G | A | Sound | ||
|---|---|---|---|---|---|---|---|---|---|---|---|---|---|---|---|---|---|---|
| 0 | 0 | 8% | 0 | 110 | 50 | 0 | 5.999616 | 3 | 0.0 | 0.0 | 0.0 | |||||||
Timing[edit]
Minimum duration[edit]
| Hitbox | 1 |
|---|---|
| Intangible | 1 |
| Reflects | 4-21 |
| Jump-cancellable | 4-21 |
| Turnaround possible | 4-21 |
| Animation length | 39 |
| Hitboxes | |||||||||||||||||||||||||||||||||||||||
|---|---|---|---|---|---|---|---|---|---|---|---|---|---|---|---|---|---|---|---|---|---|---|---|---|---|---|---|---|---|---|---|---|---|---|---|---|---|---|---|
| Body | |||||||||||||||||||||||||||||||||||||||
| Jump-cancel |
In general[edit]
| Hitbox | 1 |
|---|---|
| Intangible | 1 |
| Reflects | 4-[release+1] |
| Jump-cancellable | 4-[release+1] |
| Turnaround possible | 4-[release+1] |
| Animation length | [release+19] |
| Hitboxes | |||||||||||||||||||||||||||||||||||||||||||||||||
|---|---|---|---|---|---|---|---|---|---|---|---|---|---|---|---|---|---|---|---|---|---|---|---|---|---|---|---|---|---|---|---|---|---|---|---|---|---|---|---|---|---|---|---|---|---|---|---|---|---|
| Body | |||||||||||||||||||||||||||||||||||||||||||||||||
| Jump-cancel |
Lag time |
Hitbox |
Vulnerable |
Loop point |
Reflect |
Intangible |
Continuable |
Turning around disables jump-canceling for 3 frames. These frames will always reflect, regardless of release time. If the reflect window was increased that way, the ending lag will also increase by the same amount.
Properties[edit]
| Reflection radius | 8.5 |
|---|---|
| Reflection damage | 1.5x |
| Reflection speed | 1.0x |
| Max reflectable damage | 50 |
| Reflection lag | 20 |
Similar moves[edit]
|

