Ganondorf (SSBB)/Side special: Difference between revisions
SuperSqank (talk | contribs) |
m (→Aerial) |
||
| (3 intermediate revisions by 2 users not shown) | |||
| Line 1: | Line 1: | ||
{{ArticleIcons|ssbb=y}} | {{ArticleIcons|ssbb=y}} | ||
{{disambig2|the hitbox visualization in ''[[Super Smash Bros. Brawl]]''|the move itself|Flame Choke}} | {{disambig2|the hitbox visualization in ''[[Super Smash Bros. Brawl]]''|the move itself|Flame Choke}} | ||
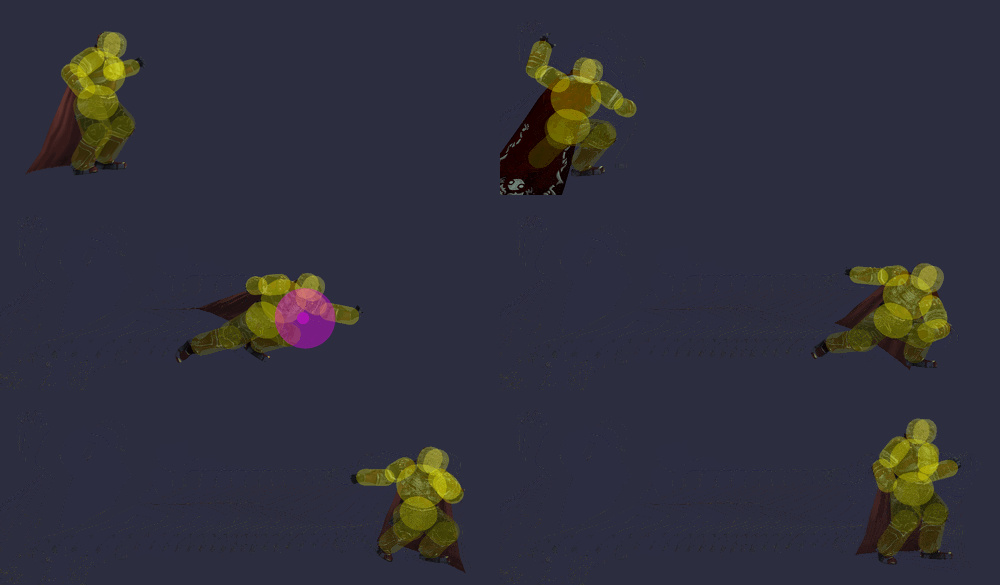
[[File:GanondorfFlameChokeGSSBB.gif|thumb|500px|Hitbox visualization showing Ganondorf's grounded side special, Flame Choke.]] | |||
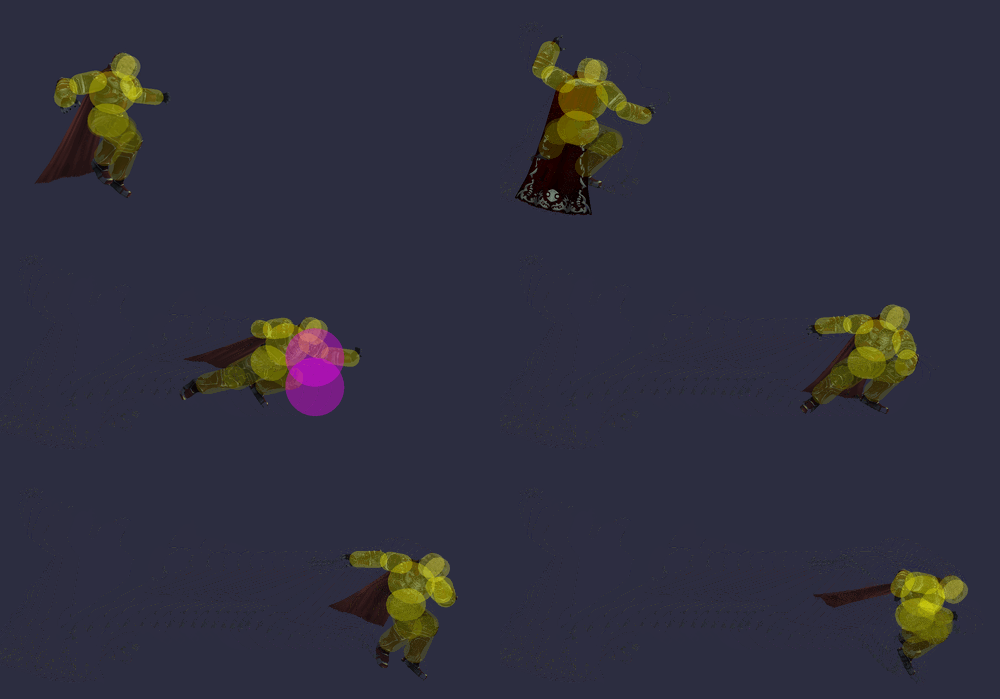
[[File:GanondorfFlameChokeASSBB.gif|thumb|500px|Hitbox visualization showing Ganondorf's aerial side special, Flame Choke.]] | |||
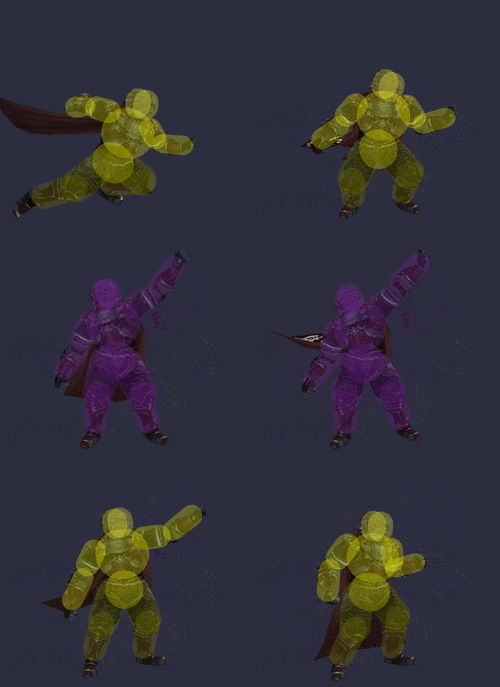
[[File:GanondorfFlameChokeGHitSSBB.gif|thumb|250px|Hitbox visualization showing Ganondorf's successful grounded Flame Choke.]] | |||
==Overview== | ==Overview== | ||
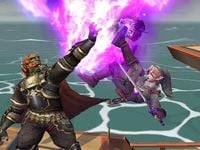
[[File:Ganon link flamechoke.jpg|thumb|{{SSBB|Ganondorf}} using [[Flame Choke]] against {{SSBB|Link}} in ''Brawl''.]] | [[File:Ganon link flamechoke.jpg|thumb|{{SSBB|Ganondorf}} using [[Flame Choke]] against {{SSBB|Link}} in ''Brawl''.]] | ||
| Line 66: | Line 69: | ||
{{BrawlGrabboxTableRow | {{BrawlGrabboxTableRow | ||
|id=1 | |id=1 | ||
|r= | |r=300000 | ||
|bn=0 | |bn=0 | ||
|xpos=0 | |xpos=0 | ||
| Line 285: | Line 288: | ||
|- | |- | ||
|Landing Wizard's Foot | |Landing Wizard's Foot | ||
|{{indeterminate| | |{{y|15}}/{{indeterminate|15}} | ||
|{{y|20}}||{{y|20}}||{{y|20}}||{{y|20}}||{{y|20}}||{{y|20}}||{{y|20}}||{{y|20}}||{{y|20}}||{{y|20}}||{{y|20}}||{{y|20}}||{{y|20}}||{{y|20}}||{{y|20}}||{{y|20}}||{{y|20}}||{{y|20}}||{{y|20}}||{{y|20}}||{{y|20}}||{{y|20}} | |{{y|20}}||{{y|20}}||{{y|20}}||{{y|20}}||{{y|20}}||{{y|20}}||{{y|20}}||{{y|20}}||{{y|20}}||{{y|20}}||{{y|20}}||{{y|20}}||{{y|20}}||{{y|20}}||{{y|20}}||{{y|20}}||{{y|20}}||{{y|20}}||{{y|20}}||{{y|20}}||{{y|20}}||{{y|20}} | ||
|{{indeterminate| | |{{y|15}}/{{indeterminate|15}} | ||
|{{y|20}} | |{{y|20}} | ||
|{{indeterminate| | |{{y|15}}/{{indeterminate|15}}||{{y|15}}/{{indeterminate|15}} | ||
|{{n|20}}||{{n|20}}||{{n|20}}||{{n|20}}||{{n|20}} | |{{n|20}}||{{n|20}}||{{n|20}}||{{n|20}}||{{n|20}} | ||
|{{indeterminate| | |{{y|15}}/{{indeterminate|15}}||{{indeterminate|20}} | ||
|{{n|20}}||{{n|20}}||{{n|20}}||{{n|20}}||{{n|20}} | |{{n|20}}||{{n|20}}||{{n|20}}||{{n|20}}||{{n|20}} | ||
|Landing Wizard's Foot | |Landing Wizard's Foot | ||
| Line 319: | Line 322: | ||
|} | |} | ||
*Some otherwise guaranteed followups can be avoided by drifting out of the way as Ganondorf lets go (either out or in depending on the character/followup), indicated by {{indeterminate}}. | *Some otherwise guaranteed followups can be avoided by drifting out of the way as Ganondorf lets go (either out or in depending on the character/followup), indicated by {{indeterminate}}. | ||
*{{y}}/{{indeterminate}} indicates that the followup is fully guaranteed | *{{y}}/{{indeterminate}} indicates that the followup is fully guaranteed however: | ||
*{{indeterminate}}/{{n}} indicates that while the followup is usually not | **If the opponent drifts in, Ganondorf has to perform a turnaround jab/forward tilt/down tilt. | ||
**If the opponent drifts out, Ganondorf has to perform a dash jump into landing Wizard's Foot. | |||
*{{indeterminate}}/{{n}} indicates that while the followup is usually not guaranteed, it can be guaranteed if the opponent drifts in a specific direction. | |||
{{MvSubNavGanondorf|g=SSBB}} | {{MvSubNavGanondorf|g=SSBB}} | ||
[[Category:Ganondorf (SSBB)]] | [[Category:Ganondorf (SSBB)]] | ||
[[Category:Side special moves (SSBB)]] | [[Category:Side special moves (SSBB)]] | ||
Latest revision as of 00:28, June 7, 2024
Overview[edit]
Ganondorf's side special in Brawl is Flame Choke. Ganondorf boosts forward with one dark magic-infused hand outstretched and grabs an opponent by the face before dropping them to the ground. As it is a command grab, Flame Choke cannot be shielded. The grab comes out slowly and it has deceptively poor range, which can make it hard to land. If Ganondorf does grab the opponent, however, it is fairly rewarding. The opponent is put into a wakeup situation that cannot be avoided with a tech, and when used on the ground, Ganondorf has the frame advantage against his opponent. Ganondorf has a +9 to +12 frame advantage against most characters, giving him guaranteed followups, including dash attack or forward tilt for a KO confirm against over half the cast (and characters vulnerable to forward tilt must be wary of Ganondorf mixing up their DI). If Ganondorf cannot follow up or if he wants to go for a more powerful followup, he can tech chase the opponent where he can either land one of his stronger moves (such as down aerial or a smash attack) or he can Flame Choke again to reset the situation.
If used in the air, Ganondorf will forcefully slam the opponent down to the ground. This is not as useful on stage as it has considerably more ending lag than the grounded version, giving Ganondorf no guaranteed followups. If used offstage, unless there is a moving platform that prevents them from reaching the blast zone, he and the opponent will plummet downwards and will result in both players being KOed. This tactic is called the Ganoncide. However, unlike in Smash 4, where this tactic will always result in victory for Ganondorf, in Brawl, using Ganoncide is unpredictable and can result in a win, a loss, or even Sudden Death.
Grabbox Data[edit]
Grounded[edit]
| ID | Radius | Bone | Offset | G | A | ||
|---|---|---|---|---|---|---|---|
| 0 | 5.0 | 0 | 0.0 | 8.0 | 4.5 | ||
| 1 | 1.0 | 0 | 0.0 | 8.0 | 4.2 | ||
| ID | Damage | Angle | BK | KS | FKV | Bone | SDIx | FFx | T% | Type | Effect | Sound | |
|---|---|---|---|---|---|---|---|---|---|---|---|---|---|
| 1 | 4% | Forwards | 100 | 10 | 0 | 0 | 1.0x | None | 0% | ||||
Aerial[edit]
| ID | Radius | Bone | Offset | G | A | ||
|---|---|---|---|---|---|---|---|
| 0 | 5.0 | 0 | 0.0 | 6.0 | 6.5 | ||
| 1 | 5.0 | 0 | 0.0 | 11.0 | 6.5 | ||
| ID | Damage | Angle | BK | KS | FKV | Bone | SDIx | FFx | T% | Type | Effect | Sound | |
|---|---|---|---|---|---|---|---|---|---|---|---|---|---|
| 1 | 4% | Forwards | 100 | 10 | 0 | 0 | 1.0x | None | 0% | ||||
Throw Data[edit]
Grounded[edit]
| ID | Damage | Angle | BK | KS | FKV | Bone | SDIx | FFx | T% | Type | Effect | Sound | |
|---|---|---|---|---|---|---|---|---|---|---|---|---|---|
| 0 | 9% | Standard | 60 | 90 | 0 | 0 | 1.0x | None | 0% | ||||
| 1 | 4% | Forwards | 100 | 10 | 0 | 0 | 1.0x | None | 0% | ||||
Aerial[edit]
| ID | Damage | Angle | BK | KS | FKV | Bone | SDIx | FFx | T% | Type | Effect | Sound | |
|---|---|---|---|---|---|---|---|---|---|---|---|---|---|
| 0 | 12% | Standard | 40 | 82 | 0 | 0 | 1.0x | None | 0% | ||||
| 1 | 4% | Forwards | 100 | 10 | 0 | 0 | 1.0x | None | 0% | ||||
Timing[edit]
Grounded[edit]
| Grab | 16-30 |
|---|---|
| Animation length | 59 |
Grounded Throw[edit]
| Super Armor | 17-40 |
|---|---|
| Throw Release | 31 |
| Animation length | 60 |
Aerial[edit]
| Grab | 19-31 |
|---|---|
| Animation length | 59 |
Aerial throw (landing)[edit]
| Throw Release | 1 |
|---|---|
| Animation length | 40 |
Lag time |
Vulnerable |
Armour |
Grab |
Throw point |
Flame Choke followup list[edit]
As a note of reference:
- Jab is a frame 8 option
- Forward tilt, down tilt, dash attack and landing Wizard's Foot are frame 10 options
- Down smash is a frame 15 option
- This whole lists assumes Ganondorf performs the move on flat ground. Slopes and platforms can alter the followups Ganondorf can get.
| Dash attack | Dash attack | |||||||||||||||||||||||||||||||||||||||
| Forward tilt | Forward tilt | |||||||||||||||||||||||||||||||||||||||
| Down tilt | Down tilt | |||||||||||||||||||||||||||||||||||||||
| Landing Wizard's Foot | Landing Wizard's Foot | |||||||||||||||||||||||||||||||||||||||
| Jab | Jab | |||||||||||||||||||||||||||||||||||||||
| Down smash | ||||||||||||||||||||||||||||||||||||||||
- Some otherwise guaranteed followups can be avoided by drifting out of the way as Ganondorf lets go (either out or in depending on the character/followup), indicated by
 .
.  /
/ indicates that the followup is fully guaranteed however:
- If the opponent drifts in, Ganondorf has to perform a turnaround jab/forward tilt/down tilt.
- If the opponent drifts out, Ganondorf has to perform a dash jump into landing Wizard's Foot.
 /
/ indicates that while the followup is usually not guaranteed, it can be guaranteed if the opponent drifts in a specific direction.


