Kirby (SSBU)/Down throw: Difference between revisions
From SmashWiki, the Super Smash Bros. wiki
Jump to navigationJump to search
| (10 intermediate revisions by 9 users not shown) | |||
| Line 1: | Line 1: | ||
{{ArticleIcons|ssbu=y}} | {{ArticleIcons|ssbu=y}} | ||
{|class="wikitable" style="float:right; margin:4pt;" | {|class="wikitable" style="float:right; margin:4pt;" | ||
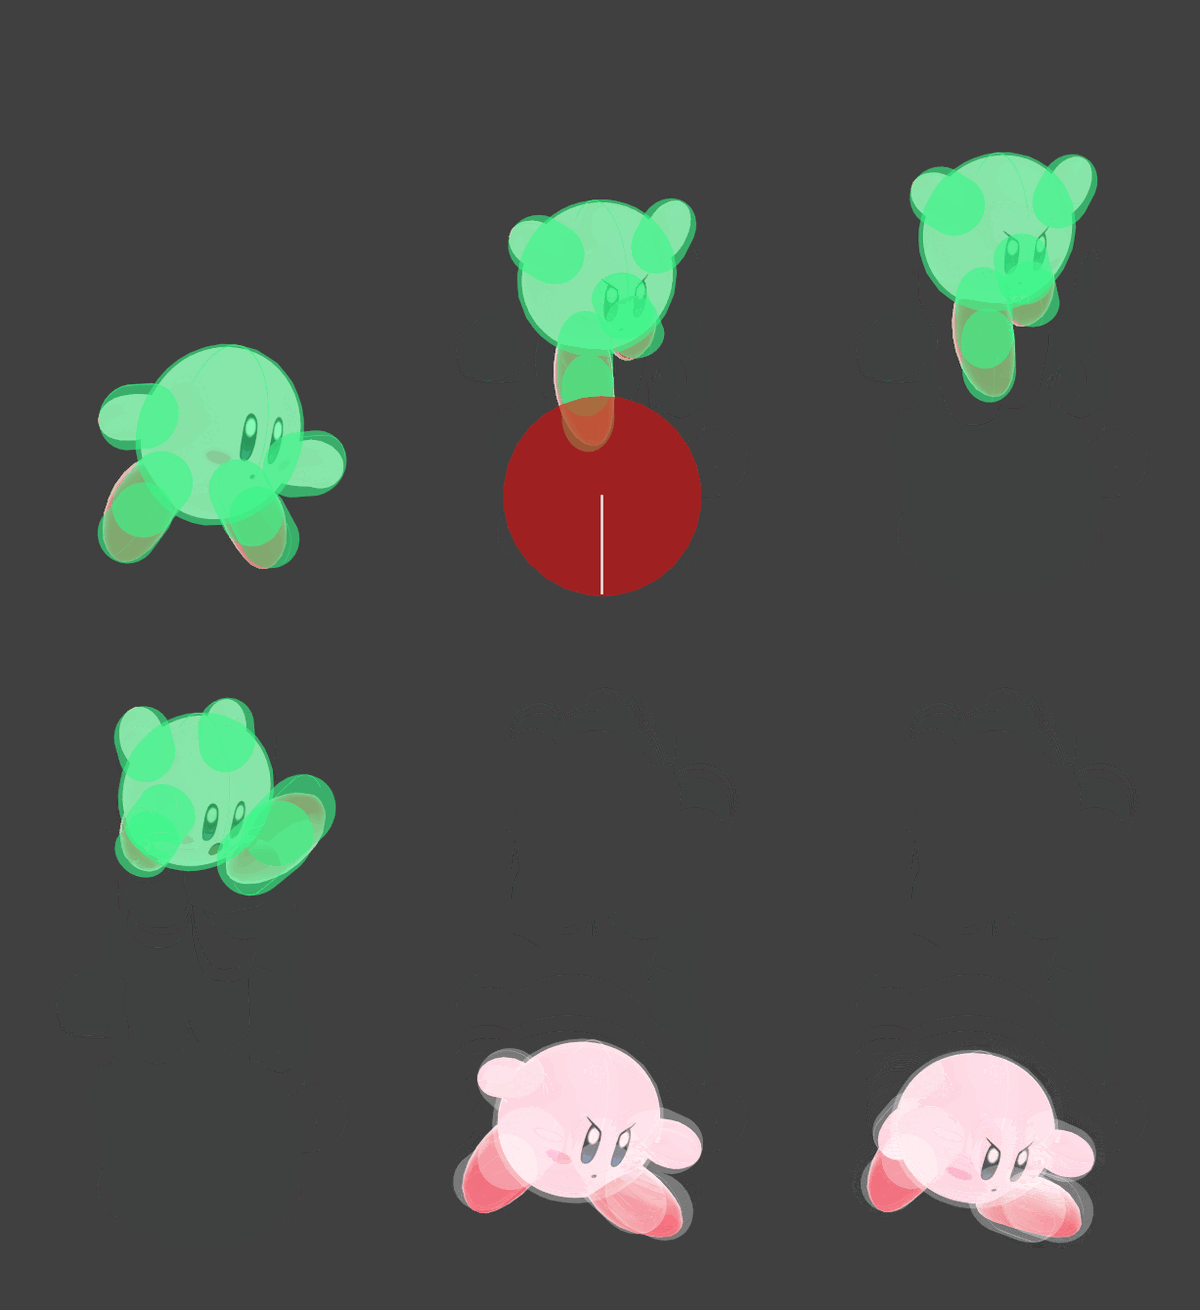
!colspan=5|Kirby down throw hurtbox and hitbox visualization | !colspan=5|Kirby down throw hurtbox and hitbox visualization | ||
| Line 9: | Line 8: | ||
==Overview== | ==Overview== | ||
The Fury Stomp from the Suplex ability. Due to its knockback and unfavorable angle, it | The Fury Stomp from the Suplex ability. Due to its knockback and unfavorable angle, it launches too high for starting combos. This throw is most suited for racking up damage, since it has the highest damage of all of Kirby's throws, dealing 12%. It is among the strongest down throws in terms of knockback and damage; however, despite its knockback being high enough to KO middleweights at around 200%, Kirby's back and up throws possess much better KO potential, thus making them far better options unless Kirby is on top of the highest [[Battlefield (SSBU)|Battlefield]] platform. | ||
==Update History== | |||
'''{{GameIcon|ssbu}} {{SSBU|3.0.0}}''' | |||
*{{buff|The first 9 hits of down throw deal more damage (0.8% → 1%, total: 10.2% → 12%).}} | |||
==Throw and Hitbox Data== | ==Throw and Hitbox Data== | ||
{{UltimateHitboxTableHeader}} | {{UltimateHitboxTableHeader}} | ||
{{HitboxTableTitle|Hits 1-9| | {{HitboxTableTitle|Hits 1-9|42}} | ||
{{UltimateHitboxTableRow | {{UltimateHitboxTableRow | ||
|id=0 | |id=0 | ||
|damage=1.0% | |damage=1.0% | ||
|angle=270 | |angle=270 | ||
|af=3 | |||
|bk=0 | |bk=0 | ||
|ks=100 | |ks=100 | ||
| Line 23: | Line 26: | ||
|r=5.8 | |r=5.8 | ||
|bn=top | |bn=top | ||
|ypos=4.0 | |ypos=4.0 | ||
|zpos=3.2 | |zpos=3.2 | ||
| Line 34: | Line 36: | ||
|rebound=f | |rebound=f | ||
}} | }} | ||
{{HitboxTableTitle|Hit 10| | {{HitboxTableTitle|Hit 10|42}} | ||
{{UltimateHitboxTableRow | {{UltimateHitboxTableRow | ||
|id=0 | |id=0 | ||
|damage=1.0% | |damage=1.0% | ||
|angle=90 | |angle=90 | ||
|af=3 | |||
|bk=10 | |bk=10 | ||
|ks=100 | |ks=100 | ||
| Line 44: | Line 47: | ||
|r=5.8 | |r=5.8 | ||
|bn=top | |bn=top | ||
|ypos=4.0 | |ypos=4.0 | ||
|zpos=2.4 | |zpos=2.4 | ||
|type=Foot | |type=Foot | ||
|sfx=Kick | |sfx=Kick | ||
|slvl=M | |slvl=M | ||
| Line 57: | Line 57: | ||
|} | |} | ||
{{UltimateThrowTableHeader}} | {{UltimateThrowTableHeader}} | ||
{{HitboxTableTitle|Throw| | {{HitboxTableTitle|Throw|42}} | ||
{{UltimateThrowTableRow | {{UltimateThrowTableRow | ||
|id=0 | |id=0 | ||
| Line 67: | Line 67: | ||
|fkv=0 | |fkv=0 | ||
|ff=0.0 | |ff=0.0 | ||
|sfx=None | |||
|slvl=S | |||
}} | |||
{{UltimateThrowTableRow | |||
|kind=1 | |||
|id=0 | |||
|type=Throwing | |||
|damage=3.0% | |||
|angle=361 | |||
|bk=60 | |||
|ks=100 | |||
|fkv=0 | |||
|effect=Normal | |effect=Normal | ||
|sfx=None | |sfx=None | ||
| Line 88: | Line 100: | ||
|- | |- | ||
!Interruptible | !Interruptible | ||
| | |88 | ||
|- | |- | ||
!Animation length | !Animation length | ||
| Line 94: | Line 106: | ||
|} | |} | ||
{{FrameStripStart}} | {{FrameStripStart}} | ||
{{FrameStrip|t=Lag|c=8}}{{FrameStrip|t=Hitbox|c=2}}{{FrameStrip|t=Lag|c=2}}{{FrameStrip|t=Hitbox|c=2}}{{FrameStrip|t=Lag|c=2}}{{FrameStrip|t=Hitbox|c=2}}{{FrameStrip|t=Lag|c=2}}{{FrameStrip|t=Hitbox|c=2}}{{FrameStrip|t=Lag|c=2}}{{FrameStrip|t=Hitbox|c=2}}{{FrameStrip|t=Lag|c=2}}{{FrameStrip|t=Hitbox|c=2}}{{FrameStrip|t=Lag|c=2}}{{FrameStrip|t=Hitbox|c=2}}{{FrameStrip|t=Lag|c=2}}{{FrameStrip|t=Hitbox|c=2}}{{FrameStrip|t=Lag|c=2}}{{FrameStrip|t=Hitbox|c=2}}{{FrameStrip|t=Lag|c=13}}{{FrameStrip|t=Hitbox|c=2|e=HitboxThrowS}}{{FrameStrip|t=Lag|c= | {{FrameStrip|t=Lag|c=8}}{{FrameStrip|t=Hitbox|c=2}}{{FrameStrip|t=Lag|c=2}}{{FrameStrip|t=Hitbox|c=2}}{{FrameStrip|t=Lag|c=2}}{{FrameStrip|t=Hitbox|c=2}}{{FrameStrip|t=Lag|c=2}}{{FrameStrip|t=Hitbox|c=2}}{{FrameStrip|t=Lag|c=2}}{{FrameStrip|t=Hitbox|c=2}}{{FrameStrip|t=Lag|c=2}}{{FrameStrip|t=Hitbox|c=2}}{{FrameStrip|t=Lag|c=2}}{{FrameStrip|t=Hitbox|c=2}}{{FrameStrip|t=Lag|c=2}}{{FrameStrip|t=Hitbox|c=2}}{{FrameStrip|t=Lag|c=2}}{{FrameStrip|t=Hitbox|c=2}}{{FrameStrip|t=Lag|c=13}}{{FrameStrip|t=Hitbox|c=2|e=HitboxThrowS}}{{FrameStrip|t=Lag|c=30|s=LagThrowE}}{{FrameStrip|t=Interruptible|c=7}} | ||
|- | |- | ||
{{FrameStrip|t=Invincible|c=58}}{{FrameStrip|t=Vulnerable|c=36}} | {{FrameStrip|t=Invincible|c=58}}{{FrameStrip|t=Vulnerable|c=36}} | ||
Latest revision as of 16:44, September 30, 2023
| Kirby down throw hurtbox and hitbox visualization | ||||
|---|---|---|---|---|

| ||||
Overview[edit]
The Fury Stomp from the Suplex ability. Due to its knockback and unfavorable angle, it launches too high for starting combos. This throw is most suited for racking up damage, since it has the highest damage of all of Kirby's throws, dealing 12%. It is among the strongest down throws in terms of knockback and damage; however, despite its knockback being high enough to KO middleweights at around 200%, Kirby's back and up throws possess much better KO potential, thus making them far better options unless Kirby is on top of the highest Battlefield platform.
Update History[edit]
 The first 9 hits of down throw deal more damage (0.8% → 1%, total: 10.2% → 12%).
Throw and Hitbox Data[edit]
| Kind | ID | Damage | Angle | Angle type | BK | KS | FKV | H× | Effect | Type | Sound | ||||||||||||||||||||||||||||||
|---|---|---|---|---|---|---|---|---|---|---|---|---|---|---|---|---|---|---|---|---|---|---|---|---|---|---|---|---|---|---|---|---|---|---|---|---|---|---|---|---|---|
| Throw | |||||||||||||||||||||||||||||||||||||||||
| Throw | 0 | 2.0% | Forward | 60 | 180 | 0 | 0.0× | ||||||||||||||||||||||||||||||||||
| Break | 0 | 3.0% | Forward | 60 | 100 | 0 | 0.0× | ||||||||||||||||||||||||||||||||||
Timing[edit]
| Invincibility | 1-58 |
|---|---|
| Hits 1-9 | 9-10, 13-14, 17-18, 21-22, 25-26, 29-30, 33-34, 37-38, 41-42 |
| Hit 10 | 56-57 |
| Throw Release | 58 |
| Interruptible | 88 |
| Animation length | 94 |
Lag time |
Hitbox |
Vulnerable |
Invincible |
Throw point |
Interruptible |
|