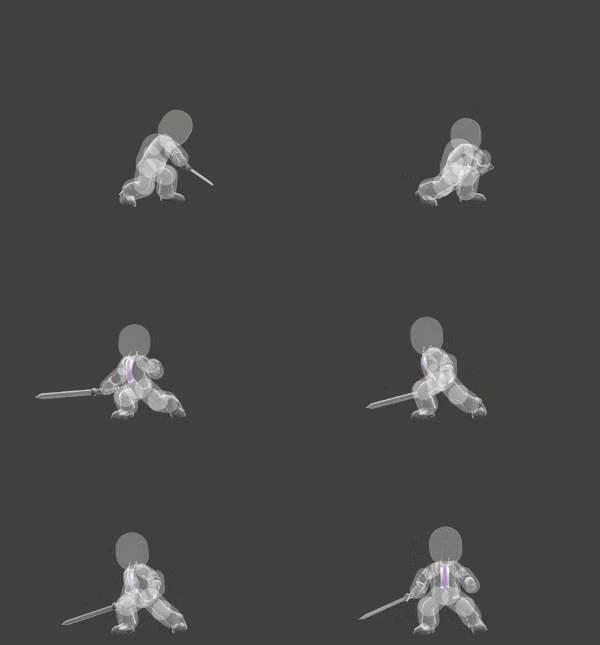
Mii Swordfighter (SSBU)/Up tilt: Difference between revisions
From SmashWiki, the Super Smash Bros. wiki
Jump to navigationJump to search
(New Page: {{ArticleIcons|ssbu=y}} thumb|450px|Hitbox visualization showing Mii Swordfighter's up tilt. {{competitive expertise}} ==Overview== ==Hitboxes== {{...) |
Omega Tyrant (talk | contribs) mNo edit summary Tag: Disambiguation links |
||
| (4 intermediate revisions by 3 users not shown) | |||
| Line 1: | Line 1: | ||
{{ArticleIcons|ssbu=y}} | {{ArticleIcons|ssbu=y}} | ||
[[File:MiiSwordfighterUTiltSSBU.gif|thumb| | [[File:MiiSwordfighterUTiltSSBU.gif|thumb|300px|Hitbox visualization showing Mii Swordfighter's up tilt.]] | ||
{{competitive expertise}} | {{competitive expertise}} | ||
==Overview== | ==Overview== | ||
An arching upward slash. The move is mainly used for anti-airing and [[juggling]], though it has some other situational uses as a [[combo]] tool; when reversed, it can combo into itself at low percents and into {{mvsub|Mii Swordfighter|SSBU|back aerial}} at mid percents. While it's not a particularly effective [[kill]] option, it can KO at very high percents; its [[sweetspot]] can KO middleweights from ground level with no [[rage]] around 160%, while its weaker hitboxes KO in the same situation around 180%. | |||
==Hitboxes== | ==Hitboxes== | ||
{{UltimateHitboxTableHeader}} | {{UltimateHitboxTableHeader}} | ||
| Line 42: | Line 45: | ||
}} | }} | ||
{{UltimateHitboxTableRow | {{UltimateHitboxTableRow | ||
|id= | |id=2 | ||
|damage=7.0% | |damage=7.0% | ||
|angle=85 | |angle=85 | ||
| Line 58: | Line 61: | ||
|sfx=Slash | |sfx=Slash | ||
|slvl=M | |slvl=M | ||
|clang=f | |||
|rebound=f | |||
}} | }} | ||
|} | |} | ||
Latest revision as of 20:03, August 12, 2023
Overview[edit]
An arching upward slash. The move is mainly used for anti-airing and juggling, though it has some other situational uses as a combo tool; when reversed, it can combo into itself at low percents and into back aerial at mid percents. While it's not a particularly effective kill option, it can KO at very high percents; its sweetspot can KO middleweights from ground level with no rage around 160%, while its weaker hitboxes KO in the same situation around 180%.
Hitboxes[edit]
Timing[edit]
| Hitboxes | 8-12 |
|---|---|
| Interruptible | 33 |
| Animation length | 45 |
Lag time |
Hitbox |
Interruptible |
|

