VR: Difference between revisions
From SmashWiki, the Super Smash Bros. wiki
Jump to navigationJump to search
m (According to serebii) Tag: Mobile edit |
(Fixed the abundant amount of errors relating to what stages are VR supported and what aren't and add missing stages to both lists. Reorganize lists by SSS order and Smash title) |
||
| Line 26: | Line 26: | ||
|colspan=2|[[File:SSBU-Big-Battlefield.png|150x90px|link=Big Battlefield (SSBU)]]<br>{{SSBU|Big Battlefield}}<br>{{symbol|smash|20px}} | |colspan=2|[[File:SSBU-Big-Battlefield.png|150x90px|link=Big Battlefield (SSBU)]]<br>{{SSBU|Big Battlefield}}<br>{{symbol|smash|20px}} | ||
|colspan=2|[[File:SSBU-Final Destination.jpg|150x90px|link=Final Destination (SSBU)]]<br>{{SSBU|Final Destination}}<br>{{symbol|smash|20px}} | |colspan=2|[[File:SSBU-Final Destination.jpg|150x90px|link=Final Destination (SSBU)]]<br>{{SSBU|Final Destination}}<br>{{symbol|smash|20px}} | ||
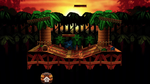
|colspan=2|[[File:SSBU-Kongo Jungle.png|150x90px|link=Kongo Jungle (SSB)]]<br>{{gameIcon|SSB}} [[Kongo Jungle (SSB)|Kongo Jungle]]<br>{{symbol|dk|20px}} | |||
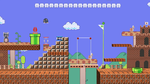
|colspan=2|[[File:SSBU-Mushroom Kingdom (SSB).png|150x90px|link=Mushroom Kingdom (SSB)]]<br>{{gameIcon|SSB}} [[Mushroom Kingdom (SSB)|Mushroom Kingdom]]<br>{{symbol|mario|20px}} | |colspan=2|[[File:SSBU-Mushroom Kingdom (SSB).png|150x90px|link=Mushroom Kingdom (SSB)]]<br>{{gameIcon|SSB}} [[Mushroom Kingdom (SSB)|Mushroom Kingdom]]<br>{{symbol|mario|20px}} | ||
|- | |||
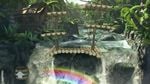
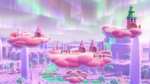
|colspan=2|[[File:SSBU-Rainbow Cruise.png|150x90px|link=Rainbow Cruise]]<br>{{gameIcon|SSBM}} [[Rainbow Cruise]]*<br>{{symbol|mario|20px}} | |colspan=2|[[File:SSBU-Rainbow Cruise.png|150x90px|link=Rainbow Cruise]]<br>{{gameIcon|SSBM}} [[Rainbow Cruise]]*<br>{{symbol|mario|20px}} | ||
|colspan=2|[[File:SSBU-Kongo Falls.jpg|150x90px|link=Kongo Falls]]<br>{{gameIcon|SSBM}} [[Kongo Jungle (SSBM)|Kongo Falls]]<br>{{symbol|dk|20px}} | |colspan=2|[[File:SSBU-Kongo Falls.jpg|150x90px|link=Kongo Falls]]<br>{{gameIcon|SSBM}} [[Kongo Jungle (SSBM)|Kongo Falls]]<br>{{symbol|dk|20px}} | ||
|colspan=2|[[File:SSBU-Jungle Japes.png|150x90px|link=Jungle Japes]]<br>{{gameIcon|SSBM}} [[Jungle Japes]]<br>{{symbol|dk|20px}} | |colspan=2|[[File:SSBU-Jungle Japes.png|150x90px|link=Jungle Japes]]<br>{{gameIcon|SSBM}} [[Jungle Japes]]<br>{{symbol|dk|20px}} | ||
|colspan=2|[[File:SSBU-Great Bay.jpg|150x90px|link=Great Bay]]<br>{{gameIcon|SSBM}} [[Great Bay]]<br>{{symbol|zelda|20px}} | |colspan=2|[[File:SSBU-Great Bay.jpg|150x90px|link=Great Bay]]<br>{{gameIcon|SSBM}} [[Great Bay]]<br>{{symbol|zelda|20px}} | ||
|colspan=2|[[File:SSBU-Brinstar.png|150x90px|link=Brinstar]]<br>{{gameIcon|SSBM}} [[Brinstar]]<br>{{symbol|metroid|20px}} | |colspan=2|[[File:SSBU-Brinstar.png|150x90px|link=Brinstar]]<br>{{gameIcon|SSBM}} [[Brinstar]]<br>{{symbol|metroid|20px}} | ||
|colspan=2|[[File:SSBU-Yoshi's Story.png|150x90px|link=Yoshi's Story]]<br>{{gameIcon|SSBM}} [[Yoshi's Story]]<br>{{symbol|yoshi|20px}} | |||
|- | |- | ||
|colspan=2|[[File:SSBU-Green Greens.png|150x90px|link=Green Greens]]<br>{{gameIcon|SSBM}} [[Green Greens]]<br>{{symbol|kirby|20px}} | |colspan=2|[[File:SSBU-Green Greens.png|150x90px|link=Green Greens]]<br>{{gameIcon|SSBM}} [[Green Greens]]<br>{{symbol|kirby|20px}} | ||
|colspan=2|[[File:SSBU-Corneria.png|150x90px|link=Corneria]]<br>{{gameIcon|SSBM}} [[Corneria]]*<br>{{symbol|starfox|20px}} | |colspan=2|[[File:SSBU-Corneria.png|150x90px|link=Corneria]]<br>{{gameIcon|SSBM}} [[Corneria]]*<br>{{symbol|starfox|20px}} | ||
|colspan=2|[[File:SSBU- | |colspan=2|[[File:SSBU-Onett.png|150x90px|link=Onett]]<br>{{gameIcon|SSBM}} [[Onett]]<br>{{symbol|mother|20px}} | ||
|colspan=2|[[File:SSBU-Big Blue.png|150x90px|link=Big Blue]]<br>{{gameIcon|SSBM}} [[Big Blue]]*<br>{{symbol|f-zero|20px}} | |colspan=2|[[File:SSBU-Big Blue.png|150x90px|link=Big Blue]]<br>{{gameIcon|SSBM}} [[Big Blue]]*<br>{{symbol|f-zero|20px}} | ||
|colspan=2|[[File:SSBU-Fourside.jpg|150x90px|link=Fourside]]<br>{{gameIcon|SSBM}} [[Fourside]]<br>{{symbol|earthbound|20px}} | |||
|colspan=2|[[File:SSBU-Delfino Plaza.jpg|150x90px|link=Delfino Plaza]]<br>{{gameIcon|SSBB}} [[Delfino Plaza]]*<br>{{symbol|mario|20px}} | |||
|- | |||
|colspan=2|[[File:SSBU-Mario Circuit (SSBB).png|150x90px|link=Mario Circuit (SSBB)]]<br>{{gameIcon|SSBB}} [[Mario Circuit (SSBB)|Figure-8 Circuit]]<br>{{symbol|mario|20px}} | |||
|colspan=2|[[File:SSBU-WarioWare, Inc..png|150x90px|link=WarioWare, Inc.]]<br>{{gameIcon|SSBB}} [[WarioWare, Inc.]]<br>{{symbol|wario|20px}} | |||
|colspan=2|[[File:SSBU-Port Town Aero Dive.png|150x90px|link=Port Town Aero Dive]]<br>{{gameIcon|SSBB}} [[Port Town Aero Dive]]*<br>{{symbol|f-zero|20px}} | |colspan=2|[[File:SSBU-Port Town Aero Dive.png|150x90px|link=Port Town Aero Dive]]<br>{{gameIcon|SSBB}} [[Port Town Aero Dive]]*<br>{{symbol|f-zero|20px}} | ||
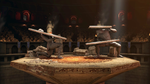
|colspan=2|[[File:SSBU-Castle Siege.png|150x90px|link=Castle Siege]]<br>{{gameIcon|SSBB}} [[Castle Siege]]<br>{{symbol|fe|20px}} | |||
|colspan=2|[[File:SSBU-Smashville.png|150x90px|link=Smashville]]<br>{{gameIcon|SSBB}} [[Smashville]]<br>{{symbol|ac|20px}} | |||
|colspan=2|[[File:SSBU-Summit.png|150x90px|link=Summit]]<br>{{gameIcon|SSBB}} [[Summit]]<br>{{symbol|ic|20px}} | |||
|- | |||
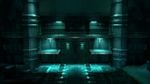
|colspan=2|[[File:SSBU-Shadow Moses Island 2.jpg|150x90px|link=Shadow Moses Island]]<br>{{gameIcon|SSBB}} [[Shadow Moses Island]]<br>{{symbol|mg|20px}} | |||
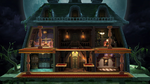
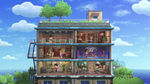
|colspan=2|[[File:SSBU-Luigi's_Mansion.png|150x90px|link=Luigi's Mansion]]<br>{{gameIcon|SSBB}} [[Luigi's Mansion]]<br>{{symbol|mario|20px}} | |||
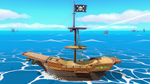
|colspan=2|[[File:SSBU-Pirate Ship.png|150x90px|link=Pirate Ship]]<br>{{gameIcon|SSBB}} [[Pirate Ship]]*<br>{{symbol|zelda|20px}} | |||
|colspan=2|[[File:SSBU-Paper_Mario.png|150x90px|link=Paper Mario]]<br>{{gameIcon|SSB4-3DS}} [[Paper Mario]]<br>{{symbol|mario|20px}} | |||
|colspan=2|[[File:SSBU-Spirit Train.png|150x90px|link=Spirit Train]]<br>{{gameIcon|SSB4-3DS}} [[Spirit Train]]<br>{{symbol|zelda|20px}} | |||
|colspan=2|[[File:SSBU-Prism Tower.png|150x90px|link=Prism Tower]]<br>{{gameIcon|SSB4-3DS}} [[Prism Tower]]*<br>{{symbol|pokémon|20px}} | |||
|- | |- | ||
|colspan=2|[[File:SSBU-Mute City (3DS).png|150x90px|link=Mute City (SSB4)]]<br>{{gameIcon|SSB4-3DS}} [[Mute City (SSB4)|Mute City SNES]]*<br>{{symbol|f-zero|20px}} | |colspan=2|[[File:SSBU-Mute City (3DS).png|150x90px|link=Mute City (SSB4)]]<br>{{gameIcon|SSB4-3DS}} [[Mute City (SSB4)|Mute City SNES]]*<br>{{symbol|f-zero|20px}} | ||
|colspan=2|[[File:SSBU-Magicant.png|150x90px|link=Magicant]]<br>{{gameIcon|SSB4-3DS}} [[Magicant]]<br>{{symbol|earthbound|20px}} | |colspan=2|[[File:SSBU-Magicant.png|150x90px|link=Magicant]]<br>{{gameIcon|SSB4-3DS}} [[Magicant]]<br>{{symbol|earthbound|20px}} | ||
|colspan=2|[[File:SSBU- | |colspan=2|[[File:SSBU-Arena Ferox.png|150x90px|link=Arena Ferox]]<br>{{gameIcon|SSB4-3DS}} [[Arena Ferox]]<br>{{symbol|fe|20px}} | ||
|colspan=2|[[File:SSBU- | |colspan=2|[[File:SSBU-Tortimer Island.png|150x90px|link=Tortimer Island]]<br>{{gameIcon|SSB4-3DS}} [[Tortimer Island]]<br>{{symbol|ac|20px}} | ||
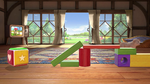
|colspan=2|[[File:SSBU-Living Room.png|150x90px|link=Living Room]]<br>{{gameIcon|SSB4-3DS}} [[Living Room]]<br>{{symbol|nintendogs|20px}} | |||
|colspan=2|[[File:SSBU-Find Mii.png|150x90px|link=Find Mii]]<br>{{gameIcon|SSB4-3DS}} [[Find Mii]]<br>{{symbol|streetpass|20px}} | |||
|- | |- | ||
|colspan=2|[[File:SSBU- | |colspan=2|[[File:SSBU-Tomodachi Life.png|150x90px|link=Tomodachi Life]]<br>{{gameIcon|SSB4-3DS}} [[Tomodachi Life]]<br>{{symbol|tomodachi|20px}} | ||
|colspan=2|[[File:SSBU- | |colspan=2|[[File:SSBU-PictoChat 2.png|150x90px|link=PictoChat 2]]<br>{{gameIcon|SSB4-3DS}}[[PictoChat 2]]<br>{{symbol|ds|20px}} | ||
|colspan=2|[[File:SSBU- | |colspan=2|[[File:SSBU-Mario Circuit (SSB4).png|150x90px|link=Mario Circuit (SSB4)]]<br>{{gameIcon|SSB4-U}} {{SSB4|Mario Circuit}}*<br>{{symbol|mario|20px}} | ||
|colspan=2|[[File:SSBU-Skyloft.png|150x90px|link=Skyloft]]<br>{{gameIcon|SSB4-U}} [[Skyloft]]<br>{{symbol|zelda|20px}} | |||
|colspan=2|[[File:SSBU- | |||
|colspan=2|[[File:SSBU-Garden of Hope.png|150x90px|link=Garden of Hope]]<br>{{gameIcon|SSB4-U}} [[Garden of Hope]]<br>{{symbol|pikmin|20px}} | |colspan=2|[[File:SSBU-Garden of Hope.png|150x90px|link=Garden of Hope]]<br>{{gameIcon|SSB4-U}} [[Garden of Hope]]<br>{{symbol|pikmin|20px}} | ||
|colspan=2|[[File:SSBU-Town and City.png|150x90px|link=Town and City]]<br>{{gameIcon|SSB4-U}} [[Town and City]]<br>{{symbol|ac|20px}} | |||
|- | |- | ||
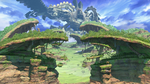
|colspan=2|[[File:SSBU-Gaur Plain.png|150x90px|link=Gaur Plain]]<br>{{gameIcon|SSB4}} [[Gaur Plain]]<br>{{symbol|xenoblade|20px}} | |colspan=2|[[File:SSBU-Gaur Plain.png|150x90px|link=Gaur Plain]]<br>{{gameIcon|SSB4}} [[Gaur Plain]]<br>{{symbol|xenoblade|20px}} | ||
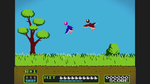
|colspan=2|[[File:SSBU-Duck Hunt.png|150x90px|link=Duck Hunt (stage)]]<br>{{gameIcon|SSB4}} [[Duck Hunt (stage)|Duck Hunt]]<br>{{symbol|dh|20px}} | |colspan=2|[[File:SSBU-Duck Hunt.png|150x90px|link=Duck Hunt (stage)]]<br>{{gameIcon|SSB4}} [[Duck Hunt (stage)|Duck Hunt]]<br>{{symbol|dh|20px}} | ||
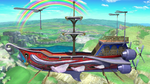
|colspan=2|[[File:SSBU-Pilotwings.png|150x90px|link=Pilotwings]]<br>{{gameIcon|SSB4-U}} [[Pilotwings]]*<br>{{symbol|pw|20px}} | |colspan=2|[[File:SSBU-Pilotwings.png|150x90px|link=Pilotwings]]<br>{{gameIcon|SSB4-U}} [[Pilotwings]]*<br>{{symbol|pw|20px}} | ||
|colspan=2|[[File:SSBU-Wuhu Island.png|150x90px|link=Wuhu Island]]<br>{{gameIcon|SSB4-U}} [[Wuhu Island]]*<br>{{symbol|wiisports|20px}} | |colspan=2|[[File:SSBU-Wuhu Island.png|150x90px|link=Wuhu Island]]<br>{{gameIcon|SSB4-U}} [[Wuhu Island]]*<br>{{symbol|wiisports|20px}} | ||
|colspan=2|[[File:SSBU-Suzaku Castle.png|150x90px|link=Suzaku Castle]]<br>{{gameIcon|SSB4}} [[Suzaku Castle]]<br>{{symbol|streetfighter|20px}} | |||
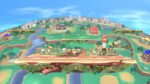
|colspan=2|[[File:SSBU-New Donk City Hall.jpg|150x90px|link=New Donk City Hall]]<br>[[New Donk City Hall]]*<br>{{symbol|mario|20px}} | |colspan=2|[[File:SSBU-New Donk City Hall.jpg|150x90px|link=New Donk City Hall]]<br>[[New Donk City Hall]]*<br>{{symbol|mario|20px}} | ||
|- | |||
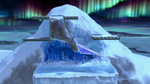
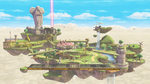
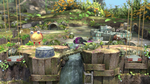
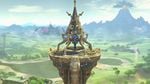
|colspan=2|[[File:SSBU-Great Plateau Tower.jpg|150x90px|link=Great Plateau Tower]]<br>[[Great Plateau Tower]]<br>{{symbol|zelda|20px}} | |colspan=2|[[File:SSBU-Great Plateau Tower.jpg|150x90px|link=Great Plateau Tower]]<br>[[Great Plateau Tower]]<br>{{symbol|zelda|20px}} | ||
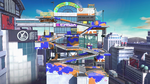
|colspan=2|[[File:SSBU-Moray Towers.png|150x90px|link=Moray Towers]]<br>[[Moray Towers]]<br>{{symbol|splatoon|20px}} | |colspan=2|[[File:SSBU-Moray Towers.png|150x90px|link=Moray Towers]]<br>[[Moray Towers]]<br>{{symbol|splatoon|20px}} | ||
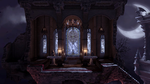
|colspan=2|[[File:SSBU-Dracula's Castle.png|150x90px|link=Dracula's Castle]]<br>[[Dracula's Castle]]<br>{{symbol|castlevania|20px}} | |colspan=2|[[File:SSBU-Dracula's Castle.png|150x90px|link=Dracula's Castle]]<br>[[Dracula's Castle]]<br>{{symbol|castlevania|20px}} | ||
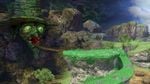
|colspan=2|[[File:SSBU-Spiral Mountain.jpg|150x90px|link=Spiral Mountain]]<br>[[Spiral Mountain]]*<br>{{symbol|banjokazooie|20px}} | |colspan=2|[[File:SSBU-Spiral Mountain.jpg|150x90px|link=Spiral Mountain]]<br>[[Spiral Mountain]]*<br>{{symbol|banjokazooie|20px}} | ||
|colspan=2|[[File:SSBU-Fatal Fury Stage.jpg|150x90px|link=King of Fighters Stadium]]<br>[[King of Fighters Stadium]]<br>{{symbol|fatalfury|20px}} | |colspan=2|[[File:SSBU-Fatal Fury Stage.jpg|150x90px|link=King of Fighters Stadium]]<br>[[King of Fighters Stadium]]<br>{{symbol|fatalfury|20px}} | ||
|colspan=2|[[File:SSBU-Garreg_Mach_Monastery.jpg|150x90px|link=Garreg Mach Monastery]]<br><small>[[Garreg Mach Monastery]]<br>{{symbol|fe|20px}} | |||
|- | |||
|colspan=2|[[File:SSBU-Spring Stadium.jpg|150x90px|link=Spring Stadium]]<br>[[Spring Stadium]]<br>{{symbol|arms|20px}} | |||
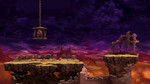
|colspan=2|[[File:SSBU_Northern_Cave.png|150x90px|link=Northern Cave]]<br>[[Northern Cave]]<br>{{symbol|finalfantasy|20px}} | |||
|} | |} | ||
"*" indicates that the stage can be viewed in 360. | "*" indicates that the stage can be viewed in 360. | ||
| Line 99: | Line 98: | ||
*[[Dream Land (SSB)|Dream Land]] | *[[Dream Land (SSB)|Dream Land]] | ||
*[[Saffron City]] | *[[Saffron City]] | ||
| | |||
*[[Princess Peach's Castle]] | *[[Princess Peach's Castle]] | ||
*[[Temple]] | |||
*[[Yoshi's Island (Melee)]] | *[[Yoshi's Island (Melee)]] | ||
*[[Fountain of Dreams]] | *[[Fountain of Dreams]] | ||
*[[Venom]] | *[[Venom]] | ||
*[[Pokémon Stadium]] | *[[Pokémon Stadium]] | ||
*[[Mushroom Kingdom II]] | |||
*[[Brinstar Depths]] | |||
| | |||
*[[Mushroomy Kingdom]] | |||
*[[Bridge of Eldin]] | |||
*[[Norfair]] | *[[Norfair]] | ||
*[[Frigate Orpheon]] | *[[Frigate Orpheon]] | ||
*[[Yoshi's Island (Brawl)]] | *[[Yoshi's Island (Brawl)]] | ||
*[[Halberd]] | |||
*[[Lylat Cruise]] | *[[Lylat Cruise]] | ||
*[[Pokémon Stadium 2]] | *[[Pokémon Stadium 2]] | ||
*[[ | *[[Distant Planet]] | ||
*[[New Pork City]] | |||
*[[Skyworld]] | |||
*[[Spear Pillar]] | |||
*[[75 m]] | |||
*[[Mario Bros.]] | *[[Mario Bros.]] | ||
*[[Hanenbow]] | *[[Hanenbow]] | ||
*[[Green Hill Zone]] | |||
| | | | ||
*[[3D Land]] | *[[3D Land]] | ||
*[[Golden Plains]] | |||
*[[Gerudo Valley]] | |||
*[[Dream Land GB]] | |||
*[[Unova Pokémon League]] | |||
*[[Reset Bomb Forest]] | |||
*[[Balloon Fight]] | *[[Balloon Fight]] | ||
| | |||
*[[Mushroom Kingdom U]] | *[[Mushroom Kingdom U]] | ||
*[[Mario Galaxy]] | *[[Mario Galaxy]] | ||
*[[The Great Cave Offensive]] | *[[The Great Cave Offensive]] | ||
*[[Kalos Pokémon League]] | |||
*[[Coliseum]] | |||
*[[Flat Zone X]] | |||
*[[Palutena's Temple]] | |||
*[[Gamer]] | |||
*[[Wii Fit Studio]] | *[[Wii Fit Studio]] | ||
*[[Boxing Ring]] | *[[Boxing Ring]] | ||
*[[Wrecking Crew]] | *[[Wrecking Crew]] | ||
*[[Windy Hill Zone]] | *[[Windy Hill Zone]] | ||
*[[Wily Castle]] | |||
*[[PAC-LAND]] | |||
*[[Super Mario Maker]] | |||
*[[Midgar]] | |||
*[[Umbra Clock Tower]] | *[[Umbra Clock Tower]] | ||
| | |||
*[[Mementos]] | *[[Mementos]] | ||
*[[Yggdrasil's Altar]] | *[[Yggdrasil's Altar]] | ||
*[[Minecraft World]] | *[[Minecraft World]] | ||
|} | |} | ||
Only offline timed matches (can be set from 1:00 to 10:00) with CPUs can be played in this mode. However, the player can join the battle themselves by changing the first CPU to Player 1. Items and Final Smashes are disabled. | Only offline timed matches (can be set from 1:00 to 10:00) with CPUs can be played in this mode. However, the player can join the battle themselves by changing the first CPU to Player 1. Items and Final Smashes are disabled. | ||
Revision as of 01:06, January 29, 2021

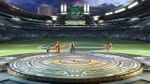
VR is a feature in Super Smash Bros. Ultimate that allows players to spectate and play single-player matches using the Nintendo Labo VR Goggles. VR functionality was introduced as part of the 3.1.0 update.
A limited number of stages are available in VR mode. These stages are:


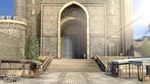
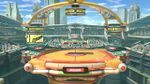
"*" indicates that the stage can be viewed in 360.
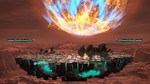
Conversely, the following stages are not available:
Only offline timed matches (can be set from 1:00 to 10:00) with CPUs can be played in this mode. However, the player can join the battle themselves by changing the first CPU to Player 1. Items and Final Smashes are disabled.
Trivia
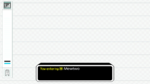
- Moving the camera so that it faces behind the stage is impossible on stages that do not support 360 view; the screen simply fades to black, with a message telling the player to reset the camera's direction. Though, it is possible to see the void behind where the camera normally is if the player turns the camera just enough to see it where the message does not pop up. The ones that do allow it mostly appear be ones that have the stage travel around the environment, which would make sense as the majority of the stage is viewable during normal game play.
- The Mii Fighters cannot be selected in this mode; the reason for this is currently unknown.
- The Stage Select screen, the Fighter Select screen and the Victory/Results screen are bordered 16:9. The gameplay HUD and Pause Menu are open matte 16:9.
- The screen cut to black and transitions are used in a black background instead of white after each battle.
- If Joker wins however, his screen transition is used instead.
- However, the Versus screen is not shown when the game is loading.
- The screen cut to black and transitions are used in a black background instead of white after each battle.