[dismiss]
| Welcome to SmashWiki! Log in or create an account and join the community, and don't forget to read this first! |
| Notices |
|---|
| The Skill parameter has been removed from Smasher infoboxes, and in its place are the new "Best historical ranking" and "Best tournament result" parameters. SmashWiki needs help adding these new parameters to Smasher infoboxes, refer to the guidelines here for what should be included in these new parameters. |
| When adding results to Smasher pages, include each tournament's entrant number in addition to the player's placement, and use the {{Trn}} template with the matching game specified. Please also fix old results on Smasher pages that do not abide to this standard. Refer to our Smasher article guidelines to see how results tables should be formatted. |
| Check out our project page for ongoing projects that SmashWiki needs help with. |
Dr. Mario (SSB4)/Neutral attack/Hit 2: Difference between revisions
From SmashWiki, the Super Smash Bros. wiki
Jump to navigationJump to search
SuperSqank (talk | contribs) No edit summary |
SuperSqank (talk | contribs) |
||
| Line 8: | Line 8: | ||
{{SSB4HitboxTableRow | {{SSB4HitboxTableRow | ||
|id=0 | |id=0 | ||
|damage=1. | |damage=1.5% | ||
|angle=70 | |angle=70 | ||
|bk=30 | |bk=30 | ||
| Line 25: | Line 25: | ||
{{SSB4HitboxTableRow | {{SSB4HitboxTableRow | ||
|id=1 | |id=1 | ||
|damage=1. | |damage=1.5% | ||
|angle=78 | |angle=78 | ||
|bk=30 | |bk=30 | ||
| Line 41: | Line 41: | ||
{{SSB4HitboxTableRow | {{SSB4HitboxTableRow | ||
|id=2 | |id=2 | ||
|damage=1. | |damage=1.5% | ||
|angle=88 | |angle=88 | ||
|bk=30 | |bk=30 | ||
| Line 56: | Line 56: | ||
|sfx=Punch | |sfx=Punch | ||
}} | }} | ||
{{HitboxTableRowNote|The damage values are untouched before being affected by Dr. Mario's 1.12x damage multiplier.|24}} | |||
|} | |} | ||
Latest revision as of 17:30, August 2, 2020
Overview[edit]
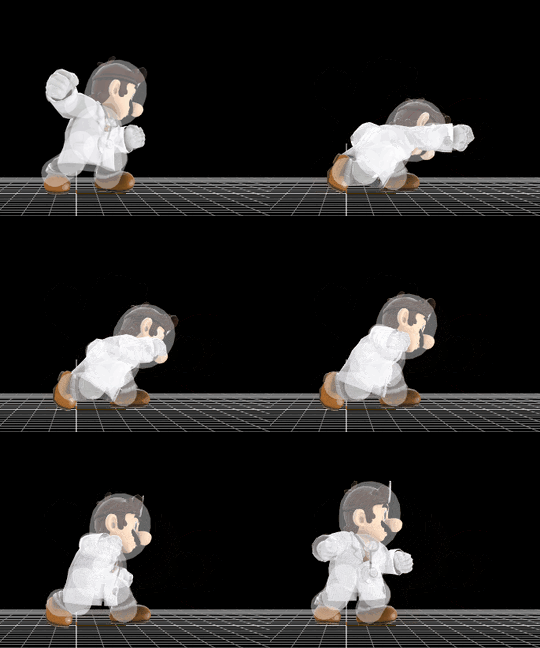
The second hit of Dr. Mario's neutral attack is a simple punch using the arm closer to the camera. In terms of properties, it is quite similar to the first hit, but it only does 1.68% damage, and once again unable to lock as it lacks the Sakurai angle. It can still be used somewhat effectively, however, even if it isn't as good of a combo tool as jab 1. It is mostly used as a mindgame, where using jab 2 would likely mean that the opponent would think that Dr. Mario would continue into jab 3, in which case, Dr. Mario can jab cancel into a grab if they were and still are shielding, anticipating jab 3.
Hitboxes[edit]
Timing[edit]
| Hitbox | 2-3 |
|---|---|
| Earliest continuable frame | 9 |
| Interruptible | 25 |
| Animation length | 29 |
Lag time |
Hitbox |
Earliest continuable point |
Interruptible |
References[edit]
|

