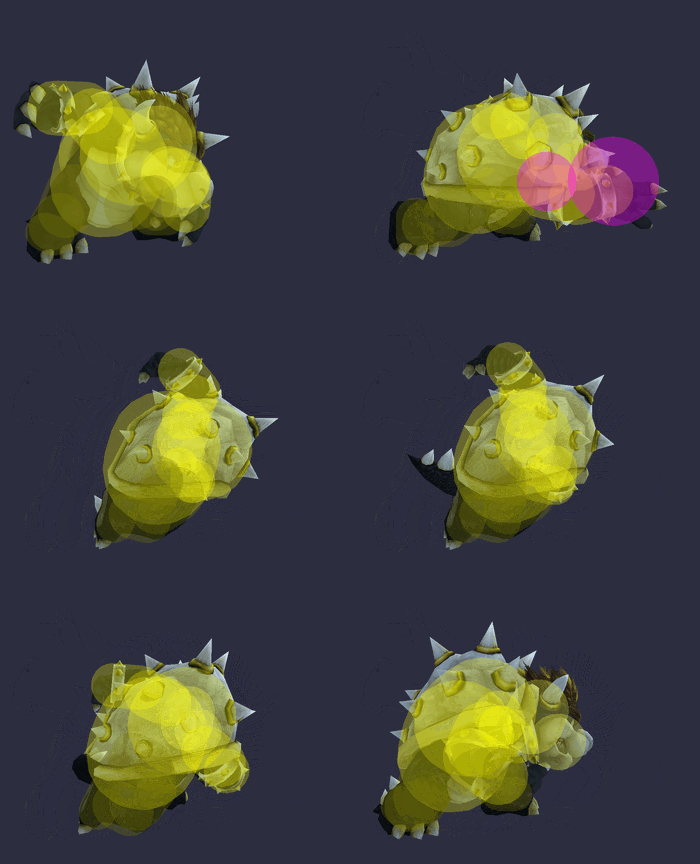
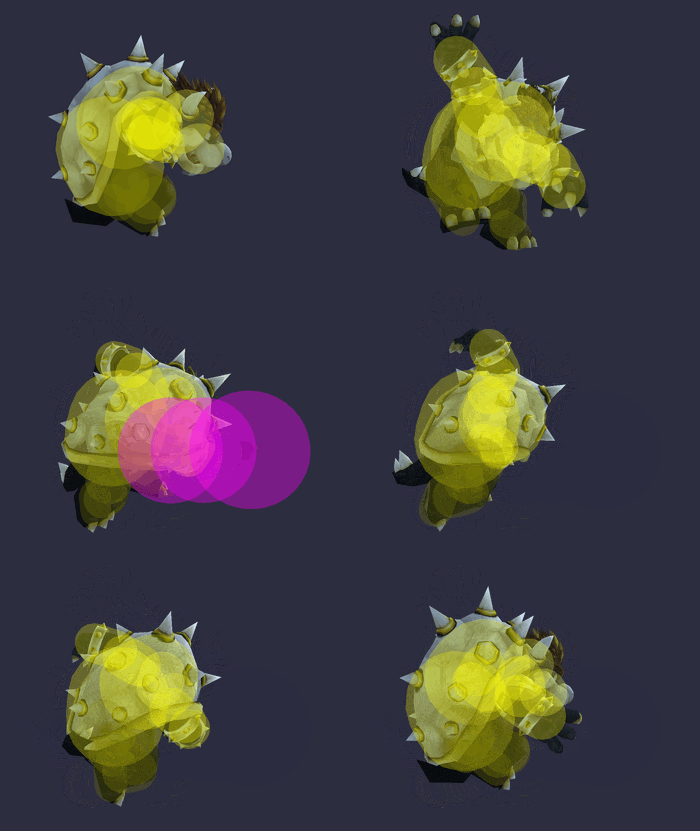
Bowser (SSBB)/Side special
Overview[edit]
Bowser clenches his hand forwards and if it catches an opponent, Bowser grabs the opponent and does a massive flying suplex. Bowser and the opponent can control the direction of his suplex and if both players are holding different directions, the direction Bowser travels depends on the opponents percent. Once he lands, the opponent will fly into the air at a diagonal angle, witht the throw dealing 18%. If Bowser does not land, he will keep falling until he reaches the blastzone, which can be used to commit Bowsercide, which under most circumstances KOs the opponent first.
The grab is fairly fast on the ground and has great range, being faster and having more range than Bowser's normal standing grab although the grounded version cannot grab aerial opponents and its range is shorter than its animation suggests. In the air, the grab comes out much slower but it has more range and it can catch aerial opponents.
The slam KOs Mario at 146% on Final Destination, and its angle makes the move more ambiguous to DI than many other moves. When the move is used in the middle of the stage for example, DIing down will allow the opponent to live for longer but if it is used near the edge, DIing down will KO the opponent earlier. The slam also restores Bowser's double jump, even if he has already used it, which helps him to chase or retreat from his opponents.
Compared to Koopa Klaw, Flying Slam provides more uses to the table, as it provides a strategy to even stocks at a stock disadvantage and vise versa. The move is also less laggy than Koopa Klaw and it has much more grab range, making it a lot safer. At low percents, depending on the opponent’s DI, Bowser can either use his forward aerial, another Flying Slam, or his Fire Breath to rack up more damage although none of these followups are guaranteed, as opponents can act quite some time before Bowser can.
One of the most useful properties Flying Slam has however is that the move auto-cancels on landing throughout its entire animation. This makes the aerial version of the move very difficult to punish if Bowser gets the grab out, especially when short hopping. What makes this even more powerful however is that the move does not auto-cancel like other moves do. Bowser does not immediately land once he touches the ground like any other move which auto-cancels. Instead, Bowser will go into an animation transition frame where he is in an aerial state but the game recognises that he touches the ground and then he will land on the next frame. During this one animation frame, Bowser regains his double jump where he can then either use an aerial, air dodge or he can use another Flying Slam, land with it and give himself another double jump, which can be done infinitely. This is known as Koopa Hopping and it is a form of Second Jump Recovery. The move's ability to auto-cancel combined with Koopa Hopping makes Flying Slam a surprisingly versatile move, aiding Bowser's aerial approach. Bowser can use it to stay in the air for longer by double jumping as he lands and if he does not want to use the double jump, he can just land normally with minimal lag. Bowser also has the option to use his Fire Breath during the animation transition frame, which allows him to use it with no frames of landing lag although this is naturally far less useful than double jumping.
Although the move is quite powerful, opponents at lower percents have more control than Bowser while they are being thrown, which can make the difference between the foe living or Bowser securing the stock. Bowser has more control at higher percents although the opponent does still have some degree of control at higher percents. Bowser has few setups to guarantee the throw with his only notable setup being grab release into Flying Slam. The move also has moderate ending lag on the ground which makes it quite punishable. This is especially prominent against character like Ice Climbers and King Dedede, as a whiffed Flying Slam could potentially could risk Bowser sustaining an infinite chain grab. The aerial version is much safer if Bowser uses it near the ground, he will suffer from a minimal amount of lag, although it has much higher startup lag, allowing opponents to set up a punish the move during its startup. Since the move auto-cancel for its entire animation, this means that if Bowser lands just a little bit before the grab comes out, the grab will not come out, making the move easier to punish, although Bowser can perform a mixup by either double jumping or landing normally to make the move a bit harder to punish.
Overall, despite its flaws, this move is one of Bowser’s most important moves in his toolkit (especially the aerial version) as it has good range, solid power, potential to KO opponents at low percents with Bowserside, the aerial version's ability to auto-cancel and give Bowser his double jump back. All these factors combined not only give Bowser a potent command grab but they also give Bowser an excellent landing option and a solid tool to improve his aerial mobility on stage.
Throw and Grabbbox Data[edit]
Ground Grab[edit]
| ID | Radius | Bone | Offset | G | A | ||
|---|---|---|---|---|---|---|---|
| 0 | 6.0 | 0 | 0.0 | 0.8 | 20.0 | ||
| 1 | 4.0 | 0 | 0.0 | 8.0 | 11.0 | ||
Air Grab[edit]
| ID | Radius | Bone | Offset | G | A | ||
|---|---|---|---|---|---|---|---|
| 0 | 9.0 | 0 | 0.0 | 8.0 | 18.0 | ||
| 1 | 8.0 | 0 | 0.0 | 8.0 | 11.0 | ||
| 2 | 8.0 | 0 | 0.0 | 8.0 | 6.0 | ||
Throw[edit]
| ID | Damage | Angle | BK | KS | FKV | Bone | SDIx | FFx | T% | Type | Effect | Sound | |
|---|---|---|---|---|---|---|---|---|---|---|---|---|---|
| 0 | 18% | Forwards | 80 | 50 | 0 | 0 | 1.0x | None | 0% | ||||
| 1 | 5% | Forwards | 30 | 30 | 0 | 0 | 1.0x | None | 0% | ||||
Timing[edit]
Ground grab[edit]
| Grab | 8-10 |
|---|---|
| Animation length | 37 |
Air grab[edit]
| Grab | 17-19 |
|---|---|
| Animation length | 43 |
Throw[edit]
The timing only includes once Bowser lands.
| Throw | 14 |
|---|---|
| Animation length | 48 |
Lag time |
Grab |
Throw point |

