Welcome to SmashWiki! Log in or create an account and join the community, and don't forget to read this first!
Notices
The Skill parameter has been removed from Smasher infoboxes, and in its place are the new "Best historical ranking" and "Best tournament result" parameters. SmashWiki needs help adding these new parameters to Smasher infoboxes, refer to the guidelines here for what should be included in these new parameters.
When adding results to Smasher pages, include each tournament's entrant number in addition to the player's placement, and use the {{Trn}} template with the matching game specified. Please also fix old results on Smasher pages that do not abide to this standard. Refer to our Smasher article guidelines to see how results tables should be formatted.
Check out our project page for ongoing projects that SmashWiki needs help with.
Super Smash Bros. Brawl

Bowser (SSBB)/Neutral attack/Hit 2

From SmashWiki, the Super Smash Bros. wiki
Jump to navigationJump to search
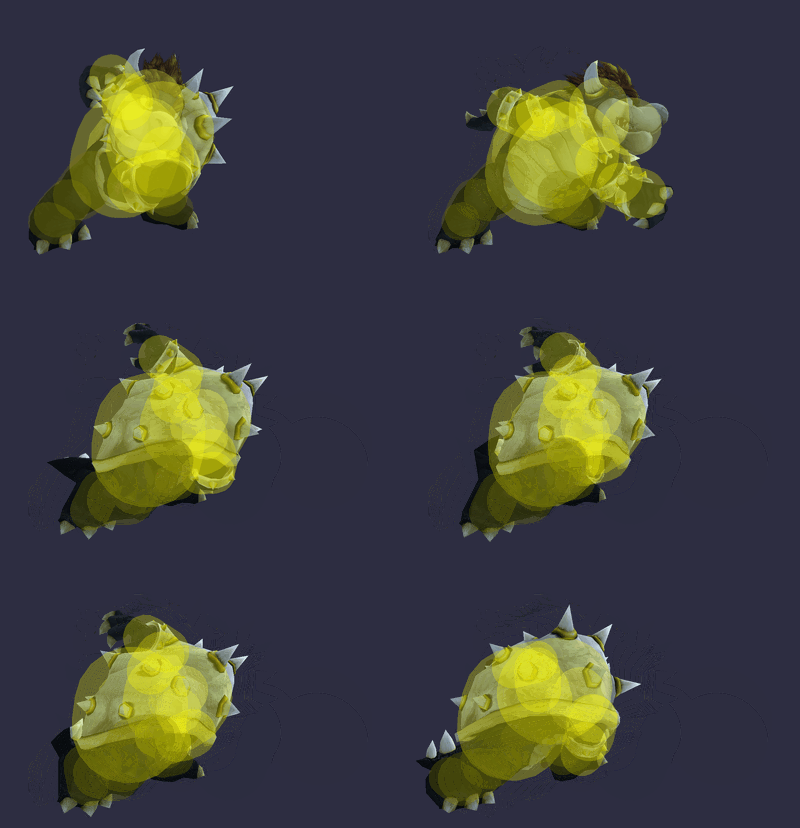
Hitbox visualization showing Bowser's second jab.

Overview[edit]

The second jab that is part of Bowser’s neutral attack. Has base knockback that poorly KOs opponents. But it is safer to use since it has good knockback scaling.

Hitboxes[edit]

ID Part Damage SD Angle BK KS FKV Radius Bone Offset SDIx T% Clang Rebound Type Effect G A Sound Direct
0 0 5% 0 Sakurai angle 50 100 0 6.0 62 -8.0 0.0 0.0 1.0x 1.0x 0% HitboxTableIcon(Clang).png HitboxTableIcon(Rebound).png Hand (type) Slash (effect) HitboxTableIcon(GroundedTrue).png HitboxTableIcon(AerialTrue).png L Slash SpecialsDirect.png
1 0 5% 0 Sakurai angle 50 100 0 5.5 62 0.0 0.0 0.0 1.0x 1.0x 0% HitboxTableIcon(Clang).png HitboxTableIcon(Rebound).png Hand (type) Slash (effect) HitboxTableIcon(GroundedTrue).png HitboxTableIcon(AerialTrue).png L Slash SpecialsDirect.png
2 0 5% 0 Sakurai angle 50 100 0 5.0 62 7.3 0.0 0.0 1.0x 1.0x 0% HitboxTableIcon(Clang).png HitboxTableIcon(Rebound).png Hand (type) Slash (effect) HitboxTableIcon(GroundedTrue).png HitboxTableIcon(AerialTrue).png L Slash SpecialsDirect.png

Timing[edit]

Hitboxes 8-10
Arm Intangible 8-10
Interruptible 26
Animation length 35
Hitboxes  FrameIcon(Lag).png FrameIcon(Lag).png FrameIcon(Lag).png FrameIcon(Lag).png FrameIcon(Lag).png FrameIcon(Lag).png FrameIcon(Lag).png FrameIcon(Hitbox).png FrameIcon(Hitbox).png FrameIcon(Hitbox).png FrameIcon(Lag).png FrameIcon(Lag).png FrameIcon(Lag).png FrameIcon(Lag).png FrameIcon(Lag).png FrameIcon(Lag).png FrameIcon(Lag).png FrameIcon(Lag).png FrameIcon(Lag).png FrameIcon(Lag).png FrameIcon(Lag).png FrameIcon(Lag).png FrameIcon(Lag).png FrameIcon(Lag).png FrameIcon(Lag).png FrameIcon(Interruptible).png FrameIcon(Interruptible).png FrameIcon(Interruptible).png FrameIcon(Interruptible).png FrameIcon(Interruptible).png FrameIcon(Interruptible).png FrameIcon(Interruptible).png FrameIcon(Interruptible).png FrameIcon(Interruptible).png FrameIcon(Interruptible).png
Arm  FrameIcon(Vulnerable).png FrameIcon(Vulnerable).png FrameIcon(Vulnerable).png FrameIcon(Vulnerable).png FrameIcon(Vulnerable).png FrameIcon(Vulnerable).png FrameIcon(Vulnerable).png FrameIcon(Intangible).png FrameIcon(Intangible).png FrameIcon(Intangible).png FrameIcon(Vulnerable).png FrameIcon(Vulnerable).png FrameIcon(Vulnerable).png FrameIcon(Vulnerable).png FrameIcon(Vulnerable).png FrameIcon(Vulnerable).png FrameIcon(Vulnerable).png FrameIcon(Vulnerable).png FrameIcon(Vulnerable).png FrameIcon(Vulnerable).png FrameIcon(Vulnerable).png FrameIcon(Vulnerable).png FrameIcon(Vulnerable).png FrameIcon(Vulnerable).png FrameIcon(Vulnerable).png FrameIcon(Vulnerable).png FrameIcon(Vulnerable).png FrameIcon(Vulnerable).png FrameIcon(Vulnerable).png FrameIcon(Vulnerable).png FrameIcon(Vulnerable).png FrameIcon(Vulnerable).png FrameIcon(Vulnerable).png FrameIcon(Vulnerable).png FrameIcon(Vulnerable).png
Legend (1 square = 1 frame)
Lag
Lag time
Hitbox
Hitbox
FrameIcon(Vulnerable).png
Vulnerable
Intangibility
Intangible
Interruptibility
Interruptible