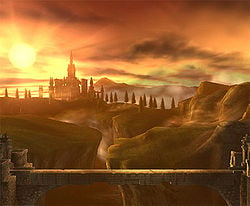
Bridge of Eldin
| Bridge of Eldin | |
|---|---|
 File:Triforce Icon.gif | |
| Universe | The Legend of Zelda |
| Appears in | SSBB |
| Availability | Starter |
The Bridge of Eldin originating from The Legend of Zelda: Twilight Princess is a stage in Super Smash Bros. Brawl.
Stage history
The Bridge of Eldin appears in The Legend of Zelda: Twilight Princess and connects Hyrule Castle Town to the Eldin Province. The bridge is situated over a large valley. In Twilight Princess this bridge was temporarily unusable as a large section of it had been teleported away by twilight monsters. The destroyed section of the bridge was teleported to the Gerudo Mesa in the Gerudo Desert. Later in the game, Midna and Link recover and teleport the section back after it becomes necessary to use the bridge. After a minor skirmish across the plains of Hyrule, Link and King Bulbin duel upon this bridge atop cavalry, leading to to the defeat of King Bulbin who fell into the valley below.
In the Super Smash Bros. series
The Bridge of Eldin appears as a default stage in Super Smash Brothers Brawl.
The Bridge of Eldin is a flat stage. King Bulbin occasionally intervenes the battle and throws bombs which destroy the center of the bridge for a short time. The characters can take damage from the exploding bombs. The characters can also fall into the abyss that is below the damaged section of the bridge. After a certain amount of time, a twilight portal appears and drops the missing section back onto the bridge.
If Bulbin is hit enough times before he gets to the middle of the bridge he won't drop a bomb.
Songs in My Music
- Main Theme (The Legend of Zelda)
- Ocarina of Time Medley
- Title (The Legend of Zelda)
- The Dark World
- The Hidden Mountain & Forest
- Hyrule Field Theme
- Main Theme (Twilight Princess)
- The Hidden Village
- Midna's Lament
Emboldened songs must be unlocked
Glitches
There is a glitch that occurs on this stage when using Jigglypuff's final smash. After King Bulbin breaks the bridge, wait for the rift to try to fix the bridge. If the player uses Jigglypuff's Final Smash in the middle of the bridge while it is sending back the missing pieces, Jigglypuff will expand until the bridge is complete, at which point it seems that Jigglypuff fell. If done correctly, Jigglypuff will stay on the bridge and be able to play as her enourmous size. Also, if Jigglypuff is hit by Yoshi's B attack, she will double in size. Jigglypuff can repeatedly increase in size, until she becomes too big for the stage to handle and will die. Jigglypuff's attacks do the same damage, but she will have a larger range. Also, Rest will no longer hurt anyone while large. After Jigglypuff is KO'd, Jigglypuff will be returned to normal size.If the player does this in training mode,they can pause and use the zoom in function multiple times to view the whole hyrule field map.
Another glitch is done the same way as Jigglypuff's. Using Fox, Falco, or Wolf, you can use their Final Smash's the same as Jigglypuff's. As the stage rebuilds, one of the three activates his Final Smash, he will fall when the stage resets. The Final Smash will fail but the character will still have the glowing flames and no Smash Balls will appear. Until the character walks toward another it will stay zoomed in on the character who used it. Pressing B will let the character use his Blaster and the Smash Ball can't be knocked out of him. As Lucario and Snake activate their Final Smash in the same manner as the Star Fox team, it's likely that they can perform the glitch, too.
A third glitch is available by the same method as the other two except using R.O.B.s. When the character activates his Final Smash right before the bridge closes on them, the Diffusion Beam will be infinitely activated. When R.O.B. dies the effect is canceled.
A fourth glitch is when done with Kirby. He will retain the Smash Ball, but not able to use it.
Yet another glitch can be done with Marth, and 2 things can happen. If done when the Bridge is just starting or barely rebuilt, Marth will still glow and can use Shield Breaker. If done when the Bridge is near done, it will zoom in on Marth, he will attempt to lift his sword, but knocked out of the Bridge and stay zoomed in on.
Trivia
- King Bulblin never used bombs on this bridge in Twilight Princess. His appearance is more likely a reference to the fights the player has with the Bulblin Kings on various bridges. In the original game, the bridge was broken by the same twilight portal that eventually repairs it.
- Fanfare blares out from a horn when King Bulblin is about to charge across the stage. The sound matches the one made by King Bulblin at two points in Twilight Princess; firstly to call in reinforcements for the attack on Ordon, and later to alert the Bulblin Riders for the horseback battle against Link.
- Occasionaly, a lone Bulblin will run on to the stage, accompanying King Bulblin. He is usually knocked away from the bomb on the bridge, yet he can be attacked to halt his movement. He deals no damage to the player. If you hit it enough times, it'll fall off of the bridge. If you keep it from being blown up from the bomb, it will simply jump off the bridge once it reaches the gap.
Gallery
- Stage05 070706b.jpg
- Stage05 070706c.jpg
- Stage05 070706d.jpg
External Links