Double jump: Difference between revisions
(→Double jump heights: Added stock icons for Smash 4.) |
|||
| Line 134: | Line 134: | ||
!date-sort-type="number"|Rank!!Character!!Double Jump Height | !date-sort-type="number"|Rank!!Character!!Double Jump Height | ||
|- | |- | ||
| '''1''' || {{SSB4| | |'''1'''||{{CharHead|Mewtwo|SSB4|hsize=20px}}||58.542999 | ||
|- | |- | ||
| '''2''' || {{SSB4| | |'''2'''||{{CharHead|Yoshi|SSB4|hsize=20px}}||51.560001 | ||
|- | |- | ||
| '''3''' || {{SSB4| | |'''3'''||{{CharHead|Falco|SSB4|hsize=20px}}||50.506073 | ||
|- | |- | ||
| '''4''' || {{SSB4| | |'''4'''||{{CharHead|Greninja|SSB4|hsize=20px}}||46 | ||
|- | |- | ||
| '''5''' || {{ | |'''5'''||{{CharHead|Zero Suit Samus|SSB4|hsize=20px}}||44.199909 | ||
|- | |- | ||
| '''6''' || {{SSB4| | |'''6'''||{{CharHead|Bayonetta|SSB4|hsize=20px}}||42 | ||
|- | |- | ||
| '''7''' || {{SSB4| | |'''7'''||{{CharHead|Luigi|SSB4|hsize=20px}}||41.305771 | ||
|- | |- | ||
| '''8''' || {{ | |'''8'''||{{CharHead|Diddy Kong|SSB4|hsize=20px}}||41.208694 | ||
|- | |- | ||
| '''9''' || {{SSB4| | |rowspan=2|'''9-10'''||{{CharHead|Sheik|SSB4|hsize=20px}}||rowspan=2|40 | ||
|- | |- | ||
| | |{{CharHead|Rosalina & Luma|SSB4|hsize=20px}} | ||
|- | |- | ||
| '''11''' || {{ | |'''11''' ||{{CharHead|R.O.B.|SSB4|hsize=20px|color=Grey}}||38 | ||
|- | |- | ||
| '''12''' || {{SSB4| | |'''12'''||{{CharHead|Lucario|SSB4|hsize=20px}}||37.619999 | ||
|- | |- | ||
| '''13''' || {{ | |'''13'''||{{CharHead|Captain Falcon|SSB4|hsize=20px}}||37.306652 | ||
|- | |- | ||
| '''14''' || {{SSB4| | |rowspan=2|'''14-15'''||{{CharHead|Samus|SSB4|hsize=20px}}||rowspan=2|37 | ||
|- | |- | ||
| | |{{CharHead|Fox|SSB4|hsize=20px}} | ||
|- | |- | ||
| '''16-17''' || {{ | |rowspan=2|'''16-17'''||{{CharHead|Mario|SSB4|hsize=20px}}||rowspan=2|36.331814 | ||
|- | |- | ||
| | |{{CharHead|Dr. Mario|SSB4|hsize=20px}} | ||
|- | |- | ||
| ''' | |'''18'''||{{CharHead|Charizard|SSB4|hsize=20px}}||36 | ||
|- | |- | ||
| ''' | |'''19'''||{{CharHead|Palutena|SSB4|hsize=20px}}||35.900002 | ||
|- | |- | ||
| ''' | |'''20'''||{{CharHead|Wii Fit Trainer|SSB4|hsize=20px}}||35.599998 | ||
|- | |- | ||
| ''' | |rowspan=3|'''21-23'''||{{CharHead|Donkey Kong|SSB4|hsize=20px}}||rowspan=3|35.5 | ||
|- | |- | ||
| | |{{CharHead|Pikachu|SSB4|hsize=20px}} | ||
|- | |- | ||
| | |{{CharHead|Mii Brawler|SSB4|hsize=20px}} | ||
|- | |- | ||
| ''' | |'''24'''||{{CharHead|Sonic|SSB4|hsize=20px}}||35 | ||
|- | |- | ||
| ''' | |'''25'''||{{CharHead|Shulk|SSB4|hsize=20px}}||34.799999 | ||
|- | |- | ||
| ''' | |'''26'''||{{CharHead|Lucas|SSB4|hsize=20px}}||34.48 | ||
|- | |- | ||
| ''' | |'''27'''||{{CharHead|Ness|SSB4|hsize=20px}}||34.476265 | ||
|- | |- | ||
| ''' | |'''28'''||{{CharHead|Bowser Jr.|SSB4|hsize=20px}}||34.400002 | ||
|- | |- | ||
| ''' | |'''29'''||{{CharHead|Pac-Man|SSB4|hsize=20px}}||34.099998 | ||
|- | |- | ||
| '''31''' || {{ | |rowspan=2|'''30-31''' ||{{CharHead|Toon Link|SSB4|hsize=20px}}||rowspan=2|33.799999 | ||
|- | |- | ||
|{{CharHead|Duck Hunt|SSB4|hsize=20px}} | |||
|- | |- | ||
| ''' | |rowspan=2|'''32-33''' ||{{CharHead|Marth|SSB4|hsize=20px}}||rowspan=2|33.660133 | ||
|- | |- | ||
| | |{{CharHead|Lucina|SSB4|hsize=20px}} | ||
|- | |- | ||
| ''' | |'''34'''||{{CharHead|Mii Gunner|SSB4|hsize=20px}}||33.500343 | ||
|- | |- | ||
| ''' | |'''35'''||{{CharHead|Olimar|SSB4|hsize=20px}}||33.5 | ||
|- | |- | ||
| ''' | |'''36'''||{{CharHead|Robin|SSB4|hsize=20px}}||33.208813 | ||
|- | |- | ||
| ''' | |'''37'''||{{CharHead|King Dedede|SSB4|hsize=20px}}||32.849998 | ||
|- | |- | ||
| ''' | |'''38'''||{{CharHead|Mega Man|SSB4|hsize=20px}}||32.799999 | ||
|- | |- | ||
| ''' | |'''39'''||{{CharHead|Bowser|SSB4|hsize=20px}}||32.611839 | ||
|- | |- | ||
| ''' | |rowspan=2|'''40-41''' ||{{CharHead|Villager|SSB4|hsize=20px}}||rowspan=2|32 | ||
|- | |- | ||
| | |{{CharHead|Cloud|SSB4|hsize=20px}} | ||
|- | |- | ||
| ''' | |'''42'''||{{CharHead|Zelda|SSB4|hsize=20px}}||31.552761 | ||
|- | |- | ||
| '''46''' || {{SSB4| | |rowspan=4|'''43-46'''||{{CharHead|Pit|SSB4|hsize=20px}}||rowspan=4|31 | ||
|- | |- | ||
| | |{{CharHead|Dark Pit|SSB4|hsize=20px}} | ||
|- | |- | ||
| | |{{CharHead|Ike|SSB4|hsize=20px}} | ||
|- | |- | ||
| | |{{CharHead|Corrin|SSB4|hsize=20px}} | ||
|- | |- | ||
| ''' | |'''47'''||{{CharHead|Wario|SSB4|hsize=20px}}||30.5 | ||
|- | |- | ||
| ''' | |'''48'''||{{CharHead|Peach|SSB4|hsize=20px}}||30.025824 | ||
|- | |- | ||
| ''' | |'''49'''||{{CharHead|Ryu|SSB4|hsize=20px}}||29.5 | ||
|- | |- | ||
| ''' | |'''50'''||{{CharHead|Link|SSB4|hsize=20px}}||29 | ||
|- | |- | ||
| ''' | |'''51'''||{{CharHead|Meta Knight|SSB4|hsize=20px}}||28.925524 | ||
|- | |- | ||
| ''' | |'''52'''||{{CharHead|Mii Swordfighter|SSB4|hsize=20px}}||28.299999 | ||
|- | |- | ||
| ''' | |'''53'''||{{CharHead|Roy|SSB4|hsize=20px}}||28 | ||
|- | |- | ||
| ''' | |'''54'''||{{CharHead|Mr. Game & Watch|SSB4|hsize=20px}}||27.511969 | ||
|- | |- | ||
| '''58''' || {{SSB4| | |rowspan=2|'''55-56'''||{{CharHead|Ganondorf|SSB4|hsize=20px}}||rowspan=2|26 | ||
|- | |||
|{{CharHead|Little Mac|SSB4|hsize=20px}} | |||
|- | |||
|'''57'''||{{CharHead|Kirby|SSB4|hsize=20px}}||22 | |||
|- | |||
|'''58'''||{{CharHead|Jigglypuff|SSB4|hsize=20px}}||19.786329 | |||
|} | |} | ||
===''[[Super Smash Bros. Ultimate]]''=== | ===''[[Super Smash Bros. Ultimate]]''=== | ||
{|class="wikitable sortable" align="center" style="text-align:center" | {|class="wikitable sortable" align="center" style="text-align:center" | ||
!date-sort-type="number"|Rank !! Character !! Double Jump Height | !date-sort-type="number"|Rank !! Character !! Double Jump Height | ||
|- | |- | ||
| '''1''' || {{CharHead|Mewtwo|SSBU|hsize=20px}} || 57.35 | |'''1'''||{{CharHead|Mewtwo|SSBU|hsize=20px}}||57.35 | ||
|- | |- | ||
| '''2''' || {{CharHead|Yoshi|SSBU|hsize=20px}} || 51.56 | |'''2'''||{{CharHead|Yoshi|SSBU|hsize=20px}}||51.56 | ||
|- | |- | ||
| '''3''' || {{CharHead|Falco|SSBU|hsize=20px}} || 50.51 | |'''3'''||{{CharHead|Falco|SSBU|hsize=20px}}||50.51 | ||
|- | |- | ||
| '''4''' || {{CharHead|Kazuya|SSBU|hsize=20px}} || 49 | |'''4'''||{{CharHead|Kazuya|SSBU|hsize=20px}}||49 | ||
|- | |- | ||
| '''5''' || {{CharHead|Greninja|SSBU|hsize=20px}} || 46 | |'''5'''||{{CharHead|Greninja|SSBU|hsize=20px}}||46 | ||
|- | |- | ||
| '''6''' || {{CharHead|Ness|SSBU|hsize=20px}} || 45.65 | |'''6'''||{{CharHead|Ness|SSBU|hsize=20px}}||45.65 | ||
|- | |- | ||
| '''7''' || {{CharHead|Zero Suit Samus|SSBU|hsize=20px}} || 44.2 | |'''7'''||{{CharHead|Zero Suit Samus|SSBU|hsize=20px}}||44.2 | ||
|- | |- | ||
| '''8''' || {{CharHead|Lucas|SSBU|hsize=20px}} || 44.13 | |'''8'''||{{CharHead|Lucas|SSBU|hsize=20px}}||44.13 | ||
|- | |- | ||
| '''9''' || {{CharHead|Bayonetta|SSBU|hsize=20px}} || 42 | |'''9'''||{{CharHead|Bayonetta|SSBU|hsize=20px}}||42 | ||
|- | |- | ||
| '''10''' || {{CharHead|Luigi|SSBU|hsize=20px}} || 41.31 | |'''10'''||{{CharHead|Luigi|SSBU|hsize=20px}}||41.31 | ||
|- | |- | ||
| '''11''' || {{CharHead|Diddy Kong|SSBU|hsize=20px}} || 41.21 | |'''11'''||{{CharHead|Diddy Kong|SSBU|hsize=20px}}||41.21 | ||
|- | |- | ||
| rowspan=3 | '''12-14''' || {{CharHead|Sheik|SSBU|hsize=20px}} || 40 | |rowspan=3|'''12-14'''||{{CharHead|Sheik|SSBU|hsize=20px}}||rowspan=3|40 | ||
|- | |- | ||
| {{CharHead|Rosalina & Luma|SSBU|hsize=20px}} | |{{CharHead|Rosalina & Luma|SSBU|hsize=20px}} | ||
|- | |- | ||
| {{CharHead|Sora|SSBU|hsize=20px}} | |{{CharHead|Sora|SSBU|hsize=20px}} | ||
|- | |- | ||
| '''15''' || {{CharHead|Piranha Plant|SSBU|hsize=20px}} || 38.52 | |'''15'''||{{CharHead|Piranha Plant|SSBU|hsize=20px}}||38.52 | ||
|- | |- | ||
| '''16''' || {{CharHead|R.O.B.|SSBU|hsize=20px}} || 38 | |'''16'''||{{CharHead|R.O.B.|SSBU|hsize=20px|color=Grey}}||38 | ||
|- | |- | ||
| '''17''' || {{CharHead|Lucario|SSBU|hsize=20px}} || 37.62 | |'''17'''||{{CharHead|Lucario|SSBU|hsize=20px}}||37.62 | ||
|- | |- | ||
| '''18''' || {{CharHead|Captain Falcon|SSBU|hsize=20px}} || 37.31 | |'''18'''||{{CharHead|Captain Falcon|SSBU|hsize=20px}}||37.31 | ||
|- | |- | ||
| rowspan=3 | '''19-21''' || {{CharHead|Samus|SSBU|hsize=20px}} || 37 | |rowspan=3|'''19-21'''||{{CharHead|Samus|SSBU|hsize=20px}}||rowspan=3|37 | ||
|- | |- | ||
| {{CharHead|Dark Samus|SSBU|hsize=20px}} | |{{CharHead|Dark Samus|SSBU|hsize=20px}} | ||
|- | |- | ||
| {{CharHead|Fox|SSBU|hsize=20px}} | |{{CharHead|Fox|SSBU|hsize=20px}} | ||
|- | |- | ||
| rowspan=2 | '''22-23''' || {{CharHead|Mario|SSBU|hsize=20px}} || 36.33 | |rowspan=2|'''22-23'''||{{CharHead|Mario|SSBU|hsize=20px}}||rowspan=2|36.33 | ||
|- | |- | ||
| {{CharHead|Inkling|SSBU|hsize=20px}} | |{{CharHead|Inkling|SSBU|hsize=20px}} | ||
|- | |- | ||
| '''24''' || {{CharHead|Pichu|SSBU|hsize=20px}} || 36.02 | |'''24'''||{{CharHead|Pichu|SSBU|hsize=20px}}||36.02 | ||
|- | |- | ||
| '''25''' || {{CharHead|Charizard|SSBU|hsize=20px}} || 36 | |'''25'''||{{CharHead|Charizard|SSBU|hsize=20px}}||36 | ||
|- | |- | ||
| '''26''' || {{CharHead|Palutena|SSBU|hsize=20px}} || 35.9 | |'''26'''||{{CharHead|Palutena|SSBU|hsize=20px}}||35.9 | ||
|- | |- | ||
| '''27''' || {{CharHead|Wii Fit Trainer|SSBU|hsize=20px}} || 35.6 | |'''27'''||{{CharHead|Wii Fit Trainer|SSBU|hsize=20px}}||35.6 | ||
|- | |- | ||
| rowspan=3 | '''28-30''' || {{CharHead|Donkey Kong|SSBU|hsize=20px}} || 35.5 | |rowspan=3|'''28-30'''||{{CharHead|Donkey Kong|SSBU|hsize=20px}}||rowspan=3|35.5 | ||
|- | |- | ||
| {{CharHead|Pikachu|SSBU|hsize=20px}} | |{{CharHead|Pikachu|SSBU|hsize=20px}} | ||
|- | |- | ||
| {{CharHead|Mii Brawler|SSBU|hsize=20px}} | |{{CharHead|Mii Brawler|SSBU|hsize=20px}} | ||
|- | |- | ||
| '''31''' || {{CharHead|Squirtle|SSBU|hsize=20px}} || 35.35 | |'''31'''||{{CharHead|Squirtle|SSBU|hsize=20px}}||35.35 | ||
|- | |- | ||
| '''32''' || {{CharHead|Sonic|SSBU|hsize=20px}} || 35 | |'''32'''||{{CharHead|Sonic|SSBU|hsize=20px}}||35 | ||
|- | |- | ||
| '''33''' || {{CharHead|Ice Climbers|SSBU|hsize=20px}} || 34.69 | |'''33'''||{{CharHead|Ice Climbers|SSBU|hsize=20px}}||34.69 | ||
|- | |- | ||
| '''34''' || {{CharHead|Bowser Jr.|SSBU|hsize=20px}} || 34.4 | |'''34'''||{{CharHead|Bowser Jr.|SSBU|hsize=20px}}||34.4 | ||
|- | |- | ||
| '''35''' || {{CharHead|Pac-Man|SSBU|hsize=20px}} || 34.1 | |'''35'''||{{CharHead|Pac-Man|SSBU|hsize=20px}}||34.1 | ||
|- | |- | ||
| '''36''' || {{CharHead|Snake|SSBU|hsize=20px}} || 34.07 | |'''36'''||{{CharHead|Snake|SSBU|hsize=20px}}||34.07 | ||
|- | |- | ||
| rowspan=2 | '''37-38''' || {{CharHead|Joker|SSBU|hsize=20px}} || 34 | |rowspan=2|'''37-38'''||{{CharHead|Joker|SSBU|hsize=20px}}||34 | ||
|- | |- | ||
| {{CharHead|Sephiroth|SSBU|hsize=20px}} || {{rollover|34|28.9 for the second air jump.|?}} | |{{CharHead|Sephiroth|SSBU|hsize=20px}}||{{rollover|34|28.9 for the second air jump.|?}} | ||
|- | |- | ||
| rowspan=2 | '''39-40''' || {{CharHead|Toon Link|SSBU|hsize=20px}} || 33.8 | |rowspan=2|'''39-40'''||{{CharHead|Toon Link|SSBU|hsize=20px}}||rowspan=2|33.8 | ||
|- | |- | ||
| {{CharHead|Duck Hunt|SSBU|hsize=20px}} | |{{CharHead|Duck Hunt|SSBU|hsize=20px}} | ||
|- | |- | ||
| rowspan=3 | '''41-43''' || {{CharHead|Marth|SSBU|hsize=20px}} || 33.66 | |rowspan=3|'''41-43'''||{{CharHead|Marth|SSBU|hsize=20px}}||rowspan=3|33.66 | ||
|- | |- | ||
| {{CharHead|Lucina|SSBU|hsize=20px}} | |{{CharHead|Lucina|SSBU|hsize=20px}} | ||
|- | |- | ||
| {{CharHead|Young Link|SSBU|hsize=20px}} | |{{CharHead|Young Link|SSBU|hsize=20px}} | ||
|- | |- | ||
| rowspan=2 | '''44-45''' || {{CharHead|Olimar|SSBU|hsize=20px}} || 33.5 | |rowspan=2|'''44-45'''||{{CharHead|Olimar|SSBU|hsize=20px}}||rowspan=2|33.5 | ||
|- | |- | ||
| {{CharHead|Shulk|SSBU|hsize=20px}} | |{{CharHead|Shulk|SSBU|hsize=20px}} | ||
|- | |- | ||
| '''46''' || {{CharHead|Robin|SSBU|hsize=20px}} || 33.21 | |'''46'''||{{CharHead|Robin|SSBU|hsize=20px}}||33.21 | ||
|- | |- | ||
| '''47''' || {{CharHead|Mythra|SSBU|hsize=20px}} || 33 | |'''47'''||{{CharHead|Mythra|SSBU|hsize=20px}}||33 | ||
|- | |- | ||
| '''48''' || {{CharHead|King Dedede|SSBU|hsize=20px}} || 32.85 | |'''48'''||{{CharHead|King Dedede|SSBU|hsize=20px}}||32.85 | ||
|- | |- | ||
| rowspan=2 | '''49-50''' || {{CharHead|Mega Man|SSBU|hsize=20px}} || 32.8 | |rowspan=2|'''49-50'''||{{CharHead|Mega Man|SSBU|hsize=20px}}||rowspan=2|32.8 | ||
|- | |- | ||
| {{CharHead|Incineroar|SSBU|hsize=20px}} | |{{CharHead|Incineroar|SSBU|hsize=20px}} | ||
|- | |- | ||
| rowspan=2 | '''51-52''' || {{CharHead|Bowser|SSBU|hsize=20px}} || 32.61 | |rowspan=2|'''51-52'''||{{CharHead|Bowser|SSBU|hsize=20px}}||rowspan=2|32.61 | ||
|- | |- | ||
| {{CharHead|King K. Rool|SSBU|hsize=20px}} | |{{CharHead|King K. Rool|SSBU|hsize=20px}} | ||
|- | |- | ||
| rowspan=3 | '''53-55''' || {{CharHead|Villager|SSBU|hsize=20px}} || 32.5 | |rowspan=3|'''53-55'''||{{CharHead|Villager|SSBU|hsize=20px}}||rowspan=3|32.5 | ||
|- | |- | ||
| {{CharHead|Cloud|SSBU|hsize=20px}} | |{{CharHead|Cloud|SSBU|hsize=20px}} | ||
|- | |- | ||
| {{CharHead|Isabelle|SSBU|hsize=20px}} | |{{CharHead|Isabelle|SSBU|hsize=20px}} | ||
|- | |- | ||
| '''56''' || {{CharHead|Mii Gunner|SSBU|hsize=20px}} || 32.3 | |'''56'''||{{CharHead|Mii Gunner|SSBU|hsize=20px}}||32.3 | ||
|- | |- | ||
| '''57''' || {{CharHead|Ivysaur|SSBU|hsize=20px}} || 32.25 | |'''57'''|| {{CharHead|Ivysaur|SSBU|hsize=20px}}||32.25 | ||
|- | |- | ||
| rowspan=2 | '''58-59''' || {{CharHead|Ridley|SSBU|hsize=20px}} || 32 | |rowspan=2|'''58-59'''||{{CharHead|Ridley|SSBU|hsize=20px}}||rowspan=2|32 | ||
|- | |- | ||
| {{CharHead|Banjo & Kazooie|SSBU|hsize=20px}} | |{{CharHead|Banjo & Kazooie|SSBU|hsize=20px}} | ||
|- | |- | ||
| '''60''' || {{CharHead|Zelda|SSBU|hsize=20px}} || 31.55 | | '''60''' || {{CharHead|Zelda|SSBU|hsize=20px}} || 31.55 | ||
|- | |- | ||
| rowspan=5 | '''61-65''' || {{CharHead|Pit|SSBU|hsize=20px}} || 31 | |rowspan=5|'''61-65'''||{{CharHead|Pit|SSBU|hsize=20px}}||rowspan=5|31 | ||
|- | |- | ||
| {{CharHead|Dark Pit|SSBU|hsize=20px}} | |{{CharHead|Dark Pit|SSBU|hsize=20px}} | ||
|- | |- | ||
| {{CharHead|Ike|SSBU|hsize=20px}} | |{{CharHead|Ike|SSBU|hsize=20px}} | ||
|- | |- | ||
| {{CharHead|Corrin|SSBU|hsize=20px}} | |{{CharHead|Corrin|SSBU|hsize=20px}} | ||
|- | |- | ||
| {{CharHead|Hero|SSBU|hsize=20px}} | |{{CharHead|Hero|SSBU|hsize=20px}} | ||
|- | |- | ||
| '''66''' || {{CharHead|Wolf|SSBU|hsize=20px}} || 30.71 | |'''66'''||{{CharHead|Wolf|SSBU|hsize=20px}}||30.71 | ||
|- | |- | ||
| '''67''' || {{CharHead|Wario|SSBU|hsize=20px}} || 30.5 | |'''67'''||{{CharHead|Wario|SSBU|hsize=20px}}||30.5 | ||
|- | |- | ||
| rowspan=2 | '''68-69''' || {{CharHead|Peach|SSBU|hsize=20px}} || 30.03 | |rowspan=2|'''68-69'''||{{CharHead|Peach|SSBU|hsize=20px}}||rowspan=2|30.03 | ||
|- | |- | ||
| {{CharHead|Daisy|SSBU|hsize=20px}} | |{{CharHead|Daisy|SSBU|hsize=20px}} | ||
|- | |- | ||
| rowspan=2 | '''70-71''' || {{CharHead|Ryu|SSBU|hsize=20px}} || 29.5 | |rowspan=2|'''70-71'''||{{CharHead|Ryu|SSBU|hsize=20px}}||rowspan=2|29.5 | ||
|- | |- | ||
| {{CharHead|Ken|SSBU|hsize=20px}} | |{{CharHead|Ken|SSBU|hsize=20px}} | ||
|- | |- | ||
| rowspan=6 | '''72-77''' || {{CharHead|Link|SSBU|hsize=20px}} || 29 | |rowspan=6|'''72-77'''||{{CharHead|Link|SSBU|hsize=20px}}||rowspan=6|29 | ||
|- | |- | ||
| {{CharHead|Simon|SSBU|hsize=20px}} | |{{CharHead|Simon|SSBU|hsize=20px}} | ||
|- | |- | ||
| {{CharHead|Richter|SSBU|hsize=20px}} | |{{CharHead|Richter|SSBU|hsize=20px}} | ||
|- | |- | ||
| {{CharHead|Terry|SSBU|hsize=20px}} | |{{CharHead|Terry|SSBU|hsize=20px}} | ||
|- | |- | ||
| {{CharHead|Min Min|SSBU|hsize=20px}} | |{{CharHead|Min Min|SSBU|hsize=20px}} | ||
|- | |- | ||
| {{CharHead|Pyra|SSBU|hsize=20px}} | |{{CharHead|Pyra|SSBU|hsize=20px}} | ||
|- | |- | ||
| '''78''' || {{CharHead|Meta Knight|SSBU|hsize=20px}} || 28.93 | |'''78'''||{{CharHead|Meta Knight|SSBU|hsize=20px}}||28.93 | ||
|- | |- | ||
| '''79''' || {{CharHead|Byleth|SSBU|hsize=20px}} || 28.5 | |'''79'''||{{CharHead|Byleth|SSBU|hsize=20px}}||28.5 | ||
|- | |- | ||
| '''80''' || {{CharHead|Mii Swordfighter|SSBU|hsize=20px}} || 28.3 | |'''80'''||{{CharHead|Mii Swordfighter|SSBU|hsize=20px}}||28.3 | ||
|- | |- | ||
| rowspan=2 | '''81-82''' || {{CharHead|Roy|SSBU|hsize=20px}} || 28 | |rowspan=2|'''81-82'''||{{CharHead|Roy|SSBU|hsize=20px}}||rowspan=2|28 | ||
|- | |- | ||
| {{CharHead|Chrom|SSBU|hsize=20px}} | |{{CharHead|Chrom|SSBU|hsize=20px}} | ||
|- | |- | ||
| '''83''' || {{CharHead|Dr. Mario|SSBU|hsize=20px}} || {{rollover|27.785184|Value is stored in-game as the same as Mario, then multiplied by 0.7648.|y}} | |'''83'''||{{CharHead|Dr. Mario|SSBU|hsize=20px}}||{{rollover|27.785184|Value is stored in-game as the same as Mario, then multiplied by 0.7648.|y}} | ||
|- | |- | ||
| '''84''' || {{CharHead|Mr. Game & Watch|SSBU|hsize=20px}} || 27.51 | |'''84'''||{{CharHead|Mr. Game & Watch|SSBU|hsize=20px}}||27.51 | ||
|- | |- | ||
| rowspan=2 | '''85-86''' || {{CharHead|Ganondorf|SSBU|hsize=20px}} || 26 | |rowspan=2|'''85-86'''||{{CharHead|Ganondorf|SSBU|hsize=20px}}||rowspan=2|26 | ||
|- | |- | ||
| {{CharHead|Little Mac|SSBU|hsize=20px}} | |{{CharHead|Little Mac|SSBU|hsize=20px}} | ||
|- | |- | ||
| '''87''' || {{CharHead|Steve|SSBU|hsize=20px}} || 22.5 | |'''87'''||{{CharHead|Steve|SSBU|hsize=20px}}||22.5 | ||
|- | |- | ||
| '''88''' || {{CharHead|Kirby|SSBU|hsize=20px}} || 22 | |'''88'''||{{CharHead|Kirby|SSBU|hsize=20px}}||22 | ||
|- | |- | ||
| '''89''' || {{CharHead|Jigglypuff|SSBU|hsize=20px}} || 19.79 | |'''89'''||{{CharHead|Jigglypuff|SSBU|hsize=20px}}||19.79 | ||
|} | |} | ||
Revision as of 01:51, November 9, 2021

A double jump (also called an air jump or a midair jump) is a jump that can be used once every time the user is airborne. Just like the grounded jump, double jumping is achieved by hitting up on the Control Stick or hitting the jump button. Every character has at least one double jump in the Smash Bros. series, regardless of whether such an ability exists in their original series, while some characters can use up to five.
Overview
A character's double jump(s) are restored upon landing, grabbing a ledge, being KO'd and respawning, or being grabbed by an opposing character (even if the character being grabbed does not touch the ground). Unlike most recovery moves, double jumps are not given back to the player upon being put into hitstun. This can be catastrophic to a character trying to return to the stage if they have already used their double jump(s) and an opponent edge guards their attempt to recover.
In contrast with jumps from the ground, each character only has one height of a double jump, whereas the player can control grounded jumps to be either short hops or full hops. The exception to this is with characters with more than one midair jump, as these usually decay in height with each successive jump.
Yoshi's double jump is unique in that it provides a significant amount of knockback-based armor.
Animations
Double jumps are a lot more varied in animation than single jumps. Most characters twist or flip, and some characters inflate themselves (Kirby, Jigglypuff, King Dedede) or flap their wings (Meta Knight, Charizard, Pit, Dark Pit, Bayonetta, Ridley, Kazooie). During these animations, all characters cast a double circle platform beneath them that disappears after the jump is completed (except for R.O.B. in Brawl, in which a smoke ring is formed instead from the base of his Robo Burner; this does not waste any fuel from his recovery). Like jumps from the ground, characters have a different animation if they are jumping backward. For example, Mario spins around when performing a regular midair jump, but does rapid backward somersaults when performing a backward midair jump. This does not apply to characters with multiple double jumps, in which case they simply turn 180 degrees horizontally as they jump. If a character flips, their collision bubble moves accordingly, though this has no effect on the jump itself.
Delayed double jumps
Most characters have their vertical speed instantly set to their given value upon using their double jump, providing an immediate height boost. Certain characters instead have double jumps that have a short pause before applying a slower and constant upwards boost, controlled by animation rather than an immediate velocity change. Depending on the game, the floatiness of such second jumps allows for several techniques such as double jump canceling and rising aerials. Ness, Mewtwo, Lucas, Kazuya and Sora have this type of double jump. Yoshi had a delayed double jump in Smash 64, Melee and Brawl, while Peach had it in Melee before losing it in Brawl.
Multiple double jumps
Most characters can only jump once while in the air; however, some characters can jump multiple times without touching the ground. Most characters cannot turn around in midair using their double jump, but all characters with multi-jumps can turn around when in midair by using jump while holding away from the direction the character is facing on the Control Stick. Characters without multiple midair jumps that can turn around include Yoshi, who is also able to turn around with his midair jump, and Steve, who can use Minecart to turn around at any time midair regardless of having no jumps left.
Fighters with multiple midair jumps tend to gain substantially less height per jump than the jumps of fighters with only one. There is usually also a brief delay between the end of one jump and being able to start the next. Usually, this delay is small enough for the character to gain a decent amount of height with all of their jumps, but if the character is metal, these multi-jumps become useless or nearly useless.
Characters with multi-jumps usually have poor air speed (with the exception of Jigglypuff, who has among the best air speed, in exchange for among the worst jump height).
In Melee, Captain Falcon and Ganondorf gain another midair jump after using Falcon Kick and Wizard's Foot, respectively. Bayonetta can also restore her double jump by inputting Witch Twist 4 frames after initiating the double jump (3 frames prior to version 8.0.0 of Ultimate). This effectively gives her access to three midair jumps (through two uses of Witch Twist) if the technique is performed correctly. In the initial release of Super Smash Bros. for Nintendo 3DS, a bug allowed Robin and Kirby, upon copying Robin, to regain all of their respective midair jumps after charging Thoron; this bug was removed in version 1.0.4.
In games from Melee onward, characters with multiple midair jumps cannot drop through soft platforms during any of their midair jumps until their animation completes, even if holding down on the Control Stick or after fast falling. This does not apply to their ground jumps and is unlike other characters, who can all drop through platforms during any portion of their midair jump.
A Smash Run Power allows any character to have extra midair jumps.
Some Spirits, such as Ho-Oh, give players an additional midair jump when equipped.
Multiple double jumpers
| Fighter | Double jumps | |||||
|---|---|---|---|---|---|---|
| Banjo & Kazooie | 2 | |||||
| Charizard | 2 | |||||
| Dark Pit | 3 | |||||
| Jigglypuff | 5 | |||||
| King Dedede | 4 | |||||
| Kirby | 5 | |||||
| Meta Knight | 5 | |||||
| Pit | 3 | |||||
| Ridley | 2 | |||||
| Sephiroth | 2 (in Winged Form) |
Double jump heights

Super Smash Bros.
Super Smash Bros. Melee
Super Smash Bros. Brawl
Super Smash Bros. 4
| Rank | Character | Double Jump Height |
|---|---|---|
| 1 | 58.542999 | |
| 2 | 51.560001 | |
| 3 | 50.506073 | |
| 4 | 46 | |
| 5 | 44.199909 | |
| 6 | 42 | |
| 7 | 41.305771 | |
| 8 | 41.208694 | |
| 9-10 | 40 | |
| 11 | 38 | |
| 12 | 37.619999 | |
| 13 | 37.306652 | |
| 14-15 | 37 | |
| 16-17 | 36.331814 | |
| 18 | 36 | |
| 19 | 35.900002 | |
| 20 | 35.599998 | |
| 21-23 | 35.5 | |
| 24 | 35 | |
| 25 | 34.799999 | |
| 26 | 34.48 | |
| 27 | 34.476265 | |
| 28 | 34.400002 | |
| 29 | 34.099998 | |
| 30-31 | 33.799999 | |
| 32-33 | 33.660133 | |
| 34 | 33.500343 | |
| 35 | 33.5 | |
| 36 | 33.208813 | |
| 37 | 32.849998 | |
| 38 | 32.799999 | |
| 39 | 32.611839 | |
| 40-41 | 32 | |
| 42 | 31.552761 | |
| 43-46 | 31 | |
| 47 | 30.5 | |
| 48 | 30.025824 | |
| 49 | 29.5 | |
| 50 | 29 | |
| 51 | 28.925524 | |
| 52 | 28.299999 | |
| 53 | 28 | |
| 54 | 27.511969 | |
| 55-56 | 26 | |
| 57 | 22 | |
| 58 | 19.786329 |
Super Smash Bros. Ultimate
Origin
Double jumping is a common mechanic in many platforming video games, with the oldest game to include such an ability being Namco's Dragon Buster. Occasionally it is given as a power-up or an upgrade, while other times it is just a natural ability. Fighters who can double jump in their native games include Bayonetta, Daisy, Kazooie, Kirby, Samus, Sonic, Wario, Yoshi, King Dedede, and Meta Knight.
Gallery
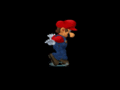
Mario performing his double jump in Melee.
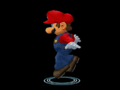
Mario's double jump backward.


Trivia
- Despite being able to actually fly, both Charizard and Ridley have fewer midair jumps than both Pit and Dark Pit, who cannot actually fly on their own.
- In SSB4, with any character that can turn around using their midair jump, holding backward and pressing the attack button a few frames before the character fully turns around will cause them to use their back aerial instead of their forward aerial as they turn around, thus erroneously attacking in the opposite direction. This appears to be a glitch, as it did not happen in previous games.
- Melee is the only game to not introduce any characters with multiple double jumps.
- Banjo & Kazooie are the only third party and DLC fighter to always have multiple double jumps. Sephiroth also has the ability to perform more than one midair jump, but only in his winged form.