Super Smash Bros. Ultimate

Wii Fit Trainer (SSBU)/Neutral attack/Hit 2: Difference between revisions

From SmashWiki, the Super Smash Bros. wiki
Jump to navigationJump to search
m (Doing some cleaning)
mNo edit summary
Line 3: Line 3:


==Overview==
==Overview==
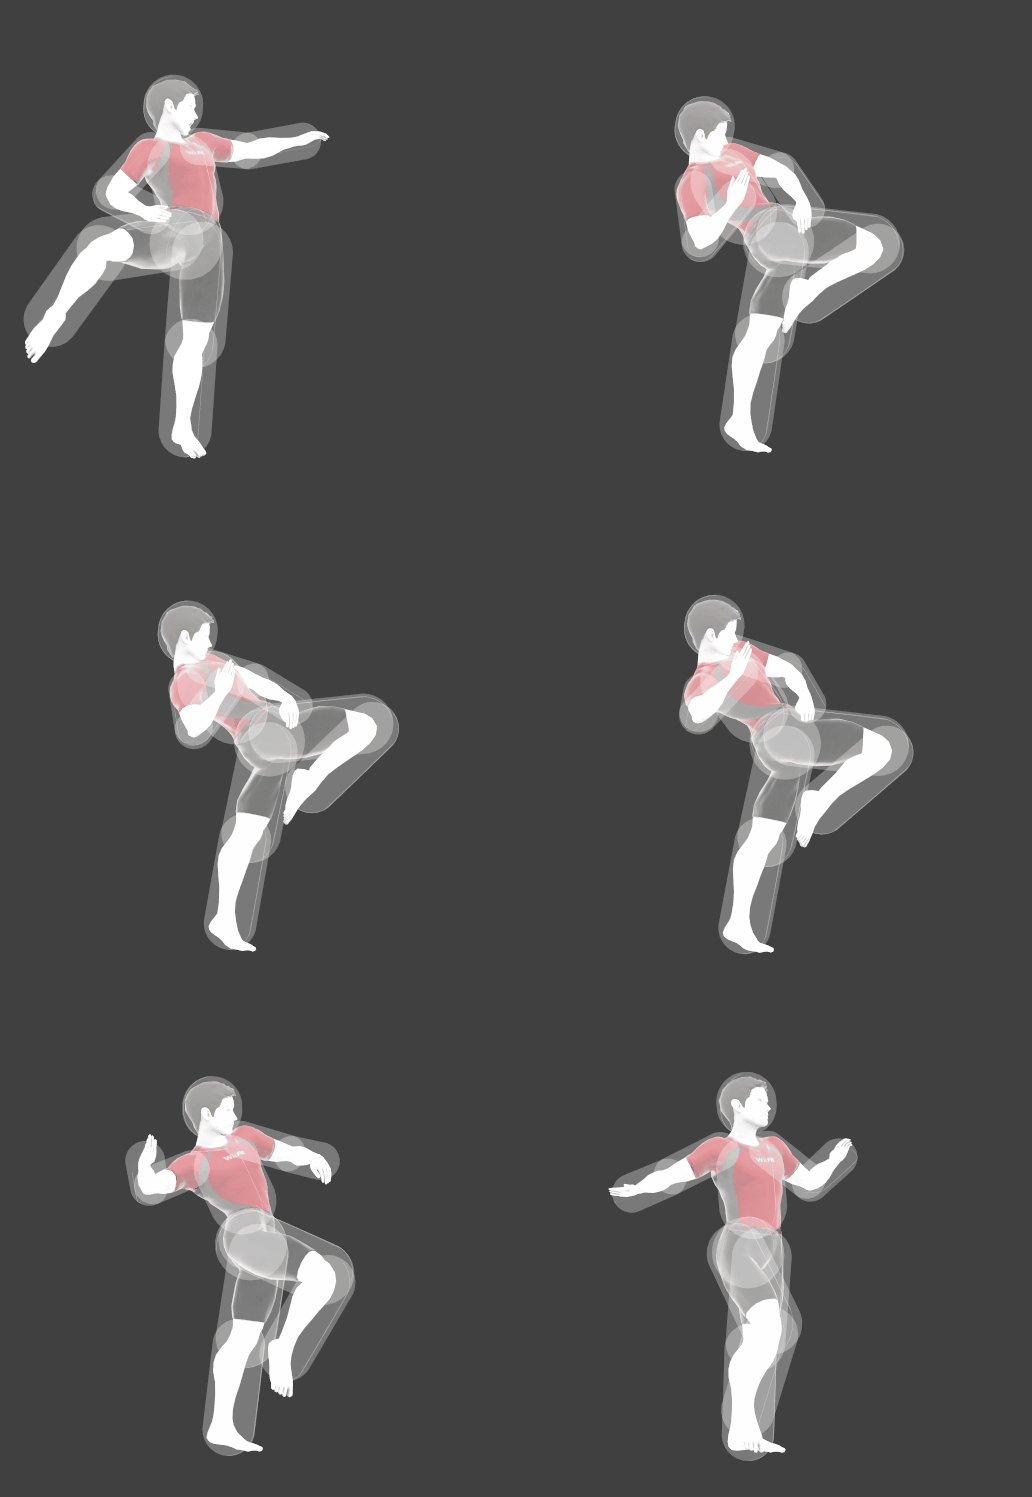
Wii Fit Trainer performs a Single Leg Twist, striking with her knee. This move's utility is restricted almost entirely to simply continuing the jab combo, but even so, it has a few issues that sometimes cause opponents to fall out of the combo. The first issue is the move's knockback; at higher percents and especially with [[Deep Breathing]] active, jab 2 is prone to knocking opponents too far away for the final hit of the jab combo to bury or even connect at all. Secondly, due to the move's [[Sakurai angle]] and superfluous knockback, jab 2 has a 7% chance to [[trip]] the opponent, which once again can cause jab 3 to not bury or even miss entirely. There are a few fringe situations where jab 2 can be used effectively without finishing the jab combo, most notably to [[jablock]] the opponent. However, due to the move's longer endlag in comparison to jab 1, it's typically more optimal to use jab 1 twice to jablock instead. Additionally, jab 2 can be used to cause opponents to slide off the edges of platforms or stages, forcing them into a tech or ledge hang situation, which Wii Fit Trainer can then capitalize upon.[https://youtu.be/t_gL0E62Oqw]
Wii Fit Trainer performs a Single Leg Twist, striking with their knee. This move's utility is restricted almost entirely to simply continuing the jab combo, but even so, it has a few issues that sometimes cause opponents to fall out of the combo. The first issue is the move's knockback; at higher percents and especially with [[Deep Breathing]] active, jab 2 is prone to knocking opponents too far away for the final hit of the jab combo to bury or even connect at all. Secondly, due to the move's [[Sakurai angle]] and superfluous knockback, jab 2 has a 7% chance to [[trip]] the opponent, which once again can cause jab 3 to not bury or even miss entirely. There are a few fringe situations where jab 2 can be used effectively without finishing the jab combo, most notably to [[jablock]] the opponent. However, due to the move's longer endlag in comparison to jab 1, it's typically more optimal to use jab 1 twice to jablock instead. Additionally, jab 2 can be used to cause opponents to slide off the edges of platforms or stages, forcing them into a tech or ledge hang situation, which Wii Fit Trainer can then capitalize upon.[https://youtu.be/t_gL0E62Oqw]


==Hitboxes==
==Hitboxes==

Revision as of 08:12, October 14, 2020

Hitbox visualization showing Wii Fit Trainer's jab 2.

Overview

Wii Fit Trainer performs a Single Leg Twist, striking with their knee. This move's utility is restricted almost entirely to simply continuing the jab combo, but even so, it has a few issues that sometimes cause opponents to fall out of the combo. The first issue is the move's knockback; at higher percents and especially with Deep Breathing active, jab 2 is prone to knocking opponents too far away for the final hit of the jab combo to bury or even connect at all. Secondly, due to the move's Sakurai angle and superfluous knockback, jab 2 has a 7% chance to trip the opponent, which once again can cause jab 3 to not bury or even miss entirely. There are a few fringe situations where jab 2 can be used effectively without finishing the jab combo, most notably to jablock the opponent. However, due to the move's longer endlag in comparison to jab 1, it's typically more optimal to use jab 1 twice to jablock instead. Additionally, jab 2 can be used to cause opponents to slide off the edges of platforms or stages, forcing them into a tech or ledge hang situation, which Wii Fit Trainer can then capitalize upon.[1]

Hitboxes

ID Part Rehit rate Damage SD Angle Angle type BK KS FKV Set weight Radius Bone Offset SDI× T% Clang Rebound Effect Type G A Sound Direct Hit bits Hit part Blockable Reflectable Absorbable Flinchless No GFX Heedless
0 0 0 2.0% 0 Sakurai angle Standard 45 24 0 HitboxTableIcon(False).png 3.2 top 0.0 9.0 2.5 1.0× 1.0× 0% HitboxTableIcon(Clang).png HitboxTableIcon(Rebound).png Normal (effect) Foot (type) HitboxTableIcon(GroundedTrue).png HitboxTableIcon(AerialFalse).png M Kick SpecialsDirect.png All All HitboxTableIcon(Blockable).png HitboxTableIcon(Unreflectable).png HitboxTableIcon(Unabsorbable).png HitboxTableIcon(False).png HitboxTableIcon(False).png HitboxTableIcon(False).png
1 0 0 2.0% 0 AngleIcon8.png Standard 25 24 0 HitboxTableIcon(False).png 3.2 top 0.0 9.0 2.5 1.0× 1.0× 0% HitboxTableIcon(Clang).png HitboxTableIcon(Rebound).png Normal (effect) Foot (type) HitboxTableIcon(GroundedFalse).png HitboxTableIcon(AerialTrue).png M Kick SpecialsDirect.png All All HitboxTableIcon(Blockable).png HitboxTableIcon(Unreflectable).png HitboxTableIcon(Unabsorbable).png HitboxTableIcon(False).png HitboxTableIcon(False).png HitboxTableIcon(False).png
2 0 0 2.0% 0 AngleIcon8.png Standard 25 24 0 HitboxTableIcon(False).png 4.5 top 0.0 9.3 6.5 1.0× 1.0× 0% HitboxTableIcon(Clang).png HitboxTableIcon(Rebound).png Normal (effect) Foot (type) HitboxTableIcon(GroundedFalse).png HitboxTableIcon(AerialTrue).png M Kick SpecialsDirect.png All All HitboxTableIcon(Blockable).png HitboxTableIcon(Unreflectable).png HitboxTableIcon(Unabsorbable).png HitboxTableIcon(False).png HitboxTableIcon(False).png HitboxTableIcon(False).png
3 0 0 2.0% 0 Sakurai angle Standard 45 24 0 HitboxTableIcon(False).png 4.5 top 0.0 9.3 6.5 1.0× 1.0× 0% HitboxTableIcon(Clang).png HitboxTableIcon(Rebound).png Normal (effect) Foot (type) HitboxTableIcon(GroundedTrue).png HitboxTableIcon(AerialFalse).png M Kick SpecialsDirect.png All All HitboxTableIcon(Blockable).png HitboxTableIcon(Unreflectable).png HitboxTableIcon(Unabsorbable).png HitboxTableIcon(False).png HitboxTableIcon(False).png HitboxTableIcon(False).png

Timing

Hitbox 3-4
Earliest continuable frame 9
Interruptible 30
Animation length 49
FrameIcon(Lag).png FrameIcon(Lag).png FrameIcon(Hitbox).png FrameIcon(Hitbox).png FrameIcon(Lag).png FrameIcon(Lag).png FrameIcon(Lag).png FrameIcon(LagContinuableS).png FrameIcon(LagContinuableE).png FrameIcon(Lag).png FrameIcon(Lag).png FrameIcon(Lag).png FrameIcon(Lag).png FrameIcon(Lag).png FrameIcon(Lag).png FrameIcon(Lag).png FrameIcon(Lag).png FrameIcon(Lag).png FrameIcon(Lag).png FrameIcon(Lag).png FrameIcon(Lag).png FrameIcon(Lag).png FrameIcon(Lag).png FrameIcon(Lag).png FrameIcon(Lag).png FrameIcon(Lag).png FrameIcon(Lag).png FrameIcon(Lag).png FrameIcon(Lag).png FrameIcon(Interruptible).png FrameIcon(Interruptible).png FrameIcon(Interruptible).png FrameIcon(Interruptible).png FrameIcon(Interruptible).png FrameIcon(Interruptible).png FrameIcon(Interruptible).png FrameIcon(Interruptible).png FrameIcon(Interruptible).png FrameIcon(Interruptible).png FrameIcon(Interruptible).png FrameIcon(Interruptible).png FrameIcon(Interruptible).png FrameIcon(Interruptible).png FrameIcon(Interruptible).png FrameIcon(Interruptible).png FrameIcon(Interruptible).png FrameIcon(Interruptible).png FrameIcon(Interruptible).png FrameIcon(Interruptible).png
Legend (1 square = 1 frame)
Lag
Lag time
Hitbox
Hitbox
FrameIcon(BlankContinuableS).pngFrameIcon(BlankContinuableE).png
Earliest continuable point
Interruptibility
Interruptible