[dismiss]
| Welcome to SmashWiki! Log in or create an account and join the community, and don't forget to read this first! |
| Notices |
|---|
| The Skill parameter has been removed from Smasher infoboxes, and in its place are the new "Best historical ranking" and "Best tournament result" parameters. SmashWiki needs help adding these new parameters to Smasher infoboxes, refer to the guidelines here for what should be included in these new parameters. |
| When adding results to Smasher pages, include each tournament's entrant number in addition to the player's placement, and use the {{Trn}} template with the matching game specified. Please also fix old results on Smasher pages that do not abide to this standard. Refer to our Smasher article guidelines to see how results tables should be formatted. |
| Check out our project page for ongoing projects that SmashWiki needs help with. |
Falco (SSBM)/Neutral attack/Hit 1: Difference between revisions
From SmashWiki, the Super Smash Bros. wiki
Jump to navigationJump to search
No edit summary |
|||
| Line 1: | Line 1: | ||
{{ArticleIcons|ssbm=y}} | {{ArticleIcons|ssbm=y}} | ||
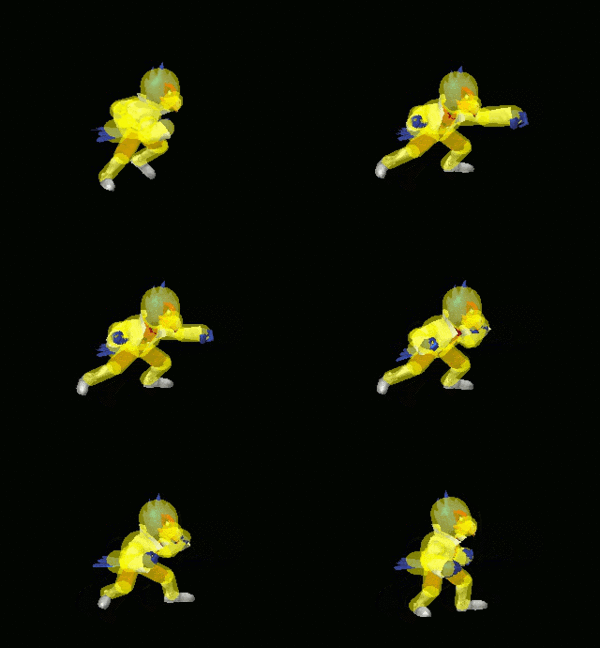
[[File: | [[File:FalcoJab1Melee.gif|thumb|300px|Hitbox visualization showing Falco's first jab.]] | ||
{{competitive expertise}} | {{competitive expertise}} | ||
==Overview== | ==Overview== | ||
Revision as of 19:21, March 24, 2020
Overview
Hitboxes
| ID | Part | Damage | SD | Angle | BK | KS | FKV | Radius | Bone | Offset | Clang | Rebound | Effect | G | A | Sound | ||
|---|---|---|---|---|---|---|---|---|---|---|---|---|---|---|---|---|---|---|
| 0 | 0 | 4% | 0 | 0 | 100 | 0 | 3.5154 | 23 | 4.655952 | 0.0 | 0.0 | |||||||
| 1 | 0 | 4% | 0 | 0 | 100 | 0 | 3.5154 | 23 | 0.0 | 0.0 | 0.0 | |||||||
Timing
| Hitbox | 2-3 |
|---|---|
| Interruptible | 16 |
| Window of jab 2 | 3-31 |
| Jab 2 earliest start | 6 |
| Animation length | 17 |
Lag time |
Hitbox |
Continuable |
Earliest continuable point |
Interruptible |
Similar moves
|

