Enhanceable spirit: Difference between revisions
Magenta Face (talk | contribs) mNo edit summary |
Capstalker (talk | contribs) |
||
| Line 41: | Line 41: | ||
|[[File:Toad Spirit.png|center|108x108px]] | |[[File:Toad Spirit.png|center|108x108px]] | ||
|{{anchor|Toad}}[[Toad]] | |{{anchor|Toad}}[[Toad]] | ||
|[[File:SpiritTypeGrab.png| | |[[File:SpiritTypeGrab.png|20px|center|Grab]] | ||
|★★ | |★★ | ||
|•Battle via Spirit Board<br>•Battle via World of Light (The Light Realm)<br>•Purchase from the Vault Shop for 1000G<br>•Scan the Toad amiibo | |•Battle via Spirit Board<br>•Battle via World of Light (The Light Realm)<br>•Purchase from the Vault Shop for 1000G<br>•Scan the Toad amiibo | ||
| Line 55: | Line 55: | ||
|[[File:Bulletbill.png|center|108x108px]] | |[[File:Bulletbill.png|center|108x108px]] | ||
|{{anchor|Bullet Bill}}[[Bullet Bill]] | |{{anchor|Bullet Bill}}[[Bullet Bill]] | ||
|[[File:SpiritTypeAttack.png| | |[[File:SpiritTypeAttack.png|20px|center|Attack]] | ||
|★ | |★ | ||
|•Battle via World of Light (The Light Realm)<br>•Battle via Spirit Board<br>•Purchase from the Vault Shop for 500G | |•Battle via World of Light (The Light Realm)<br>•Battle via Spirit Board<br>•Purchase from the Vault Shop for 500G | ||
| Line 68: | Line 68: | ||
|[[File:Boo Spirit.png|center|108x108px]] | |[[File:Boo Spirit.png|center|108x108px]] | ||
|{{anchor|Boo}}[[Boo]] | |{{anchor|Boo}}[[Boo]] | ||
|[[File:SpiritTypeNeutral.png| | |[[File:SpiritTypeNeutral.png|20px|center|Neutral]] | ||
|★ | |★ | ||
|•Battle via World of Light (Dracula's Castle)<br>•Battle via Spirit Board<br>•Purchase from the Vault Shop for 500G<br>•Scan the Boo amiibo | |•Battle via World of Light (Dracula's Castle)<br>•Battle via Spirit Board<br>•Purchase from the Vault Shop for 500G<br>•Scan the Boo amiibo | ||
| Line 82: | Line 82: | ||
|[[File:Nipper Plant Spirit.png|center|108x108px]] | |[[File:Nipper Plant Spirit.png|center|108x108px]] | ||
|Nipper Plant | |Nipper Plant | ||
|[[File:SpiritTypeGrab.png| | |[[File:SpiritTypeGrab.png|20px|center|Grab]] | ||
|★ | |★ | ||
|•Purchase at Beedle's Tent for 500SP<br>•Battle via Spirit Board | |•Purchase at Beedle's Tent for 500SP<br>•Battle via Spirit Board | ||
| Line 95: | Line 95: | ||
|[[File:Boom Boom Spirit.png|center|108x108px]] | |[[File:Boom Boom Spirit.png|center|108x108px]] | ||
|Boom Boom | |Boom Boom | ||
|[[File:SpiritTypeAttack.png| | |[[File:SpiritTypeAttack.png|20px|center|Attack]] | ||
|★★ | |★★ | ||
|•Battle via World of Light (The Light Realm)<br>•Battle via Spirit Board<br>•Purchase from the Vault Shop for 1000G | |•Battle via World of Light (The Light Realm)<br>•Battle via Spirit Board<br>•Purchase from the Vault Shop for 1000G | ||
| Line 108: | Line 108: | ||
|[[File:Paper Bowser Spirit.png|center|108x108px]] | |[[File:Paper Bowser Spirit.png|center|108x108px]] | ||
|{{anchor|Paper Bowser}}Paper Bowser | |{{anchor|Paper Bowser}}Paper Bowser | ||
|[[File:SpiritTypeAttack.png| | |[[File:SpiritTypeAttack.png|20px|center|Attack]] | ||
|★★★ | |★★★ | ||
|•Battle via Spirit Board<br>•Purchase from the Vault Shop for 6000G | |•Battle via Spirit Board<br>•Purchase from the Vault Shop for 6000G | ||
| Line 121: | Line 121: | ||
|[[File:Mini Mario Spirit.png|center|108x108px]] | |[[File:Mini Mario Spirit.png|center|108x108px]] | ||
|{{anchor|Mini Mario}}Mini Mario | |{{anchor|Mini Mario}}Mini Mario | ||
|[[File:SpiritTypeNeutral.png| | |[[File:SpiritTypeNeutral.png|20px|center|Neutral]] | ||
|★★ | |★★ | ||
|•Purchase at Timmy and Tommy's for 1000SP | |•Purchase at Timmy and Tommy's for 1000SP | ||
| Line 134: | Line 134: | ||
|[[File:Dixiekong.png|center|108x108px]] | |[[File:Dixiekong.png|center|108x108px]] | ||
|{{anchor|Dixie Kong}}[[Dixie Kong]] | |{{anchor|Dixie Kong}}[[Dixie Kong]] | ||
|[[File:SpiritTypeGrab.png| | |[[File:SpiritTypeGrab.png|20px|center|Grab]] | ||
|★★★ | |★★★ | ||
|•Summon with cores from Tiny Kong and Candy Kong<br>•Battle via Spirit Board (unlocked after obtaining spirit once)<br>•Purchase from the Vault Shop for 6000G (unlocked after obtaining spirit once) | |•Summon with cores from Tiny Kong and Candy Kong<br>•Battle via Spirit Board (unlocked after obtaining spirit once)<br>•Purchase from the Vault Shop for 6000G (unlocked after obtaining spirit once) | ||
|146 | |146 | ||
|[[File:Dixiekongenhanced.png|center|108x108px]] | |[[File:Dixiekongenhanced.png|center|108x108px]] | ||
|{{anchor|Dixie Kong & Kiddy Kong}} | |{{anchor|Dixie Kong & Kiddy Kong}}Dixie Kong & Kiddy Kong | ||
|★★★★ | |★★★★ | ||
||Thrown Items ↑ | ||Thrown Items ↑ | ||
| Line 147: | Line 147: | ||
|[[File:Young Zelda.png|center|108x108px]] | |[[File:Young Zelda.png|center|108x108px]] | ||
|{{anchor|Young Zelda}}Young [[Zelda]] | |{{anchor|Young Zelda}}Young [[Zelda]] | ||
|[[File:SpiritTypeShield.png| | |[[File:SpiritTypeShield.png|20px|center|Shield]] | ||
|★★ | |★★ | ||
|•Battle via Spirit Board<br>•Purchase from the Vault Shop for 1000G | |•Battle via Spirit Board<br>•Purchase from the Vault Shop for 1000G | ||
|190 | |190 | ||
|[[File:Zelda oot Spirit.png|center|108x108px]] | |[[File:Zelda oot Spirit.png|center|108x108px]] | ||
|{{anchor|Zelda (Ocarina of Time)}} | |{{anchor|Zelda (Ocarina of Time)}}Zelda (Ocarina of Time) | ||
|★★★★ | |★★★★ | ||
|Assist Killer | |Assist Killer | ||
| Line 160: | Line 160: | ||
|[[File:Koume and kotake.png|center|108x108px]] | |[[File:Koume and kotake.png|center|108x108px]] | ||
|{{anchor|Koume & Kotake}}[[Koume & Kotake]] | |{{anchor|Koume & Kotake}}[[Koume & Kotake]] | ||
|[[File:SpiritTypeNeutral.png| | |[[File:SpiritTypeNeutral.png|20px|center|Neutral]] | ||
|★★ | |★★ | ||
|•Battle via World of Light (Sacred Land)<br>•Battle via Spirit Board (unlocked after obtaining spirit once)<br>•Purchase from the Vault Shop for 6000G (unlocked after obtaining spirit once) | |•Battle via World of Light (Sacred Land)<br>•Battle via Spirit Board (unlocked after obtaining spirit once)<br>•Purchase from the Vault Shop for 6000G (unlocked after obtaining spirit once) | ||
|203 | |203 | ||
|[[File:Twinrova.png|center|108x108px]] | |[[File:Twinrova.png|center|108x108px]] | ||
|{{anchor|Twinrova}} | |{{anchor|Twinrova}}Twinrova | ||
|★★★ | |★★★ | ||
|Magic Attack ↑ | |Magic Attack ↑ | ||
| Line 173: | Line 173: | ||
|[[File:Skullkid.png|center|108x108px]] | |[[File:Skullkid.png|center|108x108px]] | ||
|{{anchor|Skull Kid}}[[Skull Kid]] | |{{anchor|Skull Kid}}[[Skull Kid]] | ||
|[[File:SpiritTypeGrab.png| | |[[File:SpiritTypeGrab.png|20px|center|Grab]] | ||
|★★ | |★★ | ||
|•Battle via World of Light (Sacred Land)<br>•Battle via Spirit Board<br>•Purchase from the Vault Shop for 1000G | |•Battle via World of Light (Sacred Land)<br>•Battle via Spirit Board<br>•Purchase from the Vault Shop for 1000G | ||
|206 | |206 | ||
|[[File:Skullkid2.png|center|108x108px]] | |[[File:Skullkid2.png|center|108x108px]] | ||
|{{anchor|Skull Kid & Majora's Mask}} | |{{anchor|Skull Kid & Majora's Mask}}Skull Kid & [[Majora's Mask]] | ||
|★★★★ | |★★★★ | ||
|Lifesteal | |Lifesteal | ||
| Line 186: | Line 186: | ||
|[[File:Ganondorf Spirit.png|center|108x108px]] | |[[File:Ganondorf Spirit.png|center|108x108px]] | ||
|{{anchor|Ganondorf (Twilight Princess)}}[[Ganondorf]] (Twilight Princess) | |{{anchor|Ganondorf (Twilight Princess)}}[[Ganondorf]] (Twilight Princess) | ||
|[[File:SpiritTypeAttack.png| | |[[File:SpiritTypeAttack.png|20px|center|Attack]] | ||
|★★★ | |★★★ | ||
|•Battle via World of Light (Mysterious Dimension)<br>•Battle via Spirit Board<br>•Purchase from the Vault Shop for 6000G | |•Battle via World of Light (Mysterious Dimension)<br>•Battle via Spirit Board<br>•Purchase from the Vault Shop for 6000G | ||
| Line 199: | Line 199: | ||
|[[File:Midna.png|center|108x108px]] | |[[File:Midna.png|center|108x108px]] | ||
|{{anchor|Midna}}[[Midna]] | |{{anchor|Midna}}[[Midna]] | ||
|[[File:SpiritTypeGrab.png| | |[[File:SpiritTypeGrab.png|20px|center|Grab]] | ||
|★★★ | |★★★ | ||
|•Battle via World of Light (The Final Battle - Dark)<br>•Battle via Spirit Board<br>•Purchase from the Vault Shop for 6000G<br>•Scan the Wolf Link amiibo | |•Battle via World of Light (The Final Battle - Dark)<br>•Battle via Spirit Board<br>•Purchase from the Vault Shop for 6000G<br>•Scan the Wolf Link amiibo | ||
| Line 212: | Line 212: | ||
|[[File:Link Drawing Spirit.png|center|108x108px]] | |[[File:Link Drawing Spirit.png|center|108x108px]] | ||
|{{anchor|Wall-Merged Link}}Wall-Merged [[Link]] | |{{anchor|Wall-Merged Link}}Wall-Merged [[Link]] | ||
|[[File:SpiritTypeNeutral.png| | |[[File:SpiritTypeNeutral.png|20px|center|Neutral]] | ||
|★★ | |★★ | ||
|•Treasure Chest in World of Light (Sacred Land)<br>•Battle via Spirit Board<br>•Purchase from the Vault Shop for 1000G | |•Treasure Chest in World of Light (Sacred Land)<br>•Battle via Spirit Board<br>•Purchase from the Vault Shop for 1000G | ||
|234 | |234 | ||
|[[File:Link (A Link Between Worlds).png|center|108x108px]] | |[[File:Link (A Link Between Worlds).png|center|108x108px]] | ||
|{{anchor|Link (A Link Between Worlds)}} | |{{anchor|Link (A Link Between Worlds)}}Link (A Link Between Worlds) | ||
|★★★ | |★★★ | ||
|Weapon Attack ↑ | |Weapon Attack ↑ | ||
| Line 225: | Line 225: | ||
|[[File:Tetra.png|center|108x108px]] | |[[File:Tetra.png|center|108x108px]] | ||
|{{anchor|Tetra}}[[Tetra]] | |{{anchor|Tetra}}[[Tetra]] | ||
|[[File:SpiritTypeShield.png| | |[[File:SpiritTypeShield.png|20px|center|Shield]] | ||
|★★★ | |★★★ | ||
|•Battle via World of Light (The Final Battle - Light)<br>•Battle via Spirit Board<br>•Purchase from the Vault Shop for 6000G | |•Battle via World of Light (The Final Battle - Light)<br>•Battle via Spirit Board<br>•Purchase from the Vault Shop for 6000G | ||
|247 | |247 | ||
|[[File:Zelda Wind Waker Spirit.png|center|108x108px]] | |[[File:Zelda Wind Waker Spirit.png|center|108x108px]] | ||
|{{anchor|Zelda (The Wind Waker)}} | |{{anchor|Zelda (The Wind Waker)}}Zelda (The Wind Waker) | ||
|★★★★ | |★★★★ | ||
|Chance of Double Final Smash | |Chance of Double Final Smash | ||
| Line 238: | Line 238: | ||
|[[File:King of Red Lions.png|center|108x108px]] | |[[File:King of Red Lions.png|center|108x108px]] | ||
|{{anchor|King of Red Lions}}[[King of Red Lions]] | |{{anchor|King of Red Lions}}[[King of Red Lions]] | ||
|[[File:SpiritTypeAttack.png| | |[[File:SpiritTypeAttack.png|20px|center|Attack]] | ||
|★★ | |★★ | ||
|•Purchase at Funky Kong's Shack for 1000SP | |•Purchase at Funky Kong's Shack for 1000SP | ||
| Line 251: | Line 251: | ||
|[[File:Phantom.png|center|108x108px]] | |[[File:Phantom.png|center|108x108px]] | ||
|{{anchor|Phantom}}[[Phantom]] | |{{anchor|Phantom}}[[Phantom]] | ||
|[[File:SpiritTypeShield.png| | |[[File:SpiritTypeShield.png|20px|center|Shield]] | ||
|★★ | |★★ | ||
|•Battle via World of Light (The Light Realm)<br>•Battle via Spirit Board<br>•Purchase from the Vault Shop for 1000G | |•Battle via World of Light (The Light Realm)<br>•Battle via Spirit Board<br>•Purchase from the Vault Shop for 1000G | ||
|259 | |259 | ||
|[[File:Zelda Spirit Tracks Spirit.png|center|108x108px]] | |[[File:Zelda Spirit Tracks Spirit.png|center|108x108px]] | ||
|{{anchor|Zelda (Spirit Tracks)}} | |{{anchor|Zelda (Spirit Tracks)}}Zelda (Spirit Tracks) | ||
|★★★ | |★★★ | ||
|Trade-Off Ability ↑ | |Trade-Off Ability ↑ | ||
| Line 264: | Line 264: | ||
|[[File:SSBU Spirits Dark Suit.png|center|108x108px]] | |[[File:SSBU Spirits Dark Suit.png|center|108x108px]] | ||
|{{anchor|Dark Suit}}Dark Suit | |{{anchor|Dark Suit}}Dark Suit | ||
|[[File:SpiritTypeShield.png| | |[[File:SpiritTypeShield.png|20px|center|Shield]] | ||
|★★ | |★★ | ||
|•Purchase at Sheldon's Place for 1000SP | |•Purchase at Sheldon's Place for 1000SP | ||
| Line 277: | Line 277: | ||
|[[File:SSBU Spirits Mother Brain.png|center|108x108px]] | |[[File:SSBU Spirits Mother Brain.png|center|108x108px]] | ||
|{{anchor|Mother Brain}}[[Mother Brain]] | |{{anchor|Mother Brain}}[[Mother Brain]] | ||
|[[File:SpiritTypeShield.png| | |[[File:SpiritTypeShield.png|20px|center|Shield]] | ||
|★★★ | |★★★ | ||
|•Battle via World of Light (The Final Battle - Dark)<br>•Battle via Spirit Board<br>•Purchase from the Vault Shop for 6000G | |•Battle via World of Light (The Final Battle - Dark)<br>•Battle via Spirit Board<br>•Purchase from the Vault Shop for 6000G | ||
| Line 290: | Line 290: | ||
|[[File:XParasiteSpirit.png|center|108x108px]] | |[[File:XParasiteSpirit.png|center|108x108px]] | ||
|{{anchor|X Parasite}}X Parasite | |{{anchor|X Parasite}}X Parasite | ||
|[[File:SpiritTypeAttack.png| | |[[File:SpiritTypeAttack.png|20px|center|Attack]] | ||
|★ | |★ | ||
|•Purchase at Beedle's Tent for 500SP<br>•Battle via Spirit Board | |•Purchase at Beedle's Tent for 500SP<br>•Battle via Spirit Board | ||
| Line 303: | Line 303: | ||
|[[File:Babymario.png|center|108x108px]] | |[[File:Babymario.png|center|108x108px]] | ||
|{{anchor|Baby Mario}}Baby Mario | |{{anchor|Baby Mario}}Baby Mario | ||
|[[File:SpiritTypeNeutral.png| | |[[File:SpiritTypeNeutral.png|20px|center|Neutral]] | ||
|★★★ | |★★★ | ||
|•Battle via World of Light (The Final Battle - Light)<br>•Battle via Spirit Board<br>•Purchase from the Vault Shop for 6000G | |•Battle via World of Light (The Final Battle - Light)<br>•Battle via Spirit Board<br>•Purchase from the Vault Shop for 6000G | ||
| Line 316: | Line 316: | ||
|[[File:Power Orb Spirit.png|center|108x108px]] | |[[File:Power Orb Spirit.png|center|108x108px]] | ||
|{{anchor|Nightmare's Power Orb}}[[Nightmare]]'s Power Orb | |{{anchor|Nightmare's Power Orb}}[[Nightmare]]'s Power Orb | ||
|[[File:SpiritTypeGrab.png| | |[[File:SpiritTypeGrab.png|20px|center|Grab]] | ||
|★★ | |★★ | ||
|•Battle via Spirit Board<br>•Purchase from the Vault Shop for 1000G | |•Battle via Spirit Board<br>•Purchase from the Vault Shop for 1000G | ||
|342 | |342 | ||
|[[File:Nightmare Spirit.png|center|108x108px]] | |[[File:Nightmare Spirit.png|center|108x108px]] | ||
|{{anchor|Nightmare Wizard}} | |{{anchor|Nightmare Wizard}}Nightmare Wizard | ||
|★★★★ | |★★★★ | ||
|Jam FS Charge | |Jam FS Charge | ||
| Line 329: | Line 329: | ||
|[[File:MarxSpirit.png|center|108x108px]] | |[[File:MarxSpirit.png|center|108x108px]] | ||
|{{anchor|Marx}}[[Marx]] | |{{anchor|Marx}}[[Marx]] | ||
|[[File:SpiritTypeGrab.png| | |[[File:SpiritTypeGrab.png|20px|center|Grab]] | ||
|★★ | |★★ | ||
|•Defeat the Mysterious Dimension boss in World of Light | |•Defeat the Mysterious Dimension boss in World of Light | ||
|348 | |348 | ||
|[[File:MarxTrueFormSpirit.png|center|108x108px]] | |[[File:MarxTrueFormSpirit.png|center|108x108px]] | ||
|{{anchor|Marx (True Form)}} | |{{anchor|Marx (True Form)}}Marx (True Form) | ||
|★★★★ | |★★★★ | ||
|Magic Attack ↑ | |Magic Attack ↑ | ||
| Line 342: | Line 342: | ||
|[[File:Daroach.png|center|108x108px]] | |[[File:Daroach.png|center|108x108px]] | ||
|{{anchor|Daroach}}Daroach | |{{anchor|Daroach}}Daroach | ||
|[[File:SpiritTypeAttack.png| | |[[File:SpiritTypeAttack.png|20px|center|Attack]] | ||
|★★★ | |★★★ | ||
|•Summon with cores from Count Cannoli, Mouser, and any two [[File:SpiritTypeNeutral.png|24px]] cores | |•Summon with cores from Count Cannoli, Mouser, and any two [[File:SpiritTypeNeutral.png|24px]] cores | ||
| Line 355: | Line 355: | ||
|[[File:Waddledee.png|center|108x108px]] | |[[File:Waddledee.png|center|108x108px]] | ||
|{{anchor|Waddle Dee}}[[Waddle Dee]] | |{{anchor|Waddle Dee}}[[Waddle Dee]] | ||
|[[File:SpiritTypeNeutral.png| | |[[File:SpiritTypeNeutral.png|20px|center|Neutral]] | ||
|★★ | |★★ | ||
|•Battle via World of Light (Gourmet Race)<br>•Battle via Spirit Board<br>•Purchase from the Vault Shop for 1000G<br>•Scan the Waddle Dee amiibo | |•Battle via World of Light (Gourmet Race)<br>•Battle via Spirit Board<br>•Purchase from the Vault Shop for 1000G<br>•Scan the Waddle Dee amiibo | ||
| Line 368: | Line 368: | ||
|[[File:Scarfy Spirit.png|center|108x108px]] | |[[File:Scarfy Spirit.png|center|108x108px]] | ||
|{{anchor|Scarfy}}Scarfy | |{{anchor|Scarfy}}Scarfy | ||
|[[File:SpiritTypeShield.png| | |[[File:SpiritTypeShield.png|20px|center|Shield]] | ||
|★ | |★ | ||
|•Battle via World of Light (Mysterious Dimension)<br>•Battle via Spirit Board<br>•Purchase from the Vault Shop for 500G | |•Battle via World of Light (Mysterious Dimension)<br>•Battle via Spirit Board<br>•Purchase from the Vault Shop for 500G | ||
| Line 381: | Line 381: | ||
|[[File:Andross spirit.png|center|108x108px]] | |[[File:Andross spirit.png|center|108x108px]] | ||
|[[Andross]] (Star Fox 64 3D) | |[[Andross]] (Star Fox 64 3D) | ||
|[[File:SpiritTypeGrab.png| | |[[File:SpiritTypeGrab.png|20px|center|Grab]] | ||
|★★★ | |★★★ | ||
|•Battle via World of Light (Mysterious Dimension)<br>•Battle via Spirit Board<br>•Purchase from the Vault Shop for 6000G | |•Battle via World of Light (Mysterious Dimension)<br>•Battle via Spirit Board<br>•Purchase from the Vault Shop for 6000G | ||
|402 | |402 | ||
|[[File:Andross True Form Spirit.png|center|108x108px]] | |[[File:Andross True Form Spirit.png|center|108x108px]] | ||
| | |Andross (True Form) | ||
|★★★★ | |★★★★ | ||
|Critical-Health Stats ↑ | |Critical-Health Stats ↑ | ||
| Line 394: | Line 394: | ||
|[[File:Kangaskhan Spirit.png|center|108x108px]] | |[[File:Kangaskhan Spirit.png|center|108x108px]] | ||
|{{anchor|Kangaskhan}}Kangaskhan | |{{anchor|Kangaskhan}}Kangaskhan | ||
|[[File:SpiritTypeGrab.png| | |[[File:SpiritTypeGrab.png|20px|center|Grab]] | ||
|★★ | |★★ | ||
|•Battle via Spirit Board<br>•Purchase from the Vault Shop for 1000G | |•Battle via Spirit Board<br>•Purchase from the Vault Shop for 1000G | ||
| Line 407: | Line 407: | ||
|[[File:Kyogre2.png|center|108x108px]] | |[[File:Kyogre2.png|center|108x108px]] | ||
|{{anchor|Kyogre}}[[Kyogre]] | |{{anchor|Kyogre}}[[Kyogre]] | ||
|[[File:SpiritTypeShield.png| | |[[File:SpiritTypeShield.png|20px|center|Shield]] | ||
|★★ | |★★ | ||
|•Battle via Spirit Board<br>•Purchase from the Vault Shop for 1000G | |•Battle via Spirit Board<br>•Purchase from the Vault Shop for 1000G | ||
|497 | |497 | ||
|[[File:Primalkyogre.png|center|108x108px]] | |[[File:Primalkyogre.png|center|108x108px]] | ||
|{{anchor|Primal Kyogre}}Primal | |{{anchor|Primal Kyogre}}Primal Kyogre | ||
|★★★ | |★★★ | ||
|Water/Freezing Resist ↑ | |Water/Freezing Resist ↑ | ||
| Line 420: | Line 420: | ||
|[[File:GroudonSpirit.png|center|108x108px]] | |[[File:GroudonSpirit.png|center|108x108px]] | ||
|{{anchor|Groudon}}[[Groudon]] | |{{anchor|Groudon}}[[Groudon]] | ||
|[[File:SpiritTypeAttack.png| | |[[File:SpiritTypeAttack.png|20px|center|Attack]] | ||
|★★ | |★★ | ||
|•Battle via World of Light (Molten Fortress)<br>•Battle via Spirit Board<br>•Purchase from the Vault Shop for 1000G | |•Battle via World of Light (Molten Fortress)<br>•Battle via Spirit Board<br>•Purchase from the Vault Shop for 1000G | ||
|499 | |499 | ||
|[[File:Primalgroundon.png|center|108x108px]] | |[[File:Primalgroundon.png|center|108x108px]] | ||
|{{anchor|Primal Groudon}}Primal | |{{anchor|Primal Groudon}}Primal Groudon | ||
|★★★ | |★★★ | ||
|Fire/Explosion Resist ↑ | |Fire/Explosion Resist ↑ | ||
| Line 433: | Line 433: | ||
|[[File:Giratina Altered Spirit.png|center|108x108px]] | |[[File:Giratina Altered Spirit.png|center|108x108px]] | ||
|{{anchor|Giratina (Altered Forme)}}[[Giratina]] (Altered Forme) | |{{anchor|Giratina (Altered Forme)}}[[Giratina]] (Altered Forme) | ||
|[[File:SpiritTypeNeutral.png| | |[[File:SpiritTypeNeutral.png|20px|center|Neutral]] | ||
|★★★ | |★★★ | ||
|•Battle via Spirit Board<br>•Purchase from the Vault Shop for 6000G | |•Battle via Spirit Board<br>•Purchase from the Vault Shop for 6000G | ||
|513 | |513 | ||
|[[File:Giratina Origin Spirit.png|center|108x108px]] | |[[File:Giratina Origin Spirit.png|center|108x108px]] | ||
|{{anchor|Giratina (Origin Forme)}} | |{{anchor|Giratina (Origin Forme)}}Giratina (Origin Forme) | ||
|★★★★ | |★★★★ | ||
|Shield Damage ↑ | |Shield Damage ↑ | ||
| Line 446: | Line 446: | ||
|[[File:Shaymin Land Spirit.png|center|108x108px]] | |[[File:Shaymin Land Spirit.png|center|108x108px]] | ||
|{{anchor|Shaymin (Land Forme)}}Shaymin (Land Forme) | |{{anchor|Shaymin (Land Forme)}}Shaymin (Land Forme) | ||
|[[File:SpiritTypeGrab.png| | |[[File:SpiritTypeGrab.png|20px|center|Grab]] | ||
|★★★ | |★★★ | ||
|•Battle via Spirit Board<br>•Purchase from the Vault Shop for 6000G | |•Battle via Spirit Board<br>•Purchase from the Vault Shop for 6000G | ||
| Line 459: | Line 459: | ||
|[[File:Keldeo Spirit.png|center|108x108px]] | |[[File:Keldeo Spirit.png|center|108x108px]] | ||
|{{anchor|Keldeo (Ordinary Form)}}[[Keldeo]] (Ordinary Form) | |{{anchor|Keldeo (Ordinary Form)}}[[Keldeo]] (Ordinary Form) | ||
|[[File:SpiritTypeShield.png| | |[[File:SpiritTypeShield.png|20px|center|Shield]] | ||
|★★ | |★★ | ||
|•Battle via Spirit Board<br>•Purchase from the Vault Shop for 1000G | |•Battle via Spirit Board<br>•Purchase from the Vault Shop for 1000G | ||
|535 | |535 | ||
|[[File:Keldeo Resolute Spirit.png|center|108x108px]] | |[[File:Keldeo Resolute Spirit.png|center|108x108px]] | ||
|{{anchor|Keldeo (Resolute Form)}} | |{{anchor|Keldeo (Resolute Form)}}Keldeo (Resolute Form) | ||
|★★★★ | |★★★★ | ||
|Hyper Smash Attacks | |Hyper Smash Attacks | ||
| Line 472: | Line 472: | ||
|[[File:Zygarde Spirit.png|center|108x108px]] | |[[File:Zygarde Spirit.png|center|108x108px]] | ||
|{{anchor|Zygarde (50% Forme)}}Zygarde (50% Forme) | |{{anchor|Zygarde (50% Forme)}}Zygarde (50% Forme) | ||
|[[File:SpiritTypeGrab.png| | |[[File:SpiritTypeGrab.png|20px|center|Grab]] | ||
|★ | |★ | ||
|•Battle via Spirit Board<br>•Purchase from the Vault Shop for 500G | |•Battle via Spirit Board<br>•Purchase from the Vault Shop for 500G | ||
| Line 485: | Line 485: | ||
|[[File:Diamantus.png|center|108x108px]] | |[[File:Diamantus.png|center|108x108px]] | ||
|{{anchor|Diancie}}Diancie | |{{anchor|Diancie}}Diancie | ||
|[[File:SpiritTypeGrab.png| | |[[File:SpiritTypeGrab.png|20px|center|Grab]] | ||
|★★ | |★★ | ||
|•Battle via Spirit Board<br>•Purchase from the Vault Shop for 1000G | |•Battle via Spirit Board<br>•Purchase from the Vault Shop for 1000G | ||
| Line 498: | Line 498: | ||
|[[File:Hoopa Confined Spirit.png|center|108x108px]] | |[[File:Hoopa Confined Spirit.png|center|108x108px]] | ||
|{{anchor|Hoopa (Confined)}}Hoopa (Confined) | |{{anchor|Hoopa (Confined)}}Hoopa (Confined) | ||
|[[File:SpiritTypeGrab.png| | |[[File:SpiritTypeGrab.png|20px|center|Grab]] | ||
|★★ | |★★ | ||
|•Battle via Spirit Board<br>•Purchase from the Vault Shop for 1000G | |•Battle via Spirit Board<br>•Purchase from the Vault Shop for 1000G | ||
| Line 511: | Line 511: | ||
|[[File:Tiki Spirit.png|center|108x108px]] | |[[File:Tiki Spirit.png|center|108x108px]] | ||
|[[Tiki]] | |[[Tiki]] | ||
|[[File:SpiritTypeNeutral.png| | |[[File:SpiritTypeNeutral.png|20px|center|Neutral]] | ||
|★★ | |★★ | ||
|•Summon with cores from Ninian, Medeus, and any [[File:SpiritTypeNeutral.png|24px]] core<br>•Battle via World of Light (The Light Realm)<br>•Purchase from the Vault Shop for 1000G (unlocked after obtaining spirit once)<br>•Scan the Tiki amiibo | |•Summon with cores from Ninian, Medeus, and any [[File:SpiritTypeNeutral.png|24px]] core<br>•Battle via World of Light (The Light Realm)<br>•Purchase from the Vault Shop for 1000G (unlocked after obtaining spirit once)<br>•Scan the Tiki amiibo | ||
|631 | |631 | ||
|[[File:Tiki Naga Voice Spirit.png|center|108x108px]] | |[[File:Tiki Naga Voice Spirit.png|center|108x108px]] | ||
| | |Tiki (Naga's Voice) | ||
|★★★ | |★★★ | ||
|Fire/Explosion Resist ↑ | |Fire/Explosion Resist ↑ | ||
| Line 524: | Line 524: | ||
|[[File:Camus Spirit.png|center|108x108px]] | |[[File:Camus Spirit.png|center|108x108px]] | ||
|Camus | |Camus | ||
|[[File:SpiritTypeShield.png| | |[[File:SpiritTypeShield.png|20px|center|Shield]] | ||
|★★★ | |★★★ | ||
|•Battle via World of Light (Sacred Land)<br>•Battle via Spirit Board<br>•Purchase from the Vault Shop for 6000G | |•Battle via World of Light (Sacred Land)<br>•Battle via Spirit Board<br>•Purchase from the Vault Shop for 6000G | ||
| Line 537: | Line 537: | ||
|[[File:Alm Celica Child.png|center|108x108px]] | |[[File:Alm Celica Child.png|center|108x108px]] | ||
|Alm & Celica (Young) | |Alm & Celica (Young) | ||
|[[File:SpiritTypeNeutral.png| | |[[File:SpiritTypeNeutral.png|20px|center|Neutral]] | ||
|★ | |★ | ||
|•Battle via World of Light (The Light Realm)<br>•Battle via Spirit Board<br>•Purchase from the Vault Shop for 500G<br>•Scan the Alm amiibo or Celica amiibo | |•Battle via World of Light (The Light Realm)<br>•Battle via Spirit Board<br>•Purchase from the Vault Shop for 500G<br>•Scan the Alm amiibo or Celica amiibo | ||
| Line 550: | Line 550: | ||
|[[File:Lyn Spirit.png|center|108x108px]] | |[[File:Lyn Spirit.png|center|108x108px]] | ||
|[[Lyn]] | |[[Lyn]] | ||
|[[File:SpiritTypeAttack.png| | |[[File:SpiritTypeAttack.png|20px|center|Attack]] | ||
|★★★ | |★★★ | ||
|•Battle via Spirit Board<br>•Purchase from the Vault Shop for 6000G | |•Battle via Spirit Board<br>•Purchase from the Vault Shop for 6000G | ||
|646 | |646 | ||
|[[File:Lyn Blade Lord Spirit.png|center|108x108px]] | |[[File:Lyn Blade Lord Spirit.png|center|108x108px]] | ||
| | |Lyn (Blade Lord) | ||
|★★★★ | |★★★★ | ||
|Critical Hit ↑↑ | |Critical Hit ↑↑ | ||
| Line 563: | Line 563: | ||
|[[File:Elincia Spirit.png|center|108x108px]] | |[[File:Elincia Spirit.png|center|108x108px]] | ||
|Elincia | |Elincia | ||
|[[File:SpiritTypeShield.png| | |[[File:SpiritTypeShield.png|20px|center|Shield]] | ||
|★★ | |★★ | ||
|•Battle via World of Light (Mysterious Dimension)<br>•Battle via Spirit Board<br>•Purchase from the Vault Shop for 1000G | |•Battle via World of Light (Mysterious Dimension)<br>•Battle via Spirit Board<br>•Purchase from the Vault Shop for 1000G | ||
| Line 576: | Line 576: | ||
|[[File:Zelgius Spirit.png|center|108x108px]] | |[[File:Zelgius Spirit.png|center|108x108px]] | ||
|Zelgius | |Zelgius | ||
|[[File:SpiritTypeAttack.png| | |[[File:SpiritTypeAttack.png|20px|center|Attack]] | ||
|★★★ | |★★★ | ||
|•Battle via Spirit Board<br>•Purchase from the Vault Shop for 6000G | |•Battle via Spirit Board<br>•Purchase from the Vault Shop for 6000G | ||
| Line 589: | Line 589: | ||
|[[File:TsubasaOribe.png|center|108x108px]] | |[[File:TsubasaOribe.png|center|108x108px]] | ||
|Tsubasa Oribe | |Tsubasa Oribe | ||
|[[File:SpiritTypeShield.png| | |[[File:SpiritTypeShield.png|20px|center|Shield]] | ||
|★ | |★ | ||
|•Battle via World of Light (The Light Realm)<br>•Battle via Spirit Board<br>•Purchase from the Vault Shop for 500G | |•Battle via World of Light (The Light Realm)<br>•Battle via Spirit Board<br>•Purchase from the Vault Shop for 500G | ||
| Line 602: | Line 602: | ||
|[[File:Classic Medusa Spirit.png|center|108x108px]] | |[[File:Classic Medusa Spirit.png|center|108x108px]] | ||
|Medusa | |Medusa | ||
|[[File:SpiritTypeAttack.png| | |[[File:SpiritTypeAttack.png|20px|center|Attack]] | ||
|★★ | |★★ | ||
|•Battle via World of Light (Mysterious Dimension)<br>•Battle via Spirit Board (unlocked after obtaining spirit once)<br>•Purchase from the Vault Shop for 1000G (unlocked after obtaining spirit once) | |•Battle via World of Light (Mysterious Dimension)<br>•Battle via Spirit Board (unlocked after obtaining spirit once)<br>•Purchase from the Vault Shop for 1000G (unlocked after obtaining spirit once) | ||
| Line 615: | Line 615: | ||
|[[File:Pandora.png|center|108x108px]] | |[[File:Pandora.png|center|108x108px]] | ||
|Pandora | |Pandora | ||
|[[File:SpiritTypeGrab.png| | |[[File:SpiritTypeGrab.png|20px|center|Grab]] | ||
|★★ | |★★ | ||
|•Battle via World of Light (The Dark Realm)<br>•Battle via Spirit Board<br>•Purchase from the Vault Shop for 1000G | |•Battle via World of Light (The Dark Realm)<br>•Battle via Spirit Board<br>•Purchase from the Vault Shop for 1000G | ||
| Line 628: | Line 628: | ||
|[[File:Hades Spirit.png|center|108x108px]] | |[[File:Hades Spirit.png|center|108x108px]] | ||
|Hades | |Hades | ||
|[[File:SpiritTypeShield.png| | |[[File:SpiritTypeShield.png|20px|center|Shield]] | ||
|★★★ | |★★★ | ||
|•Battle via Spirit Board<br>•Purchase from the Vault Shop for 6000G | |•Battle via Spirit Board<br>•Purchase from the Vault Shop for 6000G | ||
| Line 641: | Line 641: | ||
|[[File:5volt.png|center|108x108px]] | |[[File:5volt.png|center|108x108px]] | ||
|[[5-Volt]] | |[[5-Volt]] | ||
|[[File:SpiritTypeNeutral.png| | |[[File:SpiritTypeNeutral.png|20px|center|Neutral]] | ||
|★★ | |★★ | ||
|•Battle via Spirit Board<br>•Purchase from the Vault Shop for 1000G | |•Battle via Spirit Board<br>•Purchase from the Vault Shop for 1000G | ||
|742 | |742 | ||
|[[File:5volt Angry Spirit.png|center|108x108px]] | |[[File:5volt Angry Spirit.png|center|108x108px]] | ||
| | |5-Volt (Angry) | ||
|★★★ | |★★★ | ||
|Critical-Health Attack ↑ | |Critical-Health Attack ↑ | ||
| Line 654: | Line 654: | ||
|[[File:Naked Snake2.png|center|108x108px]] | |[[File:Naked Snake2.png|center|108x108px]] | ||
|Naked Snake | |Naked Snake | ||
|[[File:SpiritTypeGrab.png| | |[[File:SpiritTypeGrab.png|20px|center|Grab]] | ||
|★★★ | |★★★ | ||
|•Battle via World of Light (The Final Battle - Dark)<br>•Battle via Spirit Board<br>•Purchase from the Vault Shop for 6000G | |•Battle via World of Light (The Final Battle - Dark)<br>•Battle via Spirit Board<br>•Purchase from the Vault Shop for 6000G | ||
| Line 667: | Line 667: | ||
|[[File:Revolver Ocelot.png|center|108x108px]] | |[[File:Revolver Ocelot.png|center|108x108px]] | ||
|Revolver Ocelot (Metal Gear Solid 3) | |Revolver Ocelot (Metal Gear Solid 3) | ||
|[[File:SpiritTypeGrab.png| | |[[File:SpiritTypeGrab.png|20px|center|Grab]] | ||
|★★ | |★★ | ||
|•Battle via World of Light (Base)<br>•Battle via Spirit Board<br>•Purchase from the Vault Shop for 1000G | |•Battle via World of Light (Base)<br>•Battle via Spirit Board<br>•Purchase from the Vault Shop for 1000G | ||
| Line 680: | Line 680: | ||
|[[File:Metal Gear ZEKE Spirit.png|center|108x108px]] | |[[File:Metal Gear ZEKE Spirit.png|center|108x108px]] | ||
|Metal Gear ZEKE | |Metal Gear ZEKE | ||
|[[File:SpiritTypeShield.png| | |[[File:SpiritTypeShield.png|20px|center|Shield]] | ||
|★ | |★ | ||
|•Purchase at Sheldon's Place for 500SP<br>•Battle via Spirit Board | |•Purchase at Sheldon's Place for 500SP<br>•Battle via Spirit Board | ||
| Line 693: | Line 693: | ||
|{{anchor|Shadow the Hedgehog}}[[File:Shadow Spirit.png|center|108x108px]] | |{{anchor|Shadow the Hedgehog}}[[File:Shadow Spirit.png|center|108x108px]] | ||
|[[Shadow the Hedgehog]] | |[[Shadow the Hedgehog]] | ||
|[[File:SpiritTypeAttack.png| | |[[File:SpiritTypeAttack.png|20px|center|Attack]] | ||
|★★★ | |★★★ | ||
|•Battle via Spirit Board<br>•Purchase from the Vault Shop for 6000G | |•Battle via Spirit Board<br>•Purchase from the Vault Shop for 6000G | ||
| Line 706: | Line 706: | ||
|[[File:Chao Spirit.png|center|108x108px]] | |[[File:Chao Spirit.png|center|108x108px]] | ||
|Chao | |Chao | ||
|[[File:SpiritTypeShield.png| | |[[File:SpiritTypeShield.png|20px|center|Shield]] | ||
|★ | |★ | ||
|•Battle via World of Light (The Light Realm)<br>•Battle via Spirit Board<br>•Purchase from the Vault Shop for 500G | |•Battle via World of Light (The Light Realm)<br>•Battle via Spirit Board<br>•Purchase from the Vault Shop for 500G | ||
| Line 719: | Line 719: | ||
|[[File:Red Bulbord.png|center|108x108px]] | |[[File:Red Bulbord.png|center|108x108px]] | ||
|{{anchor|Red Bulborb}}[[Bulborb]] | |{{anchor|Red Bulborb}}[[Bulborb]] | ||
|[[File:SpiritTypeShield.png| | |[[File:SpiritTypeShield.png|20px|center|Shield]] | ||
|★★ | |★★ | ||
|•Battle via World of Light (Sacred Land)<br>•Battle via Spirit Board<br>•Purchase from the Vault Shop for 1000G | |•Battle via World of Light (Sacred Land)<br>•Battle via Spirit Board<br>•Purchase from the Vault Shop for 1000G | ||
| Line 732: | Line 732: | ||
|[[File:Tomnook.png|center|108x108px]] | |[[File:Tomnook.png|center|108x108px]] | ||
|[[Tom Nook]] | |[[Tom Nook]] | ||
|[[File:SpiritTypeNeutral.png| | |[[File:SpiritTypeNeutral.png|20px|center|Neutral]] | ||
|★★ | |★★ | ||
|•Summon with cores from Maruhige Shop Owner, Shop Assistant, and any [[File:SpiritTypeNeutral.png|24px]] core<br>•Battle via Spirit Board (unlocked after obtaining spirit once)<br>•Purchase from the Vault Shop for 1000G (unlocked after obtaining spirit once)<br>•Scan the Tom Nook amiibo | |•Summon with cores from Maruhige Shop Owner, Shop Assistant, and any [[File:SpiritTypeNeutral.png|24px]] core<br>•Battle via Spirit Board (unlocked after obtaining spirit once)<br>•Purchase from the Vault Shop for 1000G (unlocked after obtaining spirit once)<br>•Scan the Tom Nook amiibo | ||
| Line 745: | Line 745: | ||
|[[File:Spirit DJ KK.png|center|108x108px]] | |[[File:Spirit DJ KK.png|center|108x108px]] | ||
|DJ K.K. | |DJ K.K. | ||
|[[File:SpiritTypeNeutral.png| | |[[File:SpiritTypeNeutral.png|20px|center|Neutral]] | ||
|★★ | |★★ | ||
|•Summon with cores from 9-Volt & 18-Volt and Labrador Retriever<br>•Battle via Spirit Board (unlocked after obtaining spirit once)<br>•Purchase from the Vault Shop for 1000G (unlocked after obtaining spirit once)<br>•Scan the K.K. amiibo | |•Summon with cores from 9-Volt & 18-Volt and Labrador Retriever<br>•Battle via Spirit Board (unlocked after obtaining spirit once)<br>•Purchase from the Vault Shop for 1000G (unlocked after obtaining spirit once)<br>•Scan the K.K. amiibo | ||
| Line 758: | Line 758: | ||
|[[File:Mega Man X Spirit.png|center|108x108px]] | |[[File:Mega Man X Spirit.png|center|108x108px]] | ||
|{{b|X|Mega Man}} | |{{b|X|Mega Man}} | ||
|[[File:SpiritTypeGrab.png| | |[[File:SpiritTypeGrab.png|20px|center|Grab]] | ||
|★★★ | |★★★ | ||
|•Battle via World of Light (The Final Battle - Light)<br>•Battle via Spirit Board<br>•Purchase from the Vault Shop for 6000G | |•Battle via World of Light (The Final Battle - Light)<br>•Battle via Spirit Board<br>•Purchase from the Vault Shop for 6000G | ||
|906 | |906 | ||
|[[File:Full Armor X Spirit.png|center|108x108px]] | |[[File:Full Armor X Spirit.png|center|108x108px]] | ||
|Full Armor | |Full Armor X | ||
|★★★★ | |★★★★ | ||
|Super Armor | |Super Armor | ||
| Line 771: | Line 771: | ||
|{{anchor|Zero}}[[File:Zero.png|center|108x108px]] | |{{anchor|Zero}}[[File:Zero.png|center|108x108px]] | ||
|{{b|Zero|Mega Man}} (Zero Buster) | |{{b|Zero|Mega Man}} (Zero Buster) | ||
|[[File:SpiritTypeAttack.png| | |[[File:SpiritTypeAttack.png|20px|center|Attack]] | ||
|★★ | |★★ | ||
|•Battle via World of Light (The Final Battle - Dark)<br>•Battle via Spirit Board<br>•Purchase from the Vault Shop for 1000G | |•Battle via World of Light (The Final Battle - Dark)<br>•Battle via Spirit Board<br>•Purchase from the Vault Shop for 1000G | ||
|908 | |908 | ||
|[[File:Zero Zsaber Spirit.png|center|108x108px]] | |[[File:Zero Zsaber Spirit.png|center|108x108px]] | ||
|Zero (Z-Saber) | |||
|★★★★ | |★★★★ | ||
|Weapon Attack & Move Speed ↑ | |Weapon Attack & Move Speed ↑ | ||
| Line 784: | Line 784: | ||
|{{anchor|Geo Stelar & Omega-Xis}}[[File:GeoStelar&OmegaXis.png|center|108x108px]] | |{{anchor|Geo Stelar & Omega-Xis}}[[File:GeoStelar&OmegaXis.png|center|108x108px]] | ||
|Geo Stelar & Omega-Xis | |Geo Stelar & Omega-Xis | ||
|[[File:SpiritTypeNeutral.png| | |[[File:SpiritTypeNeutral.png|20px|center|Neutral]] | ||
|★★ | |★★ | ||
|•Complete Challenge (Adventure): Awaken 25 fighters.<br>•Battle via Spirit Board (unlocked after obtaining spirit once)<br>•Purchase from the Vault Shop for 1000G (unlocked after obtaining spirit once) | |•Complete Challenge (Adventure): Awaken 25 fighters.<br>•Battle via Spirit Board (unlocked after obtaining spirit once)<br>•Purchase from the Vault Shop for 1000G (unlocked after obtaining spirit once) | ||
| Line 797: | Line 797: | ||
|{{anchor|Vent Model X}}[[File:Modelx.png|center|108x108px]] | |{{anchor|Vent Model X}}[[File:Modelx.png|center|108x108px]] | ||
|Model X | |Model X | ||
|[[File:SpiritTypeGrab.png| | |[[File:SpiritTypeGrab.png|20px|center|Grab]] | ||
|★ | |★ | ||
|•Battle via World of Light (The Light Realm)<br>•Battle via Spirit Board<br>•Purchase from the Vault Shop for 500G | |•Battle via World of Light (The Light Realm)<br>•Battle via Spirit Board<br>•Purchase from the Vault Shop for 500G | ||
| Line 810: | Line 810: | ||
|[[File:Mumkhar.png|center|108x108px]] | |[[File:Mumkhar.png|center|108x108px]] | ||
|Mumkhar | |Mumkhar | ||
|[[File:SpiritTypeAttack.png| | |[[File:SpiritTypeAttack.png|20px|center|Attack]] | ||
|★★ | |★★ | ||
|•Battle via World of Light (The Final Battle - Dark)<br>•Battle via Spirit Board<br>•Purchase from the Vault Shop for 1000G | |•Battle via World of Light (The Final Battle - Dark)<br>•Battle via Spirit Board<br>•Purchase from the Vault Shop for 1000G | ||
| Line 823: | Line 823: | ||
|[[File:Chun Li Alpha Spirit.png|center|108x108px]] | |[[File:Chun Li Alpha Spirit.png|center|108x108px]] | ||
|Chun-Li (Street Fighter Alpha) | |Chun-Li (Street Fighter Alpha) | ||
|[[File:SpiritTypeGrab.png| | |[[File:SpiritTypeGrab.png|20px|center|Grab]] | ||
|★★ | |★★ | ||
|•Battle via World of Light (World Tour)<br>•Battle via Spirit Board<br>•Purchase from the Vault Shop for 1000G | |•Battle via World of Light (World Tour)<br>•Battle via Spirit Board<br>•Purchase from the Vault Shop for 1000G | ||
| Line 836: | Line 836: | ||
|[[File:Jeanne.png|center|108x108px]] | |[[File:Jeanne.png|center|108x108px]] | ||
|Jeanne | |Jeanne | ||
|[[File:SpiritTypeAttack.png| | |[[File:SpiritTypeAttack.png|20px|center|Attack]] | ||
|★★★ | |★★★ | ||
|•Battle via World of Light (The Final Battle - Dark)<br>•Battle via Spirit Board<br>•Purchase from the Vault Shop for 6000G | |•Battle via World of Light (The Final Battle - Dark)<br>•Battle via Spirit Board<br>•Purchase from the Vault Shop for 6000G | ||
| Line 849: | Line 849: | ||
|[[File:Rodin SSBU.png|center|108x108px]] | |[[File:Rodin SSBU.png|center|108x108px]] | ||
|[[Rodin]] | |[[Rodin]] | ||
|[[File:SpiritTypeAttack.png| | |[[File:SpiritTypeAttack.png|20px|center|Attack]] | ||
|★★★ | |★★★ | ||
|•Summon with cores from Brewster and Aegislash | |•Summon with cores from Brewster and Aegislash | ||
| Line 862: | Line 862: | ||
|[[File:BalderSpirit.png|center|108x108px]] | |[[File:BalderSpirit.png|center|108x108px]] | ||
|Balder | |Balder | ||
|[[File:SpiritTypeShield.png| | |[[File:SpiritTypeShield.png|20px|center|Shield]] | ||
|★★ | |★★ | ||
|•Battle via World of Light (The Final Battle - Light)<br>•Battle via Spirit Board<br>•Purchase from the Vault Shop for 1000G | |•Battle via World of Light (The Final Battle - Light)<br>•Battle via Spirit Board<br>•Purchase from the Vault Shop for 1000G | ||
| Line 875: | Line 875: | ||
|[[File:Djoctavio.png|center|108x108px]] | |[[File:Djoctavio.png|center|108x108px]] | ||
|DJ Octavio | |DJ Octavio | ||
|[[File:SpiritTypeNeutral.png| | |[[File:SpiritTypeNeutral.png|20px|center|Neutral]] | ||
|★★ | |★★ | ||
|•Summon with cores from Octoling, Octorok, and any [[File:SpiritTypeNeutral.png|24px]] core | |•Summon with cores from Octoling, Octorok, and any [[File:SpiritTypeNeutral.png|24px]] core | ||
| Line 888: | Line 888: | ||
|[[File:Maria DX.PNG|center|108x108px]] | |[[File:Maria DX.PNG|center|108x108px]] | ||
|Maria Renard | |Maria Renard | ||
|[[File:SpiritTypeGrab.png| | |[[File:SpiritTypeGrab.png|20px|center|Grab]] | ||
|★★ | |★★ | ||
|•Battle via World of Light (Dracula's Castle)<br>•Battle via Spirit Board<br>•Purchase from the Vault Shop for 1000G | |•Battle via World of Light (Dracula's Castle)<br>•Battle via Spirit Board<br>•Purchase from the Vault Shop for 1000G | ||
| Line 901: | Line 901: | ||
|[[File:Dracula Spirit.png|center|108x108px]] | |[[File:Dracula Spirit.png|center|108x108px]] | ||
|[[Dracula]] | |[[Dracula]] | ||
|[[File:SpiritTypeNeutral.png| | |[[File:SpiritTypeNeutral.png|20px|center|Neutral]] | ||
|★★★ | |★★★ | ||
|•Defeat the Dracula's Castle boss in World of Light | |•Defeat the Dracula's Castle boss in World of Light | ||
| Line 914: | Line 914: | ||
|{{anchor|Donbe & Hikari}}[[File:Donbe hikari.png|center|108x108px]] | |{{anchor|Donbe & Hikari}}[[File:Donbe hikari.png|center|108x108px]] | ||
|Donbe & Hikari | |Donbe & Hikari | ||
|[[File:SpiritTypeNeutral.png| | |[[File:SpiritTypeNeutral.png|20px|center|Neutral]] | ||
|★★ | |★★ | ||
|•Battle via World of Light (Sacred Land)<br>•Battle via Spirit Board<br>•Purchase from the Vault Shop for 1000G | |•Battle via World of Light (Sacred Land)<br>•Battle via Spirit Board<br>•Purchase from the Vault Shop for 1000G | ||
| Line 926: | Line 926: | ||
|1,143 | |1,143 | ||
|{{anchor|Sablé Prince}}[[File:Sable Prince.png|center|108x108px]] | |{{anchor|Sablé Prince}}[[File:Sable Prince.png|center|108x108px]] | ||
|Frog & Snake | |||
|[[File:SpiritTypeShield.png| | |[[File:SpiritTypeShield.png|20px|center|Shield]] | ||
|★★ | |★★ | ||
|•Summon with cores from Prince Peasley, Winky, and Rattly<br>•Battle via World of Light (The Dark Realm)<br>•Purchase from the Vault Shop for 1000G (unlocked after obtaining spirit once) | |•Summon with cores from Prince Peasley, Winky, and Rattly<br>•Battle via World of Light (The Dark Realm)<br>•Purchase from the Vault Shop for 1000G (unlocked after obtaining spirit once) | ||
| Line 940: | Line 940: | ||
|[[File:Raymk3.png|center|108x108px]] | |[[File:Raymk3.png|center|108x108px]] | ||
|{{anchor|Ray MK II}}Ray Mk II | |{{anchor|Ray MK II}}Ray Mk II | ||
|[[File:SpiritTypeGrab.png| | |[[File:SpiritTypeGrab.png|20px|center|Grab]] | ||
|★★ | |★★ | ||
|•Treasure Chest in World of Light (The Light Realm)<br>•Battle via Spirit Board (unlocked after obtaining spirit once)<br>•Purchase from the Vault Shop for 1000G (unlocked after obtaining spirit once) | |•Treasure Chest in World of Light (The Light Realm)<br>•Battle via Spirit Board (unlocked after obtaining spirit once)<br>•Purchase from the Vault Shop for 1000G (unlocked after obtaining spirit once) | ||
| Line 953: | Line 953: | ||
|[[File:Isaac Spirit.png|center|108x108px]] | |[[File:Isaac Spirit.png|center|108x108px]] | ||
|[[Isaac]] | |[[Isaac]] | ||
|[[File:SpiritTypeGrab.png| | |[[File:SpiritTypeGrab.png|20px|center|Grab]] | ||
|★★★ | |★★★ | ||
|•Summon with cores from Garet, Mia, and Ivan<br>•Battle via World of Light (The Final Battle - Light)<br>•Purchase from the Vault Shop for 6000G (unlocked after obtaining spirit once) | |•Summon with cores from Garet, Mia, and Ivan<br>•Battle via World of Light (The Final Battle - Light)<br>•Purchase from the Vault Shop for 6000G (unlocked after obtaining spirit once) | ||
|1,169 | |1,169 | ||
|[[File:Isaac (Dark Dawn) Spirit.png|center|108x108px]] | |[[File:Isaac (Dark Dawn) Spirit.png|center|108x108px]] | ||
| | |Isaac (Dark Dawn) | ||
|★★★★ | |★★★★ | ||
|Energy Shot Attack/Resistance ↑ | |Energy Shot Attack/Resistance ↑ | ||
| Line 966: | Line 966: | ||
|{{anchor|The Wandering Samurai}}[[File:Wandering-Samurai.png|center|108x108px]] | |{{anchor|The Wandering Samurai}}[[File:Wandering-Samurai.png|center|108x108px]] | ||
|The Wandering Samurai | |The Wandering Samurai | ||
|[[File:SpiritTypeAttack.png| | |[[File:SpiritTypeAttack.png|20px|center|Attack]] | ||
|★★ | |★★ | ||
|•Summon with cores from Sakura Samurai and Ghosts | |•Summon with cores from Sakura Samurai and Ghosts | ||
| Line 979: | Line 979: | ||
|{{anchor|Chibi-Robo}}[[File:Chibi Robo.png|center|108x108px]] | |{{anchor|Chibi-Robo}}[[File:Chibi Robo.png|center|108x108px]] | ||
|[[Chibi-Robo]] | |[[Chibi-Robo]] | ||
|[[File:SpiritTypeGrab.png| | |[[File:SpiritTypeGrab.png|20px|center|Grab]] | ||
|★★ | |★★ | ||
|•Battle via World of Light (The Final Battle - Light)<br>•Battle via Spirit Board<br>•Purchase from the Vault Shop for 1000G<br>•Scan the Chibi-Robo amiibo | |•Battle via World of Light (The Final Battle - Light)<br>•Battle via Spirit Board<br>•Purchase from the Vault Shop for 1000G<br>•Scan the Chibi-Robo amiibo | ||
|1,207 | |1,207 | ||
|{{anchor|Super Chibi-Robo}}[[File:Super Chibi Robo Spirit.png|center|108x108px]] | |{{anchor|Super Chibi-Robo}}[[File:Super Chibi Robo Spirit.png|center|108x108px]] | ||
|Super | |Super Chibi-Robo | ||
|★★★ | |★★★ | ||
|Thrown Items ↑ | |Thrown Items ↑ | ||
| Line 992: | Line 992: | ||
|[[File:Dr Kawashima Spirit.png|center|108x108px]] | |[[File:Dr Kawashima Spirit.png|center|108x108px]] | ||
|[[Dr. Kawashima]] | |[[Dr. Kawashima]] | ||
|[[File:SpiritTypeNeutral.png| | |[[File:SpiritTypeNeutral.png|20px|center|Neutral]] | ||
|★★ | |★★ | ||
|•Battle via Spirit Board<br>•Purchase from the Vault Shop for 1000G | |•Battle via Spirit Board<br>•Purchase from the Vault Shop for 1000G | ||
|1,215 | |1,215 | ||
|[[File:Dr Kawashima CT Spirit.png|center|108x108px]] | |[[File:Dr Kawashima CT Spirit.png|center|108x108px]] | ||
| | |Dr. Kawashima (Concentration Training) {{Flag|North America}}<br>Dr. Kawashima (Devilish Brain Training) {{Flag|PAL}} | ||
|★★★★ | |★★★★ | ||
|Unflinching Charged Smashes | |Unflinching Charged Smashes | ||
| Line 1,005: | Line 1,005: | ||
|{{anchor|Nick}}[[File:Nick.png|center|108x108px]] | |{{anchor|Nick}}[[File:Nick.png|center|108x108px]] | ||
|Nick | |Nick | ||
|[[File:SpiritTypeNeutral.png| | |[[File:SpiritTypeNeutral.png|20px|center|Neutral]] | ||
|★ | |★ | ||
|•Battle via World of Light (The Light Realm)<br>•Battle via Spirit Board<br>•Purchase from the Vault Shop for 500G | |•Battle via World of Light (The Light Realm)<br>•Battle via Spirit Board<br>•Purchase from the Vault Shop for 500G | ||
| Line 1,018: | Line 1,018: | ||
|[[File:SlimeOG.png|center|108x108px]] | |[[File:SlimeOG.png|center|108x108px]] | ||
|[[Slime]] | |[[Slime]] | ||
|[[File:SpiritTypeGrab.png| | |[[File:SpiritTypeGrab.png|20px|center|Grab]] | ||
|★ | |★ | ||
|•Battle via DLC Spirit Board<br>•Purchase from the Vault Shop for 500G (since v4.0.0) | |•Battle via DLC Spirit Board<br>•Purchase from the Vault Shop for 500G (since v4.0.0) | ||
| Line 1,031: | Line 1,031: | ||
|[[File:GSCub.png|center|108x108px]] | |[[File:GSCub.png|center|108x108px]] | ||
|Great Sabrecub | |Great Sabrecub | ||
|[[File:SpiritTypeAttack.png| | |[[File:SpiritTypeAttack.png|20px|center|Attack]] | ||
|★ | |★ | ||
|•Battle via DLC Spirit Board<br>•Purchase from the Vault Shop for 500G (since v4.0.0) | |•Battle via DLC Spirit Board<br>•Purchase from the Vault Shop for 500G (since v4.0.0) | ||
| Line 1,042: | Line 1,042: | ||
|- | |- | ||
|1,341 | |1,341 | ||
|[[File:.png|center|108x108px]] | |[[File:Jinjos Spirit.png|center|108x108px]] | ||
|[[Jinjo]]s | |[[Jinjo]]s | ||
|[[File:SpiritTypeNeutral.png| | |[[File:SpiritTypeNeutral.png|20px|center|Neutral]] | ||
|★★ | |★★ | ||
|•Battle via DLC Spirit Board<br>•Purchase from the Vault Shop for 1000G (since v4.0.0) | |•Battle via DLC Spirit Board<br>•Purchase from the Vault Shop for 1000G (since v4.0.0) | ||
|1,342 | |1,342 | ||
|[[File:.png|center|108x108px]] | |[[File:The Mighty Jinjonator Spirit.png|center|108x108px]] | ||
|[[The Mighty Jinjonator]] | |[[The Mighty Jinjonator]] | ||
|★★★ | |★★★ | ||
Revision as of 05:01, September 6, 2019
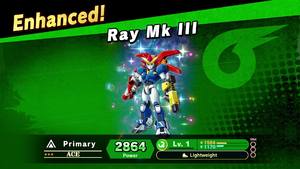
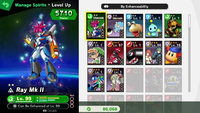
Enhanceable Spirits are Spirits that can be evolved into newer Spirits after maxing out their level.
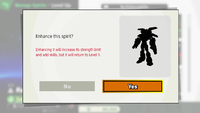
Enhanceable Spirits do not have a trait, instead stating that they can be enhanced once they reach Lv.99. Upon reaching Lv.99, the Spirit can then be enhanced into a stronger higher class Spirit who now grants a skill, generally being one that isn't found as a trait on a regular Primary Spirit. The Spirit's level resets to Lv.1 upon enhancing.
Enhanced Spirits are also numbered directly after their Enhanceable counterpart, and share the same Type and number of Slots as them.
List of Enhanceable Spirits
Enhanceable Spirits' abilities are not listed as they all say "Can be enhanced at Lv. 99".
| Base Spirit | Enhanced Spirit | Series | |||||||||
|---|---|---|---|---|---|---|---|---|---|---|---|
| No. | Image | Name | Type | Class | Acquisition | No. | Image | Name | Class | Ability | |
| 31 | Toad | ★★ | •Battle via Spirit Board •Battle via World of Light (The Light Realm) •Purchase from the Vault Shop for 1000G •Scan the Toad amiibo |
32 | Captain Toad | ★★★ | Item Gravitation | Super Mario Series (Toad)
Captain Toad: Treasure Tracker Series (Captain Toad) | |||
| 41 | Bullet Bill | ★ | •Battle via World of Light (The Light Realm) •Battle via Spirit Board •Purchase from the Vault Shop for 500G |
42 | Banzai Bill | ★★ | Impact Run | Super Mario Series | |||
| 48 | Boo | ★ | •Battle via World of Light (Dracula's Castle) •Battle via Spirit Board •Purchase from the Vault Shop for 500G •Scan the Boo amiibo |
49 | King Boo | ★★ | Floaty Jumps | Super Mario Series (Boo)
Luigi's Mansion Series (King Boo) | |||
| 53 | Nipper Plant | ★ | •Purchase at Beedle's Tent for 500SP •Battle via Spirit Board |
54 | Petey Piranha | ★★★ | Giant | Super Mario Series | |||
| 55 | Boom Boom | ★★ | •Battle via World of Light (The Light Realm) •Battle via Spirit Board •Purchase from the Vault Shop for 1000G |
56 | Boom Boom & Pom Pom | ★★★ | Hyper Smash Attacks | Super Mario Series | |||
| 95 | Paper Bowser | ★★★ | •Battle via Spirit Board •Purchase from the Vault Shop for 6000G |
96 | Paper Bowser (Paper Mario: Sticker Star) | ★★★★ | Mouthful of Curry | Paper Mario Series | |||
| 126 | Mini Mario | ★★ | •Purchase at Timmy and Tommy's for 1000SP | 127 | Mini Mario & Hammers | ★★★ | Hammer Duration ↑ | Mario vs. Donkey Kong Series | |||
| 145 | Dixie Kong | ★★★ | •Summon with cores from Tiny Kong and Candy Kong •Battle via Spirit Board (unlocked after obtaining spirit once) •Purchase from the Vault Shop for 6000G (unlocked after obtaining spirit once) |
146 | Dixie Kong & Kiddy Kong | ★★★★ | Thrown Items ↑ | Donkey Kong Series | |||
| 189 | Young Zelda | ★★ | •Battle via Spirit Board •Purchase from the Vault Shop for 1000G |
190 | Zelda (Ocarina of Time) | ★★★★ | Assist Killer | The Legend of Zelda Series | |||
| 202 | Koume & Kotake | ★★ | •Battle via World of Light (Sacred Land) •Battle via Spirit Board (unlocked after obtaining spirit once) •Purchase from the Vault Shop for 6000G (unlocked after obtaining spirit once) |
203 | Twinrova | ★★★ | Magic Attack ↑ | The Legend of Zelda Series | |||
| 205 | Skull Kid | ★★ | •Battle via World of Light (Sacred Land) •Battle via Spirit Board •Purchase from the Vault Shop for 1000G |
206 | Skull Kid & Majora's Mask | ★★★★ | Lifesteal | The Legend of Zelda Series | |||
| 220 | Ganondorf (Twilight Princess) | ★★★ | •Battle via World of Light (Mysterious Dimension) •Battle via Spirit Board •Purchase from the Vault Shop for 6000G |
221 | Beast Ganon | ★★★★ | Impact Run | The Legend of Zelda Series | |||
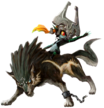
| 222 | Midna | ★★★ | •Battle via World of Light (The Final Battle - Dark) •Battle via Spirit Board •Purchase from the Vault Shop for 6000G •Scan the Wolf Link amiibo |
223 | Wolf Link & Midna | ★★★★ | Dash Attack ↑ | The Legend of Zelda Series | |||
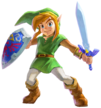
| 233 | Wall-Merged Link | ★★ | •Treasure Chest in World of Light (Sacred Land) •Battle via Spirit Board •Purchase from the Vault Shop for 1000G |
234 | Link (A Link Between Worlds) | ★★★ | Weapon Attack ↑ | The Legend of Zelda Series | |||
| 246 | Tetra | ★★★ | •Battle via World of Light (The Final Battle - Light) •Battle via Spirit Board •Purchase from the Vault Shop for 6000G |
247 | Zelda (The Wind Waker) | ★★★★ | Chance of Double Final Smash | The Legend of Zelda Series | |||
| 248 | King of Red Lions | ★★ | •Purchase at Funky Kong's Shack for 1000SP | 249 | King of Hyrule | ★★★ | Transformation Duration ↑ | The Legend of Zelda Series | |||
| 258 | Phantom | ★★ | •Battle via World of Light (The Light Realm) •Battle via Spirit Board •Purchase from the Vault Shop for 1000G |
259 | Zelda (Spirit Tracks) | ★★★ | Trade-Off Ability ↑ | The Legend of Zelda Series | |||
| 272 | Dark Suit | ★★ | •Purchase at Sheldon's Place for 1000SP | 273 | Light Suit | ★★★★ | Healing Shield | Metroid Prime Series | |||
| 278 | Mother Brain | ★★★ | •Battle via World of Light (The Final Battle - Dark) •Battle via Spirit Board •Purchase from the Vault Shop for 6000G |
279 | Mother Brain (2nd Form) | ★★★★ | Giant | Metroid Series | |||
| 285 | X Parasite | ★ | •Purchase at Beedle's Tent for 500SP •Battle via Spirit Board |
286 | Nightmare | ★★★ | Lifesteal | Metroid Series | |||
| 299 | Baby Mario | ★★★ | •Battle via World of Light (The Final Battle - Light) •Battle via Spirit Board •Purchase from the Vault Shop for 6000G |
300 | Baby Mario (Superstar Mario) | ★★★★ | First-Strike Advantage | Yoshi Series | |||
| 341 | Nightmare's Power Orb | ★★ | •Battle via Spirit Board •Purchase from the Vault Shop for 1000G |
342 | Nightmare Wizard | ★★★★ | Jam FS Charge | Kirby Series | |||
| 347 | Marx | ★★ | •Defeat the Mysterious Dimension boss in World of Light | 348 | Marx (True Form) | ★★★★ | Magic Attack ↑ | Kirby Series | |||
| 351 | Daroach | ★★★ | •Summon with cores from Count Cannoli, Mouser, and any two |
352 | Dark Daroach | ★★★★ | Fire & Explosion Attack ↑ | Kirby Series | |||
| 360 | Waddle Dee | ★★ | •Battle via World of Light (Gourmet Race) •Battle via Spirit Board •Purchase from the Vault Shop for 1000G •Scan the Waddle Dee amiibo |
361 | Bandana Waddle Dee | ★★★ | Battering Items ↑ | Kirby Series | |||
| 366 | Scarfy | ★ | •Battle via World of Light (Mysterious Dimension) •Battle via Spirit Board •Purchase from the Vault Shop for 500G |
367 | Angry Scarfy | ★★ | Unflinching Charged Smashes | Kirby Series | |||
| 401 | Andross (Star Fox 64 3D) | ★★★ | •Battle via World of Light (Mysterious Dimension) •Battle via Spirit Board •Purchase from the Vault Shop for 6000G |
402 | Andross (True Form) | ★★★★ | Critical-Health Stats ↑ | Star Fox Series | |||
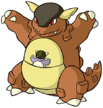
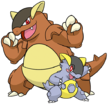
| 450 | Kangaskhan | ★★ | •Battle via Spirit Board •Purchase from the Vault Shop for 1000G |
451 | Mega Kangaskhan | ★★★ | Chance of Double Final Smash | Pokémon Series | |||
| 496 | Kyogre | ★★ | •Battle via Spirit Board •Purchase from the Vault Shop for 1000G |
497 | Primal Kyogre | ★★★ | Water/Freezing Resist ↑ | Pokémon Series | |||
| 498 | Groudon | ★★ | •Battle via World of Light (Molten Fortress) •Battle via Spirit Board •Purchase from the Vault Shop for 1000G |
499 | Primal Groudon | ★★★ | Fire/Explosion Resist ↑ | Pokémon Series | |||
| 512 | Giratina (Altered Forme) | ★★★ | •Battle via Spirit Board •Purchase from the Vault Shop for 6000G |
513 | Giratina (Origin Forme) | ★★★★ | Shield Damage ↑ | Pokémon Series | |||
| 517 | Shaymin (Land Forme) | ★★★ | •Battle via Spirit Board •Purchase from the Vault Shop for 6000G |
518 | Shaymin (Sky Forme) | ★★★★ | Jump ↑ | Pokémon Series | |||
| 534 | Keldeo (Ordinary Form) | ★★ | •Battle via Spirit Board •Purchase from the Vault Shop for 1000G |
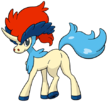
535 | Keldeo (Resolute Form) | ★★★★ | Hyper Smash Attacks | Pokémon Series | |||
| 544 | Zygarde (50% Forme) | ★ | •Battle via Spirit Board •Purchase from the Vault Shop for 500G |
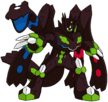
545 | Zygarde (Complete Forme) | ★★★★ | Critical-Health Healing | Pokémon Series | |||
| 546 | Diancie | ★★ | •Battle via Spirit Board •Purchase from the Vault Shop for 1000G |
547 | Mega Diancie | ★★★★ | Franklin Badge Equipped | Pokémon Series | |||
| 548 | Hoopa (Confined) | ★★ | •Battle via Spirit Board •Purchase from the Vault Shop for 1000G |
549 | Hoopa (Unbound) | ★★★ | Toss & Meteor | Pokémon Series | |||
| 630 | Tiki | ★★ | •Summon with cores from Ninian, Medeus, and any •Battle via World of Light (The Light Realm) •Purchase from the Vault Shop for 1000G (unlocked after obtaining spirit once) •Scan the Tiki amiibo |
631 | Tiki (Naga's Voice) | ★★★ | Fire/Explosion Resist ↑ | Fire Emblem Series | |||
| 633 | Camus | ★★★ | •Battle via World of Light (Sacred Land) •Battle via Spirit Board •Purchase from the Vault Shop for 6000G |
634 | Sirius | ★★★★ | Weapon Attack ↑ | Fire Emblem Series | |||
| 637 | Alm & Celica (Young) | ★ | •Battle via World of Light (The Light Realm) •Battle via Spirit Board •Purchase from the Vault Shop for 500G •Scan the Alm amiibo or Celica amiibo |
638 | Alm & Celica | ★★★ | Back Shield Equipped | Fire Emblem Series | |||
| 645 | Lyn | ★★★ | •Battle via Spirit Board •Purchase from the Vault Shop for 6000G |
646 | Lyn (Blade Lord) | ★★★★ | Critical Hit ↑↑ | Fire Emblem Series | |||
| 661 | Elincia | ★★ | •Battle via World of Light (Mysterious Dimension) •Battle via Spirit Board •Purchase from the Vault Shop for 1000G |
662 | Queen Elincia | ★★★★ | Additional Midair Jump | Fire Emblem Series | |||
| 664 | Zelgius | ★★★ | •Battle via Spirit Board •Purchase from the Vault Shop for 6000G |
665 | Black Knight | ★★★★ | Armor Knight | Fire Emblem Series | |||
| 687 | Tsubasa Oribe | ★ | •Battle via World of Light (The Light Realm) •Battle via Spirit Board •Purchase from the Vault Shop for 500G |
688 | Tsubasa Oribe (Carnage Form) | ★★★ | Jump ↑ | Tokyo Mirage Sessions ♯FE | |||
| 710 | Medusa | ★★ | •Battle via World of Light (Mysterious Dimension) •Battle via Spirit Board (unlocked after obtaining spirit once) •Purchase from the Vault Shop for 1000G (unlocked after obtaining spirit once) |
711 | Medusa (Kid Icarus: Uprising) | ★★★★ | Giant | Kid Icarus Series | |||
| 714 | Pandora | ★★ | •Battle via World of Light (The Dark Realm) •Battle via Spirit Board •Purchase from the Vault Shop for 1000G |
715 | Amazon Pandora | ★★★ | Easier Dodging | Kid Icarus Series | |||
| 717 | Hades | ★★★ | •Battle via Spirit Board •Purchase from the Vault Shop for 6000G |
718 | Hades (Final Form) | ★★★★ | Trade-Off Attacks ↑ | Kid Icarus Series | |||
| 741 | 5-Volt | ★★ | •Battle via Spirit Board •Purchase from the Vault Shop for 1000G |
742 | 5-Volt (Angry) | ★★★ | Critical-Health Attack ↑ | Warioware Series | |||
| 758 | Naked Snake | ★★★ | •Battle via World of Light (The Final Battle - Dark) •Battle via Spirit Board •Purchase from the Vault Shop for 6000G |
759 | Big Boss | ★★★★ | Metal Killer | Metal Gear Solid Series | |||
| 762 | Revolver Ocelot (Metal Gear Solid 3) | ★★ | •Battle via World of Light (Base) •Battle via Spirit Board •Purchase from the Vault Shop for 1000G |
763 | Revolver Ocelot (Metal Gear Solid V) | ★★★ | Shooting Attack ↑ | Metal Gear Solid Series | |||
| 772 | Metal Gear ZEKE | ★ | •Purchase at Sheldon's Place for 500SP •Battle via Spirit Board |
773 | Sahelanthropus | ★★★ | Metal and Giant | Metal Gear Solid Series | |||
| 788 | Shadow the Hedgehog | ★★★ | •Battle via Spirit Board •Purchase from the Vault Shop for 6000G |
789 | Super Shadow | ★★★★ | Undamaged Attack & Speed ↑ | Sonic the Hedgehog Series | |||
| 786 | Chao | ★ | •Battle via World of Light (The Light Realm) •Battle via Spirit Board •Purchase from the Vault Shop for 500G |
787 | Hero Chao | ★★★ | Fast Final Smash Meter | Sonic the Hedgehog Series | |||
| 810 | Bulborb | ★★ | •Battle via World of Light (Sacred Land) •Battle via Spirit Board •Purchase from the Vault Shop for 1000G |
811 | Empress Bulblax | ★★★★ | Stats ↑↑ after Eating | Pikmin Series | |||
| 828 | Tom Nook | ★★ | •Summon with cores from Maruhige Shop Owner, Shop Assistant, and any •Battle via Spirit Board (unlocked after obtaining spirit once) •Purchase from the Vault Shop for 1000G (unlocked after obtaining spirit once) •Scan the Tom Nook amiibo |
829 | Tom Nook (Nookington's) | ★★★ | Item Gravitation | Animal Crossing Series | |||
| 831 | DJ K.K. | ★★ | •Summon with cores from 9-Volt & 18-Volt and Labrador Retriever •Battle via Spirit Board (unlocked after obtaining spirit once) •Purchase from the Vault Shop for 1000G (unlocked after obtaining spirit once) •Scan the K.K. amiibo |
832 | K.K. Slider | ★★★ | Running Start | Animal Crossing Series | |||
| 905 | X | ★★★ | •Battle via World of Light (The Final Battle - Light) •Battle via Spirit Board •Purchase from the Vault Shop for 6000G |
906 | Full Armor X | ★★★★ | Super Armor | Mega Man X Series | |||
| 907 | Zero (Zero Buster) | ★★ | •Battle via World of Light (The Final Battle - Dark) •Battle via Spirit Board •Purchase from the Vault Shop for 1000G |
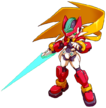
908 | Zero (Z-Saber) | ★★★★ | Weapon Attack & Move Speed ↑ | Mega Man X Series | |||
| 916 | Geo Stelar & Omega-Xis | ★★ | •Complete Challenge (Adventure): Awaken 25 fighters. •Battle via Spirit Board (unlocked after obtaining spirit once) •Purchase from the Vault Shop for 1000G (unlocked after obtaining spirit once) |
917 | Star Force Mega Man | ★★★ | Shooting Items ↑ | Mega Man Star Force Series | |||
| 919 | Model X | ★ | •Battle via World of Light (The Light Realm) •Battle via Spirit Board •Purchase from the Vault Shop for 500G |
920 | Model ZX | ★★ | Transformation Duration ↑ | Mega Man ZX Series | |||
| 959 | Mumkhar | ★★ | •Battle via World of Light (The Final Battle - Dark) •Battle via Spirit Board •Purchase from the Vault Shop for 1000G |
960 | Metal Face | ★★★★ | Metal and Giant | Xenoblade Chronicles Series | |||
| 980 | Chun-Li (Street Fighter Alpha) | ★★ | •Battle via World of Light (World Tour) •Battle via Spirit Board •Purchase from the Vault Shop for 1000G |
981 | Chun-Li | ★★★ | Physical Attack ↑ | Street Fighter Series | |||
| 1,010 | Jeanne | ★★★ | •Battle via World of Light (The Final Battle - Dark) •Battle via Spirit Board •Purchase from the Vault Shop for 6000G |
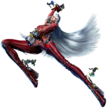
1,011 | Cutie J | ★★★★ | Easier Dodging | Bayonetta Series | |||
| 1,012 | Rodin | ★★★ | •Summon with cores from Brewster and Aegislash | 1,013 | Rodin, the Infinite One | ★★★★ | Critical-Health Attack ↑ | Bayonetta Series | |||
| 1,017 | Balder | ★★ | •Battle via World of Light (The Final Battle - Light) •Battle via Spirit Board •Purchase from the Vault Shop for 1000G |
1,018 | Father Balder | ★★★ | Franklin Badge Equipped | Bayonetta Series | |||
| 1,043 | DJ Octavio | ★★ | •Summon with cores from Octoling, Octorok, and any |
1,044 | Octobot King | ★★★ | Made of Metal | Splatoon Series | |||
| 1,053 | Maria Renard | ★★ | •Battle via World of Light (Dracula's Castle) •Battle via Spirit Board •Purchase from the Vault Shop for 1000G |
1,054 | Maria Renard (Symphony of the Night) | ★★★ | Additional Midair Jump | Castlevania Series | |||
| 1,075 | Dracula | ★★★ | •Defeat the Dracula's Castle boss in World of Light | 1,076 | Soma Cruz | ★★★★ | Giant Killer | Castlevania Series | |||
| 1,130 | Donbe & Hikari | ★★ | •Battle via World of Light (Sacred Land) •Battle via Spirit Board •Purchase from the Vault Shop for 1000G |
1,131 | Donbe & Hikari (Shin Onigashima Kouhen) | ★★★ | Stamina ↑ | Famicom Mukashibanashi Series | |||
| 1,143 | Frog & Snake | ★★ | •Summon with cores from Prince Peasley, Winky, and Rattly •Battle via World of Light (The Dark Realm) •Purchase from the Vault Shop for 1000G (unlocked after obtaining spirit once) |
1,144 | Prince of Sablé | ★★★★ | Transformation Duration ↑ | Kaeru no Tame ni Kane wa Naru | |||
| 1,160 | Ray Mk II | ★★ | •Treasure Chest in World of Light (The Light Realm) •Battle via Spirit Board (unlocked after obtaining spirit once) •Purchase from the Vault Shop for 1000G (unlocked after obtaining spirit once) |
1,161 | Ray Mk III | ★★★ | Lightweight | Custom Robo Series | |||
| 1,168 | Isaac | ★★★ | •Summon with cores from Garet, Mia, and Ivan •Battle via World of Light (The Final Battle - Light) •Purchase from the Vault Shop for 6000G (unlocked after obtaining spirit once) |
1,169 | Isaac (Dark Dawn) | ★★★★ | Energy Shot Attack/Resistance ↑ | Golden Sun Series | |||
| 1,193 | The Wandering Samurai | ★★ | •Summon with cores from Sakura Samurai and Ghosts | 1,194 | Wandering Samurai (Rhythm Heaven Fever) | ★★★ | Critical Hit ↑ | Rhythm Heaven Series Rhythm Paradise Series | |||
| 1,206 | Chibi-Robo | ★★ | •Battle via World of Light (The Final Battle - Light) •Battle via Spirit Board •Purchase from the Vault Shop for 1000G •Scan the Chibi-Robo amiibo |
1,207 | Super Chibi-Robo | ★★★ | Thrown Items ↑ | Chibi-Robo! Series | |||
| 1,214 | Dr. Kawashima | ★★ | •Battle via Spirit Board •Purchase from the Vault Shop for 1000G |
1,215 | Dr. Kawashima (Concentration Training) Dr. Kawashima (Devilish Brain Training) |
★★★★ | Unflinching Charged Smashes | Brain Age: Train Your Brain in Minutes a Day! Series Dr. Kawashima's Brain Training: How Old Is Your Brain? Series | |||
| 1,242 | Nick | ★ | •Battle via World of Light (The Light Realm) •Battle via Spirit Board •Purchase from the Vault Shop for 500G |
1,243 | Captain Rainbow | ★★★ | First-Strike Advantage | Captain Rainbow | |||
| 1,330 | Slime | ★ | •Battle via DLC Spirit Board •Purchase from the Vault Shop for 500G (since v4.0.0) |
1,331 | King Slime | ★★★ | Weight ↑↑ | DRAGON QUEST Series | |||
| 1,334 | Great Sabrecub | ★ | •Battle via DLC Spirit Board •Purchase from the Vault Shop for 500G (since v4.0.0) |
1,335 | Great Sabrecat | ★★★ | Physical Attack ↑ | DRAGON QUEST Series | |||
| 1,341 | Jinjos | ★★ | •Battle via DLC Spirit Board •Purchase from the Vault Shop for 1000G (since v4.0.0) |
1,342 | The Mighty Jinjonator | ★★★ | Giant | Banjo-Kazooie Series | |||
Trivia
- The Zelda and Pokémon series have the most enhanceable Spirits, with 9 each.
- The Yoshi, Star Fox, Wario, Pikmin, Xenoblade, Street Fighter, and Splatoon Series all have the fewest enhanceable Spirits, with 1 each, as well as the Donkey Kong unless one counts the Mario vs. Donkey Kong Series.
- Not counting Final Fantasy (as it has no Spirits other than Fighter Spirits to begin with) or series added by DLC, Pac-Man is the only third-party universe not to have any enhanceable Spirits.
- Zygarde (50% Forme) is the only enhanceable Novice-class spirit in which its enhanced form (its Complete Forme) is a Legend-class spirit.
- All Pokémon enhanced Spirits are form changes and not evolution, although they are irreversible like the latter.
- Banzai Bill, King Boo, Angry Scarfy, and Model ZX are the only enhanced Spirits to be of an Advanced-class rather than an Ace- or Legend-class.
- They're also each respectfully one of the four types, meaning each type have an Advanced-class enhanced Spirit.
| Spirits | |
|---|---|
| by categories | Primary spirit (Enhanceable spirit) · Support spirit · Master spirit · Fighter spirit · (All spirits) · Summon · DLC Spirits (DLC changes) |
| by series | Super Mario · Donkey Kong · The Legend of Zelda · Metroid · Yoshi · Kirby · Star Fox · Pokémon · EarthBound · F-Zero · Ice Climber · Fire Emblem · Game & Watch · Kid Icarus · Wario · Metal Gear · Sonic the Hedgehog · Pikmin · R.O.B. · Animal Crossing · Mega Man · Wii Fit · Punch-Out!! · Pac-Man · Xenoblade Chronicles · Duck Hunt · Street Fighter · Final Fantasy · Bayonetta · Splatoon · Castlevania · Mii · Super Smash Bros. · Others · Persona · Dragon Quest · Banjo-Kazooie · Fatal Fury · ARMS · Minecraft · Tekken · Kingdom Hearts |
