Fox (SSBM)/Side special: Difference between revisions
No edit summary |
Mariogeek2 (talk | contribs) m (→Hitboxes: Added missing info, →Timing: Added prop to FrameIconLegend temp.) |
||
| (5 intermediate revisions by 5 users not shown) | |||
| Line 1: | Line 1: | ||
{{ArticleIcons|ssbm=y}} | {{ArticleIcons|ssbm=y}} | ||
Fox's | {{disambig2|the hitbox visualization in ''[[Super Smash Bros. Melee]]''|the move itself|Fox Illusion}} | ||
{{ | |||
==Overview== | |||
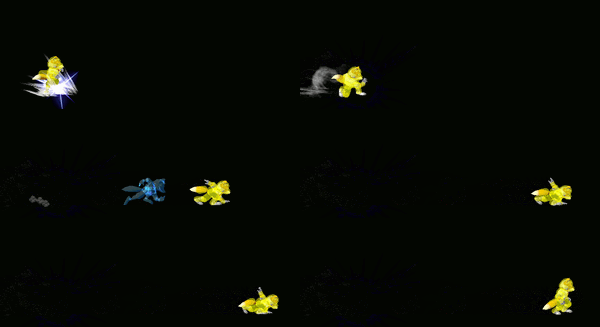
[[File:FoxFoxIllusionSSBM.gif|thumb|300px|Hitbox visualization of Fox Illusion.]] | |||
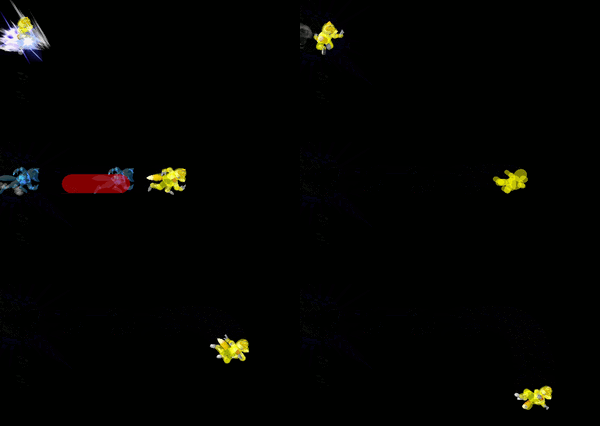
[[File:FoxFoxIllusionAerialSSBM.gif|thumb|300px|Hitbox visualization of aerial Fox Illusion.]] | |||
Fox's side special move is known as '''Fox Illusion''', a move that involves Fox dashing forward whilst leaving afterimages of himself behind. These afterimages can damage opponents, but they are very weak. The move is primarily used as a [[recovery]] move, and it travels a decent distance, though inferior to the distance traveled by {{mvsub|Fox|SSBM|up special|alt=Fire Fox}}. However, Fox Illusion is a much faster horizontal recovery move, meaning it is Fox's best option for horizontal recoveries. The move knocks opponents who are hit by the afterimages upward slightly, but it is very weak and not a useful attack. | |||
It is also possible to shorten the length of this move by quickly pressing the B button again after initiating the move. There are 5 shortened lengths for the move; one for each of the 5 frames in which Fox travels forward. Shortening the move is useful for making it to the [[edge]] whilst avoiding [[gimp]]ing options such as {{mvsub|Marth|SSBM|neutral attack|poss=y}}. | |||
==Hitboxes== | |||
<!--- Will add radius n' stuff as soon as I get access to Crazy Hand ---> | |||
===Grounded=== | |||
{{MeleeHitboxTableHeader|special=y}} | |||
{{MeleeSpecialHitboxTableRow | |||
|id=0 | |||
|damage=7% | |||
|angle=80 | |||
|bk=68 | |||
|ks=40 | |||
|fkv=0 | |||
|r=1065 | |||
|bn=0 | |||
|ypos=1000 | |||
|clang=f | |||
|rebound=f | |||
|effect=Slash | |||
|slvl=M | |||
|sfx=Slash | |||
}} | |||
|} | |||
===Aerial=== | |||
{{MeleeHitboxTableHeader|special=y}} | |||
{{MeleeSpecialHitboxTableRow | |||
|id=0 | |||
|damage=7% | |||
|angle=80 | |||
|bk=68 | |||
|ks=60 | |||
|fkv=0 | |||
|r=1065 | |||
|bn=0 | |||
|ypos=1000 | |||
|clang=f | |||
|rebound=f | |||
|effect=Slash | |||
|slvl=M | |||
|sfx=Slash | |||
}} | |||
|} | |||
==Timing== | |||
Fox can cancel this move's end lag by grabbing ledge as early as frame 29. | |||
{|class="wikitable" | |||
!Hitbox | |||
|22-25 | |||
|- | |||
!Animation length | |||
|63 | |||
|} | |||
{{FrameStripStart}} | |||
{{FrameStrip|t=Blank|c=21}}{{FrameStrip|t=Hitbox|c=4}}{{FrameStrip|t=Blank|c=38}} | |||
|- | |||
{{FrameStrip|t=Lag|c=21|e=LagPropS}}{{FrameStrip|t=Lag|c=42|s=LagPropE}} | |||
{{FrameStripEnd}} | |||
===Landing lag=== | |||
{|class="wikitable" | |||
|- | |||
!Animation length (pre free fall) | |||
|20 | |||
|- | |||
!Animation length (post free fall) | |||
|3 | |||
|} | |||
{{FrameStripStart}} | |||
|'''Pre free fall''' {{FrameStrip|t=Lag|c=20}} | |||
|- | |||
|'''Post free fall''' {{FrameStrip|t=Lag|c=3}}{{FrameStrip|t=Blank|c=17}} | |||
{{FrameStripEnd}} | |||
{{FrameIconLegend|lag=y|hitbox=y|prop=y}} | |||
==Similar moves== | |||
*[[Falco (SSBM)/Side special|Falco Phantasm]] | |||
{{MvSubNavFox|g=SSBM}} | |||
[[Category:Fox (SSBM)]] | |||
[[Category:Side special moves (SSBM)]] | |||
Latest revision as of 17:37, November 30, 2024
Overview[edit]
Fox's side special move is known as Fox Illusion, a move that involves Fox dashing forward whilst leaving afterimages of himself behind. These afterimages can damage opponents, but they are very weak. The move is primarily used as a recovery move, and it travels a decent distance, though inferior to the distance traveled by Fire Fox. However, Fox Illusion is a much faster horizontal recovery move, meaning it is Fox's best option for horizontal recoveries. The move knocks opponents who are hit by the afterimages upward slightly, but it is very weak and not a useful attack.
It is also possible to shorten the length of this move by quickly pressing the B button again after initiating the move. There are 5 shortened lengths for the move; one for each of the 5 frames in which Fox travels forward. Shortening the move is useful for making it to the edge whilst avoiding gimping options such as Marth's neutral attack.
Hitboxes[edit]
Grounded[edit]
| ID | Part | Damage | SD | Angle | BK | KS | FKV | Radius | Bone | Offset | Clang | Rebound | Effect | G | A | Sound | Blockable | Reflectable | Absorbable | ||
|---|---|---|---|---|---|---|---|---|---|---|---|---|---|---|---|---|---|---|---|---|---|
| 0 | 0 | 7% | 0 | 68 | 40 | 0 | 4.15989 | 0 | 0.0 | 3.906 | 0.0 | ||||||||||
Aerial[edit]
| ID | Part | Damage | SD | Angle | BK | KS | FKV | Radius | Bone | Offset | Clang | Rebound | Effect | G | A | Sound | Blockable | Reflectable | Absorbable | ||
|---|---|---|---|---|---|---|---|---|---|---|---|---|---|---|---|---|---|---|---|---|---|
| 0 | 0 | 7% | 0 | 68 | 60 | 0 | 4.15989 | 0 | 0.0 | 3.906 | 0.0 | ||||||||||
Timing[edit]
Fox can cancel this move's end lag by grabbing ledge as early as frame 29.
| Hitbox | 22-25 |
|---|---|
| Animation length | 63 |
Landing lag[edit]
| Animation length (pre free fall) | 20 |
|---|---|
| Animation length (post free fall) | 3 |
| Pre free fall | ||||||||||||||||||||
| Post free fall |
Lag time |
Hitbox |
Prop event |
Similar moves[edit]

