Smash Run: Difference between revisions
m (some cleanup and fixups) |
Aidanzapunk (talk | contribs) m (→Trivia) |
||
| (272 intermediate revisions by more than 100 users not shown) | |||
| Line 1: | Line 1: | ||
{{ArticleIcons|ssb4-3ds=y | {{ArticleIcons|ssb4-3ds=y}} | ||
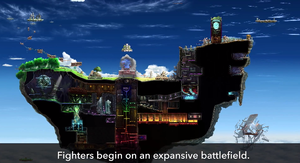
[[File:SmashRun-7.png|thumb|300px|A zoomed out shot of the Smash Run map.]] | [[File:SmashRun-7.png|thumb|300px|A zoomed out shot of the Smash Run map.]] | ||
'''Smash Run''' ({{ja|フィールドスマッシュ}}, ''Field Smash'') is a gameplay mode | '''Smash Run''' ({{ja|フィールドスマッシュ|Fīrudo Sumasshu}}, ''Field Smash'') is a gameplay mode that appears exclusively in {{for3ds}}, and one of only two modes exclusive to that installment, alongside [[StreetSmash]]. It involves a blend of platforming and exploration, as well as standard fighting or another challenge in the second half of the mode. | ||
==Overview== | |||
The mode starts with a five-minute adventure course involving exploration of a large, expansive, and unnamed island in the sky shaped like a ship. Players are tasked with strengthening their attributes via finding items in [[chest]]s, as well as defeating numerous enemies from both ''[[Brawl]]''{{'}}s [[The Subspace Emissary]] and other game series. Bonus stages hidden behind [[door]]s in the map also allow for players to take part in challenges that can give them further boosts to their various attributes and more prizes; special events that occur on the map can also provide further benefits to players, such as by defeating an exceptionally powerful enemy or finding a hidden room filled with chests. In Group mode, players can trigger traps that will drop giant [[Bob-omb]]s, by activating a switch item that can appear from treasure chests. Enemies, however, can attack the player and make them drop their power-ups sometimes; getting KO'd is also a possibility, leading to significant penalties to the player's stat boosts. | |||
Several standard [[item]]s can be found throughout the play area, including most battering items and state-granting powerups. The latter's effects last noticeably longer in this game mode, such as the [[Starman]] and [[Hammer]]. | |||
Smash Run supports [[character customization]] like most of the other modes in the game. However, Smash Run expands on this formula, further adding a variety of unique "[[Power]]s" that can be granted to competitors; these are activated by tapping their respective icon on the 3DS's lower screens (ranging from healing, attacking, and boosting), and can only be used on the Smash Run map in order to activate their effect; Equipment-type Powers that grant a held item when the player spawns are applied the same way, but don't appear as an option on the screen while playing. The lower screen can also display a map of the Smash Run arena, alternating between screens by tapping the left-hand or top area of the touch screen. | |||
When the five minutes have expired, all power-ups collected are added to the character's stats, and the players compete in one of a variety of "Final Battles", selected randomly, lasting one to two minutes. | |||
== | After a Smash Run match, players will obtain the trophies, [[character customization]] items, gold, and powers that they collected while in the adventure course. | ||
==List of stat boosts== | |||
The following items can be found by defeating enemies, opening chests, and completing miniature missions within the mode. Touching these items increases a specific stat for the character, giving potential benefits in the game's final challenge. Additionally, every item can be found in different sizes, which alters how much of each stat will be boosted, depending on the size it might increase that stat by 3, 10, 30, 100 or 200 points. Stat boosts with clocks on them also appear, which give a large temporary boost of 500 points.<ref>http://youtu.be/bvux2dfsNEk?t=14m51s</ref> Players can have a maximum of 1000 points for each category. Fighters can also build up their stats by performing the actions corresponding to them. | |||
In addition to pickups for the stats below, rare stars that pulsate a variety of colors can appear in the mode; grabbing them increases all of the player's stats. Taunting raises a random stat by 1. There is also a rare stat booster shaped as a 2x that is called a Stat Megaboost that will double all stat gains for a period of time. It appears on the stage rarely/in Challenge Doors that are Treasure Rooms, as well as very rarely being dropped by enemies. | |||
{|class="wikitable" | |||
! Icon !! Name !! Description | |||
|- | |||
|[[File:SmashRunSpeed.png]] || '''Speed ({{ja|移動|Idō}}, ''Movement'')''' || A green item resembling a boot. Increases [[walking]] speed, [[dashing]] speed, [[air speed]], and [[traction]]. Naturally increases by approximately 1 per second while walking and 2 per second while running; the rate at which the stat increases is proportional to how much distance the character is covering (which means that faster characters can build this stat up faster). | |||
|- | |||
|[[File:SmashRunJump.png]] || '''Jump ({{ja|ジャンプ|Janpu}}, ''Jump'')''' || A yellow item resembling a wing. Increases [[jump]] height and [[falling speed]]; affects all [[double jump]]s and [[wall jump]]s, but not [[shorthop]]s. Naturally increases by approximately 0.75 for every jump performed. | |||
|- | |||
|[[File:SmashRunAttack.png]] || '''Attack ({{ja|通常ワザ|Tsūjō Waza}}, ''Normal Technique'')''' || An orange item resembling a boxing glove. Increases damage of all normal [[attack]]s. Naturally increases for each normal attack used: neutral attacks are worth 0.5, tilts, dash attacks, and aerials are worth 1, and smashes are worth 2. | |||
|- | |||
|[[File:SmashRunSpecial.png]] || '''Special ({{ja|必殺ワザ|Hissatsu Waza}}, ''Special Technique'')''' || A red item shaped like a starburst. Increases damage of all [[special move]]s. Additionally, some special moves may gain increased range or a shortened charge time. Naturally increases by approximately 1.3 for each special move used. | |||
|- | |||
|[[File:SmashRunArms.png]] || '''Arms ({{ja|投げ・アイテム|Nage Aitemu}}, ''Throwing/Items'')''' || A purple item resembling a sledge-hammer. Increases strength of [[projectile]]s, [[item]] attacks, healing effects from items, and [[throw]]s. Additionally, grabbing range is increased, items of timed duration last longer, and the user is less likely to drop items when attacked. Naturally increases by 1 for each grab attempted, pummel or throw performed, and item attack/throw used. | |||
|- | |||
|[[File:SmashRunDefense.png]] || '''Defense ({{ja|防御|Bōgyo}}, ''Defense'')''' || A blue item resembling a generic shield. Makes it more difficult to launch characters; it is currently unknown whether this is an increase in [[weight]] or a decrease in [[knockback]] taken (which may also result in [[flinch]] resistance). Additionally, the [[shield]] becomes harder to break and the timing for a [[perfect shield]] becomes more lenient. Naturally increases by 1 every time the shield is raised or a dodge is used or damage is taken, scaling more depending on the damage/knockback taken; increases by 10 upon a broken shield. | |||
|} | |||
==List of enemies== | |||
{|class="wikitable sortable" | {|class="wikitable sortable" | ||
!Enemy!!Series | ! Enemy !! Series | ||
|- | |||
|[[Banzai Bill]]||rowspan=14|{{symbol|smb|24px}} {{uv|Mario}} | |||
|- | |||
|[[Big Goomba]] | |||
|- | |||
|[[Bill Blaster]] | |||
|- | |||
|{{b|Bullet Bill|enemy}} | |||
|- | |||
|[[Chain Chomp]] | |||
|- | |||
|[[Flame Chomp]] | |||
|- | |||
|[[Goomba]] | |||
|- | |||
|[[Hammer Bro]] | |||
|- | |||
|[[Koopa Paratroopa]] | |||
|- | |||
|[[Koopa Troopa]] | |||
|- | |||
|[[Lakitu and Spinies]] | |||
|- | |||
|[[Magikoopa]] | |||
|- | |||
|[[Shy Guy]] | |||
|- | |||
|[[Spike Top]] | |||
|- | |||
|[[Kritter]]||rowspan=2|{{symbol|dk|24px}} {{uv|Donkey Kong}} | |||
|- | |||
|[[Tiki Buzz]] | |||
|- | |||
|[[Bubble]]||rowspan=7|{{symbol|zelda|24px}} {{uv|The Legend of Zelda}} | |||
|- | |||
|[[Cucco]] | |||
|- | |||
|[[Darknut]] | |||
|- | |||
|[[Octorok]] | |||
|- | |- | ||
|[[ | |[[Peahat]] | ||
|- | |- | ||
|[[ | |[[ReDead]] | ||
|- | |- | ||
|[[ | |[[Stalfos]] | ||
|- | |- | ||
|[[ | |[[Geemer]]||rowspan=4|{{symbol|metroid|24px}} {{uv|Metroid}} | ||
|- | |- | ||
|[[ | |[[Kihunter]] | ||
|- | |- | ||
| | |{{b|Metroid|creature}} | ||
|- | |- | ||
|[[ | |[[Reo]] | ||
|- | |- | ||
|[[ | |[[Fly Guy]]||{{symbol|yoshi|24px}} {{uv|Yoshi}} | ||
|- | |- | ||
|[[ | |[[Bonkers]]||rowspan=9|{{symbol|kirby|24px}} {{uv|Kirby}} | ||
|- | |- | ||
|[[ | |[[Bronto Burt]] | ||
|- | |- | ||
|[[ | |[[Gordo]] | ||
|- | |- | ||
|[[ | |[[Parasol Waddle Dee]] | ||
|- | |- | ||
|[[ | |[[Plasma Wisp]] | ||
|- | |- | ||
|[[ | |[[Shotzo]] | ||
|- | |- | ||
|[[ | |[[Tac]] | ||
|- | |- | ||
|[[ | |[[Waddle Dee]] | ||
|- | |- | ||
|[[ | |[[Waddle Doo]] | ||
|- | |- | ||
|[[ | |[[Chandelure]]||rowspan=5|{{symbol|pkmn|24px}} {{uv|Pokémon}} | ||
|- | |- | ||
|[[ | |[[Cryogonal]] | ||
|- | |- | ||
|[[ | |[[Gastly]] | ||
|- | |- | ||
|[[ | |[[Koffing]] | ||
|- | |- | ||
|[[ | |[[Petilil]] | ||
|- | |- | ||
|[[ | |[[Devil Car]]||rowspan=2|{{symbol|eb|24px}} {{uv|EarthBound}} | ||
|- | |- | ||
| | |{{b|Starman|EarthBound}} | ||
|- | |- | ||
|[[ | |[[Polar Bear]]||{{symbol|ic|24px}} {{uv|Ice Climber}} | ||
|- | |- | ||
|[[ | |[[Boom Stomper]]||rowspan=19|{{symbol|ki|24px}} {{uv|Kid Icarus}} | ||
|- | |- | ||
|[[ | |[[Bumpety Bomb]] | ||
|- | |- | ||
|[[ | |[[Clubberskull]] | ||
|- | |||
|[[Daphne]] | |||
|- | |||
|[[Flage]] | |||
|- | |||
|[[Lethinium]] | |||
|- | |||
|[[Lurchthorn]] | |||
|- | |||
|[[Mahva]] | |||
|- | |||
|[[Megonta]] | |||
|- | |||
|[[Mimicutie]] | |||
|- | |||
|[[Monoeye]] | |||
|- | |||
|[[Nutski]] | |||
|- | |||
|[[Orne]] | |||
|- | |||
|[[Reaper & Reapette]] | |||
|- | |||
|[[Skuttler]] | |||
|- | |||
|[[Skuttler Cannoneer]] | |||
|- | |||
|[[Skuttler Mage]] | |||
|- | |||
|[[Souflee]] | |||
|- | |||
|[[Zuree]] | |||
|- | |||
|[[Bulborb]]||rowspan=2|{{symbol|pikmin|24px}} {{uv|Pikmin}} | |||
|- | |||
|[[Iridescent Glint Beetle]] | |||
|- | |||
|[[Generator]]||rowspan=7|{{symbol|subspace|24px}} [[The Subspace Emissary]] | |||
|- | |||
|[[Glice]] | |||
|- | |||
|[[Glire]] | |||
|- | |||
|[[Glunder]] | |||
|- | |||
|[[Mite]] | |||
|- | |||
|[[Poppant]] | |||
|- | |||
|[[Roturret]] | |||
|- | |||
|{{b|Ghost|Find Mii}}||{{symbol|streetpass|24px}} {{uv|StreetPass Mii Plaza}} | |||
|- | |||
|[[Sneaky Spirit]]||{{symbol|other|24px}} {{uv|Rhythm Heaven}} | |||
|- | |||
|[[Eggrobo]]||{{symbol|sonic|24px}} {{uv|Sonic the Hedgehog}} | |||
|- | |||
|[[Mettaur]]||{{symbol|mm|24px}} {{uv|Mega Man}} | |||
|- | |||
|[[Bacura]]||{{symbol|other|24px}} {{uv|Xevious}} | |||
|- | |||
|[[Pooka]]||{{symbol|other|24px}} {{uv|Dig Dug}} | |||
|- | |- | ||
|} | |} | ||
==List of Challenges== | |||
After entering a door, the player must complete an objective to reveal a treasure chest containing rewards that range from 1, 2, or 3 stat boosts worth 200 points correlating with the difficulty level of the challenge that range from Easy, Normal, and Hard respectively. Stat boosts do not fade away in challenge rooms, but failing a challenge or being defeated will eject the player from the room, unable to re-enter. All doors disappear from the main map for the last minute of the run. | |||
{|class="wikitable" | |||
! Challenge !! Picture !! Description | |||
|- | |||
| Target Smash! || [[File:Smash Run Target Smash easy.jpg|200px]] || All targets in the room must be destroyed within the time limit. | |||
*Easy: 5 targets, 10-second limit | |||
*Normal: 6 targets, 20-second limit. It contains two trampolines and three Gordos. | |||
*Hard: 9 targets, 20-second limit. It contains a single Beam Sword. The ground periodically acts as a Danger Zone. | |||
|- | |||
| Crystal Smash! || [[File:Smash Run Crystal Smash easy.jpg|200px]] || All crystals in the room must be destroyed within the time limit. Some crystals are attached to other, bigger ones: destroying a big crystal also destroys all of the attached small ones, while destroying a small crystal makes a crack, which acts as a weak point, appear in the bigger one. Crystals drop small power-ups when destroyed. Easy difficulty contains one crystal, normal difficulty four crystals, and hard difficulty also with four crystals, albeit higher durability. | |||
|- | |||
| Defeat Them All! || [[File:Shy Guys Smash Run.jpg|200px]] || All enemies must be defeated within the time limit. Enemies appear in waves; all enemies in a wave must be defeated before the next wave appears. Until all enemies are defeated, the floor of the stage below the main platform alternates between being normal and being a [[Danger Zone]], which [[instant KO|instantly KO]]s anything on contact. | |||
*Easy: 9 enemies - 2 Shy Guys > 2 Kritters > 2 Petilil > 2 Skuttlers, 1 Skuttler Mage | |||
*Normal: 10 enemies - 3 Octoroks > 3 Octoroks > 2 Bumpety Bombs, 1 Plasma Wisp, 1 Ghost | |||
*Hard: 6 enemies - 2 Hammer Bros. > 2 Giant Goombas > 2 Stalfos | |||
|- | |||
| Survive! || [[File:Smash Run Survive hard.jpg|200px]] || The room is filled with enemies and obstacles and the player is tasked with surviving until time runs out. With the exception of one hard mode variant, players must survive for 20 seconds. | |||
*Easy (variant 1): 1 Peahat, 1 Plasma Wisp, 1 Souflee, infinite blue Bubbles | |||
*Easy (variant 2): infinite Skuttlers, Skuttler Mages, and Cryogonal | |||
*Normal: 3 Souflees, 1 Orne | |||
*Hard (variant 1): 1 Polar Bear, 2 Gordos, 2 Barrel Cannons, infinite Fly Guys and Gastly (15-second timer) | |||
*Hard (variant 2): 1 Reaper, 1 Metroid, 10 Bacuras, 12 Zuree (also uses danger zones) | |||
|- | |||
| (Bonus Room) || [[File:Smash Run bonus room.jpg|200px]] || Instead of a proper challenge, this is just a rest room and contains various supplies to help the player in Smash Run. There is no limit to stay in this room. The [[All-Star Rest Area]] music also plays while inside. | |||
Room layouts: | |||
*6 tiny star powerups + 3 Iridescent Glint Beetles | |||
*12 medium-sized powerups of one type | |||
*4 treasure chests | |||
*6 small powerups of two different types, with food and a 2x multiplier | |||
|} | |||
==List of Events== | |||
A bar in the top corner of the screen will be marked with lines that show when random events are scheduled to occur during each five minute round of Smash Run. Most events last for a limited period of time, as indicated by a countdown timer. Any players who are inside a Challenge Door when an event begins, or enter a Challenge Door during an event, will not feel its impacts. | |||
{|class="wikitable" | |||
! Event !! Description | |||
|- | |||
| Amped Up! || All players' speed and jump stats will be temporarily maxed out to 1,000. | |||
|- | |||
| Big Haul || Additional treasure chests appear throughout the map. Not affected by a time limit. | |||
|- | |||
| Bonus Time || Enemies temporarily drop more valuable stat boosts. | |||
|- | |||
| Doors Galore || Additional challenge doors appear throughout the map. Not affected by a time limit. | |||
|- | |||
| (Enemy) Fest || All enemies that appear on-screen will temporarily be of the same type. Possible enemies include [[Tiki Buzz]]es, [[Pooka]]s, [[Shy Guy]]s, [[Bullet Bill]]s, [[Sneaky Spirit]]s and [[Souflee]]s. The former five events last for 20 seconds while the latter two lasts for 10. These enemies act as side spawns and do not interrupt the main spawns unless the area was cleared earlier. Any normal enemies still in the area when the event starts will disappear, however. | |||
|- | |||
| Fast Learner || All stat boost drops from enemies will temporarily be skewed to the same type and normal boosts by performing actions will have a greater effect. | |||
|- | |||
| Final Battle Forecast || Players are informed of which match type the final battle will be. | |||
|- | |||
| Gust of Wind || A strong gale temporarily fills the stage, [[push]]ing the player in random directions and making it difficult to traverse the map. | |||
|- | |||
| Heavenly Light || The [[Heavenly Light]] power is temporarily activated for each fighter, producing a vertical field above and below the player that does minor damage to nearby enemies. | |||
|- | |||
| Otherworldly Door || The locations of all Challenge doors will be temporarily revealed on the bottom screen map. An arrow will also direct players to the nearest door. | |||
|- | |||
| Shrunk || All players shrink to mini size as if they got hit by a [[Poison Mushroom]]. | |||
|- | |||
| Treasure Hunt || The locations of all treasure chests will be temporarily revealed on the bottom screen map. An arrow will also direct players to the nearest chest. | |||
|- | |||
| Treasure Trove || A secret room will appear in the center of the map, containing three chests. There is no time limit, but only the first player who reaches the room can claim the rewards. | |||
|- | |||
| Wanted! || A powerful enemy will appear at a random location on the map, with an arrow directing players to their location. Defeating these enemies yields greater rewards than usual, consisting of three or four 200 stat powerups. Clubberskull targets give five instead as they already give three of those upon defeat. Enemies will always be in accessible areas. Possible enemies include [[Bonkers]], [[Bulborb]], [[Clubberskull]], [[Polar Bear]] and [[Reaper]]. This event has a timer of 90 seconds. | |||
|- | |||
| Warp || All fighters are teleported to a different location elsewhere in the map. This fails if it is triggered during a [[locked battle]], or while the fighter is inside a [[Barrel Cannon]]. | |||
|} | |||
==List of Final Battles== | |||
All challenges designated in the description as a "Smash" will randomly either be a four player free-for-all Smash, or a 2v2 Team Battle where players are assigned to Red and Blue Teams randomly. In the case of a team match, both players from the winning team are considered victorious. All matches are [[Time]]d and last one minute (plus [[Sudden Death]] as usual if required), unless otherwise specified. | |||
{| class="wikitable" | |||
|- | |||
! Match Type !! Description | |||
|- | |||
| 300% Smash || A match where players start and respawn with 300% damage, akin to [[Super Sudden Death]]. | |||
|- | |||
| Climb! || Four player free-for-all, where the goal is to climb up to the goal on a vertical stage while avoiding Danger Zones. Smart Bombs begin to be dropped once the timer hits 30 seconds. | |||
|- | |||
| Easy Launch<sup>PAL</sup><br />High-Launch<sup>NA</sup> || A match with an increased [[launch rate]]. | |||
|- | |||
| Explosive Smash || A match where only [[explosive]] items spawn. | |||
|- | |||
| Flower Smash || A match where all combatants have the [[flower]] condition. | |||
|- | |||
| Glorious Smash || A match on an [[Ω form]] stage with no items, as in [[For Glory]]. | |||
|- | |||
| Mega Smash || A match where all combatants have the [[Super Mushroom]] buff. | |||
|- | |||
| Mr. Saturn Smash || A match where only the [[Mr. Saturn]] spawns. | |||
|- | |||
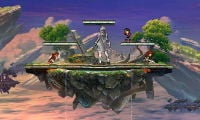
| Multi-Man Smash || On {{SSB4|Battlefield}}, each player independently vies to defeat as many opponents as possible under rules similar to [[Multi-Man mode]], within a one minute time limit. Miis are the primary enemies, with the occasional Metal and Giant Metal versions of the player's character also appearing as enemies. | |||
|- | |||
| Mushroom Smash || A match where only [[Super Mushroom]]s and [[Poison Mushroom]]s spawn. | |||
|- | |||
| Reflect Smash || A match where all combatants wear [[Franklin Badge]]s. | |||
|- | |||
| Run! || Four player free-for-all, where the goal is to reach the goal on one of two horizontally scrolling stages similar to [[Race to the Finish]]. Speed-based powerups such as the Bunny Hood, Superspicy Curry, and a temporary speed boost drop occasionally and there are many Danger Zones. Lasts two minutes. | |||
|- | |||
| Smash || A standard match. | |||
|- | |||
| Stamina Smash || A match where all combatants have [[Hit points|Stamina]] instead of [[damage percentage]]s. All players start with 200 HP. No time limit. | |||
|- | |||
| Stock Smash || A 2-[[Stock]] match with the Stock & Time rule set to one minute. | |||
|- | |||
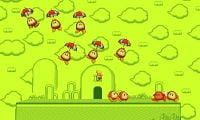
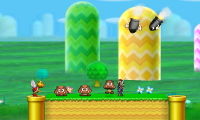
| Vs. Enemy Team || Each player is tasked with defeating as many Smash Run enemies as possible in one minute. The damage values and scores of all players are displayed on the touch screen. Variants include: | |||
*''Mario'' enemies on [[Golden Plains]] Ω | |||
*''Kirby'' enemies on {{SSB4|Dream Land}} Ω | |||
*''Kid Icarus'' enemies on [[Reset Bomb Forest]] Ω | |||
*Miscellaneous enemies on {{SSB4|Battlefield}}, in small groups sorted by series of origin (Subspace Emissary, Namco, ''Donkey Kong'', ''The Legend of Zelda'') | |||
|- | |||
| Warp Star Smash || A match where only the [[Warp Star]] spawns. Takes place only on [[Ω form]] stages | |||
|} | |||
<gallery widths="200px"> | |||
Smash Run Multi-Man.jpg|Multi-Man Smash. | |||
Smash Run final battle Kirby.jpg|Vs. Enemy Team, Kirby version. | |||
Smash Run final battle Mario.jpg|Vs. Enemy Team, Mario version. | |||
Smash Run Run end.jpg|Run!, final moments. | |||
</gallery> | |||
==Music== | |||
Players can set which music tracks can play during the five minute stat-gathering period by adding and removing them from a list; a randomly selected track from the player-chosen ones will play for each run. In addition to all the songs normally available on the game's multiplayer stages, there are additional "bonus" songs available for usage in Smash Run: | |||
:{{symbol|ssb|16px}} ''{{SSB4MusicLink|Super Smash Bros.|Menu}}'' | |||
:{{symbol|ssb|16px}} ''{{SSB4MusicLink|Super Smash Bros.|Menu 2 (Melee)}}'' | |||
:{{symbol|mario|16px}} ''{{SSB4MusicLink|Super Mario Bros.|Rainbow Cruise}}'' | |||
:{{symbol|dk|16px}} ''{{SSB4MusicLink|Donkey Kong|Stickerbush Symphony}}'' | |||
:{{symbol|zelda|16px}} ''{{SSB4MusicLink|The Legend of Zelda|Dark World / Dark World Dungeon}}'' | |||
:{{symbol|zelda|16px}} ''{{SSB4MusicLink|The Legend of Zelda|Ballad of the Goddess / Ghirahim's Theme}}'' | |||
:{{symbol|zelda|16px}} ''{{SSB4MusicLink|The Legend of Zelda|Temple Theme}}'' | |||
:{{symbol|kirby|16px}} ''{{SSB4MusicLink|Kirby|The Legendary Air Ride Machine}}'' | |||
:{{symbol|fox|16px}} ''{{SSB4MusicLink|Star Fox|Theme from Area 6 / Missile Slipstream}}'' | |||
:{{symbol|fe|16px}} ''{{SSB4MusicLink|Fire Emblem|With Mila's Divine Protection (Celica Map 1)}}'' | |||
:{{symbol|fe|16px}} ''{{SSB4MusicLink|Fire Emblem|Lost in Thoughts All Alone (Remix)|Lost in Thoughts All Alone}}'' (DLC) | |||
:{{symbol|ki|16px}} ''{{SSB4MusicLink|Kid Icarus|In the Space-Pirate Ship}}'' | |||
:{{symbol|ki|16px}} ''{{SSB4MusicLink|Kid Icarus|Boss Fight 1 (Kid Icarus: Uprising)|Boss Fight 1}}'' | |||
:{{symbol|ki|16px}} ''{{SSB4MusicLink|Kid Icarus|Dark Pit}}'' | |||
:{{symbol|ki|16px}} ''{{SSB4MusicLink|Kid Icarus|Wrath of the Reset Bomb (Original)}}'' | |||
:{{symbol|xb|16px}} ''{{SSB4MusicLink|Xenoblade|Mechanical Rhythm}}'' | |||
:{{symbol|other|16px}} ''{{SSB4MusicLink|Nintendo|The Mysterious Murasame Castle Medley}}'' | |||
:{{symbol|other|16px}} ''{{SSB4MusicLink|Nintendo|Tetris: Type A}}'' | |||
:{{symbol|mm|16px}} ''{{SSB4MusicLink|Mega Man|Air Man Stage}}'' | |||
:{{symbol|mm|16px}} ''{{SSB4MusicLink|Mega Man|Spark Man Stage}}'' | |||
:{{symbol|pm|16px}} ''{{SSB4MusicLink|Pac-Man|PAC-MAN'S PARK / BLOCK TOWN}}'' | |||
:{{symbol|ssb|16px}} ''{{SSB4MusicLink|Super Smash Bros.|Credits (Smash Bros.): Ver. 2}}'' | |||
:{{symbol|ssb|16px}} ''{{SSB4MusicLink|Super Smash Bros.|Boss Battle (Melee)|Boss Battle}}'' | |||
On a side note, if the player disables all the music pieces, then the music used on the Battlefield stage will always play. | |||
==Rewards== | |||
* Playing Smash Run 5 times awards the Lv. 2 Horizon Beam power. | |||
* Finishing first in the Final Battle awards the Lv. 1 Horizon Beam power. | |||
* Finishing first in the Final Battle 20 times awards the Lv. 3 Dual Cyclone power. | |||
* Finishing first in the Final Battle with 5 different fighters awards the Lv. 2 Spinning Blades power. | |||
* Finishing first in the Final Battle with every fighter awards the Lv. 3 Shuffle power. | |||
* Obtaining 10 different types of Powers awards the Lv. 2 Reflector power. | |||
* Obtaining 25 different types of Powers awards the Lv. 2 Instant Drop power. | |||
* Collecting every type of Power awards the Prince Hat headgear. | |||
==Origin== | |||
Smash Run is based in concept on {{s|wikirby|City Trial}} from ''{{s|wikirby|Kirby Air Ride}}'', another game directed by [[Masahiro Sakurai]], who explained that he wanted to recreate the mode in the game. In that mode, players would explore a large city to collect power-ups for their Air Ride Machines before proceeding to race or battle with those power-ups active. | |||
Originally, Sakurai wanted Smash Run to support co-op play, with features like healing a teammate or splitting damage among players, but the idea was dropped due to hardware limitations.<ref>{{cite web|url=https://sourcegaming.info/2015/07/04/english-smash4-project-proposal-slides/|title="Image Transcriptions of Project Proposal for Smash for Wii U/3DS" - Source Gaming}}</ref> | |||
==Gallery== | ==Gallery== | ||
| Line 85: | Line 374: | ||
Unknown_stage3ds.png|E3 2013 screenshot, when the mode was still a secret. | Unknown_stage3ds.png|E3 2013 screenshot, when the mode was still a secret. | ||
TreeAreaSSB4.jpg|{{SSB4|Mario}} in a wooded area, also before the mode was revealed. | TreeAreaSSB4.jpg|{{SSB4|Mario}} in a wooded area, also before the mode was revealed. | ||
SmashRunGameplay1.jpg|{{SSB4|Mario}} with [[Cryogonal]], [[Pooka]], [[Koopa Troopa]], and [[Koffing]]. | |||
SmashRunGameplay2.jpg|Mario defeating a [[Banzai Bill]]. | |||
SmashRun-3.png|{{SSB4|Wii Fit Trainer}} breaking [[target]]s. | SmashRun-3.png|{{SSB4|Wii Fit Trainer}} breaking [[target]]s. | ||
SmashRunGameplay3.jpg|Mario and Koffing, Pooka, and a [[Tiki Buzz]]. | |||
SmashRunGameplay4.jpg|Mario and [[Bronto Burt]]s. | |||
SmashRunGameplay5.jpg|Mario with [[Polar Bear]] and [[Chandelure]]. | |||
SmashRun-8.png|{{SSB4|Fox}} along with various power-ups. | SmashRun-8.png|{{SSB4|Fox}} along with various power-ups. | ||
Smash Run Stat Boost.jpg|Mario's shown stats for Smash Run. | |||
SSB4 - Pit Smash Run.jpg|{{SSB4|Pit}} participating in Smash Run. | SSB4 - Pit Smash Run.jpg|{{SSB4|Pit}} participating in Smash Run, along while using possibly a Level 4 Horizon Beam, one of the [[Power]]s. | ||
SSB4 - Smash Run Tac.jpg|{{SSB4|Donkey Kong}} fighting against enemies in Smash Run. | SSB4 - Smash Run Tac.jpg|{{SSB4|Donkey Kong}} fighting against enemies in Smash Run. | ||
Smash Run Dee Grab.jpg|{{SSB4|Charizard}} grabbing a [[Waddle Dee]]. | Smash Run Dee Grab.jpg|{{SSB4|Charizard}} grabbing a [[Waddle Dee]]. | ||
SSB4 - Smash Run Samus.jpg|Samus avoiding an [[Octorok]] and a [[Mettaur]]. | |||
Smash Run Map View.jpg|The map screen. | |||
SSB4 Smash Run Entry2-9.jpg|An event notification. | |||
SSB4 Smash Run Entry2-11.jpg|Default bottom screen showing equipped items. | |||
</gallery> | </gallery> | ||
== | ==Trivia== | ||
*The [https://youtu.be/Manvk-R4dBc?t=330 sound played at the introduction of the final battle] is the same sound played in ''[[Super Smash Bros. Brawl]]'' before facing a challenger in Classic Mode. | |||
*The highest the Climb! final battle reaches is [https://www.youtube.com/watch?v=0pBGmhzwsto 3,300 ft.]. The player can go higher, but the camera will not. | |||
**At 2000 ft., the layout of the area will change to exclusively consist of flat platforms. | |||
*At 19, the ''Kid Icarus'' series has the most amount of enemies present in Smash Run, followed by the ''Super Mario'' series at 14, and the ''Kirby'' series at 9. | |||
==References== | |||
{{reflist}} | |||
{{Smash Run}} | |||
{{SSB4-3Menus}} | |||
[[Category:Smash Run| ]] | |||
[[Category:Multiplayer modes]] | [[Category:Multiplayer modes]] | ||
[[Category:Modes (SSB4-3DS)]] | [[Category:Modes (SSB4-3DS)]] | ||
Latest revision as of 18:45, July 11, 2024
Smash Run (フィールドスマッシュ, Field Smash) is a gameplay mode that appears exclusively in Super Smash Bros. for Nintendo 3DS, and one of only two modes exclusive to that installment, alongside StreetSmash. It involves a blend of platforming and exploration, as well as standard fighting or another challenge in the second half of the mode.
Overview[edit]
The mode starts with a five-minute adventure course involving exploration of a large, expansive, and unnamed island in the sky shaped like a ship. Players are tasked with strengthening their attributes via finding items in chests, as well as defeating numerous enemies from both Brawl's The Subspace Emissary and other game series. Bonus stages hidden behind doors in the map also allow for players to take part in challenges that can give them further boosts to their various attributes and more prizes; special events that occur on the map can also provide further benefits to players, such as by defeating an exceptionally powerful enemy or finding a hidden room filled with chests. In Group mode, players can trigger traps that will drop giant Bob-ombs, by activating a switch item that can appear from treasure chests. Enemies, however, can attack the player and make them drop their power-ups sometimes; getting KO'd is also a possibility, leading to significant penalties to the player's stat boosts.
Several standard items can be found throughout the play area, including most battering items and state-granting powerups. The latter's effects last noticeably longer in this game mode, such as the Starman and Hammer.
Smash Run supports character customization like most of the other modes in the game. However, Smash Run expands on this formula, further adding a variety of unique "Powers" that can be granted to competitors; these are activated by tapping their respective icon on the 3DS's lower screens (ranging from healing, attacking, and boosting), and can only be used on the Smash Run map in order to activate their effect; Equipment-type Powers that grant a held item when the player spawns are applied the same way, but don't appear as an option on the screen while playing. The lower screen can also display a map of the Smash Run arena, alternating between screens by tapping the left-hand or top area of the touch screen.
When the five minutes have expired, all power-ups collected are added to the character's stats, and the players compete in one of a variety of "Final Battles", selected randomly, lasting one to two minutes.
After a Smash Run match, players will obtain the trophies, character customization items, gold, and powers that they collected while in the adventure course.
List of stat boosts[edit]
The following items can be found by defeating enemies, opening chests, and completing miniature missions within the mode. Touching these items increases a specific stat for the character, giving potential benefits in the game's final challenge. Additionally, every item can be found in different sizes, which alters how much of each stat will be boosted, depending on the size it might increase that stat by 3, 10, 30, 100 or 200 points. Stat boosts with clocks on them also appear, which give a large temporary boost of 500 points.[1] Players can have a maximum of 1000 points for each category. Fighters can also build up their stats by performing the actions corresponding to them.
In addition to pickups for the stats below, rare stars that pulsate a variety of colors can appear in the mode; grabbing them increases all of the player's stats. Taunting raises a random stat by 1. There is also a rare stat booster shaped as a 2x that is called a Stat Megaboost that will double all stat gains for a period of time. It appears on the stage rarely/in Challenge Doors that are Treasure Rooms, as well as very rarely being dropped by enemies.
| Icon | Name | Description |
|---|---|---|
 |
Speed (移動, Movement) | A green item resembling a boot. Increases walking speed, dashing speed, air speed, and traction. Naturally increases by approximately 1 per second while walking and 2 per second while running; the rate at which the stat increases is proportional to how much distance the character is covering (which means that faster characters can build this stat up faster). |
 |
Jump (ジャンプ, Jump) | A yellow item resembling a wing. Increases jump height and falling speed; affects all double jumps and wall jumps, but not shorthops. Naturally increases by approximately 0.75 for every jump performed. |
 |
Attack (通常ワザ, Normal Technique) | An orange item resembling a boxing glove. Increases damage of all normal attacks. Naturally increases for each normal attack used: neutral attacks are worth 0.5, tilts, dash attacks, and aerials are worth 1, and smashes are worth 2. |
 |
Special (必殺ワザ, Special Technique) | A red item shaped like a starburst. Increases damage of all special moves. Additionally, some special moves may gain increased range or a shortened charge time. Naturally increases by approximately 1.3 for each special move used. |
 |
Arms (投げ・アイテム, Throwing/Items) | A purple item resembling a sledge-hammer. Increases strength of projectiles, item attacks, healing effects from items, and throws. Additionally, grabbing range is increased, items of timed duration last longer, and the user is less likely to drop items when attacked. Naturally increases by 1 for each grab attempted, pummel or throw performed, and item attack/throw used. |
 |
Defense (防御, Defense) | A blue item resembling a generic shield. Makes it more difficult to launch characters; it is currently unknown whether this is an increase in weight or a decrease in knockback taken (which may also result in flinch resistance). Additionally, the shield becomes harder to break and the timing for a perfect shield becomes more lenient. Naturally increases by 1 every time the shield is raised or a dodge is used or damage is taken, scaling more depending on the damage/knockback taken; increases by 10 upon a broken shield. |
List of enemies[edit]
List of Challenges[edit]
After entering a door, the player must complete an objective to reveal a treasure chest containing rewards that range from 1, 2, or 3 stat boosts worth 200 points correlating with the difficulty level of the challenge that range from Easy, Normal, and Hard respectively. Stat boosts do not fade away in challenge rooms, but failing a challenge or being defeated will eject the player from the room, unable to re-enter. All doors disappear from the main map for the last minute of the run.
| Challenge | Picture | Description |
|---|---|---|
| Target Smash! | 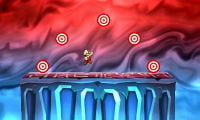 |
All targets in the room must be destroyed within the time limit.
|
| Crystal Smash! | 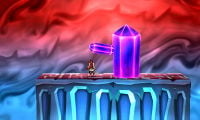 |
All crystals in the room must be destroyed within the time limit. Some crystals are attached to other, bigger ones: destroying a big crystal also destroys all of the attached small ones, while destroying a small crystal makes a crack, which acts as a weak point, appear in the bigger one. Crystals drop small power-ups when destroyed. Easy difficulty contains one crystal, normal difficulty four crystals, and hard difficulty also with four crystals, albeit higher durability. |
| Defeat Them All! | 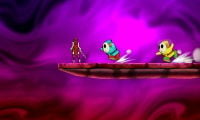 |
All enemies must be defeated within the time limit. Enemies appear in waves; all enemies in a wave must be defeated before the next wave appears. Until all enemies are defeated, the floor of the stage below the main platform alternates between being normal and being a Danger Zone, which instantly KOs anything on contact.
|
| Survive! | 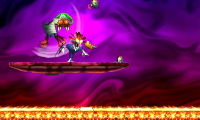 |
The room is filled with enemies and obstacles and the player is tasked with surviving until time runs out. With the exception of one hard mode variant, players must survive for 20 seconds.
|
| (Bonus Room) | 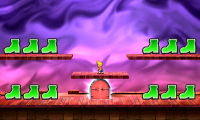 |
Instead of a proper challenge, this is just a rest room and contains various supplies to help the player in Smash Run. There is no limit to stay in this room. The All-Star Rest Area music also plays while inside.
Room layouts:
|
List of Events[edit]
A bar in the top corner of the screen will be marked with lines that show when random events are scheduled to occur during each five minute round of Smash Run. Most events last for a limited period of time, as indicated by a countdown timer. Any players who are inside a Challenge Door when an event begins, or enter a Challenge Door during an event, will not feel its impacts.
| Event | Description |
|---|---|
| Amped Up! | All players' speed and jump stats will be temporarily maxed out to 1,000. |
| Big Haul | Additional treasure chests appear throughout the map. Not affected by a time limit. |
| Bonus Time | Enemies temporarily drop more valuable stat boosts. |
| Doors Galore | Additional challenge doors appear throughout the map. Not affected by a time limit. |
| (Enemy) Fest | All enemies that appear on-screen will temporarily be of the same type. Possible enemies include Tiki Buzzes, Pookas, Shy Guys, Bullet Bills, Sneaky Spirits and Souflees. The former five events last for 20 seconds while the latter two lasts for 10. These enemies act as side spawns and do not interrupt the main spawns unless the area was cleared earlier. Any normal enemies still in the area when the event starts will disappear, however. |
| Fast Learner | All stat boost drops from enemies will temporarily be skewed to the same type and normal boosts by performing actions will have a greater effect. |
| Final Battle Forecast | Players are informed of which match type the final battle will be. |
| Gust of Wind | A strong gale temporarily fills the stage, pushing the player in random directions and making it difficult to traverse the map. |
| Heavenly Light | The Heavenly Light power is temporarily activated for each fighter, producing a vertical field above and below the player that does minor damage to nearby enemies. |
| Otherworldly Door | The locations of all Challenge doors will be temporarily revealed on the bottom screen map. An arrow will also direct players to the nearest door. |
| Shrunk | All players shrink to mini size as if they got hit by a Poison Mushroom. |
| Treasure Hunt | The locations of all treasure chests will be temporarily revealed on the bottom screen map. An arrow will also direct players to the nearest chest. |
| Treasure Trove | A secret room will appear in the center of the map, containing three chests. There is no time limit, but only the first player who reaches the room can claim the rewards. |
| Wanted! | A powerful enemy will appear at a random location on the map, with an arrow directing players to their location. Defeating these enemies yields greater rewards than usual, consisting of three or four 200 stat powerups. Clubberskull targets give five instead as they already give three of those upon defeat. Enemies will always be in accessible areas. Possible enemies include Bonkers, Bulborb, Clubberskull, Polar Bear and Reaper. This event has a timer of 90 seconds. |
| Warp | All fighters are teleported to a different location elsewhere in the map. This fails if it is triggered during a locked battle, or while the fighter is inside a Barrel Cannon. |
List of Final Battles[edit]
All challenges designated in the description as a "Smash" will randomly either be a four player free-for-all Smash, or a 2v2 Team Battle where players are assigned to Red and Blue Teams randomly. In the case of a team match, both players from the winning team are considered victorious. All matches are Timed and last one minute (plus Sudden Death as usual if required), unless otherwise specified.
| Match Type | Description |
|---|---|
| 300% Smash | A match where players start and respawn with 300% damage, akin to Super Sudden Death. |
| Climb! | Four player free-for-all, where the goal is to climb up to the goal on a vertical stage while avoiding Danger Zones. Smart Bombs begin to be dropped once the timer hits 30 seconds. |
| Easy LaunchPAL High-LaunchNA |
A match with an increased launch rate. |
| Explosive Smash | A match where only explosive items spawn. |
| Flower Smash | A match where all combatants have the flower condition. |
| Glorious Smash | A match on an Ω form stage with no items, as in For Glory. |
| Mega Smash | A match where all combatants have the Super Mushroom buff. |
| Mr. Saturn Smash | A match where only the Mr. Saturn spawns. |
| Multi-Man Smash | On Battlefield, each player independently vies to defeat as many opponents as possible under rules similar to Multi-Man mode, within a one minute time limit. Miis are the primary enemies, with the occasional Metal and Giant Metal versions of the player's character also appearing as enemies. |
| Mushroom Smash | A match where only Super Mushrooms and Poison Mushrooms spawn. |
| Reflect Smash | A match where all combatants wear Franklin Badges. |
| Run! | Four player free-for-all, where the goal is to reach the goal on one of two horizontally scrolling stages similar to Race to the Finish. Speed-based powerups such as the Bunny Hood, Superspicy Curry, and a temporary speed boost drop occasionally and there are many Danger Zones. Lasts two minutes. |
| Smash | A standard match. |
| Stamina Smash | A match where all combatants have Stamina instead of damage percentages. All players start with 200 HP. No time limit. |
| Stock Smash | A 2-Stock match with the Stock & Time rule set to one minute. |
| Vs. Enemy Team | Each player is tasked with defeating as many Smash Run enemies as possible in one minute. The damage values and scores of all players are displayed on the touch screen. Variants include:
|
| Warp Star Smash | A match where only the Warp Star spawns. Takes place only on Ω form stages |
Music[edit]
Players can set which music tracks can play during the five minute stat-gathering period by adding and removing them from a list; a randomly selected track from the player-chosen ones will play for each run. In addition to all the songs normally available on the game's multiplayer stages, there are additional "bonus" songs available for usage in Smash Run:
Menu
Menu 2 (Melee)
Rainbow Cruise
Stickerbush Symphony
Dark World / Dark World Dungeon
Ballad of the Goddess / Ghirahim's Theme
Temple Theme
The Legendary Air Ride Machine
Theme from Area 6 / Missile Slipstream
With Mila's Divine Protection (Celica Map 1)
Lost in Thoughts All Alone (DLC)
In the Space-Pirate Ship
Boss Fight 1
Dark Pit
Wrath of the Reset Bomb (Original)
Mechanical Rhythm
The Mysterious Murasame Castle Medley
Tetris: Type A
Air Man Stage
Spark Man Stage
PAC-MAN'S PARK / BLOCK TOWN
Credits (Smash Bros.): Ver. 2
Boss Battle
On a side note, if the player disables all the music pieces, then the music used on the Battlefield stage will always play.
Rewards[edit]
- Playing Smash Run 5 times awards the Lv. 2 Horizon Beam power.
- Finishing first in the Final Battle awards the Lv. 1 Horizon Beam power.
- Finishing first in the Final Battle 20 times awards the Lv. 3 Dual Cyclone power.
- Finishing first in the Final Battle with 5 different fighters awards the Lv. 2 Spinning Blades power.
- Finishing first in the Final Battle with every fighter awards the Lv. 3 Shuffle power.
- Obtaining 10 different types of Powers awards the Lv. 2 Reflector power.
- Obtaining 25 different types of Powers awards the Lv. 2 Instant Drop power.
- Collecting every type of Power awards the Prince Hat headgear.
Origin[edit]
Smash Run is based in concept on City Trial from Kirby Air Ride, another game directed by Masahiro Sakurai, who explained that he wanted to recreate the mode in the game. In that mode, players would explore a large city to collect power-ups for their Air Ride Machines before proceeding to race or battle with those power-ups active.
Originally, Sakurai wanted Smash Run to support co-op play, with features like healing a teammate or splitting damage among players, but the idea was dropped due to hardware limitations.[2]
Gallery[edit]
Mario in a wooded area, also before the mode was revealed.
Mario with Cryogonal, Pooka, Koopa Troopa, and Koffing.
Mario defeating a Banzai Bill.
Wii Fit Trainer breaking targets.
Mario and Koffing, Pooka, and a Tiki Buzz.
Mario and Bronto Burts.
Mario with Polar Bear and Chandelure.
Fox along with various power-ups.
Donkey Kong fighting against enemies in Smash Run.
Charizard grabbing a Waddle Dee.
Trivia[edit]
- The sound played at the introduction of the final battle is the same sound played in Super Smash Bros. Brawl before facing a challenger in Classic Mode.
- The highest the Climb! final battle reaches is 3,300 ft.. The player can go higher, but the camera will not.
- At 2000 ft., the layout of the area will change to exclusively consist of flat platforms.
- At 19, the Kid Icarus series has the most amount of enemies present in Smash Run, followed by the Super Mario series at 14, and the Kirby series at 9.
References[edit]
| Smash Run | |
|---|---|
| Enemies | Bacura · Banzai Bill · Bill Blaster · Bonkers · Boom Stomper · Bronto Burt · Bubble · Bulborb · Bullet Bill · Bumpety Bomb · Chain Chomp · Chandelure · Clubberskull · Cryogonal · Cucco · Daphne · Darknut · Devil Car · Eggrobo · Flage · Flame Chomp · Fly Guy · Gastly · Geemer · Generator · Ghost · Giant Goomba · Glice · Glire · Glunder · Goomba · Gordo · Hammer Bro · Iridescent Glint Beetle · Kihunter · Koffing · Koopa Paratroopa · Koopa Troopa · Kritter · Lakitu and Spinies · Lethinium · Lurchthorn · Magikoopa · Mahva · Megonta · Metroid · Mettaur · Mimicutie · Mite · Monoeye · Nutski · Octorok · Orne · Parasol Waddle Dee · Peahat · Petilil · Plasma Wisp · Polar Bear · Pooka · Poppant · Reaper & Reapette · ReDead · Reo · Roturret · Shotzo · Shy Guy · Skuttler · Sneaky Spirit · Souflee · Spike Top · Starman · Stalfos · Tac · Tiki Buzz · Waddle Dee · Waddle Doo · Zuree |
| Super Smash Bros. for Nintendo 3DS menu items | |
|---|---|
| Smash | Smash (Solo · Group · Time · Stock · Team Battle) · Rules |
| Smash Run | Solo · Group · Custom · Select Music |
| Games & More | Classic · All-Star · Stadium (Multi-Man Smash · Target Blast · Home-Run Contest) · Training · Custom · amiibo · Vault (Trophies · Trophy Rush · Album · Replays · Sounds · Records · Tips) · Options (Controls · Sound · Character Outline · Damage Display · Internet Options) |
| Online | Spectator Mode · With Anyone (For Fun · For Glory) · With Friends · Conquest · Share |
| Other | Challenge · StreetPass · Wii U |
