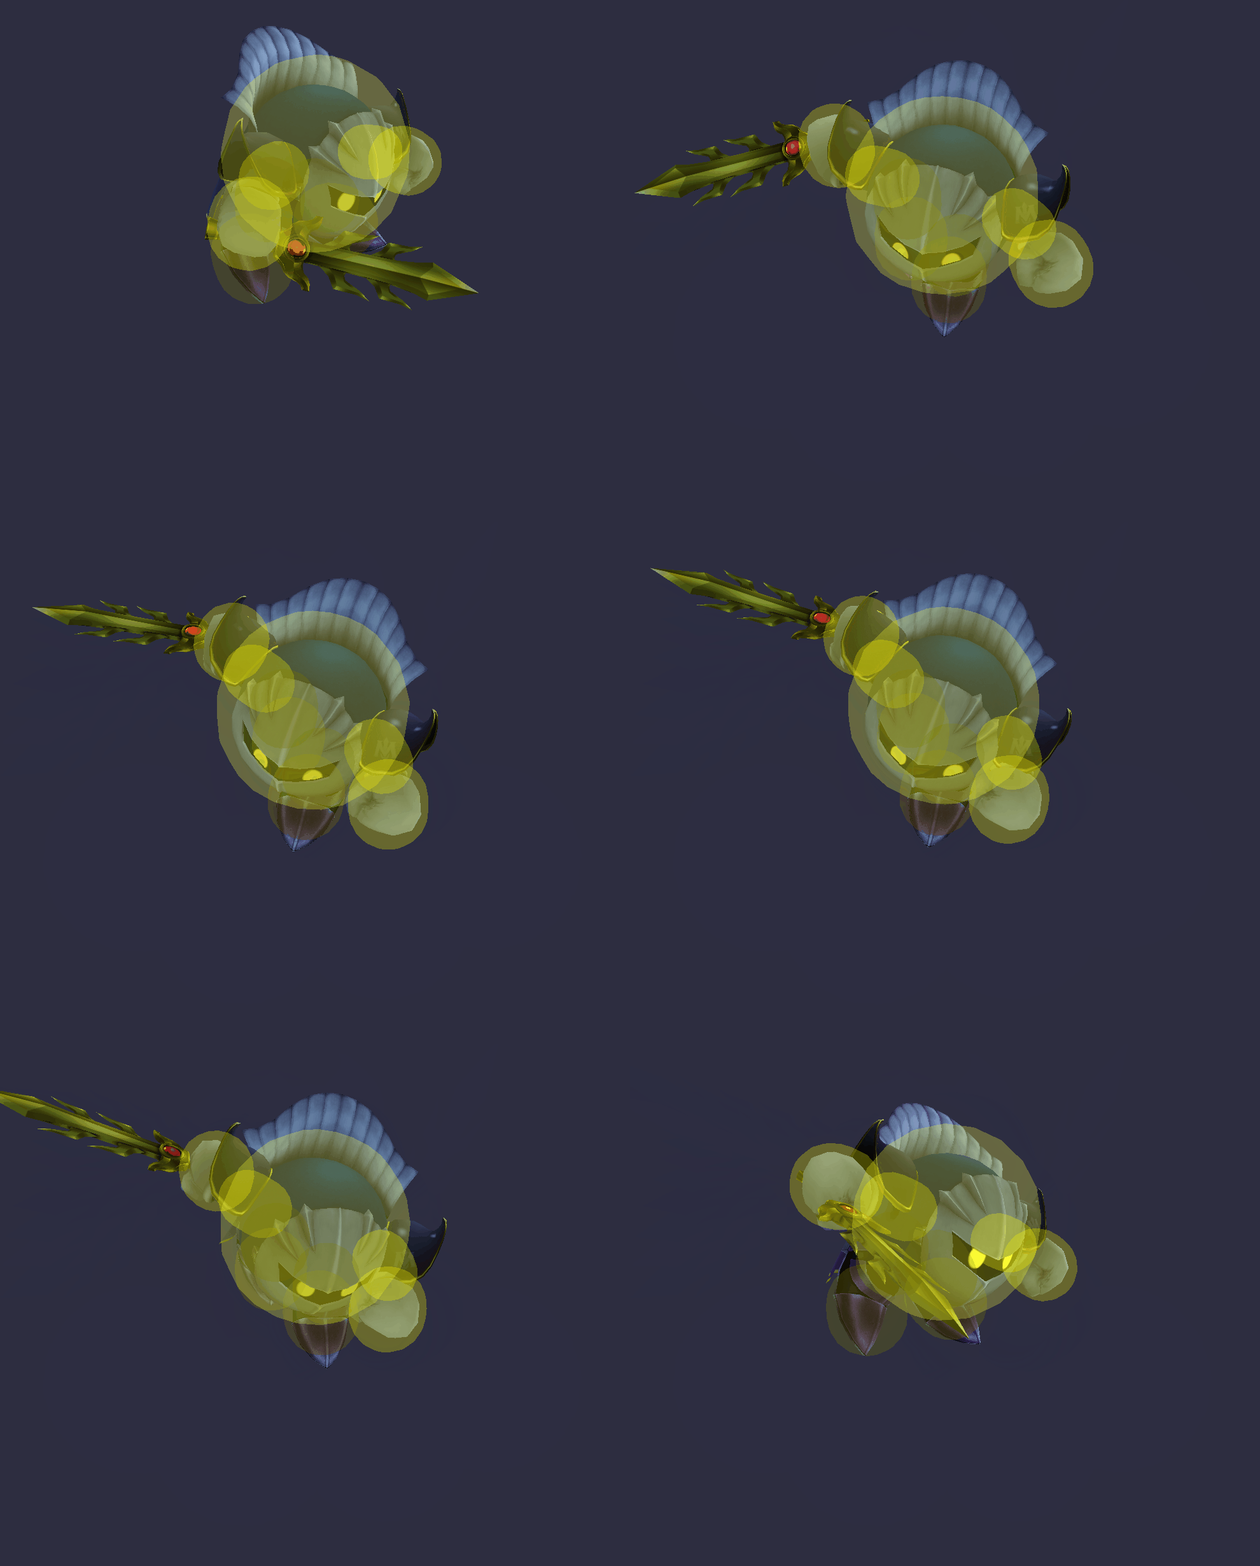
Meta Knight (SSBB)/Down aerial: Difference between revisions
m (adding new termination template) |
No edit summary |
||
| (7 intermediate revisions by 3 users not shown) | |||
| Line 1: | Line 1: | ||
{{ArticleIcons|ssbb=y}} | {{ArticleIcons|ssbb=y}} | ||
[[File:MetaKnightDAirSSBB.gif|thumb|400px|Hitbox visualization showing Meta Knight's down aerial.]] | |||
==Overview== | ==Overview== | ||
Meta Knight does a quick horizontal [[slash]] below him, doing 7%-9% [[damage]] and hits on frame 4. Like his up aerial, the move has transcendent priority, extremely little [[start-up lag]] but has a bit more [[ending lag]] but has very little regardless, making this move hard to [[punish]]. With its [[semi-spike]] trajectory and decent [[knockback]], it is one of the best [[edgeguarding]] and [[gimp]]ing moves in the game. It does great against opponents with poor horizontal recovery like {{SSBB|Ike}} and {{SSBB|Link}}. It can also be used to perform a variation of the [[wall of pain]] on many opponents. In addition, Meta Knight can "[[vertical space]]" with this move using a [[footstool jump]]→down aerial combo. This is rather situational, but can gimp easily, and if the opponent is hit into the stage, it can [[stage spike]], with a {{mvsub|Meta Knight|SSBB|up special|alt=Shuttle Loop}} being usable as a possible followup if the opponent [[tech]]s. | |||
Meta Knight does a quick horizontal slash below him, doing 7%-9% damage and hits on frame 4. Like his up aerial, the move has transcendent priority, extremely little [[start-up lag]] but has a bit more ending lag but has very little regardless, making this move hard to [[punish]]. With its [[semi-spike]] trajectory and decent knockback, it is one of the best [[edgeguarding]] and [[gimp]]ing moves in the game. It does great against opponents with poor horizontal recovery like {{SSBB|Ike}} and {{SSBB|Link}}. It can also be used to perform a variation of the [[wall of pain]] on many opponents. In addition, Meta Knight can "[[vertical space]]" with this move using a [[footstool jump]]→down aerial combo. This is rather situational, but can gimp easily, and if the opponent is hit into the stage, it can [[stage spike]], with a {{mvsub|Meta Knight|SSBB|up special|alt=Shuttle Loop}} being usable as a possible followup if the opponent [[tech]]s. | |||
This move is very effective when used for [[air camping]], being difficult for opponents to break through, and useful for [[spacing]] in conjunction with his {{mvsub|Meta Knight|SSBB|forward aerial}}. There are ways to combat this though, such as {{mvsub|Pikachu|SSBB|up aerial|poss=y}}. | This move is very effective when used for [[air camping]], being difficult for opponents to break through, and useful for [[spacing]] in conjunction with his {{mvsub|Meta Knight|SSBB|forward aerial}}. There are ways to combat this though, such as {{mvsub|Pikachu|SSBB|up aerial|poss=y}}. | ||
Overall, an excellent move that is reliable and not difficult to use in Meta Knight's metagame. | Overall, an excellent move that is reliable and not difficult to use in Meta Knight's metagame. | ||
==Hitboxes== | ==Hitboxes== | ||
| Line 25: | Line 22: | ||
|ypos=-384000 | |ypos=-384000 | ||
|zpos=-240000 | |zpos=-240000 | ||
|rawflags=00100010100000110000011000000010 | |||
|rawflags= | |||
}} | }} | ||
{{BrawlHitboxTableRow | {{BrawlHitboxTableRow | ||
| Line 45: | Line 36: | ||
|ypos=-384000 | |ypos=-384000 | ||
|zpos=240000 | |zpos=240000 | ||
|rawflags=00100010100000110000011000000010 | |||
|rawflags= | |||
}} | }} | ||
{{BrawlHitboxTableRow | {{BrawlHitboxTableRow | ||
| Line 65: | Line 50: | ||
|ypos=-204000 | |ypos=-204000 | ||
|zpos=-600000 | |zpos=-600000 | ||
|rawflags=00100010100000110000011001000010 | |||
|rawflags= | |||
}} | }} | ||
{{BrawlHitboxTableRow | {{BrawlHitboxTableRow | ||
| Line 85: | Line 64: | ||
|ypos=-204000 | |ypos=-204000 | ||
|zpos=600000 | |zpos=600000 | ||
|rawflags=00100010100000110000011001000010 | |||
|rawflags= | |||
}} | }} | ||
|} | |} | ||
| Line 116: | Line 89: | ||
|- | |- | ||
{{FrameStrip|t=Autocancel|c=3}}{{FrameStrip|t=Blank|c=20}}{{FrameStrip|t=Autocancel|c=2}} | {{FrameStrip|t=Autocancel|c=3}}{{FrameStrip|t=Blank|c=20}}{{FrameStrip|t=Autocancel|c=2}} | ||
{{FrameStripEnd}} | |||
===Landing lag=== | ===Landing lag=== | ||
Latest revision as of 20:31, May 19, 2024
Overview[edit]
Meta Knight does a quick horizontal slash below him, doing 7%-9% damage and hits on frame 4. Like his up aerial, the move has transcendent priority, extremely little start-up lag but has a bit more ending lag but has very little regardless, making this move hard to punish. With its semi-spike trajectory and decent knockback, it is one of the best edgeguarding and gimping moves in the game. It does great against opponents with poor horizontal recovery like Ike and Link. It can also be used to perform a variation of the wall of pain on many opponents. In addition, Meta Knight can "vertical space" with this move using a footstool jump→down aerial combo. This is rather situational, but can gimp easily, and if the opponent is hit into the stage, it can stage spike, with a Shuttle Loop being usable as a possible followup if the opponent techs.
This move is very effective when used for air camping, being difficult for opponents to break through, and useful for spacing in conjunction with his forward aerial. There are ways to combat this though, such as Pikachu's up aerial.
Overall, an excellent move that is reliable and not difficult to use in Meta Knight's metagame.
Hitboxes[edit]
Timing[edit]
Attack[edit]
| Initial autocancel | 1-3 |
|---|---|
| Hitboxes | 4-5 |
| Ending autocancel | 24- |
| Animation length | 25 |
Landing lag[edit]
| Animation length | 15 |
|---|
Lag time |
Hitbox |
Autocancel |
|
