The Great Maze: Difference between revisions
No edit summary |
No edit summary |
||
| (223 intermediate revisions by 100 users not shown) | |||
| Line 1: | Line 1: | ||
{{ArticleIcons|ssbb=y}} | |||
{{Infobox Stage | {{Infobox Stage | ||
| | |subtitle = [[Subspace]] | ||
|name = The Great Maze | |name = The Great Maze | ||
|image = [[ | |image = [[File:The Great Maze-Save Point.png|225px]][[File:TheGreatMazeMap.jpg|225px]] | ||
|caption = [[File:SmashBrosSymbol.svg|50px|class=invert-dark]]<br>A map of The Great Maze, showing where the false characters and bosses are. | |||
|universe = | |universe = {{uv|Super Smash Bros.}} | ||
|games = ''[[ | |games = ''[[Brawl]]'' | ||
|availability = Subspace Emissary | |availability = Subspace Emissary | ||
|precedingSSEstage = [[Subspace (Part II)]] | |||
}} | }} | ||
'''The Great Maze''' ({{ja|大迷宮|Dai Meikyū}}, ''Great Maze'') is the thirty-first and final stage of [[The Subspace Emissary]] in ''[[Super Smash Bros. Brawl]]''. After many sections of the [[World of Trophies]] are sent to [[Subspace]], [[Tabuu]] creates a large maze made of sections from most of the previously visited levels in the game. To complete this, the player must win a number of battles against [[False character#In The Great Maze|doppelgängers]] of almost all the [[fighter]]s in the game (excluding {{SSBB|Zero Suit Samus}}, {{SSBB|Sheik|}}, {{SSBB|Sonic}}, {{SSBB|Toon Link}}, {{SSBB|Wolf}}, and {{SSBB|Jigglypuff}}) and all of the [[boss]]es (except for {{SSBB|Master Hand}} and {{SSBB|Crazy Hand}}). | |||
[[File:SSEFinalBossDoor.jpg|thumb|left|The door that leads to the final battle against Tabuu.]] | |||
[[File:OpenedLastDoor.jpg|thumb|left|The door when opened. Tabuu's wings can be seen inside.]] | |||
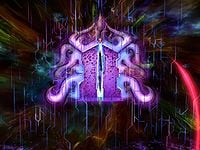
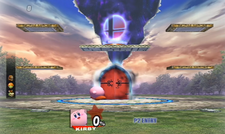
There is no specific order in which the player must beat all the enemies, and it is possible to play as any character that has been rescued so far. [[Save Point]]s and Warp points are dispersed throughout the maze. These two types of checkpoints are indicated by the ''Smash Bros.'' emblem mounted on a trophy stand and look like a forest clearing with a Subspace rip in the fabric of the sky. Save Points restore the player's stock to 4 (6 in later runs) and damage to 0%, as well as letting the player re-select characters or fiddle with stickers. Warp Points are identical but also allow teleportation between other visited Warp Points, as well as serving as both entry and exit points to and from the maze itself. | |||
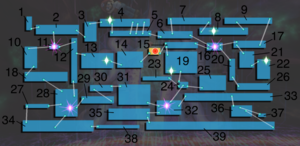
[[ | Pausing at any time displays a map of all visited rooms, as well as the player's current position inside a room and where [[door]]s and room-to-room links are. Once enough rooms have been visited to form a loop with the starting point, the map will also display all the locations of unbeaten characters and bosses with icons in the form of a monster head. | ||
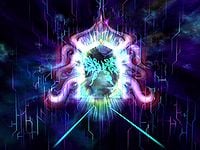
Once all battles are completed, a large purple door becomes accessible in the center of the maze, which leads to Tabuu's Residence. Any subspacial clone or boss that has not yet been defeated will be seen obstructing the door and can only vanish once each character or boss is defeated. Upon winning this final battle, in-story the Great Maze is spread apart and all the levels and locations of the [[World of Trophies]] are returned to their normal state. The [[Isle of the Ancients]], however, is not restored: the great number of Subspace Bombs going off in one place has caused it to cease existing. In-game, the Great Maze remains on the world map afterwards so that the player can reenter it whenever they want, and the stages on the Isle of the Ancients can be replayed again (having been made inaccessible after the first completion of [[The Subspace Bomb Factory II|the second Subspace Bomb Factory]]) | |||
{{clr}} | |||
== | ==Playable Characters== | ||
Five characters are always available to choose from in The Great Maze. {{SSBB|Ness}}, {{SSBB|Luigi}}, and {{SSBB|Kirby}} are revived by [[Dedede Brooch]]es, {{SSBB|King Dedede}} is revived by Luigi and Ness, and {{SSBB|Bowser}} is revived by King Dedede. {{SSBB|Sonic}} appears at the very end of the Great Maze and can join the fight against Tabuu. All other characters with the exception of {{SSBB|Toon Link}}, {{SSBB|Wolf}}, and {{SSBB|Jigglypuff}} must be revived as trophies in [[Subspace (Part I)|Sub]][[Subspace (Part II)|space]]. | |||
===Guaranteed=== | |||
*{{SSBB|Bowser}} | |||
*{{SSBB|King Dedede}} | |||
*{{SSBB|Kirby}} | |||
*{{SSBB|Luigi}} | |||
*{{SSBB|Ness}} | |||
===Revived in Part I=== | |||
*{{SSBB|Captain Falcon}} | |||
*{{SSBB|Diddy Kong}} | |||
*{{SSBB|Donkey Kong}} | |||
*{{SSBB|Falco}} | |||
*{{SSBB|Fox}} | |||
*{{SSBB|Ike}} | |||
*{{SSBB|Lucas}} | |||
*{{SSBB|Mario}} | |||
*{{SSBB|Marth}} | |||
*{{SSBB|Mr. Game & Watch}} | |||
*{{SSBB|Olimar}} | |||
*{{SSBB|Pikachu}} | |||
*{{SSBB|Pit}} | |||
*{{SSBB|Pokémon Trainer}} ({{SSBB|Squirtle}}, {{SSBB|Ivysaur}} and {{SSBB|Charizard}}) | |||
*{{SSBB|Samus}}/{{SSBB|Zero Suit Samus}} | |||
===Revived in Part II=== | |||
*{{SSBB|Ganondorf}} (only if Link and Zelda are revived) | |||
*{{SSBB|Ice Climbers}} | |||
*{{SSBB|Link}} | |||
*{{SSBB|Lucario}} | |||
*{{SSBB|Meta Knight}} | |||
*{{SSBB|Peach}} | |||
*{{SSBB|R.O.B.}} | |||
*{{SSBB|Snake}} | |||
*{{SSBB|Wario}} | |||
*{{SSBB|Yoshi}} | |||
*{{SSBB|Zelda}}/{{SSBB|Sheik}} | |||
===Joins the team to fight Tabuu=== | |||
*{{SSBB|Sonic}} | |||
==Stage recreations== | |||
Some parts of The Great Maze are combinations of older stages, with many having slight modifications and different music from than the originals. This includes [[The Forest]] with the [[Door#Day-changing doors|day-changing doors]] from [[The Lake]] and [[The Research Facility (Part II)|The Research Facility]] with the three-switch doors from the [[Subspace Bomb Factory (Part II)|Subspace Bomb Factory]]. Some of these stages sport new areas, such as the elevator rooms in The Halberd and The Research Facility, the mountain entrance to The Battlefield Fortress, the icy floors in The Ruined Zoo, the triple switch doors in the Research Facility, and the day-changing doors section in The Forest. In addition, all three of the Halberd's playable sections appear in the Great Maze despite the Halberd being destroyed and never entering Subspace. Lastly, some of the areas are laid out in such a way that the player will go through a level in the opposite direction, such as the Ruined Zoo, the Wilds, and the Battlefield Fortress. And since the [[R.O.B. Squad]] was destroyed in the Isle of the Ancients, they do not appear as enemies in the Great Maze. | |||
[[File:TGMLabelled.png|thumb|300px|The completed map with the rooms labelled. See table.]] | |||
{|class="wikitable" | {|class="wikitable" | ||
!Stage recreated!!Portion of stage!!Song | !Stage recreated!!Portion(s) of stage used!!Song(s) played | ||
|- | |- | ||
|[[Midair Stadium]]||[[Petey Piranha]] battle||''Airship Theme (Super Mario Bros. 3)'' | |rowspan="2"|[[Midair Stadium]]||[[Petey Piranha]] battle||''{{SSBBMusicLink|Super Mario Bros.|Airship Theme (Super Mario Bros. 3)}}'' | ||
|- | |||
|'''11.''' The stadium ('''Warp Point''')||''{{SSBBMusicLink|Super Smash Bros. Brawl|Step: Subspace}}'' | |||
|- | |||
|rowspan="2"|[[Skyworld (SSE)|Skyworld]]||'''1.''' Third section cube room||rowspan="2"|''{{SSBBMusicLink|Super Smash Bros. Brawl|Step: The Plain}}'' | |||
|- | |||
|'''3.''' Vertical half of the second section | |||
|- | |||
|[[Sea of Clouds]]||'''2.''' Horizontal pillar section (''original'') ||''Step: The Plain'' | |||
|- | |||
|[[The Jungle]]||'''20.''' Vertical section||''{{SSBBMusicLink|Donkey Kong|Jungle Level}}'' | |||
|- | |||
|[[The Lake]]||[[Rayquaza]] battle||''{{SSBBMusicLink|Pokémon|Victory Road}}'' | |||
|- | |- | ||
|rowspan=" | |rowspan="4"|[[The Ruined Zoo]]||[[Porky]] battle||''{{SSBBMusicLink|EarthBound|Porky's Theme}}'' | ||
|- | |- | ||
| | |'''9.''' Last section||rowspan="3"|''{{SSBBMusicLink|EarthBound|Snowman}}'' | ||
|- | |- | ||
|'''8.''' Sewer level (''icy left half is original'') | |||
|- | |- | ||
|[[ | |'''7.''' First half of the [[Porky Statue]] chase section | ||
|- | |- | ||
|rowspan=" | |rowspan="3"|[[The Battlefield Fortress]]||'''13.''' Alternate outdoor area (''original'')||rowspan="2"|''{{SSBBMusicLink|Fire Emblem|Crimean Army Sortie}}'' | ||
|- | |- | ||
|'''14.''' Most of the castle | |||
|- | |- | ||
| | |'''39.''' Second half of the underground mine cart area||''{{SSBBMusicLink|Super Smash Bros. Brawl|Step: The Cave}}'' | ||
|- | |- | ||
|The | |rowspan="2"|[[The Forest]]||'''4/5. '''Day-changing doors (''original'')||rowspan="2"|''{{SSBBMusicLink|The Legend of Zelda|The Dark World}}'' | ||
|- | |- | ||
|'''6.''' First part of the last section | |||
|- | |- | ||
| | |[[The Research Facility (Part I)|The Research Facility I]]||'''19.''' Single elevator section (''original'')||''{{SSBBMusicLink|Metroid|Opening/Menu (Metroid Prime)}}'' | ||
|- | |- | ||
| | |[[The Lake Shore]]||'''38.''' Outdoor Jyk area||''Step: The Plain'' | ||
|- | |- | ||
|rowspan=" | |rowspan="3"|[[The Path to the Ruins]]||'''10.''' A vertical pillar balance section (original)||rowspan="2"|''{{SSBBMusicLink|Super Mario Bros.|Gritzy Desert}}'' | ||
|- | |- | ||
|'''26.''' Most of the first area | |||
|- | |- | ||
| | |'''35.''' First part of the underground section||''Step: The Cave'' | ||
|- | |- | ||
|[[The | |[[The Cave]]||'''32.''' Combinations of all stage elements ('''Warp Point''') (''original'')||''Step: Subspace'' | ||
|- | |- | ||
|rowspan=" | |rowspan="3"|[[The Ruins]]||'''34.''' Almost all of the first main section||rowspan="2"|''{{SSBBMusicLink|Super Mario Bros.|Underground Theme (Super Mario Land)}}'' | ||
|- | |- | ||
|'''27.''' Flame bar part of the second section | |||
|- | |- | ||
| | |'''28.''' Elevator room with enemies ('''Warp Point''') (''original'')||''Step: Subspace'' | ||
|- | |- | ||
|[[The Wilds (Part I)|The Wilds I]]||[[Galleom]] battle||''Boss Battle Song 1'' | |rowspan="2"|[[The Wilds (Part I)|The Wilds I]]||[[Galleom]] battle||''{{SSBBMusicLink|Super Smash Bros. Brawl|Boss Battle Song 1}}'' | ||
|- | |- | ||
|rowspan=" | |'''31.''' First half of the second main area||rowspan="3"|''Step: The Plain'' | ||
|- | |- | ||
| | |rowspan="2"|[[The Wilds (Part II)|The Wilds II]]||'''29.''' Pre-elevator portion of the first area | ||
|- | |- | ||
|'''30.''' Spiky part of the second section | |||
|- | |- | ||
| | |rowspan="5"|[[The Swamp]]||'''15.''' First area||''Jungle Level'' | ||
|- | |- | ||
| | |'''16.''' Top part of the ladder section ('''Warp Point''')||''Step: Subspace'' | ||
|- | |- | ||
|3 | |'''36.''' Fraction of the rivertop spring section||rowspan="3"|''{{SSBBMusicLink|Donkey Kong|Bramble Blast}}'' | ||
|- | |- | ||
|'''33.''' Rivertop barrel section | |||
|- | |- | ||
|'''37.''' Cube room from above section | |||
|- | |- | ||
|rowspan="2"|[[ | |rowspan="2"|[[The Research Facility (Part II)|The Research Facility II]]||[[Ridley]] battle||''{{SSBBMusicLink|Metroid|Vs. Ridley}}'' | ||
|- | |- | ||
| | |'''23/24/25.''' 3-switch door and associated areas (''all original'')||''Opening/Menu (Metroid Prime)'' | ||
|- | |- | ||
|[[Battleship Halberd | |[[Outside the Ancient Ruins]]||'''18.''' First half of the main level||''Gritzy Desert'' | ||
|- | |||
|[[The Glacial Peak]]||'''12.''' Latter half of the climb||''{{SSBBMusicLink|Kirby|Frozen Hillside}}'' | |||
|- | |||
|rowspan="2"|[[Battleship Halberd Interior]]||'''21.''' Second area||rowspan="3"|''{{SSBBMusicLink|Kirby|Meta Knight's Revenge}}'' | |||
|- | |||
|'''22.''' Elevators in the Halberd (''original'') | |||
|- | |||
|[[Battleship Halberd Exterior]]||'''17.''' Right-side exterior (slightly condensed) | |||
|- | |- | ||
|[[Battleship Halberd Bridge]]||[[Duon]] battle||''Boss Battle Song 1'' | |[[Battleship Halberd Bridge]]||[[Duon]] battle||''Boss Battle Song 1'' | ||
|- | |- | ||
|[[Subspace Bomb Factory (Part II)|Subspace Bomb Factory II]]||[[Meta Ridley]] battle||''Vs. Ridley'' | |[[The Subspace Bomb Factory (Part II)|The Subspace Bomb Factory II]]||[[Meta Ridley]] battle||''Vs. Ridley'' | ||
|} | |} | ||
==Vs. stages== | |||
The fights against each false character are set on a unique stage. A gallery of these stages can be found [[/Vs Stages|here]]. | |||
==Tabuu's Residence== | |||
{{Infobox Stage | |||
|subtitle = [[Subspace]] | |||
|name = Tabuu's Residence | |||
|image = [[File:Tabuu stage.png|200px|Kirby across from Tabuu.]] | |||
|caption = [[File:SmashBrosSymbol.svg|50px|class=invert-dark]] | |||
|universe = {{uv|Super Smash Bros.}} | |||
|games = ''[[Brawl]]'' | |||
|availability = [[Adventure Mode: The Subspace Emissary|The Subspace Emissary]]<br/>[[Boss Battles Mode|Boss Battles]]<br/>[[Hacking]]}} | |||
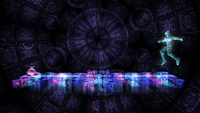
'''Tabuu's Residence''' is the common fan name given to the stage on which the player fights [[Tabuu]]. It is very similar to {{SSBB|Final Destination}}, consisting only of one similarly long and purple [[platform]], though slightly longer and differently patterned (with a central design similar to that on Tabuu's wings); and with its own background visuals, somewhat reminiscent of [[Final Destination (SSBM)|the version of Final Destination]] in ''[[Super Smash Bros. Melee]]''. Its [[Music (SSBB)#Super Smash Bros. Brawl|music]] is titled ''Boss Battle Song 2''. The stage can be accessed in other modes via [[hacking]] techniques. | |||
==Music== | ==Music== | ||
The Great Maze has many different music tracks in it, some of which only appear during the fights with the dark clones or the bosses. | The Great Maze has many different music tracks in it, some of which only appear during the fights with the dark clones or the bosses. Of these, only Pit, Fox, Falco, Captain Falcon, Snake, Olimar, and R.O.B.'s false character battle themes are not from their respective universes. | ||
*''Against | *''{{SSBBMusicLink|Fire Emblem|Against the Dark Knight}}'' - False Marth, False Ike | ||
*''Airship Theme (Super Mario Bros. 3)'' - Petey Piranha, | *''{{SSBBMusicLink|Super Mario Bros.|Airship Theme (Super Mario Bros. 3)}}'' - Petey Piranha, False Mario, False Yoshi, False Bowser, False Wario | ||
*''Battle For Storm Hill'' - | *''{{SSBBMusicLink|Donkey Kong|Battle For Storm Hill}}'' - False Donkey Kong, False Diddy Kong | ||
*''Boss Battle Song 1'' - Galleom, Duon | *''{{SSBBMusicLink|Super Smash Bros. Brawl|Boss Battle Song 1}}'' - Galleom, Duon | ||
*''Boss Battle Song 2'' - Tabuu | *''{{SSBBMusicLink|Super Smash Bros. Brawl|Boss Battle Song 2}}'' - Tabuu | ||
*''Bramble Blast'' - The Swamp Recreated | *''{{SSBBMusicLink|Donkey Kong|Bramble Blast}}'' - Most of The Swamp Recreated | ||
*''Castle/Boss Fortress (Super Mario World/SMB 3)'' - | *''{{SSBBMusicLink|Super Mario Bros.|Castle/Boss Fortress (Super Mario World/SMB 3)}}'' - False Peach, False Pit | ||
*''Crimean Army Sortie'' - | *''{{SSBBMusicLink|Fire Emblem|Crimean Army Sortie}}'' - Most of The Battlefield Fortress Recreated | ||
*''Flat Zone (Melee)'' - | *''{{SSBBMusicLink|Super Smash Bros.|Flat Zone (Melee)}}'' - False Mr. Game & Watch, False R.O.B. | ||
*''Frozen Hillside'' - | *''{{SSBBMusicLink|Kirby|Frozen Hillside}}'' - The Glacial Peak Recreated | ||
*''Gerudo Valley'' - | *''{{SSBBMusicLink|The Legend of Zelda|Gerudo Valley}}'' - False Link, False Zelda, False Ganondorf | ||
*''Gourmet Race'' - | *''{{SSBBMusicLink|Kirby|Gourmet Race}}'' - False Kirby, False Meta Knight, False King Dedede, False Olimar | ||
*''Gritzy Desert'' -Outside the Ancient Ruins Recreated, Path to the Ruins Recreated | *''{{SSBBMusicLink|Super Mario Bros.|Gritzy Desert}}'' - Outside the Ancient Ruins Recreated, most of The Path to the Ruins Recreated | ||
*''Ice Climber'' - | *''{{SSBBMusicLink|Nintendo|Ice Climber}}'' - False Ice Climbers | ||
*''Jungle Level'' - | *''{{SSBBMusicLink|Donkey Kong|Jungle Level}}'' - The Jungle Recreated, Part of The Swamp Recreated | ||
*''Luigi's Mansion Theme'' - | *''{{SSBBMusicLink|Super Mario Bros|Luigi's Mansion Theme}}'' - False Luigi | ||
*''Meta Knight's Revenge'' - Battleship Halberd Recreated | *''{{SSBBMusicLink|Kirby|Meta Knight's Revenge}}'' - Battleship Halberd Recreated | ||
*''Opening / Menu (Metroid Prime)'' - Research Facility Recreated | *''{{SSBBMusicLink|Metroid|Opening/Menu (Metroid Prime)}}'' - The Research Facility Recreated | ||
*''Porky's Theme'' - Porky Minch | *''{{SSBBMusicLink|EarthBound|Porky's Theme}}'' - Porky Minch | ||
*''Save Point'' - Inside Save Points, Door to Tabuu's Residence | *''{{SSBBMusicLink|Super Smash Bros. Brawl|Save Point}}'' - Inside Save Points, Door to Tabuu's Residence | ||
*''Sector 1'' - | *''{{SSBBMusicLink|Metroid|Sector 1}}'' - False Samus, False Fox, False Falco, False Captain Falcon, False Snake | ||
*''Snowman'' - The Ruined Zoo Recreated | *''{{SSBBMusicLink|EarthBound|Snowman}}'' - The Ruined Zoo Recreated | ||
*''Step: Subspace'' - | *''{{SSBBMusicLink|Super Smash Bros. Brawl|Step: Subspace}}'' - In the four main save points, with warp areas | ||
*''Step: The Cave'' - Part of The Ruins Recreated, Part of Battlefield Fortress Recreated | *''{{SSBBMusicLink|Super Smash Bros. Brawl|Step: The Cave}}'' - Part of The Path to the Ruins Recreated, Part of The Battlefield Fortress Recreated | ||
*''Step: The Plain'' - Skyworld Recreated, The Lake Shore Recreated, The Wilds Recreated | *''{{SSBBMusicLink|Super Smash Bros. Brawl|Step: The Plain}}'' - Skyworld Recreated, The Sea of Clouds Recreated, The Lake Shore Recreated, all of The Wilds I and most of The Wilds II Recreated | ||
*''The Dark World'' - The Forest | *''{{SSBBMusicLink|The Legend of Zelda|The Dark World}}'' - The Forest Recreated | ||
*''Underground Theme (Super Mario Land)'' - | *''{{SSBBMusicLink|Super Mario Bros.|Underground Theme (Super Mario Land)}}'' - The Ruins Recreated | ||
*''Unfounded Revenge / Smashing Song of Praise'' - | *''{{SSBBMusicLink|EarthBound|Unfounded Revenge/Smashing Song of Praise}}'' - False Ness, False Lucas | ||
*''Victory Road'' - Rayquaza, | *''{{SSBBMusicLink|Pokémon|Victory Road}}'' - Rayquaza, False Pikachu, False Pokémon Trainer, False Lucario | ||
*''Vs. Ridley'' - Ridley, Meta Ridley | *''{{SSBBMusicLink|Metroid|Vs. Ridley}}'' - Ridley, Meta Ridley | ||
==Trivia== | ==Trivia== | ||
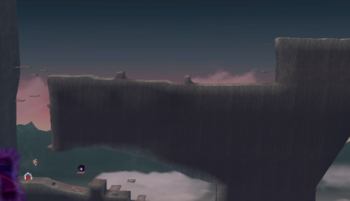
[[File:SSEUnused.png|thumb|350px|The unused section in the Great Maze. Everything above the Ice Climbers is completely inaccessible.]] | |||
* | *Most of the re-used sections from other levels contain inaccessible areas that were part of the original level. While no enemies, doors, or other special objects can spawn there, and the collision detection is typically inactive, all of the terrain, including most platforms, are still rendered outside of the camera's view. Only a couple of rooms had any inaccessible sections actually removed. | ||
**Since they were designed specifically for the Great Maze, new rooms do not have these areas, with one exception, in a room meant to resemble [[The Battlefield Fortress]]. Since this room never appears outside the Great Maze, this section is completely unused in the Subspace Emissary. It is unknown why this section exists; the most likely explanation is that the room was originally going to be larger, or was originally going to be used elsewhere as well. | |||
* | *Despite having only four stocks at a time available for the initial playthrough, six are available on all successive playthroughs. This is likely due to two reasons; the possibility that the player did not rescue any of the trophified fighters in the previous two levels, leaving them with only five characters for the entirety of the Great Maze (Bowser, King Dedede, Kirby, Luigi and Ness, with Sonic not appearing until the end) and that subsequent playthroughs do not allow for a refreshed stock post-cutscene before Tabuu. | ||
*To form a loop back to Midair Stadium, at least nine bosses/false characters must be defeated: Petey Piranha, Link, Diddy Kong, Samus, Ridley, Mario, Galleom, Lucas/Wario and Lucario/Rayquaza. | |||
* | **To unlock certain areas some bosses/Subspacial clones need to be defeated: Pit, Duon, Meta Knight, Porky, Captain Falcon, Donkey Kong, King Dedede, Falco, Meta Ridley, Pokémon Trainer, Zelda, Wario/Lucas, Rayquaza/Lucario, Ice Climbers and Ganondorf. | ||
***The Subspacial clones that have their door vanish are: Kirby, Yoshi, Snake, Mr. Game & Watch, Ness, Olimar, Pikachu, R.O.B., Bowser, Fox, Peach, Luigi, Ike and Marth. | |||
* | *If a [[Sacrificial KO]] is performed on a false character in the Great Maze while the player is on their last stock and holding an item, a glitch will occur where the player will reappear in the area they were previously in, no music will be played, and after a few seconds, the screen fades into the [[Continue|Continue screen]]. | ||
* | *Four stages do not appear in The Great Maze: [[The Plain]], [[The Ruined Hall]], [[The Canyon]] and [[The Subspace Bomb Factory I]]. | ||
*After the player finished this level, the Stage Clear page will not have the music that it has on any other stage. | |||
*This level is one of the six levels that do not have a cutscene to start it. [[The Plain]], [[The Ruins]], [[The Swamp]], [[The Research Facility (Part II)]] and [[The Subspace Bomb Factory (Part II)]] are the other levels to have this distinction. | |||
==External | ==External links== | ||
*[http://www.gamefaqs.com/console/wii/file/928518/52132 A guide to the Great Maze.] | *[http://www.gamefaqs.com/console/wii/file/928518/52132 A guide to the Great Maze.] | ||
*[http://www.smashbros.com/en_us/gamemode/modea/modea16.html Smash Bros. DOJO!! Update about the Great Maze] | *[http://www.smashbros.com/wii/en_us/gamemode/modea/modea16.html Smash Bros. DOJO!! Update about the Great Maze] | ||
{{SSBBStages}} | {{SSBBStages}} | ||
{{SubspaceArmy}} | |||
[[Category:Subspace Emissary Levels]] | [[Category:Subspace Emissary Levels]] | ||
[[ | [[es:El gran laberinto]] | ||
Latest revision as of 21:01, September 8, 2024
| Subspace The Great Maze | |
|---|---|
 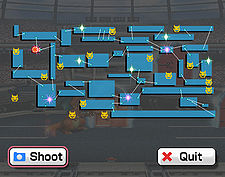  A map of The Great Maze, showing where the false characters and bosses are. | |
| Universe | Super Smash Bros. |
| Appears in | Brawl |
| Availability | Subspace Emissary |
| Preceding SSE stage | Subspace (Part II) |
The Great Maze (大迷宮, Great Maze) is the thirty-first and final stage of The Subspace Emissary in Super Smash Bros. Brawl. After many sections of the World of Trophies are sent to Subspace, Tabuu creates a large maze made of sections from most of the previously visited levels in the game. To complete this, the player must win a number of battles against doppelgängers of almost all the fighters in the game (excluding Zero Suit Samus, Sheik, Sonic, Toon Link, Wolf, and Jigglypuff) and all of the bosses (except for Master Hand and Crazy Hand).
There is no specific order in which the player must beat all the enemies, and it is possible to play as any character that has been rescued so far. Save Points and Warp points are dispersed throughout the maze. These two types of checkpoints are indicated by the Smash Bros. emblem mounted on a trophy stand and look like a forest clearing with a Subspace rip in the fabric of the sky. Save Points restore the player's stock to 4 (6 in later runs) and damage to 0%, as well as letting the player re-select characters or fiddle with stickers. Warp Points are identical but also allow teleportation between other visited Warp Points, as well as serving as both entry and exit points to and from the maze itself.
Pausing at any time displays a map of all visited rooms, as well as the player's current position inside a room and where doors and room-to-room links are. Once enough rooms have been visited to form a loop with the starting point, the map will also display all the locations of unbeaten characters and bosses with icons in the form of a monster head.
Once all battles are completed, a large purple door becomes accessible in the center of the maze, which leads to Tabuu's Residence. Any subspacial clone or boss that has not yet been defeated will be seen obstructing the door and can only vanish once each character or boss is defeated. Upon winning this final battle, in-story the Great Maze is spread apart and all the levels and locations of the World of Trophies are returned to their normal state. The Isle of the Ancients, however, is not restored: the great number of Subspace Bombs going off in one place has caused it to cease existing. In-game, the Great Maze remains on the world map afterwards so that the player can reenter it whenever they want, and the stages on the Isle of the Ancients can be replayed again (having been made inaccessible after the first completion of the second Subspace Bomb Factory)
Playable Characters[edit]
Five characters are always available to choose from in The Great Maze. Ness, Luigi, and Kirby are revived by Dedede Brooches, King Dedede is revived by Luigi and Ness, and Bowser is revived by King Dedede. Sonic appears at the very end of the Great Maze and can join the fight against Tabuu. All other characters with the exception of Toon Link, Wolf, and Jigglypuff must be revived as trophies in Subspace.
Guaranteed[edit]
Revived in Part I[edit]
- Captain Falcon
- Diddy Kong
- Donkey Kong
- Falco
- Fox
- Ike
- Lucas
- Mario
- Marth
- Mr. Game & Watch
- Olimar
- Pikachu
- Pit
- Pokémon Trainer (Squirtle, Ivysaur and Charizard)
- Samus/Zero Suit Samus
Revived in Part II[edit]
- Ganondorf (only if Link and Zelda are revived)
- Ice Climbers
- Link
- Lucario
- Meta Knight
- Peach
- R.O.B.
- Snake
- Wario
- Yoshi
- Zelda/Sheik
Joins the team to fight Tabuu[edit]
Stage recreations[edit]
Some parts of The Great Maze are combinations of older stages, with many having slight modifications and different music from than the originals. This includes The Forest with the day-changing doors from The Lake and The Research Facility with the three-switch doors from the Subspace Bomb Factory. Some of these stages sport new areas, such as the elevator rooms in The Halberd and The Research Facility, the mountain entrance to The Battlefield Fortress, the icy floors in The Ruined Zoo, the triple switch doors in the Research Facility, and the day-changing doors section in The Forest. In addition, all three of the Halberd's playable sections appear in the Great Maze despite the Halberd being destroyed and never entering Subspace. Lastly, some of the areas are laid out in such a way that the player will go through a level in the opposite direction, such as the Ruined Zoo, the Wilds, and the Battlefield Fortress. And since the R.O.B. Squad was destroyed in the Isle of the Ancients, they do not appear as enemies in the Great Maze.
| Stage recreated | Portion(s) of stage used | Song(s) played |
|---|---|---|
| Midair Stadium | Petey Piranha battle | Airship Theme (Super Mario Bros. 3) |
| 11. The stadium (Warp Point) | Step: Subspace | |
| Skyworld | 1. Third section cube room | Step: The Plain |
| 3. Vertical half of the second section | ||
| Sea of Clouds | 2. Horizontal pillar section (original) | Step: The Plain |
| The Jungle | 20. Vertical section | Jungle Level |
| The Lake | Rayquaza battle | Victory Road |
| The Ruined Zoo | Porky battle | Porky's Theme |
| 9. Last section | Snowman | |
| 8. Sewer level (icy left half is original) | ||
| 7. First half of the Porky Statue chase section | ||
| The Battlefield Fortress | 13. Alternate outdoor area (original) | Crimean Army Sortie |
| 14. Most of the castle | ||
| 39. Second half of the underground mine cart area | Step: The Cave | |
| The Forest | 4/5. Day-changing doors (original) | The Dark World |
| 6. First part of the last section | ||
| The Research Facility I | 19. Single elevator section (original) | Opening/Menu (Metroid Prime) |
| The Lake Shore | 38. Outdoor Jyk area | Step: The Plain |
| The Path to the Ruins | 10. A vertical pillar balance section (original) | Gritzy Desert |
| 26. Most of the first area | ||
| 35. First part of the underground section | Step: The Cave | |
| The Cave | 32. Combinations of all stage elements (Warp Point) (original) | Step: Subspace |
| The Ruins | 34. Almost all of the first main section | Underground Theme (Super Mario Land) |
| 27. Flame bar part of the second section | ||
| 28. Elevator room with enemies (Warp Point) (original) | Step: Subspace | |
| The Wilds I | Galleom battle | Boss Battle Song 1 |
| 31. First half of the second main area | Step: The Plain | |
| The Wilds II | 29. Pre-elevator portion of the first area | |
| 30. Spiky part of the second section | ||
| The Swamp | 15. First area | Jungle Level |
| 16. Top part of the ladder section (Warp Point) | Step: Subspace | |
| 36. Fraction of the rivertop spring section | Bramble Blast | |
| 33. Rivertop barrel section | ||
| 37. Cube room from above section | ||
| The Research Facility II | Ridley battle | Vs. Ridley |
| 23/24/25. 3-switch door and associated areas (all original) | Opening/Menu (Metroid Prime) | |
| Outside the Ancient Ruins | 18. First half of the main level | Gritzy Desert |
| The Glacial Peak | 12. Latter half of the climb | Frozen Hillside |
| Battleship Halberd Interior | 21. Second area | Meta Knight's Revenge |
| 22. Elevators in the Halberd (original) | ||
| Battleship Halberd Exterior | 17. Right-side exterior (slightly condensed) | |
| Battleship Halberd Bridge | Duon battle | Boss Battle Song 1 |
| The Subspace Bomb Factory II | Meta Ridley battle | Vs. Ridley |
Vs. stages[edit]
The fights against each false character are set on a unique stage. A gallery of these stages can be found here.
Tabuu's Residence[edit]
| Subspace Tabuu's Residence | |
|---|---|
| |
| Universe | Super Smash Bros. |
| Appears in | Brawl |
| Availability | The Subspace Emissary Boss Battles Hacking |
Tabuu's Residence is the common fan name given to the stage on which the player fights Tabuu. It is very similar to Final Destination, consisting only of one similarly long and purple platform, though slightly longer and differently patterned (with a central design similar to that on Tabuu's wings); and with its own background visuals, somewhat reminiscent of the version of Final Destination in Super Smash Bros. Melee. Its music is titled Boss Battle Song 2. The stage can be accessed in other modes via hacking techniques.
Music[edit]
The Great Maze has many different music tracks in it, some of which only appear during the fights with the dark clones or the bosses. Of these, only Pit, Fox, Falco, Captain Falcon, Snake, Olimar, and R.O.B.'s false character battle themes are not from their respective universes.
- Against the Dark Knight - False Marth, False Ike
- Airship Theme (Super Mario Bros. 3) - Petey Piranha, False Mario, False Yoshi, False Bowser, False Wario
- Battle For Storm Hill - False Donkey Kong, False Diddy Kong
- Boss Battle Song 1 - Galleom, Duon
- Boss Battle Song 2 - Tabuu
- Bramble Blast - Most of The Swamp Recreated
- Castle/Boss Fortress (Super Mario World/SMB 3) - False Peach, False Pit
- Crimean Army Sortie - Most of The Battlefield Fortress Recreated
- Flat Zone (Melee) - False Mr. Game & Watch, False R.O.B.
- Frozen Hillside - The Glacial Peak Recreated
- Gerudo Valley - False Link, False Zelda, False Ganondorf
- Gourmet Race - False Kirby, False Meta Knight, False King Dedede, False Olimar
- Gritzy Desert - Outside the Ancient Ruins Recreated, most of The Path to the Ruins Recreated
- Ice Climber - False Ice Climbers
- Jungle Level - The Jungle Recreated, Part of The Swamp Recreated
- Luigi's Mansion Theme - False Luigi
- Meta Knight's Revenge - Battleship Halberd Recreated
- Opening/Menu (Metroid Prime) - The Research Facility Recreated
- Porky's Theme - Porky Minch
- Save Point - Inside Save Points, Door to Tabuu's Residence
- Sector 1 - False Samus, False Fox, False Falco, False Captain Falcon, False Snake
- Snowman - The Ruined Zoo Recreated
- Step: Subspace - In the four main save points, with warp areas
- Step: The Cave - Part of The Path to the Ruins Recreated, Part of The Battlefield Fortress Recreated
- Step: The Plain - Skyworld Recreated, The Sea of Clouds Recreated, The Lake Shore Recreated, all of The Wilds I and most of The Wilds II Recreated
- The Dark World - The Forest Recreated
- Underground Theme (Super Mario Land) - The Ruins Recreated
- Unfounded Revenge/Smashing Song of Praise - False Ness, False Lucas
- Victory Road - Rayquaza, False Pikachu, False Pokémon Trainer, False Lucario
- Vs. Ridley - Ridley, Meta Ridley
Trivia[edit]
- Most of the re-used sections from other levels contain inaccessible areas that were part of the original level. While no enemies, doors, or other special objects can spawn there, and the collision detection is typically inactive, all of the terrain, including most platforms, are still rendered outside of the camera's view. Only a couple of rooms had any inaccessible sections actually removed.
- Since they were designed specifically for the Great Maze, new rooms do not have these areas, with one exception, in a room meant to resemble The Battlefield Fortress. Since this room never appears outside the Great Maze, this section is completely unused in the Subspace Emissary. It is unknown why this section exists; the most likely explanation is that the room was originally going to be larger, or was originally going to be used elsewhere as well.
- Despite having only four stocks at a time available for the initial playthrough, six are available on all successive playthroughs. This is likely due to two reasons; the possibility that the player did not rescue any of the trophified fighters in the previous two levels, leaving them with only five characters for the entirety of the Great Maze (Bowser, King Dedede, Kirby, Luigi and Ness, with Sonic not appearing until the end) and that subsequent playthroughs do not allow for a refreshed stock post-cutscene before Tabuu.
- To form a loop back to Midair Stadium, at least nine bosses/false characters must be defeated: Petey Piranha, Link, Diddy Kong, Samus, Ridley, Mario, Galleom, Lucas/Wario and Lucario/Rayquaza.
- To unlock certain areas some bosses/Subspacial clones need to be defeated: Pit, Duon, Meta Knight, Porky, Captain Falcon, Donkey Kong, King Dedede, Falco, Meta Ridley, Pokémon Trainer, Zelda, Wario/Lucas, Rayquaza/Lucario, Ice Climbers and Ganondorf.
- The Subspacial clones that have their door vanish are: Kirby, Yoshi, Snake, Mr. Game & Watch, Ness, Olimar, Pikachu, R.O.B., Bowser, Fox, Peach, Luigi, Ike and Marth.
- To unlock certain areas some bosses/Subspacial clones need to be defeated: Pit, Duon, Meta Knight, Porky, Captain Falcon, Donkey Kong, King Dedede, Falco, Meta Ridley, Pokémon Trainer, Zelda, Wario/Lucas, Rayquaza/Lucario, Ice Climbers and Ganondorf.
- If a Sacrificial KO is performed on a false character in the Great Maze while the player is on their last stock and holding an item, a glitch will occur where the player will reappear in the area they were previously in, no music will be played, and after a few seconds, the screen fades into the Continue screen.
- Four stages do not appear in The Great Maze: The Plain, The Ruined Hall, The Canyon and The Subspace Bomb Factory I.
- After the player finished this level, the Stage Clear page will not have the music that it has on any other stage.
- This level is one of the six levels that do not have a cutscene to start it. The Plain, The Ruins, The Swamp, The Research Facility (Part II) and The Subspace Bomb Factory (Part II) are the other levels to have this distinction.
External links[edit]
