Link (SSB): Difference between revisions
m (→Moveset) |
|||
| (5 intermediate revisions by 3 users not shown) | |||
| Line 93: | Line 93: | ||
|neutralcount=3 | |neutralcount=3 | ||
|neutralinf=y | |neutralinf=y | ||
|neutralname=Slash ({{ja|なぎ払い|Nagiharai}}) | |neutralname=Slash ({{ja|なぎ払い|Nagiharai}}, ''Mow-Down'')<br>Counter Slash ({{ja|返し|Kaeshi}}, ''Return'')<br>Stab ({{ja|突き|Tsuki}})<br>Illusion Thrust ({{ja|幻影突き|Gen'ei Tsuki}}, ''Phantom Stab'') | ||
|neutral1dmg=5% | |neutral1dmg=5% | ||
|neutral2dmg=3% | |neutral2dmg=3% | ||
| Line 102: | Line 102: | ||
|ftiltdmg=17% (hilt), 18% (blade) | |ftiltdmg=17% (hilt), 18% (blade) | ||
|ftiltdesc=A delayed downward swing. Somewhat slow but above average damage and knockback for a forward tilt. | |ftiltdesc=A delayed downward swing. Somewhat slow but above average damage and knockback for a forward tilt. | ||
|utiltname=Half-Moon Slash ({{ja|半月斬り|Hangetsu | |utiltname=Half-Moon Slash ({{ja|半月斬り|Hangetsu Giri}}) | ||
|utiltdmg=10%, 15% (NTSC-J) | |utiltdmg=10%, 15% (NTSC-J) | ||
|utiltdesc=Quickly swings the Master Sword in a small arc above him. Can be chained together and good for leading into combos, usually forward tilt or neutral aerial. The attack's trajectory is based on where they are positioned on hit; when facing right, there's a slight right angle, and vice versa. This move can usually KO a foe reliably above very high damages such as 200%. Changes heavily in Japanese version of Smash 64, doing 15% damage and being able to [[shield break]] and a better angle for combos. | |utiltdesc=Quickly swings the Master Sword in a small arc above him. Can be chained together and good for leading into combos, usually forward tilt or neutral aerial. The attack's trajectory is based on where they are positioned on hit; when facing right, there's a slight right angle, and vice versa. This move can usually KO a foe reliably above very high damages such as 200%. Changes heavily in Japanese version of Smash 64, doing 15% damage and being able to [[shield break]] and a better angle for combos. | ||
|dtiltname=Grasscutter ({{ja|草薙ぎ|Kusanagi}}) | |dtiltname=Grasscutter ({{ja|草薙ぎ|Kusanagi}}, ''Grass Mower'') | ||
|dtiltdmg=12% | |dtiltdmg=12% | ||
|dtiltdesc=A ground-level slash. Usually knocks foes upwards. At lower percentages, this can be followed by a forward smash, a forward tilt, or even a grab. At high percents, it loses combo potential due to sending opponents too far for a follow-up. | |dtiltdesc=A ground-level slash. Usually knocks foes upwards. At lower percentages, this can be followed by a forward smash, a forward tilt, or even a grab. At high percents, it loses combo potential due to sending opponents too far for a follow-up. | ||
|dashname=Dash Thrust ({{ja|ダッシュ突き|Dasshu Tsuki}}) | |dashname=Dash Thrust ({{ja|ダッシュ突き|Dasshu Tsuki}}, ''Dash Stab'') | ||
|dashdmg=16% (clean body), 11% (late body), 14% (clean blade), 10% (late blade) | |dashdmg=16% (clean body), 11% (late body), 14% (clean blade), 10% (late blade) | ||
|dashdesc=Comes to a stop mid-dash, stabbing in front of himself. Good range and speed, and can KO usually around 150%. Great for combo finishers. Moderate ending lag. | |dashdesc=Comes to a stop mid-dash, stabbing in front of himself. Good range and speed, and can KO usually around 150%. Great for combo finishers. Moderate ending lag. | ||
|fsmashname=Sword Slice ({{ja|スマッシュ斬り|Sumasshu Giri}}, ''Smash | |fsmashname=Sword Slice ({{ja|スマッシュ斬り|Sumasshu Giri}}, ''Smash Cutter'') | ||
|fsmashdmg=20% (clean), 12% (late), 24% (EUR clean), 14% (EUR late) | |fsmashdmg=20% (clean), 12% (late), 24% (EUR clean), 14% (EUR late) | ||
|fsmashdesc=Twirls his sword twice in hand, then slashes downward in a similar fashion to his forward tilt, but with more power and lag. Much stronger if hit with the main blade, with very good knockback, being the most powerful forward smash in the game (knockback wise). | |fsmashdesc=Twirls his sword twice in hand, then slashes downward in a similar fashion to his forward tilt, but with more power and lag. Much stronger if hit with the main blade, with very good knockback, being the most powerful forward smash in the game (knockback wise). | ||
|usmashname=Triple Sword Slice ({{ja|三段斬り|Sandan Giri}}) | |usmashname=Triple Sword Slice ({{ja|三段斬り|Sandan Giri}}, ''Three-Stage Cutter'') | ||
|usmashdmg=7% (hit 1), 3% (hit 2), 12% (hit 3), 22% (total), 8% (NTSC-J hit 1), 4% (NTSC-J hit 2), 24% (NTSC-J total) | |usmashdmg=7% (hit 1), 3% (hit 2), 12% (hit 3), 22% (total), 8% (NTSC-J hit 1), 4% (NTSC-J hit 2), 24% (NTSC-J total) | ||
|usmashdesc=Three quick, narrow slashes while looking upwards. Lacks range but good for damage racking, as long as the foe doesn't DI out of it. Best suited for heavier characters. This move is somewhat weak for KOing, but at lower percentages it can lead into itself, an aerial, or [[Spin Attack]]. In most other cases, an up aerial or simply some other juggling plan (usually a Bomb readied before the move) is recommended. | |usmashdesc=Three quick, narrow slashes while looking upwards. Lacks range but good for damage racking, as long as the foe doesn't DI out of it. Best suited for heavier characters. This move is somewhat weak for KOing, but at lower percentages it can lead into itself, an aerial, or [[Spin Attack]]. In most other cases, an up aerial or simply some other juggling plan (usually a Bomb readied before the move) is recommended. | ||
|dsmashname=Front and Back Sword Slice ({{ja|前後足元斬り|Zengo Ashimoto Giri}}) | |dsmashname=Front and Back Sword Slice ({{ja|前後足元斬り|Zengo Ashimoto Giri}}, ''Front and Back Underfoot Cutter'') | ||
|dsmashdmg=16% | |dsmashdmg=16% | ||
|dsmashdesc=Swiftly slashes in front of himself, then behind. A good close-range defensive move but also effective for KOing. This move is one of Link's few moves that come out near-instantaneously, and the ending lag is also rather low. Assuming Link is facing right, when the foe is hit on either side while being closest to Link, they will be sent upwards at a slightly angled trajectory. When hit at the end of Link's blade, it'll knock the foe in a 45° angle in the direction depending on what side they were hit on. | |dsmashdesc=Swiftly slashes in front of himself, then behind. A good close-range defensive move but also effective for KOing. This move is one of Link's few moves that come out near-instantaneously, and the ending lag is also rather low. Assuming Link is facing right, when the foe is hit on either side while being closest to Link, they will be sent upwards at a slightly angled trajectory. When hit at the end of Link's blade, it'll knock the foe in a 45° angle in the direction depending on what side they were hit on. | ||
| Line 123: | Line 123: | ||
|nairdmg=10% (clean), 8% (late) | |nairdmg=10% (clean), 8% (late) | ||
|nairdesc=An aerial [[sex kick]]. Best used as a defensive move due to its speed and lack of KO power. Moderately good combo move, and effective for [[edge-guarding]]. | |nairdesc=An aerial [[sex kick]]. Best used as a defensive move due to its speed and lack of KO power. Moderately good combo move, and effective for [[edge-guarding]]. | ||
|fairname=Spinning Sweep ({{ja|回転なぎ払い|Kaiten Nagiharai}}) | |fairname=Spinning Sweep ({{ja|回転なぎ払い|Kaiten Nagiharai}}, ''Rotating Mow-Down'') | ||
|fairdmg=20% (clean), 12% (late) | |fairdmg=20% (clean), 12% (late) | ||
|fairdesc=Does a swirling slash in a complete circle. Has two hitboxes: the early hit does 20% damage with a good amount of knockback, while a late hit deals less damage, but keeps its decent strength. It is not possible that the two hits will combine into each other. It is used competitively to end combos due to its knockback. | |fairdesc=Does a swirling slash in a complete circle. Has two hitboxes: the early hit does 20% damage with a good amount of knockback, while a late hit deals less damage, but keeps its decent strength. It is not possible that the two hits will combine into each other. It is used competitively to end combos due to its knockback. | ||
|bairname=Double Kick ({{ja|二段蹴り|Nidan Geri}}) | |bairname=Double Kick ({{ja|二段蹴り|Nidan Geri}}, ''Two-Stage Kick'') | ||
|bairdmg=10% (hits 1-2), 20% (total) | |bairdmg=10% (hits 1-2), 20% (total) | ||
|bairdesc=Two kicks behind himself. They combo into each other for a good amount of knockback, though the second hit can be DI'd out of. In addition, it is risky to use this move near a ledge due to the length of this move, as Link's recovery may not always be good enough to make it back to the stage. Very useful for combos. | |bairdesc=Two kicks behind himself. They combo into each other for a good amount of knockback, though the second hit can be DI'd out of. In addition, it is risky to use this move near a ledge due to the length of this move, as Link's recovery may not always be good enough to make it back to the stage. Very useful for combos. | ||
|uairname=Up Thrust ({{ja|上突き|Ue Tsuki}}) | |uairname=Up Thrust ({{ja|上突き|Ue Tsuki}}, ''Up Stab'') | ||
|uairdmg=16% | |uairdmg=16% | ||
|uairdesc=Stabs upward, similarly to his {{iw|zeldawiki|Up Thrust}} from ''Zelda II: The Adventure of Link''. Decent KO power, can also juggle. Link's blade carries the move's hitbox. Useful on platforms to extend combos. | |uairdesc=Stabs upward, similarly to his {{iw|zeldawiki|Up Thrust}} from ''Zelda II: The Adventure of Link''. Decent KO power, can also juggle. Link's blade carries the move's hitbox. Useful on platforms to extend combos. | ||
|dairname=Downward Thrust ({{ja|下突き|Shita | |dairname=Downward Thrust ({{ja|下突き|Shita Zuki}}, ''Down Stab'') | ||
|dairdmg=16%, 18% (NTSC-J) | |dairdmg=16%, 18% (NTSC-J) | ||
|dairdesc=Aims his sword directly below him for a long duration, similarly to his {{iw|zeldawiki|Down Thrust}} from ''Zelda II: The Adventure of Link''. This has great horizontal knockback. It is possible to hit the same enemy twice to have this move inflict 32% altogether. This move can be used to KO recovering foes by jumping directly at them, but this is only safe if the bounce of the connected hit allows Link to return to the stage. It should be noted that this move's downwards descent can be hastened by fast falling, although doing so is unwise near ledges. Has substantial landing lag when the player lands on the ground while using the move if not [[Z-cancel]]led. Usually considered to be Link's best aerial for shield pressure when Z-cancelled. Used competitively to end combos due to its knockback. Along with [[Pikachu]]'s, this is the only down aerial in SSB to lack a [[meteor smash]] hitbox. | |dairdesc=Aims his sword directly below him for a long duration, similarly to his {{iw|zeldawiki|Down Thrust}} from ''Zelda II: The Adventure of Link''. This has great horizontal knockback. It is possible to hit the same enemy twice to have this move inflict 32% altogether. This move can be used to KO recovering foes by jumping directly at them, but this is only safe if the bounce of the connected hit allows Link to return to the stage. It should be noted that this move's downwards descent can be hastened by fast falling, although doing so is unwise near ledges. Has substantial landing lag when the player lands on the ground while using the move if not [[Z-cancel]]led. Usually considered to be Link's best aerial for shield pressure when Z-cancelled. Used competitively to end combos due to its knockback. Along with [[Pikachu]]'s, this is the only down aerial in SSB to lack a [[meteor smash]] hitbox. | ||
|grabname=[[Hookshot]] ({{ja|フックショット|Fukkushotto}}) | |grabname=[[Hookshot]] ({{ja|フックショット|Fukkushotto}}) | ||
|grabdesc=Uses the Hookshot while standing. Link, along with {{SSB|Samus}} and {{SSB|Yoshi}}, has an "extended grab". This allows him to grab opponents from a distance, but the grab is very laggy if it misses. This can lead to various unique combos due to Link's high grab range. | |grabdesc=Uses the Hookshot while standing. Link, along with {{SSB|Samus}} and {{SSB|Yoshi}}, has an "extended grab". This allows him to grab opponents from a distance, but the grab is very laggy if it misses. This can lead to various unique combos due to Link's high grab range. | ||
|fthrowname=Kick Off ({{ja|蹴り飛ばし|Keri Tobashi}}) | |fthrowname=Kick Off ({{ja|蹴り飛ばし|Keri Tobashi}}, ''Kick Fly-Off'') | ||
|fthrowdmg=14% (throw), 8% (collateral) | |fthrowdmg=14% (throw), 8% (collateral) | ||
|fthrowdesc=Kicks his foe forward with good power. Often throws the foe far enough to set up a quick boomerang or bomb-based edgeguard, or simply one of Link's aerials. | |fthrowdesc=Kicks his foe forward with good power. Often throws the foe far enough to set up a quick boomerang or bomb-based edgeguard, or simply one of Link's aerials. | ||
|bthrowname=Reverse Kick Off ({{ja|後方蹴り飛ばし|Kōhō Keri Tobashi}}, ''Backward Kick'') | |bthrowname=Reverse Kick Off ({{ja|後方蹴り飛ばし|Kōhō Keri Tobashi}}, ''Backward Kick Fly-Off'') | ||
|bthrowdmg=16% (throw), 8% (collateral) | |bthrowdmg=16% (throw), 8% (collateral) | ||
|bthrowdesc=Takes the foe and kicks them directly behind him. Somewhat better KO power than his forward throw. | |bthrowdesc=Takes the foe and kicks them directly behind him. Somewhat better KO power than his forward throw. | ||
| Line 225: | Line 225: | ||
==In Single-player== | ==In Single-player== | ||
*In the game's single-player mode, Link is the first character the player battles; he is faced on [[Hyrule Castle]]. | *In the game's single-player mode, Link is the first character the player battles; he is faced on [[Hyrule Castle]]. | ||
*If the player is against Link in Single Player Mode on | *If the player is against Link in Single Player Mode on Normal or below, he will not attack or move until the player makes the first few strikes or after a period of time. | ||
==Techniques== | ==Techniques== | ||
| Line 277: | Line 277: | ||
**Additionally, the boomerang uses its design from ''{{iw|zeldawiki|The Legend of Zelda: A Link to the Past}}'' rather than ''Ocarina of Time''. | **Additionally, the boomerang uses its design from ''{{iw|zeldawiki|The Legend of Zelda: A Link to the Past}}'' rather than ''Ocarina of Time''. | ||
*In the PAL version of ''Smash 64'', Link is the second heaviest character and no longer shares his weight with {{SSB|Captain Falcon}}. | *In the PAL version of ''Smash 64'', Link is the second heaviest character and no longer shares his weight with {{SSB|Captain Falcon}}. | ||
*On the [[Character selection screen]], Link's portrait greatly resembles his artwork from ''Ocarina of Time''. | *On the [[Character selection screen]], Link's portrait greatly resembles {{file link|Link OoT.png|his artwork}} from ''Ocarina of Time''. | ||
*This is the only game in which Link is the only ''Legend of Zelda'' fighter. | *This is the only game in which Link is the only ''Legend of Zelda'' fighter. | ||
Latest revision as of 03:45, January 15, 2025
| Link in Super Smash Bros. | |
|---|---|
| |
| Universe | The Legend of Zelda |
| Other playable appearances | in Melee in Brawl in SSB4 in Ultimate |
| Availability | Starter |
| Tier | C (11) (North America) ? (9) (Japan) |
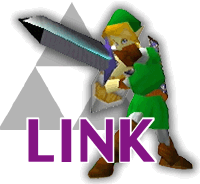
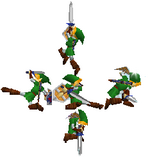
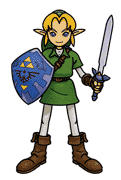
Link (リンク, Link) appears as a starter character in Super Smash Bros. He is the sole fighter from The Legend of Zelda series. Link is perhaps the most well-equipped character with either long ranged and melee options of attack, with two projectiles (which would become three in later iterations), his long-reaching Master Sword and his Hookshot. His design is based on his appearance as an adult in The Legend of Zelda: Ocarina of Time.
Link is voiced by Nobuyuki Hiyama, who reprises his role from The Legend of Zelda: Ocarina of Time through re-purposed voice clips.
Link is currently ranked 11th on the tier list, the second lowest ranked character, outranking only Luigi. His placement in Smash 64 is also tied with his later iteration in Brawl as his worst placement in the series. Link is known in high level competitive play as a very defensive character, relying on bombs and Boomerangs to prevent gimps and using his up tilt and up and back aerials for combos, while using his forward and down smash, down aerial, and projectiles for edgeguarding. Having many disjointed melee attacks and his aforementioned two projectiles, Link can be a hassle to approach, while also having an average approach himself courtesy of his extremely high traction.
However, his lack of speed and maneuverability limit his ability to safely approach. As a result, Link's game plan is largely attacking from afar with thrown projectiles and waiting for an opening. Due to his slow ground movement and attacks, it is imperative for Link players to be able to not only short hop but be able to input an attack immediately afterward. Link's recovery is awful, with little vertical or horizontal distance, high endlag when landing on stage, and inability to b-reverse. It is widely considered to be one of the worst recoveries in the series, making offstage play very risky. He is also very easy to combo due to his weight and being a fast faller. Link's recovery and combo vulnerability make many of his matchups difficult. Link is slightly better in the European PAL version due to having faster air speed (improving his recovery and some of his combo ability), and his forward smash dealing 4% more damage, and much better in the Japanese version where he is ranked 9th on the tier list, due to Link's up tilt having more reliable combo ability and sending opponents on a more favorable angle to combo, as well as his bombs being much easier to use in combos. Regardless, he has poor matchups on the NTSC-U version, and poor results due to his small playerbase.
Attributes[edit]
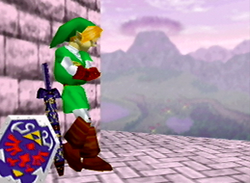
In general, Link's attacks are slow, long-ranged, and powerful. This gives him good KOing ability, with his down aerial and forward smash being especially powerful finishers. However, his moves are laggy and easy to punish if they aren't landed. His grab is also ranged, being one of the three tether grabs in the game, but it is also very slow and leaves Link very vulnerable if it misses. Link himself is also rather slow, with the second lowest dashing speed in the game and very short jumps. Despite this, his air speed and walking speed are above average. Link is also very stable in terms of gameplay.
Link has some powerful finishers as well. His forward tilt is among the strongest, but also slow for one. His forward smash is powerful but slow for a forward smash. Spin Attack is a powerful move both on the ground and the air.
Link is known for relying on his two projectiles (his Boomerang and bomb) to keep his opponents away and prevent them from approaching. His projectiles can which can lead to some combos. They can also be used to edgeguard. However, while Link can camp well himself, he has trouble dealing with projectile camping from some characters (especially Fox), due to his poor mobility and jumps.
Link is also heavy, which means he is harder to KO than normal, but it along with his size also makes him easier to combo. Link has some combo moves himself, including his up tilt, back aerial, and up aerial, as well as his aforementioned projectiles. His down aerial, forward smash, down smash, and projectiles are his main edgeguarding moves. He is one of the only two characters in the game (along with Pikachu) to not have a meteor smash, which can give him some minor trouble edgeguarding.
Link's biggest problem is his recovery, which many agree is one of the worst in the series as well as the worst one of the game itself. Link's short jumps, fast falling speed (the second fastest in the NTSC-U version and the fastest in the NTSC-J version) and extremely poor distance given by Spin Attack (it even descends before the animation is over), with no options to extend it. Link is also edgeguarded and gimped easily.
Link is low on the tier list because he is very easy to combo and edgeguard, which allows many characters to get him offstage quickly and finish him off, if not zero-deathing him outright. Link relies solely on his projectile camping to avoid this. Link is not helped by the fact that Dream Land is the only legal stage in competitive play. When Hyrule Castle was legal, he could rely on projectile camping there far more than on Dream Land.
Differences between game versions[edit]
NTSC-J to NTSC-U[edit]
Link was significantly nerfed in his transition to the NTSC-U version compared to his original Japanese incarnation. Link's gravity was increased which reduced the height of his jumps and Spin Attack, notably making his recovery even more limited than it already was. A handful of Link's moves were also made noticeably less effective. Up tilt received a huge damage/knockback reduction which both significantly hindered Link's combo potential at lower percents and his shield pressuring potential. Down aerial also saw a significant power reduction which made it far less effective as a combo ender. While the higher SDI presence/hitlag does make it easier for Link to escape combos, this overall does not help Link too much (due to his susceptibility to combos) and Link's higher gravity made him more susceptible to combos. In addition to this, these factors also hindered some of Link's main combo tools, particularly up smash and back aerial due to their multi hitting nature. Link is overall significantly worse in the NTSC-U version, as his combo game is weaker and his biggest weakness (his recovery) was made even worse. Link ended up going from a solid mid tier in the Japanese version to one of the worst characters in the North American version.
Aesthetics[edit]
 The reflective metal visuals on Link's Master Sword have been removed, making his sword look more plastic and cartoonish.
Attributes[edit]
 Link walks slightly slower (0.4 → 0.37).
 Link's gravity is higher (3.2 → 3.4). While this does improve his vertical endurance and his ability to land, it also makes him more susceptible to combos and more notably, it reduces the height of his jumps and his Spin Attack, hindering his already poor recovery.
 Link's shield is slightly larger (260 → 280).
Ground attacks[edit]
 Up tilt deals 5% less damage (15% → 10%), without compensation on its knockback values. This not only greatly hinders the move's KO potential and its combo potential at lower percents but this also greatly hinders the move's shield pressuring potential, going from being able to chain into itself on shield to now leaving Link at a frame disadvantage on shield (if the move is landed from the front).
 However, the move's lower power also improves its combo potential at higher percents.
 Up tilt launches opponents at a lower angle (90° → 79°).
 Up tilt has smaller hitboxes (120u/90u → 100u/80u) and the far hitbox has been moved closer to Link (z offset: 260 → 240).
 Up smash deals less damage (8% (hit 1)/4% (hit 2)/24% (total) → 7%/3%/22%).
Aerial attacks[edit]
 Down aerial deals less damage (18% → 16%) and has lower base knockback (30 → 25), significantly hindering its KO potential.
 Down aerial's tip has a smaller hitbox (180u → 150u).
Special attacks[edit]
 Spin Attack grants less height due to Link's higher gravity.
 Bombs deal less damage when they explode (8% → 5%).
 Bombs deal more damage when thrown (4% → 5%).
 Bombs deal more knockback when they explode, improving their combo potential.
NTSC-U to PAL (EUR)[edit]
Link has been noticeably buffed in the transition to the European PAL version. His air speed is much higher (now being almost as high as Pikachu's) and he is also significantly heavier which noticeably increases his survivability. Link's recovery covers significantly more distance (although it still remains linear and exploitable) and his higher weight means that a vast majority of hits do not send him as far, giving him the potential to live for significantly longer. Link's forward smash also saw a rather large increase to its power, making it significantly more powerful as a combo ender. Link's combo game in general was improved as his higher air speed gave him access to combos he could not perform previously (or in situations where certain combos would not work) and his stronger forward smash allows him to get KOes off combos where he previously could not score KOes. Ultimately, Link is considerably stronger in the European version than in the North American version, although he is still regarded to be slightly weaker than his Japanese counterpart, being considered to be no higher than mid tier.
 Link is significantly heavier (0.96 → 0.9) going from being tied for the 4th heaviest to the 2nd heaviest.
 Link's air speed is much higher (31 → 37) going from being tied for the 5th highest to the 3rd highest.
 Link's air acceleration is higher (0.04 → 0.05).
 Link's fast falling speed was significantly increased (102 → 110).
 Link's double jump is slightly lower (0.9 → 0.88).
 Forward smash deals more damage (20% (clean)/12% (late) → 24%/14%) without compensation on its knockback values, significantly improving its KO potential to the point of becoming the strongest forward smash in the game by a significant margin.
PAL (EUR) to PAL (AUS)[edit]
In a rather unique case, Link was changed in the Australian version, being the only character in the game who differs between the European and Australian versions. Link was heavily nerfed in his transition to the Australian PAL version, even beyond his NTSC-U counterpart. The higher weight and stronger forward smash Link received in the European version were reverted to how they were in the NTSC versions, hindering his endurance and KO potential. His air speed received a rather drastic decrease, being a considerable amount lower than in the NTSC versions and his double jump gains even less height. Both of these factors not only made Link's recovery the worst it had ever been by a significant margin but they also made Link's combo potential the worst it had ever been. Link's lower air speed removed combos Link could do in every other version while his lower double jump also meant that certain combos would stop working sooner. As a result of these factors, Link is considerably worse than in any other version, likely being the absolute worst character in the Australian version.
 Link is significantly lighter (0.9 → 0.96), with Link being reverted to his NTSC weight.
 Link's air speed is drastically lower (37 → 27), going from the 3rd highest to the 3rd lowest.
 Link's double jump is lower (0.88 → 0.85).
 Link's starting horizontal air velocity multiplier for his double jump is slightly lower (0.35 → 0.34).
 Forward smash deals less damage (24% (clean)/14% (late) → 20%/12%) without compensation on its knockback values, significantly hindering its KO potential and reverting its power back to its NTSC counterparts.
Moveset[edit]
| Name | Damage | Description | ||
|---|---|---|---|---|
| Neutral attack | Slash (なぎ払い, Mow-Down) Counter Slash (返し, Return) Stab (突き) Illusion Thrust (幻影突き, Phantom Stab) |
5% | A vertical slash, a horizontal slash, and a stab. If the attack is button mashed, the third hit will be replaced by a series of rapid jabs that can angle diagonally upwards, straight, and diagonally downwards. | |
| 3% | ||||
| 4% | ||||
| 1% per jab | ||||
| Forward tilt | Forward Chop (フォワードチョップ) | 17% (hilt), 18% (blade) | A delayed downward swing. Somewhat slow but above average damage and knockback for a forward tilt. | |
| Up tilt | Half-Moon Slash (半月斬り) | 10%, 15% (NTSC-J) | Quickly swings the Master Sword in a small arc above him. Can be chained together and good for leading into combos, usually forward tilt or neutral aerial. The attack's trajectory is based on where they are positioned on hit; when facing right, there's a slight right angle, and vice versa. This move can usually KO a foe reliably above very high damages such as 200%. Changes heavily in Japanese version of Smash 64, doing 15% damage and being able to shield break and a better angle for combos. | |
| Down tilt | Grasscutter (草薙ぎ, Grass Mower) | 12% | A ground-level slash. Usually knocks foes upwards. At lower percentages, this can be followed by a forward smash, a forward tilt, or even a grab. At high percents, it loses combo potential due to sending opponents too far for a follow-up. | |
| Dash attack | Dash Thrust (ダッシュ突き, Dash Stab) | 16% (clean body), 11% (late body), 14% (clean blade), 10% (late blade) | Comes to a stop mid-dash, stabbing in front of himself. Good range and speed, and can KO usually around 150%. Great for combo finishers. Moderate ending lag. | |
| Forward smash | Sword Slice (スマッシュ斬り, Smash Cutter) | 20% (clean), 12% (late), 24% (EUR clean), 14% (EUR late) | Twirls his sword twice in hand, then slashes downward in a similar fashion to his forward tilt, but with more power and lag. Much stronger if hit with the main blade, with very good knockback, being the most powerful forward smash in the game (knockback wise). | |
| Up smash | Triple Sword Slice (三段斬り, Three-Stage Cutter) | 7% (hit 1), 3% (hit 2), 12% (hit 3), 22% (total), 8% (NTSC-J hit 1), 4% (NTSC-J hit 2), 24% (NTSC-J total) | Three quick, narrow slashes while looking upwards. Lacks range but good for damage racking, as long as the foe doesn't DI out of it. Best suited for heavier characters. This move is somewhat weak for KOing, but at lower percentages it can lead into itself, an aerial, or Spin Attack. In most other cases, an up aerial or simply some other juggling plan (usually a Bomb readied before the move) is recommended. | |
| Down smash | Front and Back Sword Slice (前後足元斬り, Front and Back Underfoot Cutter) | 16% | Swiftly slashes in front of himself, then behind. A good close-range defensive move but also effective for KOing. This move is one of Link's few moves that come out near-instantaneously, and the ending lag is also rather low. Assuming Link is facing right, when the foe is hit on either side while being closest to Link, they will be sent upwards at a slightly angled trajectory. When hit at the end of Link's blade, it'll knock the foe in a 45° angle in the direction depending on what side they were hit on. | |
| Neutral aerial | Link Kick (リンクキック) | 10% (clean), 8% (late) | An aerial sex kick. Best used as a defensive move due to its speed and lack of KO power. Moderately good combo move, and effective for edge-guarding. | |
| Forward aerial | Spinning Sweep (回転なぎ払い, Rotating Mow-Down) | 20% (clean), 12% (late) | Does a swirling slash in a complete circle. Has two hitboxes: the early hit does 20% damage with a good amount of knockback, while a late hit deals less damage, but keeps its decent strength. It is not possible that the two hits will combine into each other. It is used competitively to end combos due to its knockback. | |
| Back aerial | Double Kick (二段蹴り, Two-Stage Kick) | 10% (hits 1-2), 20% (total) | Two kicks behind himself. They combo into each other for a good amount of knockback, though the second hit can be DI'd out of. In addition, it is risky to use this move near a ledge due to the length of this move, as Link's recovery may not always be good enough to make it back to the stage. Very useful for combos. | |
| Up aerial | Up Thrust (上突き, Up Stab) | 16% | Stabs upward, similarly to his Up Thrust from Zelda II: The Adventure of Link. Decent KO power, can also juggle. Link's blade carries the move's hitbox. Useful on platforms to extend combos. | |
| Down aerial | Downward Thrust (下突き, Down Stab) | 16%, 18% (NTSC-J) | Aims his sword directly below him for a long duration, similarly to his Down Thrust from Zelda II: The Adventure of Link. This has great horizontal knockback. It is possible to hit the same enemy twice to have this move inflict 32% altogether. This move can be used to KO recovering foes by jumping directly at them, but this is only safe if the bounce of the connected hit allows Link to return to the stage. It should be noted that this move's downwards descent can be hastened by fast falling, although doing so is unwise near ledges. Has substantial landing lag when the player lands on the ground while using the move if not Z-cancelled. Usually considered to be Link's best aerial for shield pressure when Z-cancelled. Used competitively to end combos due to its knockback. Along with Pikachu's, this is the only down aerial in SSB to lack a meteor smash hitbox. | |
| Grab | Hookshot (フックショット) | — | Uses the Hookshot while standing. Link, along with Samus and Yoshi, has an "extended grab". This allows him to grab opponents from a distance, but the grab is very laggy if it misses. This can lead to various unique combos due to Link's high grab range. | |
| Forward throw | Kick Off (蹴り飛ばし, Kick Fly-Off) | 14% (throw), 8% (collateral) | Kicks his foe forward with good power. Often throws the foe far enough to set up a quick boomerang or bomb-based edgeguard, or simply one of Link's aerials. | |
| Back throw | Reverse Kick Off (後方蹴り飛ばし, Backward Kick Fly-Off) | 16% (throw), 8% (collateral) | Takes the foe and kicks them directly behind him. Somewhat better KO power than his forward throw. | |
| Forward roll Back roll |
— | — | ||
| Techs | — | — | ||
| Floor attack (front) Floor getups (front) |
6% | Slashes on both sides and gets up. | ||
| Floor attack (back) Floor getups (back) |
6% | Slashes on both sides and gets up. | ||
| Edge attack (fast) Edge getups (fast) |
4% | Flips over and slashes outwards. Decent range. | ||
| Edge attack (slow) Edge getups (slow) |
4% | Slowly picks himself up and stabs at a slight upward angle. | ||
| Neutral special | Boomerang | 9% (throw), 8% (return) | Throws a blue boomerang, which returns after a set distance. One of Link's two projectiles. Doing a "smash throw" (smash the Control Stick forward while pressing B; similar to performing a smash attack) increases the distance the boomerang can travel. The Control Stick can be tilted up or down to aim the boomerang's trajectory. Can edgeguard, and can be used during combos if Link is a distance away from the opponent, as the hitstun caused by it allows Link to continue his combo. | |
| Up special | Spin Attack | 16% (grounded clean), 8% (grounded late), 5% (additional hitbox), 16% (aerial clean), 8% (aerial late) | Performs his signature Spin Attack. A powerful attack, especially on the ground; when grounded, the spin creates a wide, orange magic circle that grants the move more range. However, it is generally terrible for recovery, as it covers a very short distance; this gives Link a predictable recovery, and is often cited as the main reason why he is in bottom tier, as he is very easily edgeguarded by most characters, especially Pikachu and Kirby. | |
| Down special | Bomb | 5-17% (see here for full details) | Pulls out a bomb, which functions as an item that explodes on contact with an opponent or after its fuse runs out. Link's second projectile. There are many techniques that can be performed with bombs, which can be read about here. Though difficult to time, the hitstun caused by the bomb allows Link to force himself out of helplessness to attempt recovering again. | |
Announcer call[edit]
English/Japanese/Chinese
French
German
On-screen appearance[edit]
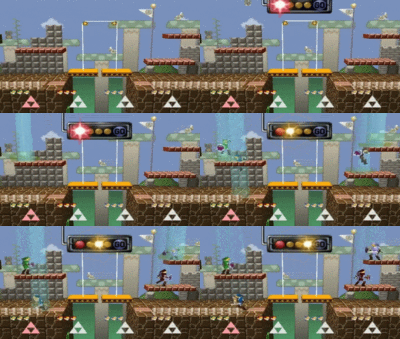
- Descends from a column of light and unsheathes the Master Sword. Based on the end-of-dungeon teleports from The Legend of Zelda: Ocarina of Time.
|
|---|
Taunt[edit]
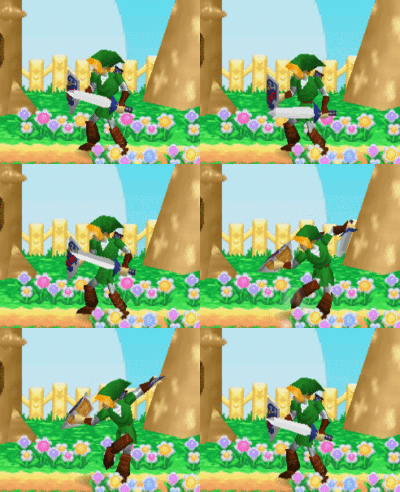
- Raises his leg and sword hand in a "readying" stance. Appears similar to the pose Link performs before attacking in Zelda II: The Adventure of Link.
|
|---|
Crowd cheer[edit]
| Cheer (International) | Cheer (Japanese) | |
|---|---|---|
| Cheer | ||
| Description | Go - Link! *claps 3 times* | Lin - k! |
Victory poses[edit]
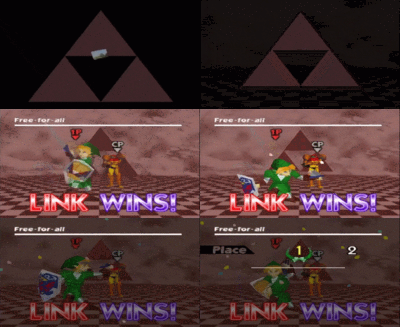
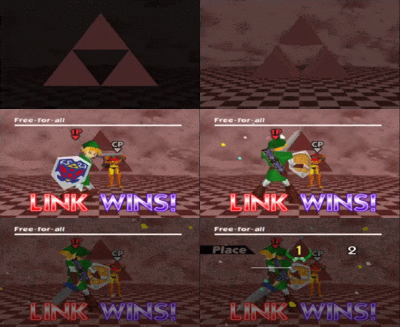
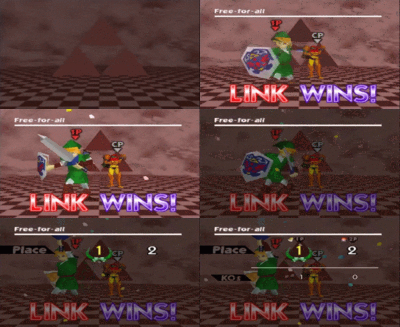
- Kneels while sheathing the Master Sword.
- Swings the Master Sword twice before him, before spinning and stopping with his back turned to the screen (also his character selection animation).
- Holds the Master Sword before his face, then hoists it upwards.
 |
 |
|
|---|
In competitive play[edit]
Most historically significant players[edit]
- See also: Category:Link players (SSB)
Firo - More known for using Ness, but also has a strong Link whom he used in tournaments. Has placed 4th at The Empire Smashes Back, 7th at Pound 2016, and 9th at COA VI, and has used Link to beat Jimmy Joe and KoRoBeNiKi. Previously ranked 33rd on the 2017 64 League Rankings.
Gyaki - One of the best Link players in Japan and in the world. His best placement is his 2nd place at Kansai 2017, where he defeated kysk and Kurabba. He also beat Isai and Josh Brody at Snosa III, where he placed 5th. He was previously ranked 17th on the 2017 64 League Rankings.
Hebiichigo - One of the best Link players in Japan. He placed 3rd at Kanto 2013, and has top 8 placements at Kansai events such as Kansai 2016 and Kansai 2022, with wins over Tatsuman, Fukurou, and Shizuku.
Isai - One of the best Smash 64 players of all time, being efficient with the entire cast. Notably placed 2nd at Apex 2012 with solo Link, beating top players such as SuPeRbOoMfAn, JaimeHR, and Kefit. He has also placed 1st at B.E.A.S.T 7 and 3rd at Snosa II primarily using Link.
Kort - Considered the best Link player in South America. Kort is known for his utilization of Link's Bombs, notably with the titled black-cat setup. He commonly played Link alongside other secondaries at multiple North American tournaments such as placing 2nd at Called Out!, 13th at Super Smash Con 2016, and 17th at GENESIS 3. He was previously ranked 20th on the 2018 64 League Rankings.
Sekirei - Considered the best Link player from Japan and of all time. He won Kanto Fall 2019, using Link to beat Kurabba and Fukurou to take the tournament. He additionally has great tournament results at other Kanto tournaments, and has beaten other highly regarded players such as Isai and Jousuke.
Tier placement and history[edit]
Throughout the history of Smash 64, Link has always been regarded as one of the worst characters in the game due to relying on slower setups and stray hits more than any other character and is in contention for having the worst recovery in the game. On the first tier list for Smash 64, he was ranked dead last as a bottom-tier character alongside Samus. Link would find a small but dedicated playerbase as Smash 64 tournaments grew, with Okajyu and Isai placing 2nd at Kanto 2010 and Apex 2012 respectively, causing him to find the occasional major success in spite of his placement of bottom-tier. As the metagame progressed, Link players would find developments in his defensive game, finding technical setups with his Bombs such as the black-cat setup, which gave him better stage control. Despite this, his flaws are too significant to rise any higher in the metagame, being placed at 11th on the second tier list, tied with Luigi at 10th on the third list, and back to 11th on the fourth and most current tier list.
In spite of his placement, Link has achieved high results in a few tournaments since the release of the current tier list, most notably in Japan, where he is considered slightly better due to players such as Gyaki, Hebiichigo, and Sekirei placing top 8 at multiple Kanto and Kansai tournaments. Link's highest peak would come from Sekirei's victory at Kanto Fall 2019, and while he also used Kirby, this marks Link's best tournament win throughout the history of Smash 64. Even with these impressive placements, it is unlikely Link will rise above his bottom-tiered status that he has consistently remained in throughout the game's lifespan.
In Single-player[edit]
- In the game's single-player mode, Link is the first character the player battles; he is faced on Hyrule Castle.
- If the player is against Link in Single Player Mode on Normal or below, he will not attack or move until the player makes the first few strikes or after a period of time.
Techniques[edit]
Extended Boomerang[edit]
Link's boomerang (neutral special attack) goes farther if it is treated as a smash attack. Quickly tap the control stick to the side while hitting the special button to extend the range.
Extended boomerang ledge boost[edit]
Link's extended boomerang, if used at the right distance from a ledge to allow Link to maintain momentum after dashing, results in Link going significantly further in midair during the boomerang throw animation. This is useful when performing a combo on an opponent who is slightly too far for the boomerang to hit.
Bomb gift[edit]
Lightly throwing a bomb so that it lands on a platform near a spawning opponent is a popular mindgame as the latter will often be tempted to pick the bomb up. This results in the player losing the invincibility frames granted by the spawn.
Invisibomb glitch[edit]
Link pulls out a bomb and places the bomb on the ground without having it explode. When the bomb will near the explosion point while being out of explosion range, Link will have just a few frames to grab the bomb (now invisible) after the explosion. All bombs thrown by Link will become invisible.
Off ledge Spin Attack[edit]
Performing a grounded Spin Attack right after Link's initial dash while running off a ledge will result in Link continuing his spin attack in midair without the animation changing to his aerial spin attack. This rarely has any uses outside top Link players using it to edgeguard or complete combos.
Bomb recovery[edit]
Like Samus, Link can use his bombs to aid his recovery. However, unlike Samus, Link must use a bit of technical skill and timing. While recovering, one should pull out a bomb and drop it slowly below Link, then continue to DI towards the stage, and use a back aerial. This will cause Link to explode toward the platform. One should then use his up special and land back safely. Note that Link will not be able to grab the edge because the explosion causes him to face the other direction. To counter this, one must throw his boomerang before using his up special. This technique is extremely situational and difficult to perform. Despite the difficulty of pulling off the technique, it does not greatly help Link's recovery.
Black-cat setup[edit]
A technique popularized by Kort involving a set up of positioning a bomb for a boomerang hit as an edgeguarding technique. The technique requires Link to throw a bomb on stage opposite to where the enemy is (preferably when the enemy is offstage), followed by a toss of a boomerang against the bomb, causing the boomerang to 1) ricochet flying in the opposite direction towards the enemy, 2) accelerate at a faster speed then the previous speed then initially thrown, and finally 3) will go through Link without causing Link to catch the boomerang, allowing for Link to reduce lag caused by the grab of a returning boomerang.[1]
Description[edit]
From the Game[edit]
Link is the valiant boy hero of "Legend of Zelda" series in which he fights against the evil Ganon to recover the Triforce. Though his tools may change with each adventure, his strength and righteousness remain constant. With his trusty sword and a variety of weapons, he takes his adventures head on!
Works:
- The Legend of Zelda (NES)
- The Legend of Zelda: A Link to the Past (SNES)
- The Legend of Zelda: Ocarina of Time (N64)
Alternate costumes[edit]

| |||
Trivia[edit]
- Link is one of the two characters to lack a meteor smash, the other being Pikachu.
- When Link picks up a battering item, his dash attack will show him using his sword and the item he's wielding.
- Despite Adult Link not being able to use the boomerang in The Legend of Zelda: Ocarina of Time, he uses it in Smash 64. This also applies for his Melee incarnation.
- Additionally, the boomerang uses its design from The Legend of Zelda: A Link to the Past rather than Ocarina of Time.
- In the PAL version of Smash 64, Link is the second heaviest character and no longer shares his weight with Captain Falcon.
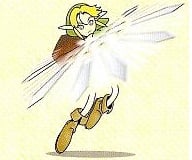
- On the Character selection screen, Link's portrait greatly resembles his artwork from Ocarina of Time.
- This is the only game in which Link is the only Legend of Zelda fighter.
References[edit]
| Fighters in Super Smash Bros. | |
|---|---|
| Fighters | Captain Falcon · Donkey Kong · Fox · Jigglypuff · Kirby · Link · Luigi · Mario · Ness · Pikachu · Samus · Yoshi |
