[dismiss]
| Welcome to SmashWiki! Log in or create an account and join the community, and don't forget to read this first! |
| Notices |
|---|
| The Skill parameter has been removed from Smasher infoboxes, and in its place are the new "Best historical ranking" and "Best tournament result" parameters. SmashWiki needs help adding these new parameters to Smasher infoboxes, refer to the guidelines here for what should be included in these new parameters. |
| When adding results to Smasher pages, include each tournament's entrant number in addition to the player's placement, and use the {{Trn}} template with the matching game specified. Please also fix old results on Smasher pages that do not abide to this standard. Refer to our Smasher article guidelines to see how results tables should be formatted. |
| Check out our project page for ongoing projects that SmashWiki needs help with. |
Daisy (SSBU)/Neutral attack/Hit 1: Difference between revisions
From SmashWiki, the Super Smash Bros. wiki
Jump to navigationJump to search
No edit summary |
m (Eliminating awkward byte-saving method) |
||
| (2 intermediate revisions by one other user not shown) | |||
| Line 1: | Line 1: | ||
{{ArticleIcons|ssbu=y}} | {{ArticleIcons|ssbu=y}} | ||
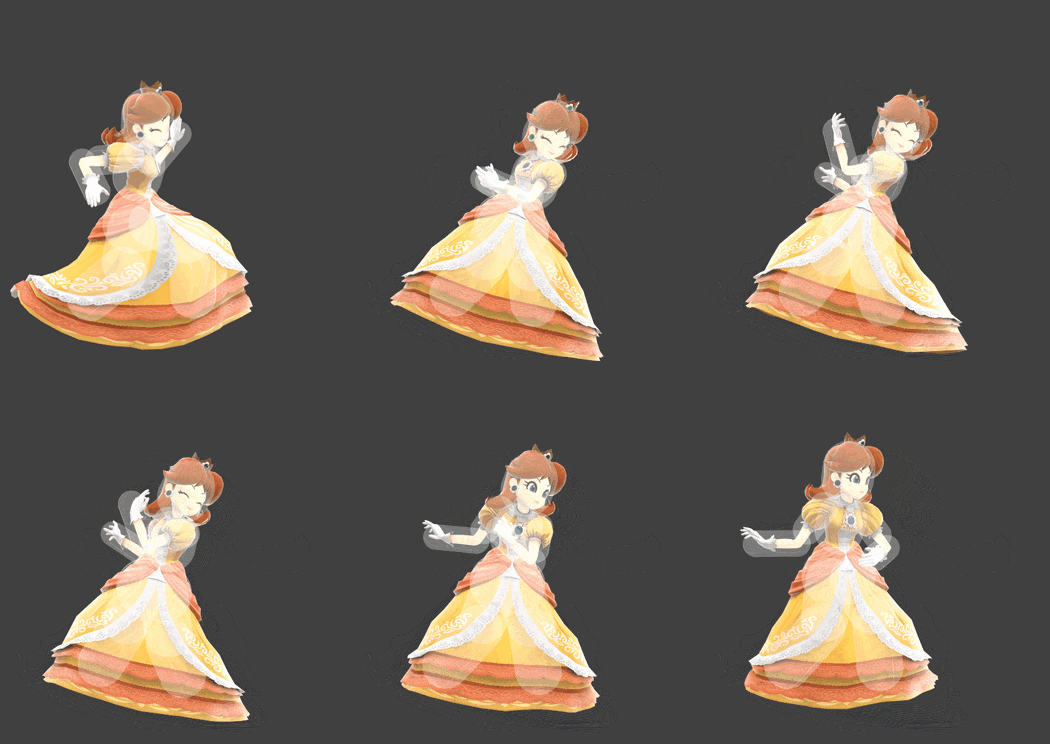
[[File: | [[File:DaisyJab1SSBU.gif|thumb|350px|Hitbox visualization showing Daisy's first jab.]] | ||
==Overview== | ==Overview== | ||
Daisy slaps inwards with the {{rollover|leading arm|left arm if facing right, vice versa|?}}. The first hit of neutral attack deals 2.0% damage. | Daisy slaps inwards with the {{rollover|leading arm|left arm if facing right, vice versa|?}}. The first hit of neutral attack deals 2.0% damage. | ||
While pressuring the opponent's shield, neutral attack's first hit can be used to attack the opponent before they act [[out of shield]] along with the second hit. However | While pressuring the opponent's shield, neutral attack's first hit can be used to attack the opponent before they act [[out of shield]] along with the second hit. However this option can be countered if the opponent continues shield. The first hit of neutral attack is one of Daisy's fastest out of shield options. It can be used after performing a [[perfect shield]]. If two attacks collide to each other, Daisy can immediately perform neutral attack. Daisy can perform neutral attack after mashing out of the opponent's grab. | ||
At low percentages, neutral aerial can combo into | At low percentages, neutral aerial can combo into neutral attack. The move can set up [[jab reset]]s. | ||
==Update History== | ==Update History== | ||
Latest revision as of 17:59, April 15, 2025
Overview[edit]
Daisy slaps inwards with the leading arm. The first hit of neutral attack deals 2.0% damage.
While pressuring the opponent's shield, neutral attack's first hit can be used to attack the opponent before they act out of shield along with the second hit. However this option can be countered if the opponent continues shield. The first hit of neutral attack is one of Daisy's fastest out of shield options. It can be used after performing a perfect shield. If two attacks collide to each other, Daisy can immediately perform neutral attack. Daisy can perform neutral attack after mashing out of the opponent's grab.
At low percentages, neutral aerial can combo into neutral attack. The move can set up jab resets.
Update History[edit]
 Neutral attack 1 connects into neutral attack 2 more reliably.
Introduced a minor bug where neutral attack 1 would no longer produce the correct sound unless Peach is also in the match.
 Neutral attack 1 now makes the correct sound, regardless of whether Peach is present in the match or not.
Hitboxes[edit]
Timing[edit]
| Hitboxes | 2 | |
|---|---|---|
| Continuability | Held on hit or tapped | 7-30 |
| Held without hitting | 14 | |
| Interruptible | 28 | |
| Animation length | 37 | |
Lag time |
Hitbox |
Continuable |
Earliest continuable point |
Interruptible |
|
