Wario (SSB4)/Down tilt: Difference between revisions
(→Overview: added more info) |
mNo edit summary |
||
| (One intermediate revision by one other user not shown) | |||
| Line 3: | Line 3: | ||
==Overview== | ==Overview== | ||
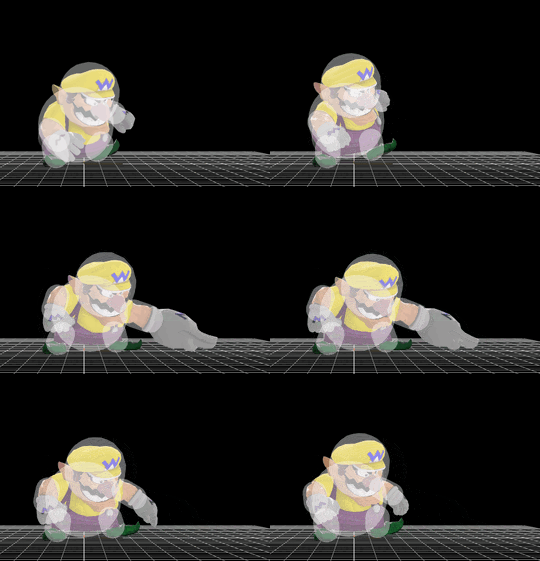
Wario prods the ground with an inflated finger. While the attack has poor vertical reach and damage output, it is very fast, can combo into itself numerous times or into other moves (usually grab or dash attack), and has disjointed horizontal range. It can be used to pressure opponents at the ledge (although won't hit every ledge hang) or pressure shielding opponents due to how quick the move is. It is also one of his best options out of a [[ | Wario prods the ground with an inflated finger. While the attack has poor vertical reach and damage output, it is very fast, can combo into itself numerous times or into other moves (usually grab or dash attack), and has disjointed horizontal range. It can be used to pressure opponents at the ledge (although won't hit every ledge hang) or pressure shielding opponents due to how quick the move is. It is also one of his best options out of a [[run turnaround cancel]], as the slide from RTC allows down tilt to combo into half waft, make followups slightly easier, or allow it to be used as an approach option, something that Wario severely lacks. The finger's hitbox launches slightly more upward, allowing it to combo even when spaced. | ||
Overall, it is a very good move for Wario, giving him combo ability and being a fast, versatile tool in general, effectively being his | Overall, it is a very good move for Wario, giving him combo ability and being a fast, versatile tool in general, effectively being his "real" jab, as his actual jab is not quite useful. | ||
==Hitboxes== | ==Hitboxes== | ||
{{SSB4HitboxTableHeader}} | {{SSB4HitboxTableHeader}} | ||
{{SSB4HitboxTableRow | {{SSB4HitboxTableRow | ||
Latest revision as of 07:41, May 7, 2022
Overview[edit]
Wario prods the ground with an inflated finger. While the attack has poor vertical reach and damage output, it is very fast, can combo into itself numerous times or into other moves (usually grab or dash attack), and has disjointed horizontal range. It can be used to pressure opponents at the ledge (although won't hit every ledge hang) or pressure shielding opponents due to how quick the move is. It is also one of his best options out of a run turnaround cancel, as the slide from RTC allows down tilt to combo into half waft, make followups slightly easier, or allow it to be used as an approach option, something that Wario severely lacks. The finger's hitbox launches slightly more upward, allowing it to combo even when spaced.
Overall, it is a very good move for Wario, giving him combo ability and being a fast, versatile tool in general, effectively being his "real" jab, as his actual jab is not quite useful.
Hitboxes[edit]
Timing[edit]
| Hitbox | 5 |
|---|---|
| Interruptible | 18 |
| Animation length | 37 |
Lag time |
Hitbox |
Interruptible |
|
