| Welcome to SmashWiki! Log in or create an account and join the community, and don't forget to read this first! |
| Notices |
|---|
| The Skill parameter has been removed from Smasher infoboxes, and in its place are the new "Best historical ranking" and "Best tournament result" parameters. SmashWiki needs help adding these new parameters to Smasher infoboxes, refer to the guidelines here for what should be included in these new parameters. |
| When adding results to Smasher pages, include each tournament's entrant number in addition to the player's placement, and use the {{Trn}} template with the matching game specified. Please also fix old results on Smasher pages that do not abide to this standard. Refer to our Smasher article guidelines to see how results tables should be formatted. |
| Check out our project page for ongoing projects that SmashWiki needs help with. |
Incineroar (SSBU)/Forward tilt: Difference between revisions
(New Page: {{ArticleIcons|ssbu=y}} {|class="wikitable" style="float:right; margin:4pt;" !colspan=5|Incineroar forward tilt hitbox visualizations |- !↗ |300px |- !...) |
Mariogeek2 (talk | contribs) m (→Overview: Added links + minor improvements/grammatical fixes.) |
||
| (3 intermediate revisions by 2 users not shown) | |||
| Line 15: | Line 15: | ||
{{competitive expertise}} | {{competitive expertise}} | ||
==Overview== | ==Overview== | ||
A powerful thrust move that can be angled upwards or downwards with a [[semi-spike]] angle. It is Incineroar's slowest-available tilt attack, but compensates with its extreme [[KO]] power, being the single most powerful forward tilt in the game, and long range (even possessing a slight [[disjoint]]), as well as surprising safety. These attributes make it one of the most reliable combo finishers Incineroar has access to at the [[ledge]], most notably in his infamous {{mvsub|Incineroar|SSBU|down tilt}} to forward tilt KO confirm on opponents hanging at the ledge. | |||
Most notably if Incineroar is buffed with [[Incineroar (SSBU)/Down special|Revenge]], forward tilt is granted exceptional amounts of [[shield stun]], becoming as safe as +9 on shield, not only making this attack [[punish|unpunishable]] out of shield, but also giving Incineroar frame advantage over his opponent. | |||
Overall, this move acts as a low-risk, high-reward KO option with unusual amounts of range for Incineroar. | |||
==Hitboxes== | ==Hitboxes== | ||
{{UltimateHitboxTableHeader}} | {{UltimateHitboxTableHeader}} | ||
| Line 21: | Line 26: | ||
|damage=13.0% | |damage=13.0% | ||
|angle=31 | |angle=31 | ||
|af=3 | |||
|bk=54 | |bk=54 | ||
|ks=85 | |ks=85 | ||
| Line 39: | Line 45: | ||
|damage=12.0% | |damage=12.0% | ||
|angle=31 | |angle=31 | ||
|af=3 | |||
|bk=54 | |bk=54 | ||
|ks=85 | |ks=85 | ||
| Line 57: | Line 64: | ||
|damage=12.0% | |damage=12.0% | ||
|angle=31 | |angle=31 | ||
|af=3 | |||
|bk=54 | |bk=54 | ||
|ks=85 | |ks=85 | ||
Latest revision as of 12:41, January 7, 2025
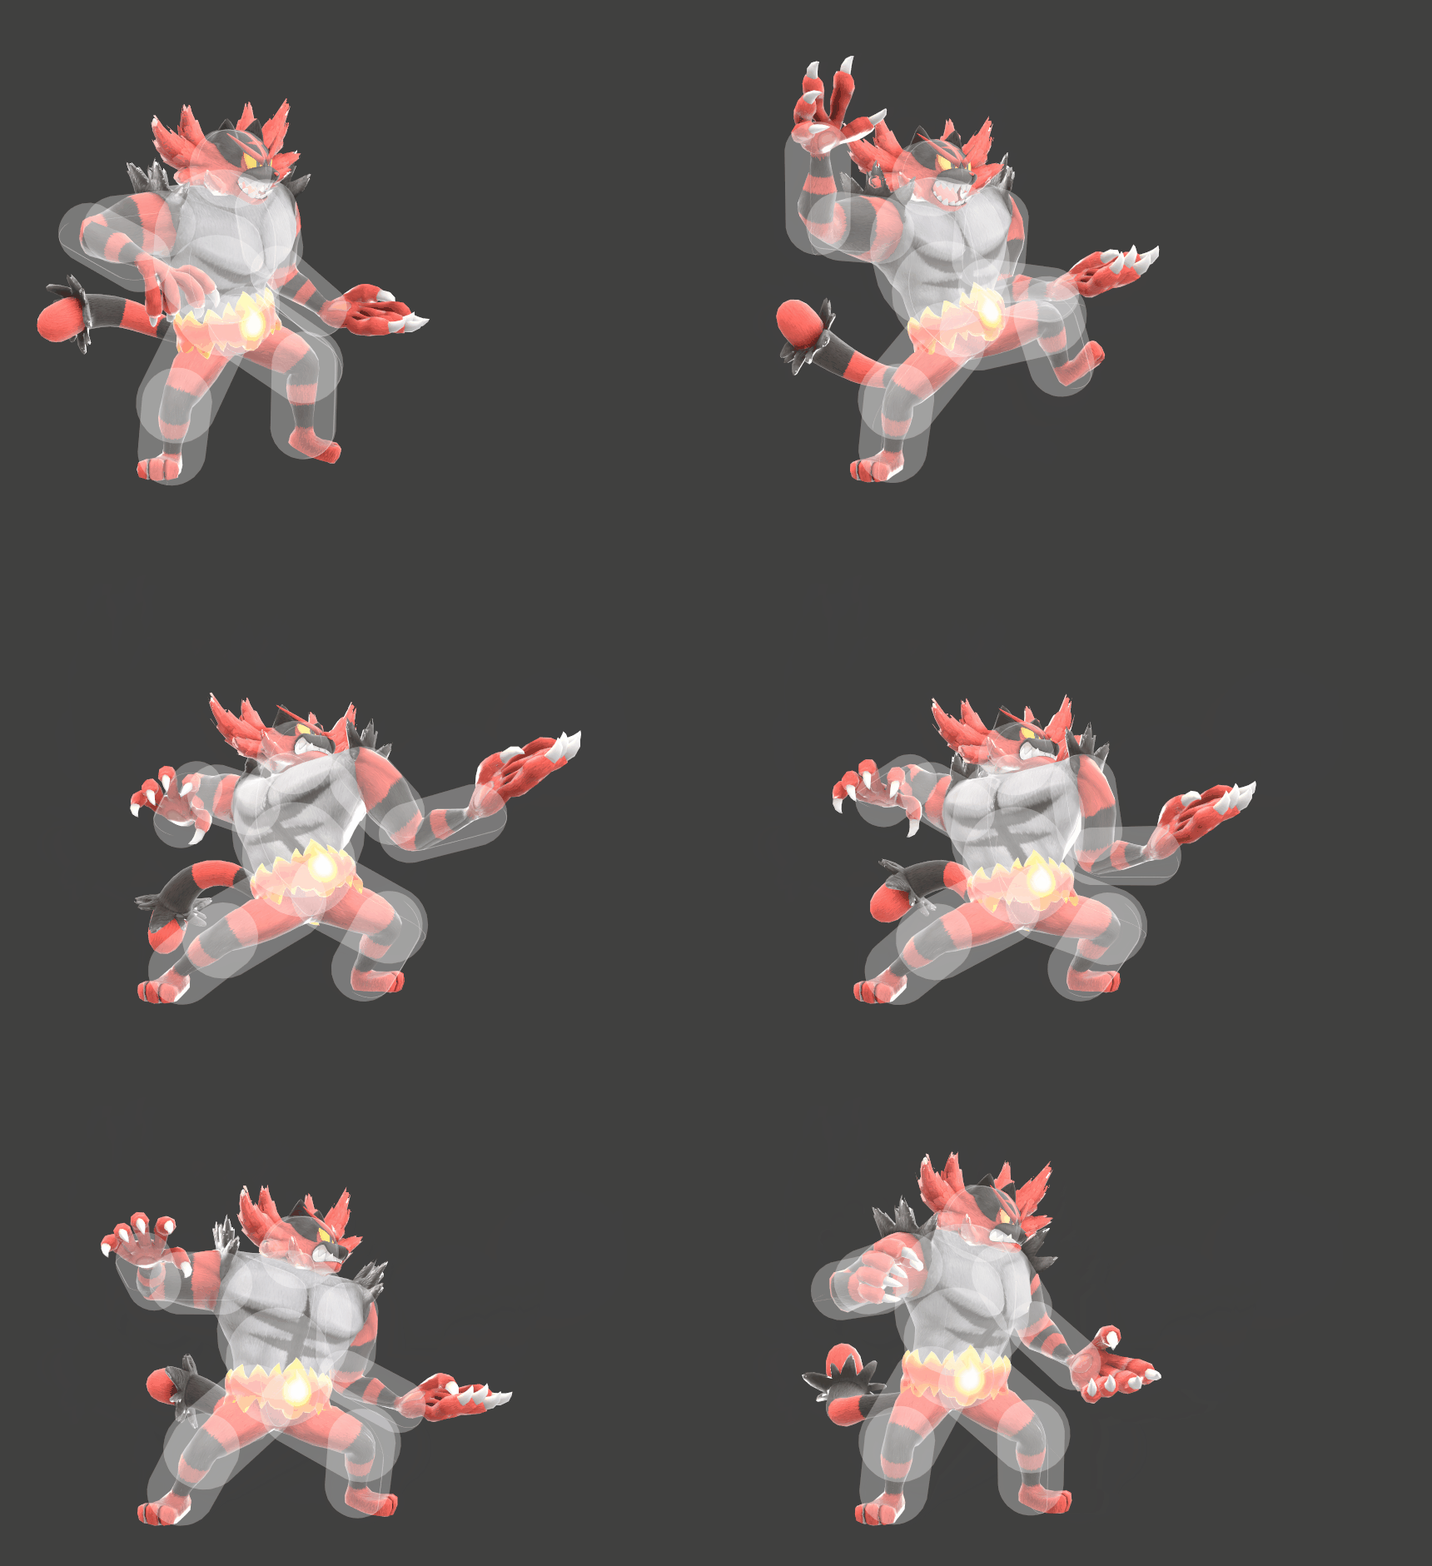
| Incineroar forward tilt hitbox visualizations | ||||
|---|---|---|---|---|
| ↗ | 
| |||
| → | 
| |||
| ↘ | 
| |||
Overview[edit]
A powerful thrust move that can be angled upwards or downwards with a semi-spike angle. It is Incineroar's slowest-available tilt attack, but compensates with its extreme KO power, being the single most powerful forward tilt in the game, and long range (even possessing a slight disjoint), as well as surprising safety. These attributes make it one of the most reliable combo finishers Incineroar has access to at the ledge, most notably in his infamous down tilt to forward tilt KO confirm on opponents hanging at the ledge. Most notably if Incineroar is buffed with Revenge, forward tilt is granted exceptional amounts of shield stun, becoming as safe as +9 on shield, not only making this attack unpunishable out of shield, but also giving Incineroar frame advantage over his opponent.
Overall, this move acts as a low-risk, high-reward KO option with unusual amounts of range for Incineroar.
Hitboxes[edit]
Timing[edit]
| Hitboxes | 12-14 |
|---|---|
| Interruptible | 37 |
| Animation length | 53 |
Lag time |
Hitbox |
Interruptible |
|
