Lucas (SSBU)/Down smash: Difference between revisions
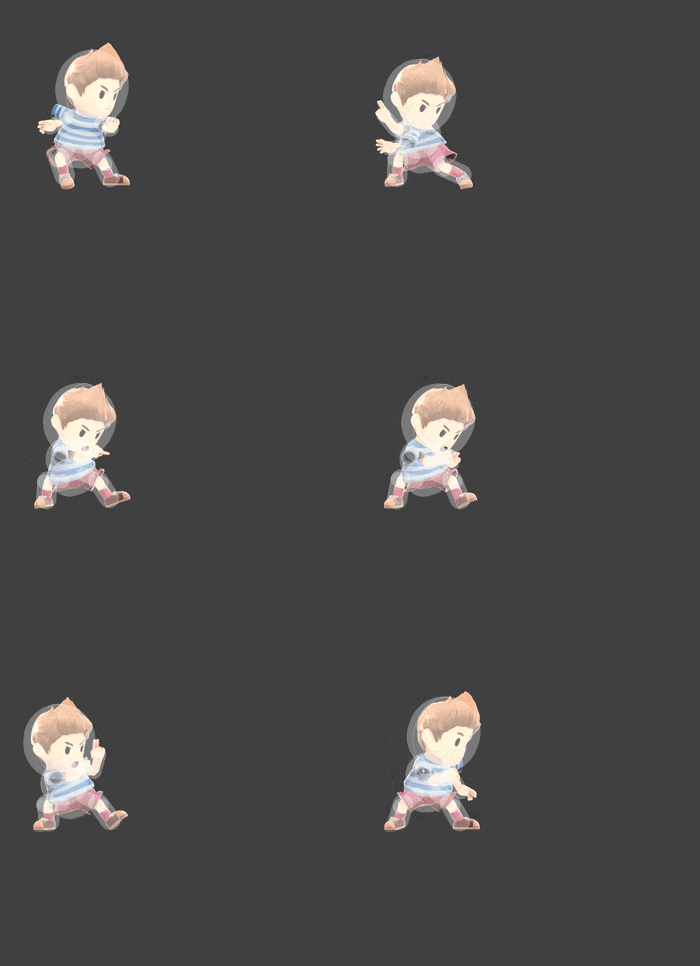
(New Page: {{ArticleIcons|ssbu=y}} thumb|300px|Hitbox visualization showing Lucas's down smash. ==Overview== ==Hitboxes== {{UltimateHitboxTableHeader}} {{HitboxTableT...) |
Mariogeek2 (talk | contribs) m (→Overview: Grammar & spelling fixes, reworded to make it flow better.) |
||
| (9 intermediate revisions by 6 users not shown) | |||
| Line 1: | Line 1: | ||
{{ArticleIcons|ssbu=y}} | {{ArticleIcons|ssbu=y}} | ||
[[File:LucasDSmashSSBU.gif|thumb| | [[File:LucasDSmashSSBU.gif|thumb|350px|Hitbox visualization showing Lucas's down smash.]] | ||
==Overview== | ==Overview== | ||
{{competitive expertise}} | |||
Lucas does 3 hits of [[PSI]] energy. The move is pretty slow, having a third of a second of [[start-up]] and a long move duration, being [[interruptible]] at frame 60. However, the move is balanced out by being very strong, [[KO]]ing at pretty early percents; additionally, the move is very big, being one of the easiest [[Edge#2_frame_punish|2 frames]] to hit in the game, and despite the high amount of total frames, the move's final hit coming out later than the other hits (at frame 39), combined with the fact that all 3 hits on shield are a [https://glossary.infil.net/?t=Block%20String true blockstring] and the fact that the last hit has plenty of [[shieldstun]], mean that the move is relatively safe on shield (-12, which is pretty good). | |||
With all of those strengths, this move is often considered one of the best [[down smash]]es in the game. | |||
==Hitboxes== | ==Hitboxes== | ||
{{UltimateHitboxTableHeader}} | {{UltimateHitboxTableHeader}} | ||
{{HitboxTableTitle|Hit 1| | {{HitboxTableTitle|Hit 1|50}} | ||
{{UltimateHitboxTableRow | {{UltimateHitboxTableRow | ||
|id=0 | |id=0 | ||
|rehit=8 | |rehit=8 | ||
|damage=17.0 | |damage={{ChargedSmashDmgSSBU|17.0}} | ||
|sd=-10.0 | |sd=-10.0 | ||
|angle=361 | |angle=361 | ||
|af=3 | |||
|bk=43 | |bk=43 | ||
|ks=90 | |ks=90 | ||
| Line 28: | Line 35: | ||
|rebound=f | |rebound=f | ||
}} | }} | ||
{{HitboxTableTitle|Hit 2| | {{HitboxTableTitle|Hit 2|50}} | ||
{{UltimateHitboxTableRow | {{UltimateHitboxTableRow | ||
|id=0 | |id=0 | ||
|rehit=9 | |rehit=9 | ||
|damage=14.0 | |damage={{ChargedSmashDmgSSBU|14.0}} | ||
|sd=-8.0 | |sd=-8.0 | ||
|angle=361 | |angle=361 | ||
|af=3 | |||
|bk=30 | |bk=30 | ||
|ks=90 | |ks=90 | ||
| Line 51: | Line 59: | ||
|rebound=f | |rebound=f | ||
}} | }} | ||
{{HitboxTableTitle|Hit 3| | {{HitboxTableTitle|Hit 3|50}} | ||
{{UltimateHitboxTableRow | {{UltimateHitboxTableRow | ||
|id=0 | |id=0 | ||
|rehit=9 | |rehit=9 | ||
|damage=11.0 | |damage={{ChargedSmashDmgSSBU|11.0}} | ||
|sd=-6.0 | |sd=-6.0 | ||
|angle=361 | |angle=361 | ||
|af=3 | |||
|bk=20 | |bk=20 | ||
|ks=90 | |ks=90 | ||
| Line 75: | Line 84: | ||
}} | }} | ||
|} | |} | ||
==Timing== | ==Timing== | ||
{|class="wikitable" | {|class="wikitable" | ||
| Line 101: | Line 111: | ||
{{FrameIconLegend|lag=y|charge=y|hitbox=y|interruptible=y}} | {{FrameIconLegend|lag=y|charge=y|hitbox=y|interruptible=y}} | ||
==Trivia== | |||
*The hitbox does not actually have any gaps between hits; instead, during the "inactive" frames, its hit bits are changed to be unable to hit fighters. This was implemented [[Lucas (SSB4)/Down smash|in ''Smash 4'']] to prevent the move from hitting more than once without giving it a consistently active hitbox against opponents; in ''Ultimate'', however, it was given a rehit rate, allowing it to still function like a traditional multi-hit move. | |||
{{MvSubNavLucas|g=SSBU}} | {{MvSubNavLucas|g=SSBU}} | ||
[[Category:Lucas (SSBU)]] | [[Category:Lucas (SSBU)]] | ||
[[Category:Down smashes (SSBU)]] | [[Category:Down smashes (SSBU)]] | ||
Latest revision as of 13:04, December 24, 2024
Overview[edit]
Lucas does 3 hits of PSI energy. The move is pretty slow, having a third of a second of start-up and a long move duration, being interruptible at frame 60. However, the move is balanced out by being very strong, KOing at pretty early percents; additionally, the move is very big, being one of the easiest 2 frames to hit in the game, and despite the high amount of total frames, the move's final hit coming out later than the other hits (at frame 39), combined with the fact that all 3 hits on shield are a true blockstring and the fact that the last hit has plenty of shieldstun, mean that the move is relatively safe on shield (-12, which is pretty good).
With all of those strengths, this move is often considered one of the best down smashes in the game.
Hitboxes[edit]
Timing[edit]
| Charges between | 5-6 |
|---|---|
| Hit 1 | 20-22 |
| Hit 2 | 29-31 |
| Hit 3 | 39-41 |
| Interruptible | 60 |
| Animation length | 73 |
Lag time |
Charge interval |
Hitbox |
Interruptible |
Trivia[edit]
- The hitbox does not actually have any gaps between hits; instead, during the "inactive" frames, its hit bits are changed to be unable to hit fighters. This was implemented in Smash 4 to prevent the move from hitting more than once without giving it a consistently active hitbox against opponents; in Ultimate, however, it was given a rehit rate, allowing it to still function like a traditional multi-hit move.
|

