Captain Falcon (SSB)/Forward smash: Difference between revisions
(New Page: {{ArticleIcons|ssb=y}} ==Overview== thumb|The hitbox of Captain Falcon's f-smash. [[File:Captain Falcon Forward Smash Hitbox A...) |
Mariogeek2 (talk | contribs) (→Gallery: Removed section, →Overview: Added other two hitbox images to be in-line with most other Falcon F-Smash pages.) |
||
| (14 intermediate revisions by 7 users not shown) | |||
| Line 2: | Line 2: | ||
==Overview== | ==Overview== | ||
[[File:Captain Falcon Forward Smash Hitbox Smash 64.gif| | {|class="wikitable" style="float:right; margin:4pt;" | ||
[[File:Captain Falcon Forward Smash Hitbox | !colspan=5|C. Falcon's F-smash hitboxes. | ||
[[File:Captain Falcon Forward Smash Hitbox Angled Down Smash 64.gif| | |- | ||
!↗ | |||
|[[File:Captain Falcon Forward Smash Hitbox Angled Up Smash 64.gif|200px]] | |||
|- | |||
!→ | |||
|[[File:Captain Falcon Forward Smash Hitbox Smash 64.gif|200px]] | |||
|- | |||
!↘ | |||
|[[File:Captain Falcon Forward Smash Hitbox Angled Down Smash 64.gif|200px]] | |||
|- | |||
|} | |||
{{ | Captain Falcon does a flaming kick forward. It has high KO power and great range, and not much lag. However, it can't be considered a fast KO move. This move is one of Captain Falcon's best options on the ground, and it can be somewhat used for [[spacing]] due to its huge [[reach]] (which makes it arguably Captain Falcon's best KO move that can be used from a considerable distance). It slightly resembles the [[Falcon Kick]], his {{mvsub|Captain Falcon|SSB|down special}}, in that it is a kick attack with a [[flame]] effect, but the two moves are still very different. Overall, the move shouldn't be used too much (if it is, it can be predictable and [[punish]]able), and it lacks [[combo]] ability, but its range and power make it a good option for Captain Falcon on the ground at KO percentages, and it is also a decent way to punish when available, being able to cover many defensive options and mistakes made during combos. Lastly, when angled down it is a popular way to [[gimp]] low-recovering opponents. | ||
{{ | |||
==Hitboxes== | |||
{{SSB64HitboxTableHeader}} | |||
{{HitboxTableTitle|Angled up|19}} | |||
{{SSB64HitboxTableRow | |||
|id=0 | |||
|damage=19% | |||
|angle=361 | |||
|bk=20 | |||
|ks=100 | |||
|fkv=0 | |||
|r=180 | |||
|xpos=180 | |||
|bn=26 | |||
|effect=Flame | |||
|slvl=M | |||
|sfx=Kick | |||
}} | |||
{{SSB64HitboxTableRow | |||
|id=1 | |||
|damage=19% | |||
|angle=361 | |||
|bk=20 | |||
|ks=100 | |||
|fkv=0 | |||
|r=180 | |||
|bn=26 | |||
|effect=Flame | |||
|slvl=M | |||
|sfx=Kick | |||
}} | |||
{{SSB64HitboxTableRow | |||
|id=2 | |||
|damage=19% | |||
|angle=361 | |||
|bk=20 | |||
|ks=100 | |||
|fkv=0 | |||
|r=130 | |||
|bn=5 | |||
|effect=Flame | |||
|slvl=M | |||
|sfx=Kick | |||
}} | |||
{{HitboxTableTitle|Angled side|19}} | |||
{{SSB64HitboxTableRow | |||
|id=0 | |||
|damage=18% | |||
|angle=361 | |||
|bk=20 | |||
|ks=100 | |||
|fkv=0 | |||
|r=180 | |||
|xpos=180 | |||
|bn=26 | |||
|effect=Flame | |||
|slvl=M | |||
|sfx=Kick | |||
}} | |||
{{SSB64HitboxTableRow | |||
|id=1 | |||
|damage=18% | |||
|angle=361 | |||
|bk=20 | |||
|ks=100 | |||
|fkv=0 | |||
|r=180 | |||
|bn=26 | |||
|effect=Flame | |||
|slvl=M | |||
|sfx=Kick | |||
}} | |||
{{SSB64HitboxTableRow | |||
|id=2 | |||
|damage=18% | |||
|angle=361 | |||
|bk=20 | |||
|ks=100 | |||
|fkv=0 | |||
|r=130 | |||
|bn=5 | |||
|effect=Flame | |||
|slvl=M | |||
|sfx=Kick | |||
}} | |||
{{HitboxTableTitle|Angled down|19}} | |||
{{SSB64HitboxTableRow | |||
|id=0 | |||
|damage=17% | |||
|angle=361 | |||
|bk=20 | |||
|ks=100 | |||
|fkv=0 | |||
|r=180 | |||
|xpos=180 | |||
|bn=26 | |||
|effect=Flame | |||
|slvl=M | |||
|sfx=Kick | |||
}} | |||
{{SSB64HitboxTableRow | |||
|id=1 | |||
|damage=17% | |||
|angle=361 | |||
|bk=20 | |||
|ks=100 | |||
|fkv=0 | |||
|r=180 | |||
|bn=26 | |||
|effect=Flame | |||
|slvl=M | |||
|sfx=Kick | |||
}} | |||
{{SSB64HitboxTableRow | |||
|id=2 | |||
|damage=17% | |||
|angle=361 | |||
|bk=20 | |||
|ks=100 | |||
|fkv=0 | |||
|r=130 | |||
|bn=5 | |||
|effect=Flame | |||
|slvl=M | |||
|sfx=Kick | |||
}} | |||
|} | |||
==Timing== | |||
{|class="wikitable" | |||
|- | |||
!Hitboxes | |||
|16-23 | |||
|- | |||
!Animation length | |||
|61 | |||
|} | |||
{{FrameStripStart}} | |||
{{FrameStrip|t=Lag|c=15}}{{FrameStrip|t=Hitbox|c=8}}{{FrameStrip|t=Lag|c=38}} | |||
{{FrameStripEnd}} | |||
{{FrameIconLegend|lag=y|hitbox=y}} | |||
{{MvSubNavCaptainFalcon|g=SSB}} | |||
[[Category:Captain Falcon (SSB)]] | [[Category:Captain Falcon (SSB)]] | ||
[[Category:Forward smashes]] | [[Category:Forward smashes (SSB)]] | ||
[[Category:Flame attacks]] | [[Category:Flame attacks (SSB)]] | ||
Latest revision as of 13:17, December 3, 2024
Overview[edit]
| C. Falcon's F-smash hitboxes. | ||||
|---|---|---|---|---|
| ↗ | 
| |||
| → | 
| |||
| ↘ | 
| |||
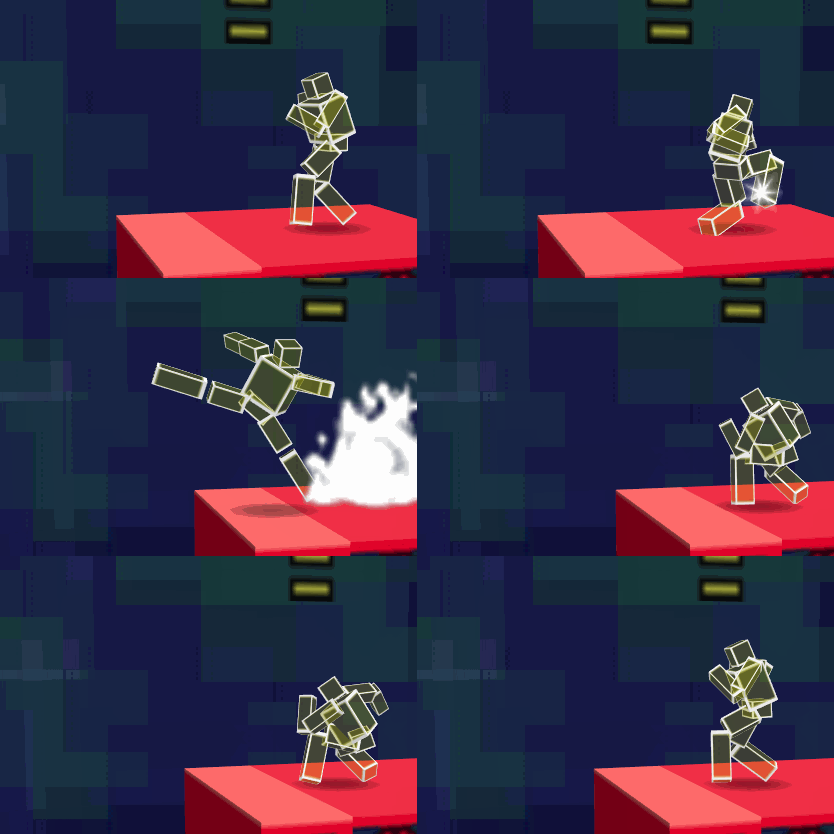
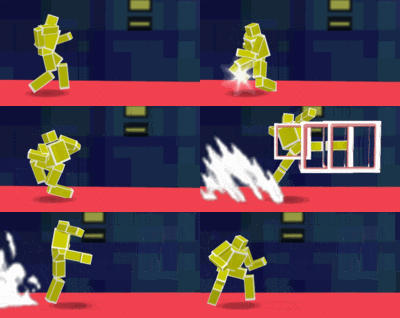
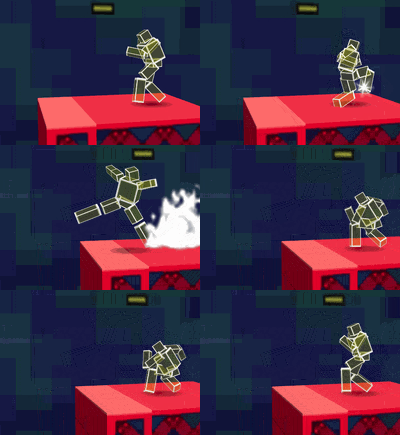
Captain Falcon does a flaming kick forward. It has high KO power and great range, and not much lag. However, it can't be considered a fast KO move. This move is one of Captain Falcon's best options on the ground, and it can be somewhat used for spacing due to its huge reach (which makes it arguably Captain Falcon's best KO move that can be used from a considerable distance). It slightly resembles the Falcon Kick, his down special, in that it is a kick attack with a flame effect, but the two moves are still very different. Overall, the move shouldn't be used too much (if it is, it can be predictable and punishable), and it lacks combo ability, but its range and power make it a good option for Captain Falcon on the ground at KO percentages, and it is also a decent way to punish when available, being able to cover many defensive options and mistakes made during combos. Lastly, when angled down it is a popular way to gimp low-recovering opponents.
Hitboxes[edit]
Timing[edit]
| Hitboxes | 16-23 |
|---|---|
| Animation length | 61 |
Lag time |
Hitbox |
|