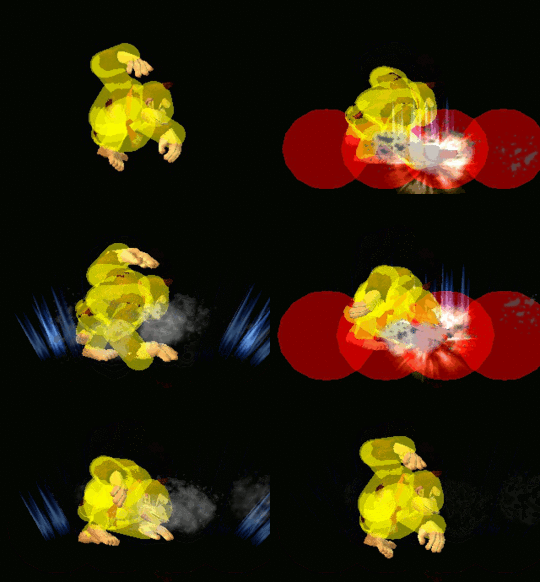
Donkey Kong (SSBM)/Down special: Difference between revisions
SuperSqank (talk | contribs) No edit summary |
Mariogeek2 (talk | contribs) (→Overview: Added a summary, and removed the 'competitive expertise' banner.) |
||
| (One intermediate revision by the same user not shown) | |||
| Line 2: | Line 2: | ||
{{disambig2|the hitbox visualization in ''[[Super Smash Bros. Melee]]''|the move itself|Hand Slap}}[[File:DonkeyKongHandSlapSSBM.gif|thumb|270px|Hitbox visualization showing Donkey Kong's Hand Slap.]] | {{disambig2|the hitbox visualization in ''[[Super Smash Bros. Melee]]''|the move itself|Hand Slap}}[[File:DonkeyKongHandSlapSSBM.gif|thumb|270px|Hitbox visualization showing Donkey Kong's Hand Slap.]] | ||
==Overview== | ==Overview== | ||
DK, as the name implies, slaps his hands on the ground, shaking the screen and launching any opponent who's within range into the air. | |||
Among DK's plethora of strong neutral tools and powerful kill moves, the Hand Slap sees minimal use in competitive play. The primary reason for this lack of use is the move's laggy startup and recovery. The first hit doesn't come out until 1/3 of a second after the move is input (which is within humans' reaction time), and the entire move (assuming the loop isn't restarted) takes an entire second before DK can input any other move. This leaves DK open to a [[Punishment|punish]]. In addition, the move is completely worthless against opponents aerialing into DK, since it can only hit grounded opponents. | |||
Despite this, the move does see niche use. The move deals bonus damage to shields and lots of shield stun and pushback, potentially leading to a shield break. In addition, the move's high fixed knockback beats [[Crouch cancel|crouch cancelling]], since it causes even crouching opponents (Peach or lighter) to tumble. When [[tech-chasing]], DK can use this move instead of attempting to guess where the opponent will go, since the move's range is so large it'll cover nearly all their tech options. If it hits, it can combo into grab, which can kickstart DK's massive combo game. | |||
==Hitboxes== | ==Hitboxes== | ||
Latest revision as of 19:18, July 1, 2024
Overview[edit]
DK, as the name implies, slaps his hands on the ground, shaking the screen and launching any opponent who's within range into the air.
Among DK's plethora of strong neutral tools and powerful kill moves, the Hand Slap sees minimal use in competitive play. The primary reason for this lack of use is the move's laggy startup and recovery. The first hit doesn't come out until 1/3 of a second after the move is input (which is within humans' reaction time), and the entire move (assuming the loop isn't restarted) takes an entire second before DK can input any other move. This leaves DK open to a punish. In addition, the move is completely worthless against opponents aerialing into DK, since it can only hit grounded opponents.
Despite this, the move does see niche use. The move deals bonus damage to shields and lots of shield stun and pushback, potentially leading to a shield break. In addition, the move's high fixed knockback beats crouch cancelling, since it causes even crouching opponents (Peach or lighter) to tumble. When tech-chasing, DK can use this move instead of attempting to guess where the opponent will go, since the move's range is so large it'll cover nearly all their tech options. If it hits, it can combo into grab, which can kickstart DK's massive combo game.
Hitboxes[edit]
Timing[edit]
| Input loop | 14-40 |
|---|---|
| Hit 1 | 19-20 |
| Hit 2 | 30-31 |
| Animation length | 60 |
Lag time |
Hitbox |
Hitbox change |
Loop point |
|
